When these eco-friendly beacons of light stop working and fail to shine, troubleshooting them typically involves a systematic process of inspecting the whole system to troubleshoot and fix them.
You must ensure correct power connections, switches, and solar panel placement. You must also look for problems like burnt-out bulbs, frayed wires, water damage, and dead batteries.
This article provides a helpful guide for troubleshooting all types of solar fairy light issues, from checking the on/off switch to replacing old batteries. So, let’s get started.
Steps to Fix Solar Lights
Check the On/Off Switch
The first step in troubleshooting any solar fairy lights is to check that they are switched on.
Solar fairy lights have a small on/off switch, usually located on the back of the solar panel. Make sure this switch is turned to the “on” position. If your lights have two switches, one controls the power, and the other controls the light sensor mode. Both switches need to be on for the lights to work correctly.
New lights may come with a small plastic pull tab between the battery terminal and contacts. This pull tab prevents battery drainage during shipping. Check and remove this clear plastic tab in new lights that aren’t working. Removing the pull tab allows the battery to make proper contact.
Optimize Solar Panel Position
Solar panels consist of solar cells. These solar cells need direct sunlight to charge the fairy lights’ batteries. Make sure to place the solar panel in an area where it will receive full, unobstructed sunlight for at least 6-7 hours per day.
While you can place the strings of fairy lights in any way you want, for the solar panel, you must choose a spot not shaded by trees, bushes, or buildings, especially during peak daylight hours.
In the Northern Hemisphere, direct the solar panels to face the southern sky to receive adequate sunlight; in the Southern Hemisphere, direct it towards the north.
Check that the solar panel is clean – a dirty solar panel can block sunlight. Wipe down solar panels with a dry cloth to remove any debris. Avoid placing solar panels where irrigation sprinklers will spray directly on them. Water droplets left behind can block sunlight as well.
Try Deep Charging Batteries
If your solar-powered lights are blinking or turning off after working briefly, try deep charging the batteries. Follow these steps to do so:
Turn the lights off for 72 hours for extended solar power panel charging time.
Make sure batteries are installed and all connections are secure.
Position the solar panel in full direct sunlight.
Do not turn the lights on during the charging period.
After 72 hours, check if solar lighting performance has improved.
Deep charging can revive dead batteries that still have life but need reconditioning. However, batteries will need replacement if they no longer hold a sufficient charge.
Most solar lights use AA or AAA rechargeable nickel metal hydride (NiMH) batteries. Over time, the maximum battery capacity decreases, causing lights to turn off early or blink slowly.
Replace dead batteries with new batteries with at least 2000 mAh capacity. Batteries typically need replacement every 1-2 years, depending on use. Choose a reputable brand for the longest battery life.
You can test if the issue is poor battery performance by switching the rechargeable batteries with regular alkaline ones. If the lights usually work with regular batteries, the rechargeable ones need replacing.
Since LEDs in solar fairy lights are wired in series, a break anywhere in the wire will cause the entire string to turn off. To locate the break, gently bend and straighten wire sections to see if the lights turn back on. Once the faulty segment is identified, follow these steps to fix broken wires:
Cut out the broken wire portion and strip 1/2 inch of insulation off the cut ends.
Twist the exposed copper wires together securely and tape isolated with electrical tape.
For a more durable connection, solder the wire ends together using a soldering iron before taping up.
Splice the two cut ends using wire nuts or crimp connectors if the wires are completely severed.
Make sure all wire connections are appropriately insulated to avoid shorts.
Test lights to confirm the break is fixed before reconnecting the solar panel and remounting.
Any solar fairy light strings with multiple wire breaks, frays, or cracks along the wiring should be replaced for safety. Repairing only works for minor damage.
Replace Burnt Out Bulbs
If individual fairy light LED light bulbs are not turning on, the issue might be a burnt-out bulb.
While LEDs in solar fairy lights are long-lasting, like any light bulb, can malfunction over time. LEDs in solar lights cannot be replaced individually. You must locate and replace the entire light socket connector for any failed LED light.
First, identify which socket has the faulty light bulb, then disconnect the connector by loosening its wires. Replace with a new socket and connector, matching the wire colors. Red wires connect to positive terminals, and black wires to negative. Wrap connections with electrical tape and ensure a snug wire fit.
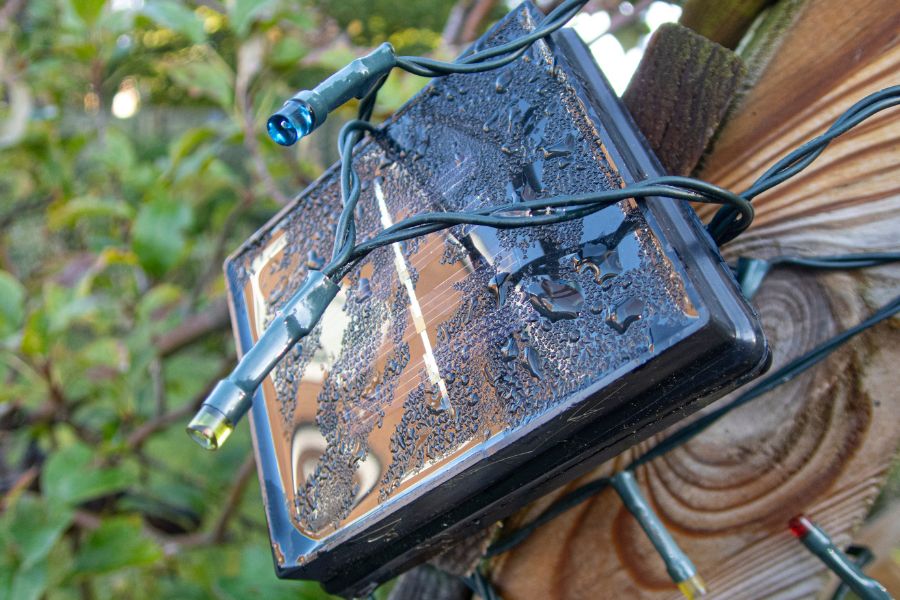
Dry Out Water Damage
Water damage is another common cause of solar lights malfunctioning. While these lights are designed for outdoor, constant moisture can still damage the internal circuit board. If the solar panel or other components get excessively wet, dry them thoroughly before reusing them.
Wipe off any standing water and allow the solar lamps to air dry completely before supplying power. Place in a warm, dry area or use a hair dryer on a low setting to accelerate drying time. Check for visible corrosion on wires and terminals and clean it with rubbing alcohol and cotton swabs.
Prevent water damage by taking outdoor solar lights down during heavy rain or storms. Consider covering solar panels or using solar light covers to protect the components when not in use.
Tips for Preventing Solar Fairy Light Damage
Preventing future issues with your solar fairy lights is as important as fixing current problems. Follow these tips to avoid physical damage that can shorten the lifespan of your lights.
Avoid placing solar fairy lights near sprinklers, gutters, handrails, or bird feeders where water can splash on the components. The lights are weather-resistant but not waterproof.
Do not allow wires to hang loosely or drape. Keep wires neatly secured to prevent wind, weather, and wildlife damage. Use clips or mounting strips.
Minimize handling of the wiring when installing lights to avoid cracks or breaks in the thin copper wires. do not tug or strain the wires.
Check lights thoroughly for cracks, frays, or cuts before rehanging each season. Rodents may chew on wiring if left up over winter.
Inspect wires and discard any damaged solar fairy light sets so they do not pose a fire or shock risk when reconnected.
Store solar fairy lights indoors when not in use for extended periods. Choose a cool, dry location.
Carefully follow any mounting and installation instructions provided to avoid placing strain and stress on the lighting wires.
Regular cleaning of the lights is essential, use a soft brush for dust and a mild soap solution for gentle cleaning. Avoid water submersion, harsh chemicals, and excessive handling, ensuring the lights are fully dry before reassembly.
Lastly, always keep a check on the battery terminal. Corrosion or debris can lead to poor connections, resulting in dead batteries or inadequate charging. Regularly cleaning the terminals can ensure a smooth flow of power.
How useful was this post?
Click on a star to rate it!
Average rating 4.3 / 5. Vote count: 6
No votes so far! Be the first to rate this post.
We are sorry that this post was not useful for you!
Let us improve this post!
Tell us how we can improve this post?
charlesnoble
Here at Spheral Solar, I’m a hands-on solar power enthusiast, constantly exploring and experimenting with DIY solutions. I’m dedicated to sharing my discoveries, insights, and even the bumps I hit along the way, all in the pursuit of a more sustainable future.
Why Your Solar Lights Stop Working (And How to Fix… by Charlesnoble December 1, 2025 Check the solar panel first by wiping away dirt, leaves, and debris that block sunlight absorption. A grimy panel is the number one reason solar lights stop working, and a simple cleaning with soapy water restores function in about 60% of cases. While you’re at it, reposition any lights that…
Your Hampton Bay Solar Light Stopped Working? Here’s… by Charlesnoble November 2, 2025 **Check the solar panel surface first** – dirt, leaves, or a thin film of grime blocks sunlight absorption and prevents charging. I learned this the hard way when my own Hampton Bay pathway lights died after just two weeks; a simple wipe with a damp cloth brought them back to…
Why Your Solar Area Lights Keep Failing (And How to… by Charlesnoble April 21, 2026 Mount your solar area lights where they’ll receive at least 6-8 hours of direct sunlight daily, avoiding shade from trees, buildings, or eaves that can cut charging efficiency by 70% or more. I learned this the hard way when my driveway lights barely lasted two hours each night until I…
9 Best Solar Step Lights in 2023 by Nick September 12, 2021 Whether for aesthetic purposes or protection while walking up your steps at night, having solar step lights covering every step is a necessity. On top of the added protection, these solar lights should also look incredible. There is nothing sleeker than a low spread of protective lighting. Best Solar Step…
Turn Any Chandelier Into a Solar-Powered Showpiece… by Charlesnoble February 17, 2026 Gather mason jars, solar garden lights, and a wire basket to create an elegant outdoor chandelier that requires zero electrical wiring and costs under $50. Pop the solar panels off inexpensive garden stakes, fit them into jar lids you’ve drilled holes through, and suspend everything from a chandelier frame you’ll…
Wire Your Motion Sensor Switch to Ignore False Triggers by Charlesnoble March 15, 2026 Wire your motion sensor switch by identifying the three critical connections: line (incoming power), load (outgoing to light fixture), and neutral. Connect the black wire from your power source to the sensor’s line terminal, the red or black load wire to your light fixture, and join all white neutral wires…
Subscribe for handpicked DIY projects, exclusive tips, and giveaways.
A portable power station will typically run your camping devices for anywhere from a few hours to several days on a single charge, depending on what you’re powering and the station’s capacity. As for lifespan, most quality units last between 3 to 10 years before the battery degrades enough to need replacement. The distinction matters… Read more: Your Portable Power Station Won’t Last as Long as You Think (Here’s Why)
A J1772 solar charger combines a standard J1772 charging connector (the same Type 1 plug used by most North American EVs and electric bikes) with solar panels and battery components to create an off-grid or grid-supplemented charging system. You’ll need three core elements: solar panels (typically 400-800 watts for practical ebike charging), a battery storage… Read more: How to Choose a J1772 Solar Charger for Your Ebike: A Buying Guide
Installing a whole house ventilation system powered by solar takes about 6 to 8 hours for a moderately skilled DIYer and delivers continuous fresh air circulation without touching your electric bill. The core method involves mounting a solar panel on your roof to power an intake or exhaust fan, routing ductwork through your attic or… Read more: How to Install a Whole House Ventilation System Using Solar Power


")
")
")

")

")
")
")

")


