How to Test Solar Panels – Tools, Terms, and Instructions
Updated:
Testing solar panels is a fairly straightforward process, requiring few tools and little to no expertise. But one single false step or wrong connection can turn this ostensibly simple task into a stressful ordeal. You can end up damaging your panels, testing devices, or even getting shocked. Therefore, you’ll want to know how to test solar panels correctly.
To lend you a helping hand, we’ve compiled this guide that will take you through a step-by-step process of testing your solar panels to make the panels last. By the end of this guide, you’ll be equipped with everything you need to know to test a solar panel.
The blog post includes:
Instructions
Required tools
Key electrical terms: Current (amp), Voltage (volt), and Power (watt)
Standard Testing Conditions (STC)
Testing the Open Circuit Voltage (Voc)
Testing the Short Circuit Current (Isc)
Testing the Charge Controller
Other considerations
Already overwhelmed? Fret not! You can always skip to your desired section by clicking the relevant heading in the table of contents.
Instructions on How to Test Your Solar Panel
Before you begin to test your solar panel, we advise you to take the necessary precautions and follow these instructions:
Closely observe the positive and negative terminals/polarities when connecting any device to the solar panel.
Cover the front of the solar panel with an opaque sheet to block sunlight and prevent heat build-up. Uncover the solar panel only when you’re taking the measurements
Solar panels are large & heavy and demand safe lifting techniques.
Short circuit the solar panel only for testing purposes
Limit the short circuit testing to less than five minutes
Use gloves to avoid burns and unexpected electric shocks.
These instructions and precautionary measures will allow you to safely and accurately test solar panels.
Tools Required to Test Solar Panels
To carry out solar panel tests, you will need these resources handy:
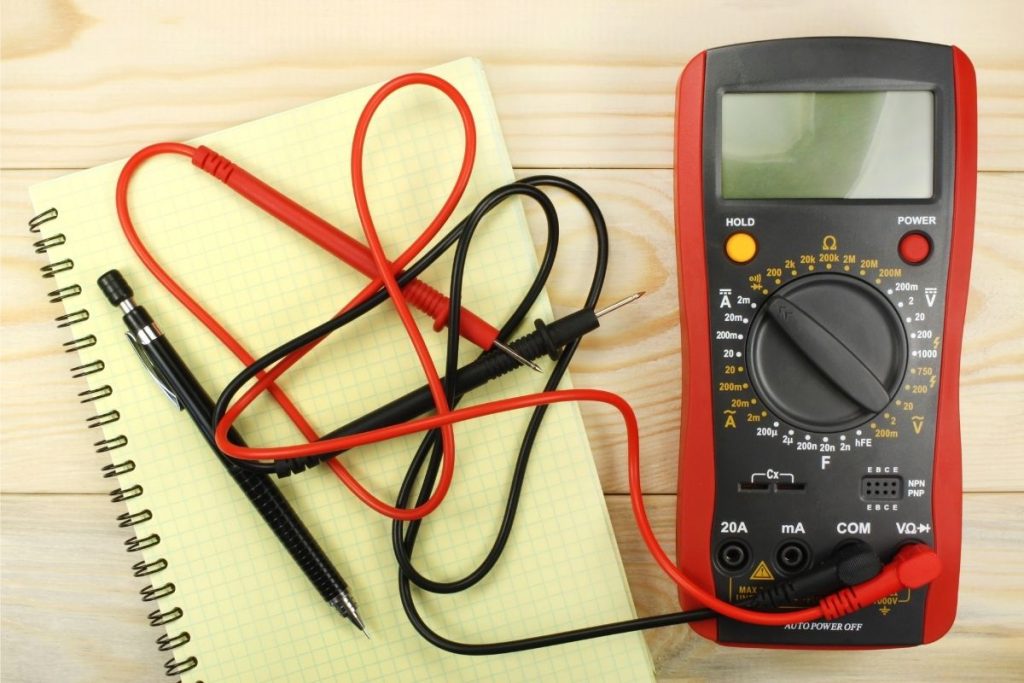
A high-quality digital multimeter (DMM)
Pair of wire to connect DMM with the solar panel’s terminals
A small screwdriver (2.5mm)
A spreadsheet or pen and paper to note down accurate reading
A nice SUNNY day
Once you’ve gathered these tools, you’re all set to test a solar panel.
But before we lift the lid on the solar panel’s testing process, it’s necessary to understand the key electrical terms – current, voltage, and power – since these are the factors that we’ll evaluate during the test.
Key Electrical Terms
The performance of a solar panel depends on the current and voltage it produces. Once you understand these concepts, you can determine the solar panel amperage and voltage reading. Afterward, you can use the two values to calculate the solar power/efficiency of the solar power system. Efficiency is equivalent to the amount of full sunlight that the solar panels convert into electricity.
To understand the electrical terms, think of electricity as water in a tank. A higher water level would mean a higher voltage, i.e., there is more potential for water flow (current).
What Is Voltage?
Voltage (V) is defined as the difference in electric potential between two points in a circuit. The electric potential difference is measured in volts (V) and is responsible for the flow of current. For this test, we will calculate the open-circuit voltage (Voc) of the panel.
Voc of a solar panel is affected by several factors, including;
Sunlight conditions: The more solar energy (irradiance) falls on the solar panels, the higher Voc will it produce
Temperature: Higher temperatures have an adverse effect on the solar panel output wattage. Don’t be surprised to see maximum efficiency on a cold sunny day than on warmer days.
Panel orientation: The pitch and azimuth of the solar panel also impact the voltage generated by the panel
What Is Current?
Electric current is the flow of charged particles (usually electrons) through an electrical conductor.
DC stands for Direct Current
AC stands for Alternative Current
In our previous analogy, the water flowing through a pipe out of the tank is analogous to the current flowing in the circuit. Electric current is denoted by “I” and is measured in amperes or simply amps.
What Is Electric Power?
Electric power (P) is the rate at which energy is transferred in an electric circuit per unit of time. It’s measured in Watts (W) and is equivalent to the product of Voltage and Current.
Power (P) = Volts (V) x Amps (I)
Now that you understand the key terms, you can measure their values and compare them to those calculated under standard testing conditions.
Standard Testing Conditions
Standard testing conditions, or shortly STC, are the industry standard conditions under which solar panels are tested. STC correspond to the following three conditions:
Temperature: 77oF or 25oC (this refers to the temperature of the cell, not the surroundings)
Solar irradiance: 1 kW/m2 (the power per unit area obtained from the sun)
Air mass: 1.5 spectra
Under these conditions, a 200-watt solar panel will generate 200 watts of electricity. The values of Voc and Isc under STC are usually mentioned on the back of the solar panel.
When we test solar panels in our own backyard, the conditions are nowhere near standard. It may be windy, the weather may be hot, and the direct sunlight may not fall optimally on the solar cell. However STC numbers provide a good standard against which we can assess a solar panel’s actual performance. As far as how well solar panels may perform in practical scenarios, you can find it out by conducting these tests.
Open Circuit Voltage Test (Voc) for a Solar Panel
To find Voc of a solar panel, here are the steps you need to follow:
Locate the converter box: To begin this test, first locate the converter box, which is mounted on the back of the solar panel. Remove the screws and detach the cover from the box.
Locate positive and negative connections: After removing the converter box, you’ll see connections with various energy setups. Locate the positive and negative connections and turn on your multimeter
Set up the multimeter: At this point, configure the multimeter so that it measures DC volts. You need to ensure that the multimeter’s energy level is set higher than what the solar panel is approved for. This will ensure that you take an accurate reading. You can find the approved Voc level in the converter box.
Connect the alligator clips: After setting up the multimeter, it’s time to attach the alligator clips to the solar panel. Connect the positive side of the multimeter to the red terminal and the negative lead to the panel’s black terminal. The digital multimeter should now measure the dc voltage that the solar panel produces. Note down the reading and check it against the one mentioned on the back of the solar panel.
Switch off the multimeter and disconnect the leads
Short Circuit Current Test (Isc)
The procedure to measure the current of the solar panel is similar to the volt test. However, there’s a slight difference in the preparation process. When testing solar panels for dc amp, it is a good idea to cover the solar panel temporarily. With solar energy striking the panel, the terminals and leads of the multimeter can produce sparks and damage the solar panel’s multimeter or panel.
Attach the positive lead to the red terminal and the negative lead to the black terminal, similar to the volts test. You’re now ready to measure DC amps by following these steps.
Set your multimeter to measure amp so that you can measure the solar panel output dc amps coming from the solar panel
Move the red lead on the multimeter to the 10ADC port and set the range to 10 amps or higher.
Connect the solar panel to the multimeter (red probe to the positive cable and black probe to the negative) and expose the solar panel to the sun
The multimeter will now show an accurate reading of Isc.
How to Test a Solar Output Wattage?
Unlike the previous tests, the wattage measurement doesn’t require a multimeter. There is a specific calculation that you need to use to test a solar panel output wattage:
Multiply the results of the Isc and Voc tests, and you’ll get the power output wattage.
P = Voc (volts) * Isc (amps)
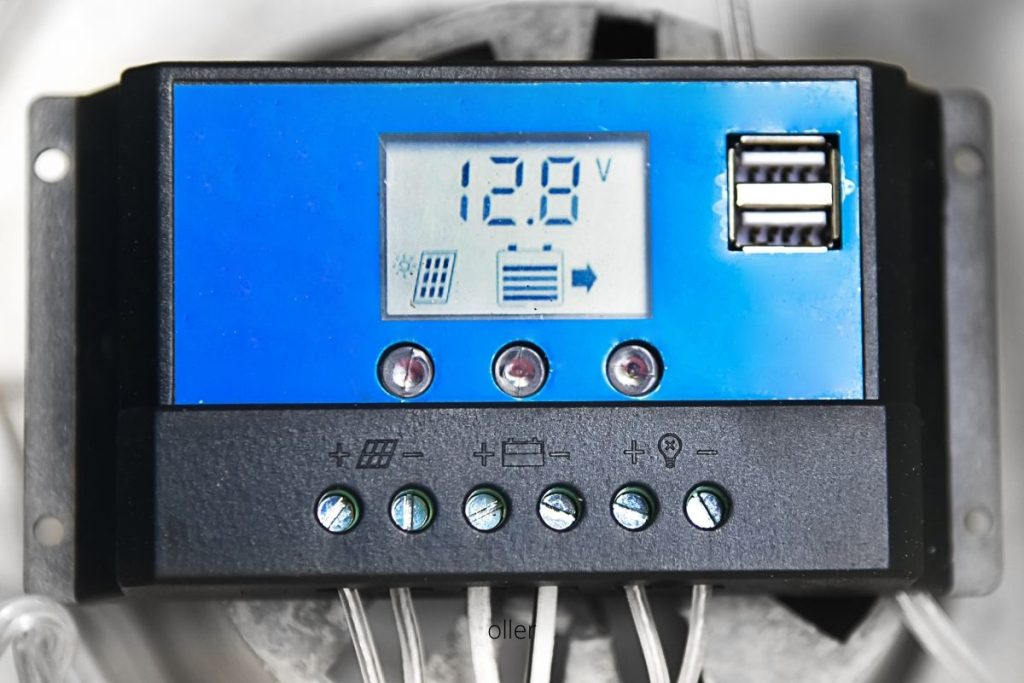
Testing the Charge Controller
For the charge controller test, ensure the battery isn’t full. If it’s full, the charge controller will not pass any current to the battery, thus resulting in zero reading. Here are the steps you need to follow to test the efficiency of your charge controller.
Connect the solar panel to the charge controller and the controller to the battery
Disconnect the positive terminal between the battery and the charge controller
Measure the current by connecting the multimeter’s positive lead to the controller’s positive port and the meter’s negative lead to the battery’s positive terminal.
Remove the regulator now and connect the panel directly to the battery.
Measure the amps by wiring the positive lead of the meter to the positive cable from the controller and the negative lead of the meter to the positive terminal of the battery
If there was no current in the presence of the regulator, but there is some now, then these possibilities may exist:
There is a loose cable connection. Go back and check all the connections.
The regulator is faulty and needs repair or replacement.
Additional Considerations
Apart from these tests, you should also regularly conduct strength tests to inspect any damage to the solar panels’ physical structure. When testing solar panels for mechanical strength, check the frame and see if it wobbles. If the panel feels unsteady, use a screwdriver and tighten the frame. All these tests, including the solar strength inspection, should be conducted after every extreme weather event.
We hope this guide provides a clear picture of the solar panel testing process. Armed with the knowledge in this article, you can test a solar panel on your own. If you still have questions, please ask us in the comments.
How useful was this post?
Click on a star to rate it!
Average rating 5 / 5. Vote count: 1
No votes so far! Be the first to rate this post.
We are sorry that this post was not useful for you!
Your Multimeter Can Tell You Everything About Your… by Charlesnoble March 8, 2026 Grab your multimeter and set it to AC voltage mode—typically marked as “V~” or “VAC”—which allows you to measure the alternating current output from your solar inverter, the device that converts your panels’ DC power into usable household electricity. You’ll want to verify that your system is delivering the standard…
Read Your Solar System Like a Pro: What Every Wire… by Charlesnoble October 31, 2025 Locate the single-line diagram in your solar system documentation—it’s your roadmap to understanding how energy flows from panels through inverters to your home’s electrical panel. This schematic shows every critical component: charge controllers, battery banks, breaker boxes, and safety disconnects, all connected by lines representing wire runs with their corresponding…
Why Your RV Solar Panels Aren’t Charging (And How to… by Charlesnoble November 30, 2025 Check your multimeter readings at each connection point along your solar charging path—from panels to charge controller to battery—to pinpoint exactly where voltage disappears. Most RV solar systems lose 10-30% of their potential power to voltage drop, but this invisible thief often goes undetected until you systematically measure and compare…
Why Your DIY Solar Project Needs a Calibrated… by Charlesnoble February 3, 2026 Point your infrared thermometer at your solar panel surface on a sunny afternoon, and you might get a reading of 145°F—but is that number actually accurate? Without proper calibration, that measurement could be off by 10, 20, or even 30 degrees, leading you to misdiagnose hot spots, overestimate efficiency losses,…
Why Your DIY Solar System Needs 3-Phase Power… by Charlesnoble December 26, 2025 Check your electrical panel right now—if you see three thick cables entering your home or property instead of two, you’re already working with 3-phase power, and standard single-phase monitoring won’t give you the complete picture of your solar system’s performance. This matters more than most DIY solar enthusiasts realize: a…
Why Your Solar Panels Aren’t Making Enough Power… by Charlesnoble April 14, 2026 Grab your multimeter and head to your solar array during peak sunlight hours—the voltage and current readings you’re about to take will reveal everything about your system’s health. An I-V curve is simply a graph showing how your solar panels behave when you measure voltage (I) against current (V) under…
Subscribe for handpicked DIY projects, exclusive tips, and giveaways.
A portable power station will typically run your camping devices for anywhere from a few hours to several days on a single charge, depending on what you’re powering and the station’s capacity. As for lifespan, most quality units last between 3 to 10 years before the battery degrades enough to need replacement. The distinction matters… Read more: Your Portable Power Station Won’t Last as Long as You Think (Here’s Why)
A J1772 solar charger combines a standard J1772 charging connector (the same Type 1 plug used by most North American EVs and electric bikes) with solar panels and battery components to create an off-grid or grid-supplemented charging system. You’ll need three core elements: solar panels (typically 400-800 watts for practical ebike charging), a battery storage… Read more: How to Choose a J1772 Solar Charger for Your Ebike: A Buying Guide
Installing a whole house ventilation system powered by solar takes about 6 to 8 hours for a moderately skilled DIYer and delivers continuous fresh air circulation without touching your electric bill. The core method involves mounting a solar panel on your roof to power an intake or exhaust fan, routing ductwork through your attic or… Read more: How to Install a Whole House Ventilation System Using Solar Power

")

")
")
")
")
")

")
")
")
")


