Growing Crops Under Solar Panels Actually Works (Here’s Why You Should Care)
Updated:
Imagine doubling the productivity of your land by growing crops and generating electricity in the same space. That’s exactly what agrivoltaics makes possible—and it’s not just for large-scale farms anymore.
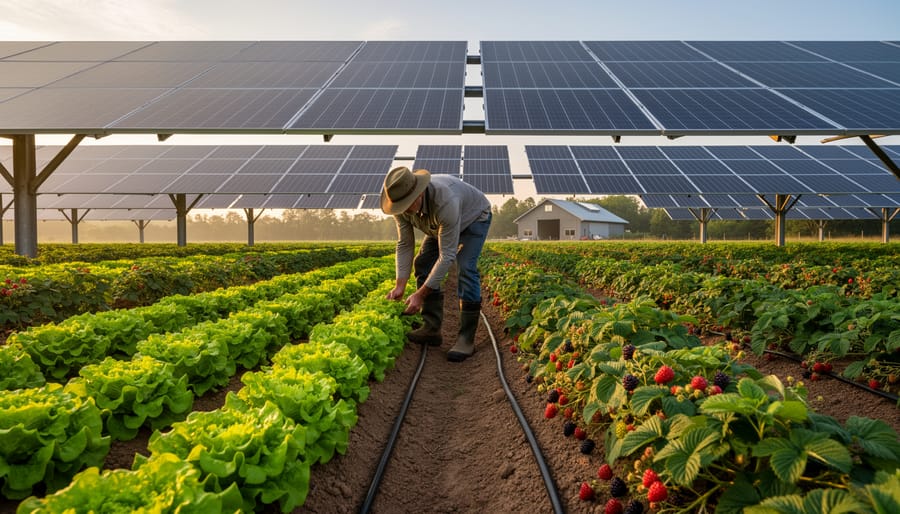
An agrivoltaic system combines solar panels with agriculture, mounting photovoltaic arrays high enough that crops, livestock, or pollinator habitats can thrive underneath. Think of it as vertical real estate optimization: sunshine filtered through elevated panels reaches shade-tolerant plants below while simultaneously producing clean energy above. The panels create a microclimate that reduces water evaporation, protects crops from extreme weather, and can actually boost yields for certain vegetables and berries.
I’ve watched this technology evolve from experimental farms in France and Japan to backyard gardens across North America. What started as an academic concept has become a practical solution for anyone with land, sunlight, and a desire to maximize both food production and energy independence.
The beauty of agrivoltaics lies in its flexibility. You might install panels over a vegetable garden to grow lettuce and spinach while powering your home. Ranchers are discovering that livestock actually prefer grazing under solar arrays during hot summers. Beekeepers are creating pollinator sanctuaries beneath panels, supporting both honey production and local ecosystems.
For DIY solar enthusiasts, agrivoltaics represents the next frontier—moving beyond rooftop installations to create integrated systems that serve multiple purposes. The challenges are real: higher installation costs, structural considerations, and careful crop selection. But the potential rewards extend far beyond typical solar projects.
This guide will walk you through everything you need to know about designing, building, and maintaining your own agrivoltaic system, whether you’re working with a small backyard plot or several acres.
What Exactly Is an Agrivoltaic System?
Agrivoltaic systems combine solar energy production with active farming beneath elevated panels, maximizing land productivity.
The Two-for-One Land Use Principle
Think of agrivoltaic systems as the ultimate space-saver for your land—kind of like putting a loft bed in a small apartment. Instead of choosing between your bedroom or your home office, you get both by stacking them vertically. That’s exactly what’s happening here, except we’re talking about crops and solar panels.
I remember visiting a farm in Colorado where the owner showed me rows of lettuce thriving beneath elevated solar panels. He grinned and said, “I’m harvesting sunshine twice—once through my plants and once through my panels.” That really stuck with me because it perfectly captures what makes agrivoltaics so clever.
Traditional farming uses land for food. Traditional solar farms use land for electricity. Agrivoltaic systems say “why not both?” By installing solar panels several feet above the ground, you create a dual-purpose setup where the same square footage produces vegetables, herbs, or grazing land while simultaneously generating clean energy. The panels provide partial shade, which many crops actually prefer during hot summers, while the plants below help keep the ground cooler and reduce dust on the panels. It’s a win-win that maximizes every inch of your property.
Why This Isn’t Just for Big Farms
You don’t need acres of farmland to benefit from agrivoltaics. I’ve seen backyard enthusiasts transform their vegetable gardens with just a few elevated solar panels, creating shade for lettuce and peppers while powering their home. The same principles that work on commercial farms scale down beautifully for homesteaders and hobbyists.
Start small with a single raised solar panel over a garden bed. You can mount panels 6-8 feet high on simple wooden or metal frames, leaving plenty of room underneath for crops that appreciate partial shade. Many DIYers connect these panels to existing grid-tied solar systems, offsetting energy costs while improving their growing conditions.
Community gardens are perfect testing grounds too. I’ve watched neighborhood groups pool resources to install shared agrivoltaic setups, splitting both the electricity generated and the produce grown underneath. The key is thinking creatively about your space. Even a small chicken run can benefit from overhead solar panels that provide shade for your flock while generating power. The beauty of agrivoltaics is its flexibility – you’re simply combining two uses of the same footprint, whether that’s 100 acres or 100 square feet.
The Surprising Benefits You Don’t Hear About
How Shade Actually Helps Certain Crops Thrive
Here’s something I learned from my neighbor Maria last summer that completely changed how I thought about agrivoltaics: not all plants love full sun all day long. In fact, many crops actually perform better with some shade, which makes them perfect candidates for growing beneath solar panels.
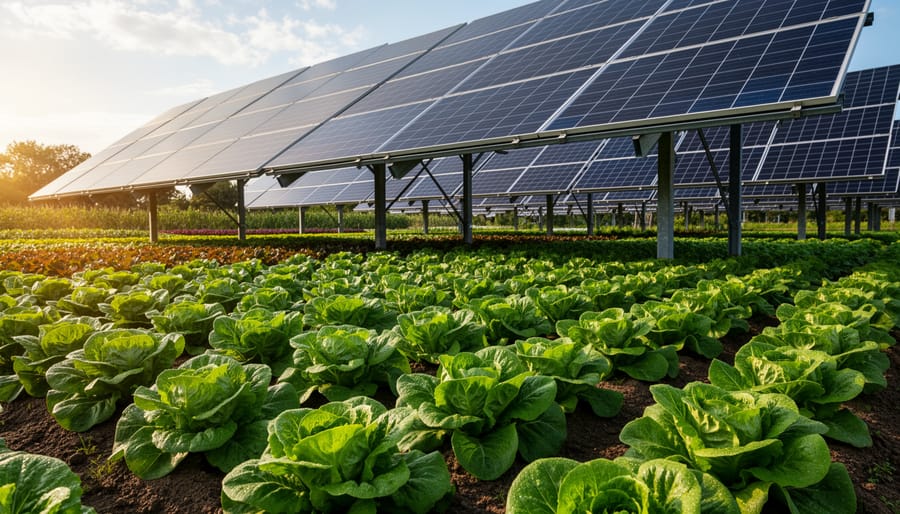
Leafy greens are the superstars of agrivoltaic systems. Lettuce, spinach, kale, and arugula naturally prefer cooler conditions and can become bitter or bolt (go to seed prematurely) when exposed to intense heat. The partial shade from solar panels creates an ideal microclimate, extending their growing season and improving flavor. Studies have shown lettuce yields can actually increase by up to 30 percent under agrivoltaic installations compared to traditional open-field growing.
Root vegetables like carrots, beets, and radishes also benefit from the cooler soil temperatures maintained under panels. The shade reduces water evaporation from the soil surface, meaning you’ll need to irrigate less frequently. This is a double win for water conservation and your water bill.
Berries are another excellent choice. Strawberries, raspberries, and blueberries naturally grow as understory plants in nature, so they’re adapted to dappled light. The panels protect delicate berries from sun scald while maintaining sufficient light for fruit production.
Even some fruiting vegetables like tomatoes, peppers, and beans can thrive in agrivoltaic systems, particularly in hot climates where full sun can stress plants during peak summer months. The key is understanding that the panels typically reduce light by 30 to 50 percent, which still provides plenty of energy for photosynthesis while moderating temperature extremes.
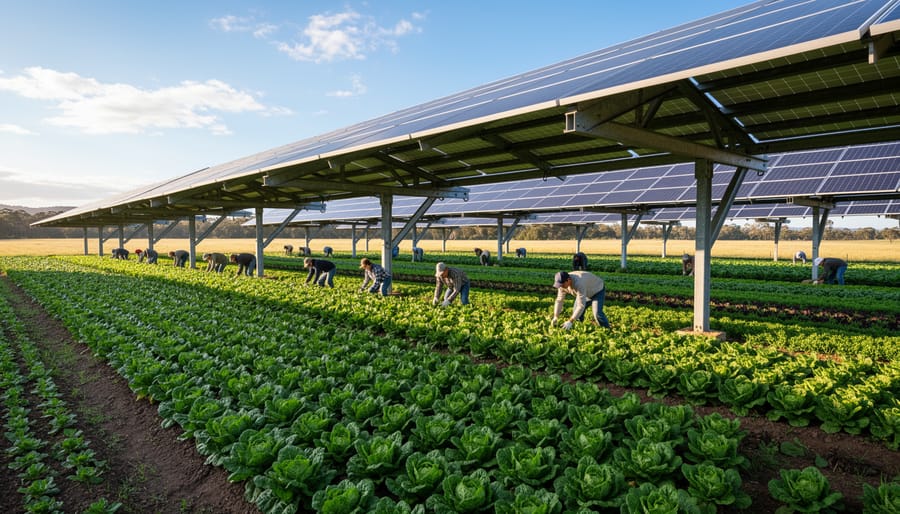
Shade-tolerant crops like lettuce thrive under solar panels, benefiting from reduced heat stress and water evaporation.
Solar Panels Work Better Around Plants
Here’s something I learned from my friend Charles that completely changed how I think about solar panels: they actually work better when they’re surrounded by plants. Sounds backwards, right? But it’s true, and the science is pretty straightforward.
Solar panels lose efficiency when they get too hot. For every degree Celsius above their ideal temperature, they typically lose about 0.5% of their power output. In a traditional solar farm with bare ground and no shade, panels can heat up to 65°C on a scorching summer day. That’s a serious efficiency killer.
But when you grow crops underneath those same panels, something remarkable happens. The plants naturally cool the air around them through a process called evapotranspiration, essentially plant-powered air conditioning. Studies from the University of Arizona found that solar panels over vegetation ran about 10°C cooler than panels over bare ground. That temperature drop translates to roughly 5% more electricity production.
It’s a genuinely symbiotic relationship. The panels shade the crops from intense heat, helping them grow with less water stress. In return, the crops cool the panels, making them work more efficiently. Everyone wins, including your electricity bill and your harvest.
Water Conservation Wins
Here’s something I discovered while visiting an agrivoltaic farm in Arizona last summer: the soil beneath the panels was noticeably more moist than the exposed areas just a few feet away. The farmer explained that his irrigation costs had dropped by nearly 30% since installing the system. That’s the water conservation magic of agrivoltaics at work.
When solar panels create shade over crops, they act like protective umbrellas that significantly reduce water evaporation from the soil. Think about how much faster a puddle dries in direct sunlight versus in the shade. The same principle applies to your growing area. In traditional farming or gardening, a huge amount of irrigation water simply evaporates before plants can use it, especially during hot afternoons.
For those of us in dry climates or dealing with water restrictions, this benefit alone can make agrivoltaics worthwhile. Studies show water savings ranging from 20% to 50%, depending on your climate and panel configuration. The panels also reduce wind speed at ground level, which further decreases moisture loss.
If you’re a home grower managing a vegetable garden or small farm, these water savings translate to lower utility bills and more resilient plants during drought periods. It’s a practical win that complements the energy generation benefits perfectly.
Real-World Agrivoltaic Setups You Can Learn From
Backyard agrivoltaic setups allow homeowners to grow fresh produce while generating renewable energy in limited space.
The Backyard Garden Approach
You don’t need acres of farmland to explore agrivoltaics. I discovered this myself when I installed a modest solar array over my raised vegetable beds, and honestly, it transformed both my garden and my energy bill. For backyard enthusiasts, the concept is wonderfully simple: mount solar panels on elevated structures about 6-8 feet high, creating shade underneath while generating electricity above.
The beauty of backyard agrivoltaics lies in its flexibility. You can start with just a few panels over a 4×8 raised bed, which typically costs between $800-1,500 for DIY installations. The partial shade works remarkably well for leafy greens like lettuce, spinach, and kale, plus herbs like cilantro and parsley that often bolt in full sun. I’ve found my tomatoes and peppers actually produce better during hot summers with the dappled sunlight filtering through.
The key is positioning panels to allow morning sun exposure while providing afternoon shade. Adjustable mounting systems let you fine-tune this balance throughout the growing season. Many homeowners report 15-25% reductions in watering needs since the panels reduce evaporation, which means less maintenance overall. It’s a practical way to test agrivoltaic principles without major commitment, and you’ll gain hands-on experience that makes larger projects feel achievable.
Community Garden Success Stories
Real-world examples show how community solar spaces are successfully combining food production with clean energy. The Rabbit Run Community Garden in Colorado installed raised solar panels at eight feet high, allowing full sun-loving crops like tomatoes underneath while shade-tolerant lettuce and herbs thrive in the filtered light areas. Their biggest lesson? Start small with a test section before committing your entire garden space.
In Massachusetts, the Somerville Community Growing Center discovered that their 15-panel array actually extended their growing season. Charles recently visited and noted how the panels reduced temperature swings, protecting tender seedlings from late spring frosts. They now grow 30% more produce than before adding solar.
The Phoenix Urban Farm took a different approach, using vertical panels as living trellises for beans and cucumbers. This dual-purpose design maximized their limited space while generating enough electricity to power irrigation pumps and a tool-sharing library.
Key takeaway across all projects: involve your community early. Gardens that held planning workshops and taste-testing events built stronger support and secured better funding than those that didn’t prioritize member input from day one.
Small Farm Implementations
Stepping up from backyard systems, small farm implementations typically range from 5-20 kilowatts and cover a quarter-acre or more. I visited a hobby farm in Vermont where the owner installed solar panels elevated eight feet high over a sheep pasture. The sheep graze comfortably underneath while the panels generate enough power for the farmhouse and outbuildings. The raised height allows tractors and equipment to pass beneath for maintenance.
These mid-sized systems work particularly well with grazing animals like sheep, goats, and even cattle. The panels provide shade during hot summer months, reducing heat stress on livestock while the animals naturally manage vegetation growth underneath. One farmer told me his water consumption for livestock dropped noticeably once the shaded areas became preferred resting spots.
Installation costs for these projects run between $15,000-$60,000 depending on size and complexity, but agricultural grants and renewable energy incentives can offset 30-50% of expenses. The key is designing the support structure tall enough for your specific needs while remaining cost-effective. Many hobby farmers start with a smaller array and expand gradually as they learn what works best for their land and animals.
Design Considerations for Your Own System
Height and Spacing: Finding Your Sweet Spot
Getting your panel height and spacing right is like finding Goldilocks’ perfect porridge—not too high, not too low, but just right for your specific crops. I learned this the hard way when I first mounted panels at eight feet, thinking taller meant better sun for everything. My tomatoes agreed, but my lettuce turned into crispy critters from too much direct light.
For most vegetable gardens, aim for panels mounted between 6-8 feet at their lowest point. This gives you comfortable headroom for walking and working while allowing equipment access. Leafy greens and shade-tolerant crops thrive under tighter spacing (panels closer together), while fruiting vegetables like tomatoes and peppers appreciate wider gaps that let more direct sunlight through.
Here’s a practical starting point: measure the mature height of your tallest crops and add 4-5 feet. Space your panel rows to create alternating sun-shade patterns—typically 8-12 feet between rows works well for most backyard setups. Walk through your garden at different times of day to observe shadow patterns before permanently mounting anything.
A simple trick I use is laying out the panel frame on sawhorses and watching how shadows move throughout the day. Take photos every two hours and note where light pools and where shade lingers. This costs nothing but gives you invaluable data.
Remember, you can always adjust. Many DIY agrivoltaic systems use adjustable mounting brackets, letting you raise panels during spring planting or lower them for summer shade. Start conservative and tweak as your crops tell you what they need.
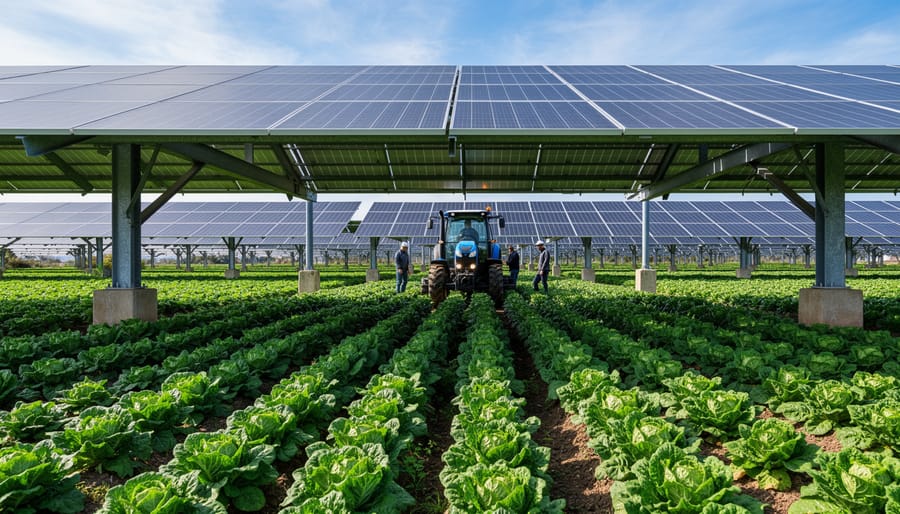
Proper panel height is crucial for agrivoltaic systems, requiring adequate clearance for crop growth and farm activities.
Panel Orientation and Tilt Angles
Getting the panel orientation right is where agrivoltaics gets really interesting. Unlike traditional solar installations where you’re purely maximizing energy production, here you’re choreographing a dance between sunlight and shade to benefit both crops and panels.
The most common approach I’ve seen working well in DIY setups is elevating panels higher than usual, typically 8-12 feet off the ground. This creates usable farming space underneath while allowing sunlight to reach crops. The tilt angle matters too. In my own backyard experiments, I found that a slightly steeper tilt than your latitude might suggest actually works better because it allows more diffused light to reach plants below during midday hours.
Vertical bifacial panels are game-changers for agrivoltaics. These panels stand upright and capture sunlight from both sides, which means they generate power during morning and evening hours while casting minimal shade during the plant-critical midday period. They’re particularly brilliant for row crops because you can align them north-south between planting rows.
Adjustable mounting systems take things further by letting you change panel angles seasonally. During growing season, tilt them steeper to favor crop growth. In winter when plants are dormant, flatten them for maximum energy capture. Some enthusiasts even build simple manual tracking systems using basic hardware store materials, though this adds complexity to your project.
Structural Requirements You Need to Know
Getting the structure right for your agrivoltaic setup is crucial for long-term success. Unlike typical ground-mounted systems, elevated solar installations require substantially stronger support frameworks to safely suspend panels at heights ranging from 8 to 16 feet.
I learned this firsthand when helping my neighbor plan his system. We initially underestimated the wind load at that height, and our structural engineer quickly set us straight. You’ll need posts anchored with concrete footings that extend below your frost line, typically 3 to 4 feet deep depending on your climate. The posts themselves should be galvanized steel or treated timber rated for ground contact.
Think carefully about accessibility too. You’ll need sufficient clearance underneath for your tractor, equipment, or livestock. Most successful designs maintain at least 8 feet of vertical clearance at the lowest panel edge. Consider adding a slight tilt orientation that follows your planting rows.
Weatherproofing is non-negotiable. All electrical connections need weatherproof enclosures rated for outdoor use, and your mounting hardware must resist corrosion. Stainless steel hardware costs more upfront but saves headaches later. Also plan for thermal expansion, as those support beams will expand and contract with temperature changes throughout the seasons.
Getting Started: A DIY-Friendly Roadmap
Start With a Small Test Area
Before you transform your entire backyard into an agrivoltaic wonderland, let’s talk about starting small. I learned this lesson the hard way when I enthusiastically built a massive solar array over my vegetable garden, only to discover that my tomatoes needed way more sunlight than I’d calculated. Trust me, testing first saves you time, money, and a lot of frustration.
Pick one raised bed or a small 4×8 foot garden section to experiment with. This gives you a manageable space to observe how your specific plants respond to partial shading throughout the day. You’ll quickly learn which crops thrive under your panels and which ones need repositioning. Plus, if you’re integrating this into your DIY solar setup, a test area lets you troubleshoot installation challenges without committing major resources.
Document everything during your test period: plant growth rates, soil moisture levels, energy production, and any unexpected issues. After one growing season, you’ll have real data about what works in your specific climate and conditions. This hands-on experience is invaluable and will guide your decisions when you’re ready to scale up.
Equipment and Materials Checklist
Getting started with a basic agrivoltaic setup doesn’t require breaking the bank, and I’ve found that smart sourcing makes all the difference. Here’s what you’ll need to begin your dual-purpose garden.
For the solar component, start with bifacial solar panels, which capture light from both sides and work beautifully above crops. Budget-friendly options range from $150-$300 per panel at retailers like Renogy or online marketplaces. You’ll need an adjustable mounting system, either commercially available racking (around $100-$200) or DIY-constructed frames using galvanized steel pipes from your local hardware store.
Essential electrical components include a charge controller ($50-$150), appropriately rated cables, and basic safety equipment like fuses and disconnect switches. Don’t skimp on safety gear like insulated gloves and voltage testers.
For the agricultural side, choose shade-tolerant crops suited to your climate. Leafy greens, herbs, and certain berries are excellent starters. Invest in quality soil amendments, irrigation supplies, and basic gardening tools you might already own.
When I built my first system, salvaged materials saved me hundreds. Check local solar installers for discounted panels with minor cosmetic imperfections, browse community marketplaces, and connect with fellow DIYers who often have surplus materials. Your local agricultural extension office can provide free advice on suitable crops and spacing requirements specific to your region.
Common Mistakes to Avoid
Charles learned some hard lessons in his first year that can save you time and money. The biggest mistake? Setting panels too low. He initially mounted his arrays just six feet high to save on materials, but discovered his tomato plants quickly grew into the panels, creating shade problems and maintenance nightmares. Now he recommends a minimum of eight feet clearance for most crops.
Crop selection matters more than you’d think. Charles tried growing shade-intolerant vegetables like peppers directly under dense panel coverage and watched them struggle. He found success by mapping sun patterns throughout the day and matching crops to light zones—full-sun lovers at the edges, shade-tolerant greens underneath.
Don’t forget maintenance access. Charles’s original design required a ladder to reach panels for cleaning, making it a dreaded monthly chore. His redesign includes walkways between rows and tilt mechanisms that bring panels within arm’s reach. Plan your layout so you can actually maintain both the technology and the plants without constant frustration. Remember, an agrivoltaic system only works if you can comfortably tend to both elements year-round.
The Challenges Nobody Talks About (And How to Handle Them)
Cost and Complexity Trade-Offs
Let me be honest with you – agrivoltaic systems aren’t the cheapest way to start your solar journey. When I first looked into setting one up on my property, the numbers gave me a bit of sticker shock. You’re essentially building an elevated solar canopy instead of just mounting panels on your roof or laying them on the ground, and that difference matters to your wallet.
The main cost driver is the structural support system. Those panels need to sit high enough for crops or livestock to thrive underneath, typically 8-12 feet up. That means stronger poles, more robust mounting hardware, and significantly more labor to install. Where a standard ground-mount system might run you around $3-4 per watt installed, agrivoltaic setups can push $5-7 per watt or higher, depending on your design.
But here’s the encouraging part: you’re getting dual-use from the same land. Your panels generate electricity while your crops or animals continue producing below. For small-scale DIY projects, consider starting simple. I’ve seen hobbyists create effective micro-agrivoltaic setups over garden beds using repurposed materials and pole-mount techniques, keeping costs manageable while learning the ropes. The investment makes more sense when you value both the energy production and the agricultural benefits together, not just the solar panels alone.
Maintenance Access and Crop Management
Here’s where things get real, friends. I learned this the hard way during my first agrivoltaic experiment with tomatoes – those panel supports become obstacles faster than you’d think! You’ll need wider equipment spacing and possibly rethink your usual farming machinery. Tractors and tillers designed for open fields don’t always play nice with solar arrays overhead.
Panel cleaning becomes a dual challenge since agricultural dust settles faster than residential rooftops. Consider your panel height carefully – too low and you can’t reach underneath for harvesting, too high and you’ll need ladders for maintenance. I’ve found that leaving at least 6-7 feet of clearance makes a world of difference.
Harvesting requires planning around your support structures. Some folks design their systems with removable panel sections for seasonal access, while others simply adjust their planting patterns. The key is thinking through these logistics before installation, not after your first harvest season.
Not All Crops Are Compatible
Here’s the reality I learned the hard way during my first agrivoltaic experiment: not every plant thrives under solar panels. Sun-loving crops like tomatoes, peppers, and corn typically need full, direct sunlight throughout the day and won’t produce well in the dappled shade created by panels overhead. Similarly, heat-loving plants such as melons and squash often struggle with reduced solar exposure.
The key is matching your crops to the light conditions your system creates. Measure how much shade your panels cast at different times of day and throughout the seasons. Leafy greens like lettuce, spinach, and kale actually prefer some shade and can flourish beneath panels. Root vegetables such as carrots and beets, along with herbs like parsley and cilantro, also adapt well to partial shade conditions.
Before committing to a specific crop plan, observe your setup for at least a few weeks or consult with local gardeners who understand your climate. Consider starting with shade-tolerant varieties and gradually experimenting to find what works best in your unique setup.
Is Agrivoltaic Right for Your Space?
Let me be honest with you—agrivoltaics isn’t the perfect solution for every backyard or small farm, and that’s completely okay. I learned this the hard way when my neighbor got excited about my setup and tried replicating it on his shaded, heavily wooded half-acre. It didn’t go well.
So when does agrivoltaics make sense? You’re looking at an ideal scenario if you have open land that gets solid sun exposure (at least 5-6 hours daily), you’re already growing something or raising small livestock, and you’re comfortable with a bit of experimentation. Community gardens, small farms, larger residential properties with gardens, and educational spaces are fantastic candidates. If you’re growing shade-tolerant crops like lettuce, herbs, or certain berries, you’re already halfway there.
The sweet spot I’ve found is when you have multiple goals. Maybe you want to reduce your electric bill while protecting heat-sensitive plants during brutal summer months. Or perhaps you’re raising chickens who’d benefit from shaded areas while you generate clean energy overhead. When agrivoltaics solves two problems at once, that’s when it really shines.
Now, when might this not be your best move? If your growing space is already shaded, adding panels just compounds the problem. If you’re working with minimal space—say, a small urban balcony garden—traditional rooftop solar probably makes more sense. And honestly, if you’re not interested in managing both energy production and agriculture together, you’ll find the dual responsibility frustrating.
Here’s my suggestion: start small. Test one raised bed under a few panels before committing to a full system. Watch how your specific plants respond. Track your energy production. This hands-on approach will tell you everything you need to know about whether agrivoltaics fits your unique situation.
Agrivoltaic systems represent an exciting frontier for anyone passionate about solar energy and sustainable living. While they might seem complex at first glance, the core principles are straightforward enough for curious DIYers to explore and experiment with. I’ve seen firsthand how even small-scale projects can yield surprising benefits, from my modest raised bed setup that now thrives under elevated panels to neighbors who’ve transformed their backyard gardens into productive dual-use spaces.
The beauty of agrivoltaics lies in its flexibility. You don’t need acres of farmland to participate in this innovation. Start small, perhaps with a single elevated panel over your tomato plants or herbs, and observe how your crops respond. Document your results, adjust your approach, and share what you learn with others in the solar community. This technology improves through collective experimentation and open dialogue.
Before diving in, use Spheral Solar’s calculators to plan your system sizing appropriately. These tools help ensure your installation meets both your energy generation goals and your agricultural needs. Remember to maintain realistic expectations about yields, costs, and the learning curve involved. Not every crop will thrive, and optimizing panel height and spacing takes time and observation.
I encourage you to share your agrivoltaic experiences, questions, or creative solutions in the comments below. What crops are you considering? What challenges have you encountered? Your insights could inspire someone else’s project.
As we look toward the future, I’m convinced that integrated sustainable systems like agrivoltaics will become increasingly important. They represent more than just efficient land use; they embody a thoughtful approach to harmonizing our energy needs with environmental stewardship. The future is bright, and it’s growing greener every day.
How useful was this post?
Click on a star to rate it!
Average rating 0 / 5. Vote count: 0
No votes so far! Be the first to rate this post.
We are sorry that this post was not useful for you!
Let us improve this post!
Tell us how we can improve this post?
charlesnoble
Here at Spheral Solar, I’m a hands-on solar power enthusiast, constantly exploring and experimenting with DIY solutions. I’m dedicated to sharing my discoveries, insights, and even the bumps I hit along the way, all in the pursuit of a more sustainable future.
Why CSP Solar Never Made It Into Your Backyard (And… by Charlesnoble January 30, 2026 When you see massive solar installations in the desert generating headlines, they’re often concentrating solar power plants—but the panels on your neighbor’s roof? Those are photovoltaics, and understanding the distinction matters more than you might think. Concentrating solar power uses mirrors or lenses to focus sunlight onto a receiver, creating…
Floating Solar Panels Could Change Where You Generate Power by Charlesnoble November 29, 2025 Picture your backyard pond doing double duty: supporting wildlife while generating clean electricity for your home. That’s the promise of floating solar panels, an innovation that’s transforming how we think about renewable energy installation. Floating solar systems, also called floatovoltaics, mount photovoltaic panels on buoyant platforms that rest on water…
Turn Your Home’s Exterior Into a Power Plant With BIPV Solar by Charlesnoble February 19, 2026 Picture this: your home’s windows generating electricity while you admire the view. Your patio awning powering your outdoor lights as it shades your afternoon barbecue. Your garage door collecting energy every time the sun hits it. This isn’t science fiction – it’s building integrated photovoltaics, and it’s transforming how we…
Why Your Electric Vehicle Needs Solar Panels (And… by Charlesnoble January 19, 2026 Picture yourself pulling into a campsite after hours on the road, your electric vehicle’s battery sitting at 40%, and the nearest charging station is twenty miles back. Now imagine your EV quietly replenishing its own power from panels mounted right on the roof while you set up camp. This isn’t…
Community Solar Projects Made Simple: How You Can… by Charlesnoble March 19, 2026 Picture this: You’re renting an apartment with a north-facing roof, or your property is shaded by towering oak trees, yet you’re determined to power your life with clean solar energy. Community solar makes this possible. Instead of installing panels on your own property, you buy or lease a portion of…
Why DC Microgrids Are Perfect for Your DIY Solar Setup by Charlesnoble January 7, 2026 Picture this: you’re running LED lights, a laptop, and a small fridge in your off-grid cabin, and every device is drawing power directly from your solar panels without converting DC to AC and back again. That’s the elegant simplicity of a DC microgrid system, where electricity flows in its natural…
Subscribe for handpicked DIY projects, exclusive tips, and giveaways.
Imagine doubling the productivity of your land by growing crops and generating electricity in the same space. That’s exactly what agrivoltaics makes possible—and it’s not just for large-scale farms anymore. An agrivoltaic system combines solar panels with agriculture, mounting photovoltaic arrays high enough that crops, livestock, or pollinator habitats can thrive underneath. Think of it… Read more: Growing Crops Under Solar Panels Actually Works (Here’s Why You Should Care)
Match your LFP battery capacity to your actual lighting needs by calculating your nightly watt-hour consumption and multiplying by three—this gives you enough storage for cloudy stretches without overspending on unused capacity. A 20-watt LED running five hours nightly needs a 300Wh minimum battery, which translates to a 100Ah 12V LFP pack. Choose LFP chemistry… Read more: Why LFP Batteries Changed Everything About Solar Lighting (And How to Use Them Right)
Stop obsessing over wattage alone—it’s the biggest mistake I see RV solar shoppers make. Yes, the highest wattage panels available for RVs currently max out around 400-550 watts, but cramming the most powerful panel onto your roof doesn’t guarantee you’ll have enough power to run your air conditioner or keep your fridge cold through the… Read more: The Highest Watt Solar Panel Won’t Save Your RV Setup (Here’s What Actually Matters)

")


")
")

")


")
")


