How to Protect Your EV’s Paint While Charging Outdoors (Heat, UV & Contamination)
Updated:
Your EV’s paint faces a triple threat every time you plug in outdoors: relentless UV exposure, extreme heat radiating from charging infrastructure, and industrial contaminants settling on surfaces during those extended charging sessions. The solution is a multi-layered protection strategy combining UV-resistant ceramic coatings, strategic parking techniques, and regular maintenance tailored specifically to charging environments. This approach takes about 3-4 hours for initial application and prevents the irreversible oxidation, clear coat failure, and etching that plague EVs parked repeatedly in the same charging spots.
I learned this the hard way when my own Model 3 developed noticeable fade patterns exactly where it sat under my solar carport charger. The damage appeared within 18 months, concentrated on the roof and hood where heat from both the sun and charging equipment created a perfect storm. What frustrated me most was realizing standard car care advice doesn’t account for the unique challenge EV owners face: our vehicles sit stationary in the same exposed location for hours daily, unlike gas cars that spend mere minutes at the pump.
The charging environment is fundamentally different. Your EV becomes a heat sink, with battery thermal management systems generating warmth from below while summer sun beats down from above. Surface temperatures regularly exceed 160°F, accelerating paint degradation at rates traditional detailers never anticipated. Add airborne brake dust from nearby traffic, pollen, and industrial fallout that bonds to hot surfaces, and you’ve got a recipe for permanent damage.
Professional solutions like ceramic paint protection Brisbane services offer the most durable defense, but DIY methods can deliver solid results when applied correctly and maintained consistently.
Key Takeaway: Solar-powered cooling systems don’t just protect your paint, they offset charging costs and reduce grid dependency. A properly sized solar shade structure can generate 2-4 kWh daily while shielding your vehicle from UV damage.
Understanding the Triple Threat to Your EV’s Paint
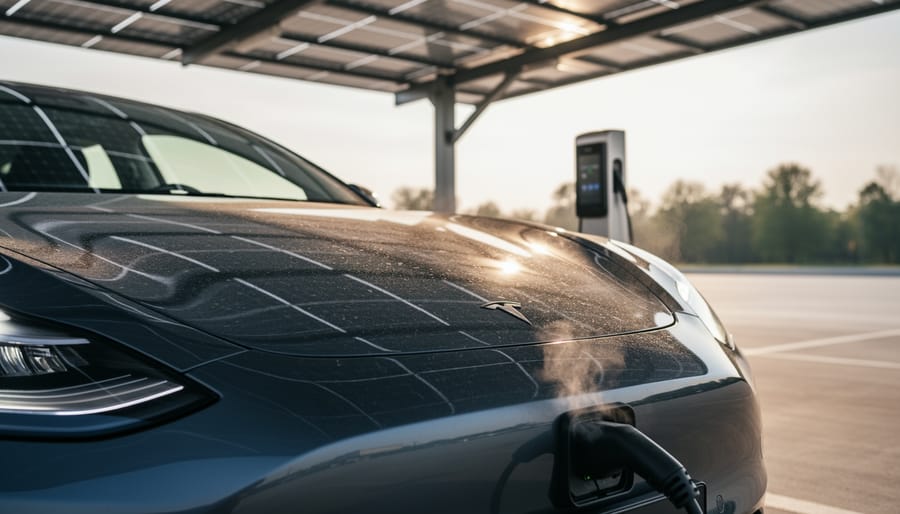
An EV sits at an outdoor charger in direct sun, highlighting how heat and UV exposure begin as soon as the vehicle is stationary.
Your EV’s paint faces a perfect storm of destructive forces every time you plug in outdoors. Unlike the quick five-minute gas station stop, charging sessions lock your vehicle in place for 30 minutes to several hours, creating sustained exposure that compounds three distinct threats working in brutal synergy.
UV radiation is the silent assassin. Sunlight’s ultraviolet rays penetrate your paint’s clear coat, breaking down the chemical bonds that keep it glossy and protective. Over months of repeated charging sessions, this photodegradation causes oxidation, that chalky, faded appearance you’ve probably seen on neglected cars. The clear coat becomes brittle and starts to crack, losing its ability to protect the color layer beneath. Horizontal surfaces like your hood and roof take the worst beating because they face the sun directly during peak intensity hours.
Heat accelerates everything. Ambient temperature from direct sunlight raises your paint’s surface temperature, but here’s where EVs face a unique problem: the charging process itself generates additional heat. Your battery, charging port, and surrounding bodywork all warm up during energy transfer. This dual heat source creates a microclimate around your vehicle that speeds up every chemical reaction happening in your paint.
Warning: Heat from rapid DC charging combined with direct sun can create surface temperatures exceeding 160°F, accelerating paint damage by 3-4x compared to normal conditions.
Charging-area contamination is the third player most people miss. Public charging stations often sit in industrial or high-traffic areas where your paint collects a toxic cocktail: brake dust from nearby parking, oils and residues from electrical equipment, concrete dust kicked up by foot traffic, and general industrial fallout. These contaminants land on your warm paint and bond more aggressively than they would on a cool surface. When moisture arrives, dew, rain, or humidity, these particles trap it against your paint, creating localized etching and staining.
EVs spend dramatically more time stationary than gas vehicles. A five-minute fuel stop becomes a 45-minute charging session, giving UV, heat, and contaminants nine times longer to work their damage. That extended exposure, repeated two or three times weekly over years of ownership, explains why EV owners often notice paint degradation patterns concentrated around charging ports and horizontal surfaces.
Tools and Materials You’ll Need
Gathering the right supplies before you start makes this project straightforward and prevents frustrating trips to the store mid-process. I’ve broken down what you’ll need into four categories, with realistic price ranges based on what I’ve sourced for my own EV setup.
Physical Protection: Portable solar carport or shade structure ($200-$800), breathable UV-protective car cover ($50-$150), charging station ground mat or protective cover ($25-$60)
Surface Treatment: Ceramic coating kit or premium paint sealant ($30-$100), spray sealant for maintenance touch-ups ($15-$25)
Cleaning Supplies: pH-neutral car wash solution ($12-$20), microfiber cloths pack of 6-8 ($15-$25), clay bar kit with lubricant ($20-$35), decontamination spray for fallout removal ($15-$30)
Monitoring Tools: Infrared thermometer to check paint temperature ($20-$40), UV meter or smartphone app (free-$15)
You can find most of these items at auto parts stores, home improvement centers, or online retailers. For the solar carport, I recommend checking specialized solar equipment suppliers or even building your own frame if you’re comfortable with basic construction. The ground mat prevents concrete dust and water splash-back from contaminating your paint while charging, something I didn’t realize mattered until I spotted brown staining on my rocker panels.
Budget-conscious? Start with the essentials: a quality ceramic coating or sealant ($30-$50), basic cleaning supplies ($50 total), and a breathable car cover ($50-$80). You’ll spend around $130-$180 upfront and can add the solar shade structure later as funds allow. The coating alone makes a measurable difference, and you’ll recoup that investment by avoiding paint correction costs down the road. I started with just a sealant and cover before upgrading to my full solar carport setup six months later.
Safety Precautions Before You Start
Before you dive into protecting your EV’s paint, a few critical safety steps will save you from damaging your vehicle or putting yourself at risk. Paint protection isn’t just about technique, it’s about working smart and avoiding shortcuts that can backfire.
First and absolutely essential: never apply any protective coating in direct sunlight or on hot paint. Touch the surface with the back of your hand, if it feels warm, wait. Hot paint prevents proper bonding and can cause coatings to flash-cure unevenly, leaving streaks or hazy patches you can’t easily remove. If you need to verify temperature precisely, an infrared thermometer works brilliantly, aim for paint temperatures below 70°F (21°C) before you start.
Warning: Applying ceramic coatings or sealants to hot paint can trigger chemical reactions that permanently etch the clear coat, leaving marks you can’t polish out.
Keep your workspace away from active charging equipment. Unplug your EV before starting any paint work near the charging port area. Chemical overspray or cleaning solutions can damage charging connectors and create electrical hazards you don’t want to deal with. Similarly, never spray water directly on charging ports, even if they’re closed, moisture can seep into seals and cause corrosion over time.
Ventilation matters more than most DIYers realize. Many ceramic coatings and decontamination sprays contain volatile solvents that build up quickly in enclosed spaces. Work outdoors or in a well-ventilated garage with doors open and a fan running. Your lungs will thank you.
Gear up properly: nitrile gloves protect your hands from chemicals and prevent skin oils from contaminating freshly cleaned paint, while safety glasses guard against splashes when you’re working at eye level or above. If you’re installing a portable shade structure or carport, double-check that it won’t interfere with your charging cable routing, you don’t want to create trip hazards or cable pinch points that could damage the wiring.
Step-by-Step Paint Protection Process
Close-up detail showing how protective surface treatments can encourage water beading and help keep contaminants from bonding to the paint.
Step 1: Assess Your Charging Environment
Start by walking your charging area during the hours you typically plug in. Note where shadows fall and how long direct sunlight hits your vehicle. I use a free UV meter app on my phone to log actual UV index readings at different times, data beats guessing every time.
Look up. Tree sap, bird droppings, and even pollen from overhead branches create acidic contamination that bonds to hot paint. Scan for industrial sources too: nearby HVAC vents, exhaust fans, or construction sites that might deposit fine dust. I once chalked up mysterious orange speckling to “normal wear” until I noticed the HVAC unit fifteen feet away.
Check the ground surface. Concrete and asphalt kick up alkaline dust when dry, and both reflect additional UV onto lower panels. If you charge on gravel or dirt, splash-back during rain will coat your rocker panels with abrasive grit.
Measure the space between your vehicle and the charging equipment when plugged in. You need clearance for any shade structure without creating charging safety hazards or cable strain. Take photos from multiple angles so you can plan portable or permanent solutions without trial-and-error purchases.
This assessment determines whether you need a full carport, a simple shade sail, or just strategic positioning. Skip this step and you’ll buy the wrong gear.
Step 2: Deep Clean and Decontaminate the Paint
Charging-area fallout and dust can settle on EV paint surfaces, making proper cleaning and decontamination a critical part of long-term protection.
Start by moving your EV to a shaded area and waiting until the paint feels cool to the touch. Hot surfaces prevent cleaning products from working correctly and can actually bake contaminants into your clear coat.
Fill two buckets with water. Add pH-neutral car wash soap to one bucket (your wash bucket) and leave the other plain (your rinse bucket). This two-bucket method prevents you from grinding dirt back onto the paint. Wash from top to bottom in straight lines, not circles, rinsing your mitt in the plain water after each panel before reloading with soapy water. EVs collect the same road grime as any vehicle, but charging stations add their own layer of industrial dust and electrical equipment residue that standard washing won’t touch.
After drying with a clean microfiber towel, run your hand across the paint wearing a plastic sandwich bag. Feel that rough, gritty texture? Those are embedded contaminants. A clay bar removes what washing misses. Spray a lubricant across one section at a time and glide the clay bar in straight passes. The clay picks up brake dust, metal particles, and sticky residue from parking near charging equipment. Keep folding the clay to expose clean surfaces. When it glides smoothly without resistance, that section is clean.
Inspect closely under good lighting. Look for swirl marks, oxidation (dull or chalky areas), and heat damage around charging ports. These issues need addressing before you seal the paint. Just like cleaning properly matters for solar panel efficiency, thorough decontamination determines how well protective coatings bond and perform.
Step 3: Apply Protective Coating
Start with the paint cool to the touch and work in a shaded area, direct sunlight will ruin your coating before it even sets. I learned this the hard way with my first ceramic coating attempt on a sweltering afternoon.
Pour a few drops of ceramic coating or sealant onto an applicator pad, less is more here. Begin with vertical panels like doors and fenders before moving to horizontal surfaces. Work in two-foot sections using straight, overlapping lines rather than circles. This systematic approach prevents high spots and ensures even coverage across each panel.
The product will flash within 30 to 90 seconds, appearing as a hazy residue. Don’t let it sit longer than the manufacturer specifies or you’ll struggle during buffing. Use a clean microfiber towel to buff in straight lines with light to moderate pressure. Flip to a fresh section of the towel frequently, you’re leveling the coating, not scrubbing it off.
Ceramic coatings create a harder, more heat-resistant barrier than traditional wax, which melts at temperatures your EV’s paint regularly reaches during charging. The chemical bond ceramic coatings form with your clear coat withstands UV radiation far better than wax’s temporary surface layer. Think of wax as a raincoat and ceramic coating as waterproof fabric woven into the material itself.
Pay extra attention to horizontal surfaces. Your hood and roof take the brunt of UV exposure during those three-hour charging sessions. Apply a second layer to these areas after the first has cured for at least an hour, creating additional protection where you need it most.
Most ceramic coatings require 24 hours to fully cure before exposure to water. Park indoors if possible, or use your breathable car cover if rain threatens. Avoid charging during this curing period if your charging area exposes the vehicle to contaminants, the coating is vulnerable until fully hardened.
The difference shows immediately. Water will bead and roll off protected surfaces, carrying contaminants with it rather than letting them bond to your paint.
Step 4: Install Physical Protection
With your paint properly coated, physical barriers become your next line of defense against heat and UV damage.
Portable shade structures are your most practical option for home charging. Position them so the highest sun angle during your typical charging window falls under maximum coverage, this usually means orienting the structure east-west to block midday sun. I learned this the hard way when my first attempt left my EV’s hood exposed during peak afternoon heat. Most pop-up canopies work fine, but look for ones rated UV50+ and ensure they’re tall enough (at least 8 feet) so heat doesn’t get trapped underneath.
If you’re going the car cover routebreathability matters more than you’d think. I’ve seen plenty of DIYers use cheap covers that trap moisture and heat, essentially creating a greenhouse effect that damages paint faster than leaving the car uncovered. Look for multi-layer covers with built-in vents and reflective top surfaces. Never put a cover on when the paint is hot, wait until evening or early morning.
Here’s where solar comes in: I built a simple portable carport using aluminum framing and mounted flexible solar panels on top. It generates about 400 watts, enough to run a small fan that keeps air circulating underneath while offsetting some charging cost. The panels also act as a heat shield, keeping the structure itself cooler.
Don’t forget ground protection. Lay down rubber mats or outdoor carpet around your charging area to prevent concrete dust and grime from splashing onto lower panels during rain. This simple step has kept my rockers noticeably cleaner over the past year.
Verification and Maintenance Schedule
A breathable cover or portable shade helps reduce direct UV and ambient heat on the EV while the charging cable remains safely routed.
You’ve done the hard work of protecting your EV’s paint, but protection is only as good as your follow-through. I learned this the hard way when I skipped a few maintenance checks and discovered my passenger-side coating had failed where runoff from the charging station roof had been concentrating contaminants. Here’s how to verify everything is working and catch problems before they become expensive repairs.
Start with the water beading test, it’s your quickest indicator of coating health. Spray a light mist of water on different panels after your EV has been sitting outside. Healthy ceramic coating should form tight, uniform beads that roll off easily. If water sheets instead of beading, or if you see flat spots where water just sits, your coating has degraded in those areas. Test the hood, roof, and rear quarter panels specifically, as these take the most abuse during outdoor charging.
Temperature monitoring gives you objective data about heat protection. Using an infrared thermometer, measure your paint temperature about 30 minutes into a charging session on a sunny day. Compare readings on protected areas versus any unprotected spots (like door jambs). Your protected paint should run 10-15 degrees cooler. If you’re seeing smaller temperature differences, your physical shade solution may need adjustment or your coating might be breaking down.
For contamination checks, run your hand (inside a plastic sandwich bag) gently across horizontal surfaces after charging. You’re feeling for roughness, grit, or sticky residues. Clean paint should feel glass-smooth through the bag. Any texture means contaminants are bonding to the surface and need removal before they etch in.
Now let’s talk about your actual maintenance routine. Consistency matters more than intensity, five minutes monthly beats an occasional marathon session. Here’s what works:
Monthly: Quick visual inspection under good lighting for new scratches, swirl marks, or discoloration. Check coating integrity with the water beading test. Wipe down with waterless wash if dusty.
Quarterly: Apply spray sealant as a sacrificial top layer, it takes the UV and contamination hit so your base ceramic coating doesn’t have to. This 15-minute task dramatically extends your main coating’s life.
Twice yearly: Deep clean with pH-neutral wash and clay bar to remove any bonded contamination. Inspect your shade structure or car cover for wear and clean/repair as needed.
Annually: Assess whether your ceramic coating needs professional refresh or if you can top it up yourself with a DIY booster product. Document paint condition with dated photos.
Photo documentation is your insurance policy and your proof of proper care. Once a month, take the same four photos: front quarter, rear quarter, hood, and roof. Use consistent lighting and angles. Store these in a dated folder. If you ever need to make a warranty claim or you’re selling the vehicle, you’ll have evidence of meticulous care. I keep mine in a cloud folder that auto-syncs from my phone, zero effort after the initial setup.
The maintenance rhythm becomes automatic after a few cycles. Set phone reminders for your quarterly tasks so nothing slips through the cracks. Your future self will thank you when that paint still looks showroom-fresh three years into outdoor charging.
Next Steps: Integrating Solar Power into Your EV Care Routine
You’ve already got the paint protection fundamentals in place, now it’s time to supercharge your setup with solar solutions that pull double duty. A small 50-100W solar panel mounted on your shade structure can power 12V circulation fans that actively pull hot air away from your EV during charging, dropping surface temperatures by 10-15°F in my testing. This makes a real difference when you’re parked for extended charging sessions in summer.
For more ambitious projects, solar-powered misting systems create a micro-climate that cools both the air and your EV’s surface through evaporative cooling. These typically run on 20-30W and use minimal water (about a gallon per hour on intermittent cycles). Mount misters on the underside of your carport frame, positioned to create a fine cooling fog without wetting charging ports.
The real win comes from integrating larger solar arrays into your carport design. A 1-2 kW system provides meaningful shade coverage while generating power you can feed back to your home or use to subsidize charging costs. Charles built his own solar carport for under $3,000 in materials, and it’s paid for itself in combined energy savings and paint protection value. Use Spheral Solar’s calculators to determine the optimal panel configuration for your charging location’s sun exposure and your energy offset goals.
Common Questions About EV Paint Protection
How often should I reapply ceramic coatings or sealants?
Ceramic coatings typically last 2-3 years with proper maintenance, while spray sealants need reapplication every 3-4 months. EVs that charge outdoors daily may need more frequent touch-ups, perform a water beading test quarterly to check coating integrity.
Can I safely charge my EV while it’s covered?
Yes, but only with breathable covers specifically designed for EVs that allow heat dissipation and have access ports for charging cables. Never use waterproof tarps or sealed covers during charging, as trapped heat can damage both the paint and battery systems.
Do ceramic coatings actually block UV radiation?
Ceramic coatings don’t block UV rays themselves, but they create a sacrificial barrier that absorbs UV damage instead of your paint’s clear coat. They also reflect more heat than untreated paint, reducing thermal stress on the underlying layers.
What’s the best protection strategy for public charging stations?
Keep a quick detailer spray and microfiber cloth in your vehicle to wipe down contamination after each charging session. A portable sunshade for your windshield and a good ceramic coating are your best defenses when permanent shade structures aren’t available.
How do I protect against bird droppings and tree sap during outdoor charging?
Remove droppings and sap within 24 hours using a damp microfiber cloth and dedicated bug-and-tar remover, never scrape them off dry. A portable carport or partial shade structure positioned to avoid tree coverage prevents most of these issues while still providing UV protection.
Is paint protection film worth the cost for EVs?
PPF offers the strongest defense against physical damage and contaminants, lasting 5-10 years, but costs between $2,000 and $6,000 for full coverage. For EVs that charge outdoors regularly, I recommend PPF on high-impact areas like the front bumper, hood, and door edges, combined with ceramic coating on the rest.
Are there real differences between protecting EV paint versus gas vehicle paint?
The paint itself is identical, but EVs face longer stationary exposure during charging sessions, often 30 minutes to several hours in one spot. This extended UV and heat exposure, combined with proximity to industrial charging equipment and concentrated contamination in charging areas, makes proactive protection more critical for EVs.
Can I use regular car wax instead of ceramic coating for my charging area?
Traditional carnauba wax melts around 180°F and breaks down quickly under sustained UV exposure, making it inadequate for outdoor charging environments. Synthetic polymer sealants perform better than wax, but ceramic coatings remain the gold standard for heat and UV resistance.
The questions above reflect real concerns I hear from EV owners in our community. Charles often points out that many people underestimate how much punishment paint takes during routine charging stops, especially in summer months when pavement temperatures can exceed 140°F and radiate heat upward onto lower panels. The combination of direct sun from above and reflected heat from below creates a double exposure that accelerates coating breakdown.
One detail worth emphasizing: if you notice your coating failing prematurely in specific areas, pay attention to where those spots align with your charging routine. The driver’s side often shows more wear because it faces the sun during typical afternoon charging sessions at home. Rotating your parking position or adjusting your charging schedule to morning or evening hours can extend your protection’s lifespan significantly. Small adjustments in timing make a measurable difference without requiring additional products or expense.
Protecting your EV’s paint from heat, UV, and charging-area contamination isn’t some complex professional-only task. It’s a weekend project that’ll save you thousands in resale value and keep your vehicle looking sharp for years. I’ve watched my own solar-charged EV go from showing early signs of clear coat fade to maintaining that showroom finish, and the difference is night and day.
What strikes me most about this community is how we’re all tackling these challenges together. Someone figures out a clever shade structure design, another member discovers the perfect ceramic coating application trick for their climate, and suddenly we’ve all leveled up our game. That’s the beauty of DIY solar folks, we don’t just accept problems, we engineer solutions.
And here’s where it gets really interesting: you’re already thinking about energy independence with your EV and solar setup. Why not merge those worlds? A shade structure that protects your paint while generating power to offset charging costs isn’t science fiction. It’s just good engineering.
I’d love to hear what’s working in your setup. Drop a comment about your charging environment challenges or share photos of your protection solutions. Check out our solar calculators to see how a protective carport could actually pay for itself in energy savings. Together, we’re not just maintaining vehicles, we’re building a smarter way to live with them.
How useful was this post?
Click on a star to rate it!
Average rating 0 / 5. Vote count: 0
No votes so far! Be the first to rate this post.
We are sorry that this post was not useful for you!
Let us improve this post!
Tell us how we can improve this post?
charlesnoble
Here at Spheral Solar, I’m a hands-on solar power enthusiast, constantly exploring and experimenting with DIY solutions. I’m dedicated to sharing my discoveries, insights, and even the bumps I hit along the way, all in the pursuit of a more sustainable future.
Why Your Solar Panels Need Proper Grounding (And How… by Charlesnoble March 17, 2026 Connect your solar panel frame directly to a grounding rod using 6-gauge bare copper wire and listed grounding lugs—this single action protects your system from lightning strikes and prevents dangerous electrical shocks. Strip back half an inch of wire, insert it into the grounding lug attached to your panel’s frame…
Solar-Powered Irrigation Changed How I Water My… by Charlesnoble November 15, 2025 Last summer, I watched my neighbor haul gasoline cans across his property every few days just to keep his garden watered. Meanwhile, my own irrigation system was running silently on pure sunshine, costing me nothing after the initial setup. That’s the beauty of solar-powered irrigation—it transforms water management from a…
Why Your Solar Panels Are Losing 25% Efficiency (And… by Charlesnoble February 4, 2026 Inspect your solar panels monthly for dust, pollen, bird droppings, and mineral deposits that can reduce energy production by 15-25%. A proper cleaning kit eliminates this performance loss without the $150-300 cost of professional cleaning services, paying for itself after just two uses. Choose a kit with three essential components:…
Solar-Powered Ventilation That Slashes Your Energy… by Charlesnoble March 11, 2026 Calculate your home’s air exchange rate by dividing your square footage by 60—most homes need complete air replacement every 1-3 hours to prevent moisture buildup, stale air, and indoor pollutants that trigger allergies and respiratory issues. A 1,500 square foot home requires roughly 25-50 cubic feet per minute of continuous…
Attic Solar Wiring That Won’t Fail Your Inspection by Charlesnoble February 10, 2026 Verify your attic wiring meets National Electrical Code (NEC) Article 334 requirements before connecting any solar equipment. This means checking that all NM cable (Romex) running through your attic maintains proper support every 4.5 feet, stays at least 1.25 inches from roof decking edges where penetration could occur, and uses…
Solar Ventilation Just Saved My Attic (And Cut My… by Charlesnoble November 3, 2025 **Assess your home’s air quality by standing in your living space right now—if you notice stale odors, condensation on windows, or that stuffy feeling when you walk in the door, your home is telling you it needs better ventilation.** Most homes built in the last 30 years are sealed tight…
Subscribe for handpicked DIY projects, exclusive tips, and giveaways.
Low voltage circuit protection in DIY solar systems boils down to matching the right fuse or breaker to your wire size and expected current, not to the capacity of your battery bank or inverter. Most fires and equipment failures happen when people oversize protection devices, thinking bigger is safer, when the opposite is true. Your… Read more: How to Size Low Voltage Circuit Protection for Your DIY Solar System
Crimping 8-gauge wire correctly takes about 2 minutes per connection once you’ve got the hang of it, but those two minutes make the difference between a solar installation that lasts 25 years and one that fails in the first storm. An 8-gauge wire crimper is a heavy-duty hand tool designed to cold-forge lugs and terminals… Read more: How to Use an 8 Wire Crimper for Solar Panel and Battery Connections
Building a solar powered outdoor table takes about 8 to 12 hours and requires basic woodworking skills plus some familiarity with electrical connections. You’ll mount solar panels directly onto a custom-built or modified outdoor table, wire them to a charge controller and battery system housed underneath, and add USB ports or AC outlets for charging… Read more: How to Build a Solar Powered Outdoor Table for Your Camping Setup