Snow on Your Solar Panels? Here’s What Actually Works (And What Wastes Your Time)
Updated:
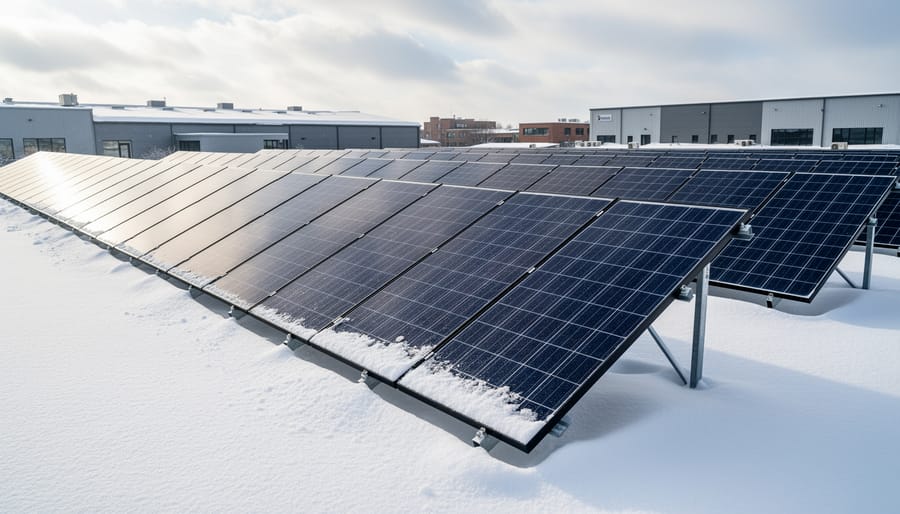
Brush snow off your panels with a soft-bristled roof rake from ground level, working gently from bottom to top to avoid scratching the glass or damaging your DIY solar setup. Use lukewarm water in a spray bottle for stubborn ice patches, never hot water that could crack cold panels from thermal shock. Install panels at a 40-degree tilt or steeper in snow-prone regions to encourage natural sliding, and leave the bottom two feet of rooftop space clear so avalanching snow has somewhere safe to land.
Most solar owners I’ve talked with obsess over snow coverage, but here’s what surprised me during my first Colorado winter with panels: light dustings melt off within hours as the dark cells absorb sunlight and warm up faster than surrounding surfaces. Heavy accumulation does block production completely, but patience often beats intervention. A six-inch snowfall typically slides off tilted panels within 2-3 days as temperatures fluctuate, and the lost energy rarely justifies risky roof climbing.
The real question isn’t whether to remove snow, but when removal makes sense for your situation. If you’re experiencing a week-long storm dumping two feet of heavy, wet snow, intervention protects both your energy production and your investment. However, climbing icy roofs or using metal tools causes more problems than it solves. I’ve seen cracked panels, damaged frames, and voided warranties from overzealous cleaning.
Understanding snow behavior on solar installations transforms winter maintenance from stressful guesswork into confident decision-making. This guide walks through the actual impact of snow on power generation, safe removal techniques that won’t damage your equipment, and smart design choices that minimize winter headaches before they start.
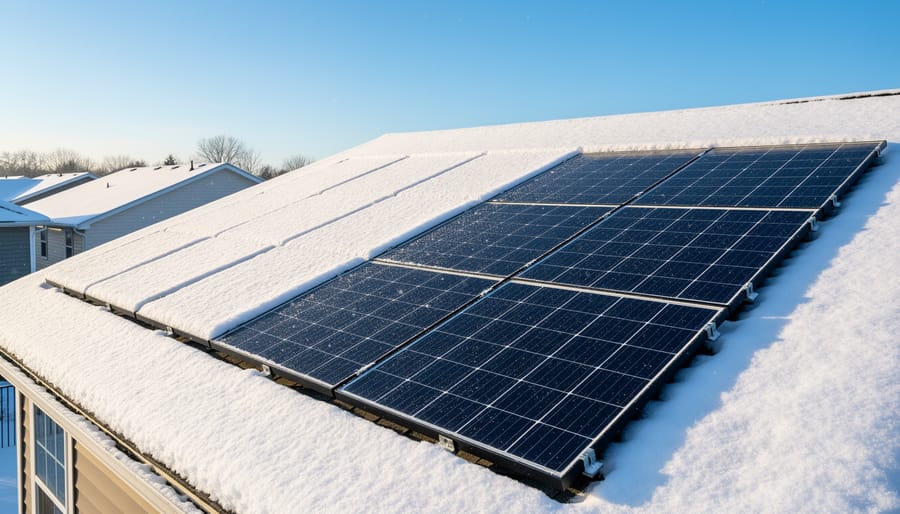
Snow accumulation on solar panels is a common winter challenge, but understanding when to remove it versus letting nature take its course can save time and protect your investment.
Why Snow on Solar Panels Isn’t Always the Emergency It Seems
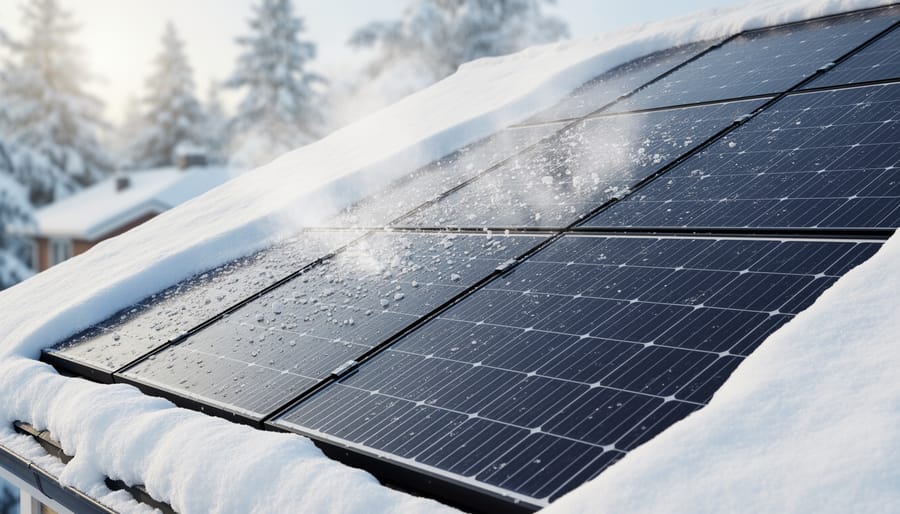
The Snow Slide Effect: How Panels Self-Clean
Here’s something I discovered during my first winter with solar panels that honestly surprised me: these panels are remarkably good at cleaning themselves! I’d worried constantly about snow piling up, but nature had already built in some clever solutions.
Solar panels are designed with a smooth, tempered glass surface that’s naturally slippery for snow. Think about how snow slides off a metal roof versus getting stuck on rough shingles. Your panels work the same way. As the sun peeks through or temperatures rise even slightly, that dark surface absorbs heat, creating a thin melt layer between the panel and the snow. This acts like a lubricant, and gravity does the rest.
The magic really happens when your panels are installed at the right angle. In most snowy regions, installers recommend a tilt of at least 35 degrees. At this angle, snow struggles to accumulate in the first place and slides off much more readily once that warming effect kicks in. I’ve watched snow sheets cascade off my 40-degree installation within hours of the sun appearing, without me lifting a finger.
Even during active snowfall, panels generate some residual heat from whatever sunlight penetrates the clouds. This passive warming, combined with their smooth surface, means light snow often melts or slides away naturally. Heavy, wet snow might stick around longer, but you’d be amazed how often patience is your best tool. The self-cleaning effect works best when you avoid interfering unnecessarily, letting physics handle the job.
Solar panels’ smooth surfaces and natural heat generation often cause snow to slide off on its own, especially when installed at steeper angles.
Production Loss Reality Check
Here’s something I learned the hard way during my first winter with solar panels: I spent three hours nervously clearing snow from my roof-mounted array, only to discover later that the energy loss wasn’t nearly as dramatic as I’d feared.
Let’s talk numbers. In most snowy regions, winter production naturally drops by 40-60% compared to summer, primarily because of shorter days and lower sun angles. Snow covering your panels might add another 10-20% loss on top of that, but here’s the key: snow events are temporary. In many cases, panels self-clear within 24-48 hours, especially if your wiring configuration allows portions of your array to generate heat from sunlight hitting cleared sections.
Here’s a simple calculation to determine if snow removal is worth your time: Take your system’s average winter daily production (check your monitoring app), multiply by your local electricity cost per kilowatt-hour, then multiply by the number of days panels typically stay covered. If you’re losing less than $10-15 per snow event, your time and safety risk probably aren’t worth the effort.
For perspective, cloudy winter days often reduce production more than snow does. A week of overcast skies can match the impact of a single snow event. My advice? Unless you’re experiencing week-long coverage or have critical energy needs, let nature handle most snow removal while you focus on proper system design and positioning for future winters.
Understanding Snow vs. Other Solar Panel Soiling
When Snow Becomes Ice: The Real Problem
Here’s the thing most solar owners don’t realize until they experience their first real winter: snow itself isn’t usually the villain in this story. Ice is.
I learned this the hard way during my second winter with solar panels. After a particularly mild snowfall, I figured I’d let nature take its course. The next morning brought sunshine, and I watched as the snow started melting beautifully off my panels. Success, right? Not quite. That night, temperatures dropped again, and all that melted snow refroze into a thick, stubborn sheet of ice that stuck around for nearly a week.
This freeze-thaw cycle is where things get tricky. Light, fluffy snow often slides right off your panels or melts away with minimal fuss. But when temperatures hover around freezing, you get this frustrating dance where snow melts during the day and refreezes at night. Each cycle builds up layers, creating an ice coating that’s much harder to remove than fresh snow ever was.
The production impact tells the whole story. A few inches of fresh snow might cut your output by 90 percent, but it’s temporary. Ice buildup, though? That can shut down production completely for days, even weeks if conditions don’t cooperate. And here’s the kicker: you can’t just scrape ice off like you would snow. The rigid, bonded nature of ice makes removal risky for both you and your panels, requiring completely different strategies than simple snow clearing.
Safe Snow Removal Methods That Won’t Damage Your Investment
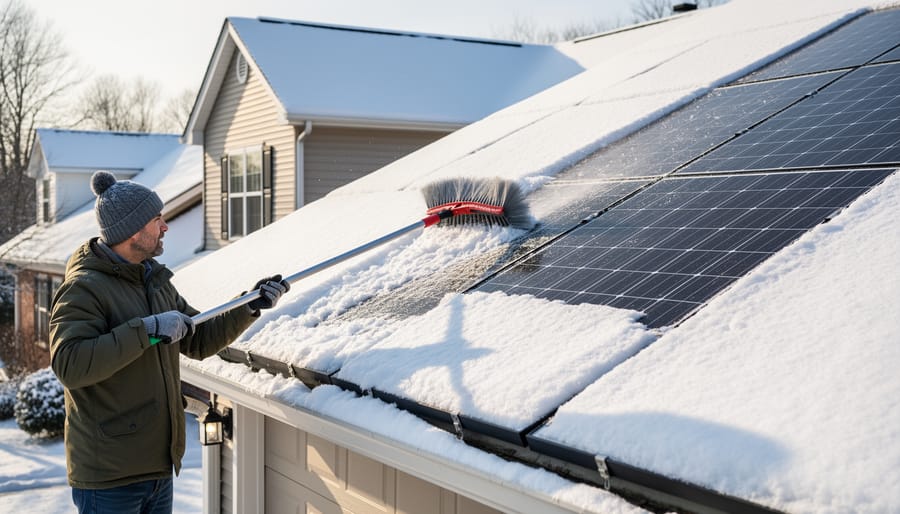
The Ground-Based Approach: Tools and Techniques
The safest way to clear snow from your solar panels is to keep your feet firmly planted on the ground. I learned this lesson years ago when Charles, a friend who installed his first array on a steep roof, nearly took a tumble trying to reach his snow-covered panels with a regular broom. That experience taught us both that specialized ground-based tools aren’t just convenient—they’re essential for safety.
Your best investment is a soft-bristled roof rake designed specifically for solar panels. Look for models with foam padding or rubber edges that won’t scratch the glass surface. The Snow Joe RoofBroom and the Garelick SnowPro are popular choices among the DIY solar community, featuring telescoping poles that extend 17 to 21 feet. These typically run between 40 and 80 dollars, and they’ll last you several winters.
For lighter dustings or the final cleanup after using a roof rake, a window squeegee mounted on an extension pole works beautifully. You can find these at any hardware store for under 30 dollars. The key is choosing a pole that locks securely at your desired length—wobbly extensions make the job frustrating and potentially dangerous.
If you’re working with a tighter budget, you can create a DIY solution using a foam pool noodle secured to a lightweight aluminum pole with zip ties. Cut the noodle lengthwise and attach it as a soft bumper. It’s not fancy, but it gets the job done without risking damage to your investment.
Whatever tool you choose, always work slowly and avoid applying excessive pressure. Think of it as gently coaxing the snow off rather than aggressively scraping. And never attempt this work during icy conditions when footing becomes treacherous.
Using soft-bristled roof rakes from ground level provides safe and effective snow removal without risking damage to panels or personal injury.
What NOT to Do: Common Mistakes That Cause Damage
Let me share a story that still makes me crunch numbers in my head. My neighbor Charles tried to speed up snow removal last winter by pouring hot water on his panels. Within seconds, he heard a loud crack. Thermal shock from the temperature difference created a spider-web fracture across two panels. His “quick fix” cost him $800 in replacements.
That incident taught our whole community what not to do, and I want to save you from similar expensive lessons.
Never use hot water on cold panels. The sudden temperature change can shatter the glass or damage the panel’s internal components. Even warm water poses risks when outside temperatures are below freezing.
Metal shovels and hard ice scrapers are equally problematic. I’ve seen people treat their panels like car windshields, scraping away with metal edges. This scratches the protective coating and glass surface, reducing efficiency permanently. One homeowner in our DIY solar group reported a 15% efficiency drop after aggressive scraping removed the anti-reflective coating.
Climbing on snow-covered panels creates multiple hazards. You’re dealing with slippery surfaces, potential falls, and concentrated pressure points that panels aren’t designed to handle. Panels support snow’s distributed weight differently than a person’s footsteps. I’ve heard of cracked frames and broken junction boxes from well-meaning owners who thought they could just walk across their array.
Salt and chemical de-icers also belong on the banned list. These corrode electrical connections and leave residue that blocks sunlight even after snow melts. Stick with the gentle methods we discussed earlier, and your panels will thank you with years of reliable performance.
When to Let Nature Handle It
Sometimes the smartest move is to grab a cup of coffee and let Mother Nature do the work for you. I learned this lesson the hard way during my first winter with solar panels, when I rushed outside during a light snowfall only to watch it melt off naturally within an hour.
Here’s when patience pays off. If the weather forecast shows temperatures climbing above freezing within 24-48 hours, especially with sunny conditions, your panels will likely clear themselves. This is particularly true if your panels are installed at angles steeper than 30 degrees, where snow slides off more easily.
Consider your actual production needs too. During shorter winter days, you’re generating less power anyway, so missing a day or two might not significantly impact your energy goals. I’ve found that tracking my winter production patterns helps me understand when it’s worth intervening versus waiting it out.
Safety should always trump energy production. If accessing your panels means climbing on an icy roof or working in active snowfall, it’s simply not worth the risk. Light, fluffy snow typically melts faster than heavy, wet snow, but both will eventually clear when conditions improve. Think of it this way: your panels are designed to last decades, so a few days of downtime won’t hurt their long-term performance.
Preventive Strategies: Designing Your System for Winter Performance
Optimal Tilt Angles for Snow-Prone Regions
If you live in a region where snow is a regular winter visitor, adjusting your panel angle can make a world of difference in how quickly snow slides off. Think of it like the pitch of your roof—the steeper it is, the less likely snow is to stick around.
For snow-prone areas, tilting your panels at 50-70 degrees during winter months creates a slope that encourages snow to slide right off, especially once the sun warms the panels even slightly. I learned this firsthand during my second winter with solar panels. After watching snow sit stubbornly on my 35-degree panels for days, I adjusted a test array to 60 degrees. The difference was remarkable—most snow would shed within hours of sunrise rather than lingering for days.
Here’s the trade-off though: steeper angles are fantastic for winter snow management, but they’re less efficient for summer energy production when the sun is high overhead. You’ll want to consider whether year-round steep angles make sense for your situation, or if seasonal adjustments are worth the effort.
If you have a ground-mounted system, adjusting optimal tilt angles seasonally is relatively straightforward—many mounting systems include adjustment mechanisms. For roof-mounted installations, you’re generally stuck with whatever angle your roof provides, though some homeowners install adjustable racks if their roof pitch is too shallow.
A practical middle ground? Aim for at least 40-45 degrees if you’re designing a new system in snow country. This provides decent snow-shedding capability while maintaining reasonable summer production.
Strategic installation with steeper tilt angles allows solar panels to naturally shed snow, reducing maintenance needs in winter climates.
Panel Placement and Accessibility Considerations
When you’re planning your solar installation in snow country, thinking ahead about accessibility can save you countless headaches down the road. I learned this lesson the hard way during my first winter with rooftop panels—clambering around on icy shingles with a snow rake at 6 AM is not something I’d recommend to anyone!
Ground-mounted systems are my top pick for snow-prone areas. They’re incredibly accessible, meaning you can easily brush off snow while keeping both feet on solid ground. You can walk right up to them with a soft-bristled broom or snow rake without risking life and limb. Plus, many ground-mounted designs allow for steeper tilt angles, which naturally encourages snow to slide off more quickly.
If roof mounting is your only option, consider panel placement considerations carefully. Arrays positioned over lower roof sections or near easy-access points make maintenance much safer. Avoid placing panels over second-story areas or sections requiring ladder work on steep pitches.
Pole-mounted systems with seasonal tilt adjustments offer a brilliant middle ground. These elevated arrays can be angled more steeply in winter months to promote natural snow shedding, then adjusted to optimal summer angles when needed. While they require more upfront investment, the convenience factor is hard to beat.
Whatever mounting style you choose, think about your winter self standing there with snow removal tools. Can you reach the panels safely? Is the approach clear of hazards? These practical questions will guide you toward the smartest setup for your situation.
Coating and Surface Treatments: Do They Work?
I’ll be honest with you—when I first heard about hydrophobic coatings for solar panels, I thought they sounded like magic. The idea that a simple spray-on solution could make snow slide right off seemed almost too good to be true. After testing a few products on my own setup, I can tell you the reality is more nuanced.
Hydrophobic coatings do reduce snow adhesion, but they’re not miracle workers. In light, fluffy snow conditions, they can help. However, wet, heavy snow still tends to stick around. Most DIY-friendly coatings cost between $30-$80 per bottle and need reapplication every 1-2 years. For a typical residential array, you’re looking at $100-$200 annually. That’s a meaningful expense when natural melting often does the job for free within a day or two.
Heating systems are even trickier from a cost perspective. Electric heating cables or heated panel frames can prevent snow accumulation, but they consume electricity—sometimes negating the energy your panels would produce anyway. Installation costs range from $500-$2,000 for DIY setups. Unless you’re in an area with frequent, prolonged snow cover and limited roof access, the return on investment just doesn’t add up for most hobbyists.
My recommendation? Save your money for now. Focus on proper panel angle during installation and keeping a safe snow rake handy instead.
Cleaning Beyond Snow: Year-Round Maintenance for Maximum Efficiency
The Seasonal Cleaning Schedule
Keeping your panels productive year-round doesn’t mean you’re climbing on the roof every weekend. I’ve learned that seasonal cleaning is really about working smarter, not harder. Here’s how I break down my maintenance calendar to match what Mother Nature throws at my panels.
Spring is pollen season, and if you’ve ever seen a yellow film covering your car, you know what I’m talking about. Around late April, I do a thorough cleaning because that pollen buildup can cut efficiency by 15-20%. A gentle rinse with the hose usually does the trick, but stubborn spots might need a soft brush on an extension pole.
Summer brings dust and dirt, especially during dry spells. I check my panels monthly but often find rain handles most of the work. If we go three weeks without rain, I’ll give them a quick spray in the early morning when they’re cool.
Fall means leaves, and this is where I stay vigilant. Wet leaves stuck on panels can create shading issues, so I inspect weekly during peak leaf-drop season. A leaf blower works great for dry leaves before they get stuck.
Winter is snow management time, which we’ve covered extensively. But remember, light dustings usually melt off quickly, so patience often beats effort.
The beauty of this schedule is flexibility. Some years need more attention, others less. Pay attention to your production monitoring, and you’ll quickly learn what your specific location demands.
DIY Cleaning Solutions and Tools
You don’t need expensive equipment to keep your panels clean and snow-free. I learned this the hard way after spending money on specialized tools that ended up sitting in my garage unused. Most of what you need is already in your home.
For snow removal, a soft-bristled push broom with an extension pole works wonderfully. The key is choosing one with gentle bristles that won’t scratch the panel surface. I keep mine dedicated solely to panel cleaning to avoid transferring dirt or debris from other cleaning jobs.
When it comes to washing away light snow, dirt, or bird droppings, a garden hose with a spray nozzle does the trick. Use lukewarm water if possible, especially on cold days, since extreme temperature changes can stress the glass. Simply spray from ground level early morning or evening when panels are cooler.
For stubborn grime, mix a solution of mild dish soap and water in a bucket. Apply with a soft microfiber cloth or car-washing mitt attached to your extension pole. Avoid abrasive cleaners, harsh chemicals, or rough sponges that could damage the protective coating.
A squeegee on an extension pole helps dry panels quickly, preventing water spots and mineral buildup. This same simple toolkit handles both winter snow situations and year-round maintenance, making panel care straightforward and budget-friendly.
Monitoring Production to Know When Action Is Needed
Here’s the thing about snow on solar panels—you don’t always need to rush outside with a broom the moment you see a dusting. I learned this the hard way during my first winter with panels, spending way too much energy clearing snow that would’ve melted off by noon anyway. The key is knowing when snow actually matters to your energy production.
Most modern solar systems come with monitoring apps that show real-time power generation. Check your app each morning and compare current output to what you’d typically see on a clear day at that same time. If you’re still producing 80-90% of normal output with light snow coverage, you’re probably fine. But when production drops below 50% or goes to zero, that’s your signal that intervention might be worthwhile.
I keep a simple notebook where I jot down daily production numbers during winter. After a few seasons, you’ll recognize patterns—like how that fluffy snow always slides off by itself within a day or two, while heavy wet snow needs attention. This observation beats any general advice because your roof angle, panel type, and local weather create unique conditions.
Don’t forget to factor in the weather forecast. If temperatures will stay above freezing and sunshine is expected, nature will often do the work for you. I’ve watched thick snow layers vanish in hours under bright winter sun, even when air temperatures hovered around 35 degrees.
The bottom line is this: let your monitoring data and simple observation guide you, not anxiety. Snow removal is only necessary when production significantly drops and conditions won’t naturally clear it soon. This approach saves effort and keeps you safer by reducing unnecessary trips onto your roof.
After several winters of living with solar panels, I’ve learned that snow management isn’t something to lose sleep over. My approach has definitely evolved from those early days when I’d rush outside after every flurry with my squeegee. Now? I’ve found a comfortable middle ground that works for me and my system.
Here’s what I’ve settled on: I keep an eye on things, but I don’t obsess. If we get a light dusting, I let it slide off naturally, which usually happens within a day or two. For those heavier storms that dump six inches or more, I’ll use my soft-bristled snow brush when it’s safe and convenient, but I’m not setting my alarm for dawn patrols anymore. The production loss is temporary, and my panels always bounce back.
The biggest lesson? Your system is more resilient than you think. Those few days of reduced output haven’t made a noticeable dent in my annual production numbers, and I’ve saved myself countless hours of worry and unnecessary roof trips.
I’d love to hear from you about your own snow management strategies. What works in your climate? Have you discovered any clever tricks or tools that make the job easier? Share your experiences in the comments below. Whether you’re dealing with occasional dustings in the Midwest or regular nor’easters in New England, your regional insights could help fellow solar enthusiasts find their own balance between proactive care and practical winter expectations.
How useful was this post?
Click on a star to rate it!
Average rating 0 / 5. Vote count: 0
No votes so far! Be the first to rate this post.
We are sorry that this post was not useful for you!
Let us improve this post!
Tell us how we can improve this post?
charlesnoble
Here at Spheral Solar, I’m a hands-on solar power enthusiast, constantly exploring and experimenting with DIY solutions. I’m dedicated to sharing my discoveries, insights, and even the bumps I hit along the way, all in the pursuit of a more sustainable future.
Why Your Bifacial Solar Panels Need a Completely… by Charlesnoble March 22, 2026 Flip your bifacial solar panels over and you’ll find a second active surface that can boost your system’s energy production by 10-30% – but only if you design your array to take advantage of it. Unlike traditional panels that capture sunlight from one side, bifacial modules harvest energy from both…
Why Series-Parallel Wiring Could Save Your Solar… by Charlesnoble March 24, 2026 When your solar array needs more power than a simple series connection provides, but your charge controller can’t handle high voltages, series-parallel wiring becomes your solution. This hybrid approach combines the voltage-boosting benefits of series connections with the current-increasing advantages of parallel wiring, giving you the flexibility to match your…
Subscribe for handpicked DIY projects, exclusive tips, and giveaways.
Brush snow off your panels with a soft-bristled roof rake from ground level, working gently from bottom to top to avoid scratching the glass or damaging your DIY solar setup. Use lukewarm water in a spray bottle for stubborn ice patches, never hot water that could crack cold panels from thermal shock. Install panels at… Read more: Snow on Your Solar Panels? Here’s What Actually Works (And What Wastes Your Time)
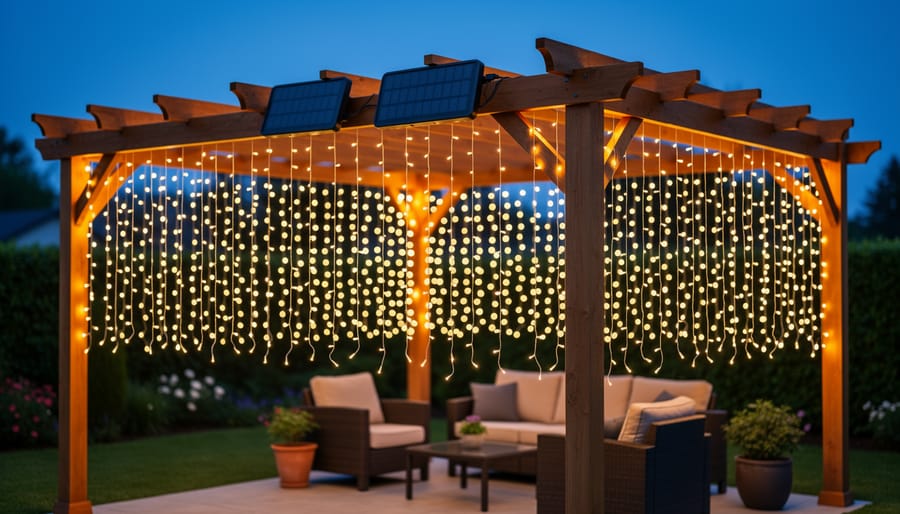
Picture this: Last summer, I draped what looked like sparkling fairy lights across my patio pergola, and guests immediately asked where I’d hidden the extension cord. There wasn’t one. These solar powered outdoor curtain lights had transformed my backyard into an enchanting evening retreat without adding a cent to my electric bill or requiring any… Read more: Solar Curtain Lights That Actually Work Outdoors (What I Learned Installing Mine)
When your solar array needs more power than a simple series connection provides, but your charge controller can’t handle high voltages, series-parallel wiring becomes your solution. This hybrid approach combines the voltage-boosting benefits of series connections with the current-increasing advantages of parallel wiring, giving you the flexibility to match your system’s exact requirements. Most DIYers… Read more: Why Series-Parallel Wiring Could Save Your Solar Setup (And Your Wallet)


")

")