This Critical Safety Switch Could Save Your Solar System (And Your Life)
Updated:
Picture this: you’ve just finished mounting your solar panels, the sun is shining, and DC power is flowing through your system at voltages high enough to seriously injure or kill someone. Without a proper DC isolator switch, you have no safe way to disconnect that power for maintenance, emergencies, or repairs. This single component stands between you and potentially fatal electrical hazards, yet many DIY solar builders treat it as an afterthought.
A PV array DC isolator switch does exactly what its name suggests: it safely breaks the electrical connection between your solar panels and the rest of your system. Unlike the AC breakers you’re familiar with in your home, DC isolators face unique challenges. Direct current doesn’t naturally “zero out” like alternating current does, making arcs harder to extinguish when you flip the switch. Choose the wrong isolator, and you could face persistent arcing, melted components, or fire hazards.
I learned this lesson the hard way during my first off-grid installation, when I underestimated the importance of proper DC disconnection. The cheap isolator I initially selected couldn’t handle my system’s voltage under load, creating a dangerous arc that could have ended much worse than a melted switch housing and a serious wake-up call.
This guide walks you through everything you need to know: what makes DC isolation different from AC, how to select an isolator rated for your specific system, where to install it for maximum safety and code compliance, and the critical maintenance steps that keep your family protected for decades to come.
What Exactly Is a PV Array DC Isolator Switch?
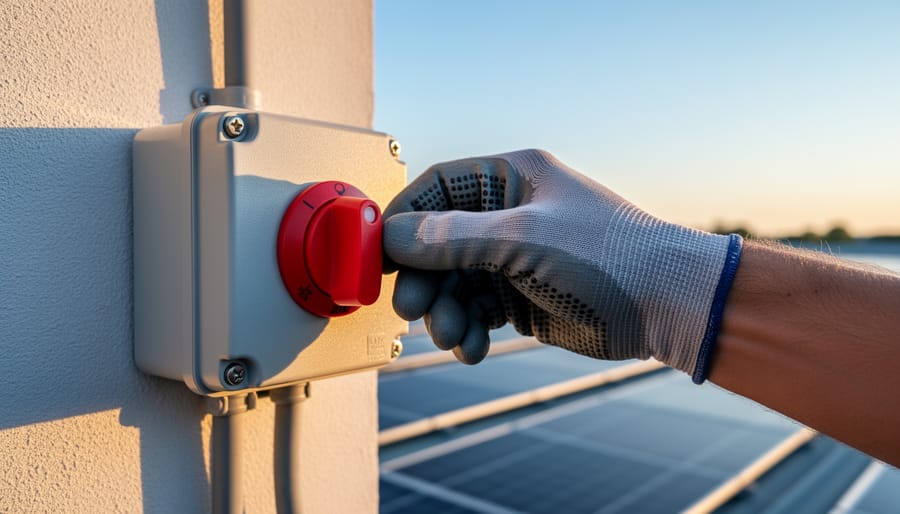
A properly installed DC isolator switch positioned between solar panels and the interior electrical system provides critical safety disconnection capability.
The Difference Between AC and DC Isolation (And Why It Matters)
Here’s something I learned the hard way during my first solar installation: you absolutely cannot use a regular household light switch to control DC power from solar panels. I flipped what I thought was a standard switch, saw a bright blue arc, and nearly jumped out of my skin. That’s when I understood why DC isolators are so different from what we’re used to.
The key difference comes down to how electricity behaves. AC (alternating current) from your wall outlets naturally crosses zero volts 120 times per second, which helps extinguish any arc when you flip a switch. DC (direct current) from solar panels never crosses zero. It flows continuously in one direction, like a river that never stops.
When you open a DC circuit under load, the electricity really doesn’t want to stop flowing. It creates an arc that can sustain itself much longer than AC. This arc is incredibly hot, around 6,000 degrees Fahrenheit, hot enough to melt metal contacts and start fires. Regular switches simply aren’t designed to handle this.
DC isolator switches use special arc-extinguishing chambers, reinforced contacts rated for high DC voltages, and wider contact gaps to safely break that persistent DC current. They’re built specifically to handle the unique challenges of solar arrays, where you might be dealing with 300 to 600 volts DC or more.
Think of it this way: using a regular switch for DC is like using a garden hose to fight a forest fire. You need the right tool for the job, and in solar systems, that tool is a properly rated DC isolator switch.
Where the DC Isolator Fits in Your Off-Grid System
Picture your solar system as a flowing river of electricity. The DC isolator sits right at a critical junction—between your solar panels up on the roof and the charge controller that regulates power to your batteries. Think of it as the main shutoff valve that gives you complete control over that energy flow.
In most off-grid setups, the physical placement is straightforward but crucial. The isolator mounts on your wall or equipment panel, typically within arm’s reach of your main system components. From your solar panels on the roof, your DC cables run down and connect to the input side of the isolator. The output side then connects directly to your charge controller. This positioning makes the solar array disconnect your first line of defense when you need to work on anything downstream.
Let me share what this looks like in real-world scenarios. In an RV setup, I’ve seen isolators mounted right inside the battery compartment or near the charge controller on an interior wall. This keeps everything accessible even when you’re parked in varying conditions. For a cabin system, the isolator usually lives in your equipment room alongside your batteries and inverter, creating a central control point.
In a home backup system, you might mount it near your main electrical panel for easy access during emergencies or maintenance. I remember helping my neighbor install his cabin system last summer—we positioned his isolator between two studs right above his battery bank. When he needed to add another panel six months later, he could simply flip that switch and work safely without any guesswork about whether power was still flowing.
Why You Absolutely Need a DC Isolator Switch
Emergency Shutdown: Your Solar System’s Kill Switch
Think of your DC isolator switch as the emergency brake for your solar system. When something goes wrong—maybe a component fails, you smell burning, or you need to work on your system—this switch gives you instant power-off capability without climbing onto your roof or fumbling with complicated procedures.
I learned this lesson the hard way during my first solar installation. A charge controller started smoking on a hot July afternoon, and I stood there momentarily frozen, realizing I had no quick way to kill the power. Since then, I’ve treated DC isolators with the respect they deserve. They’re your first line of defense during emergencies.
Here’s what makes them so critical: Your solar panels generate electricity whenever there’s light, period. You can’t just “turn them off” like a generator. The DC isolator creates a safe break point where you can physically disconnect the flowing current. During maintenance, it protects you from potentially lethal DC voltage. In emergencies like equipment failures or electrical fires, it stops power flow immediately, preventing further damage or danger.
Most codes require isolators to be lockable in the off position, which means you can secure the system while you work, ensuring nobody accidentally reconnects power while you’ve got your hands in the electrical box.
Protecting Your Charge Controller and Batteries
I learned this lesson the hard way during my first solar installation when I tried to swap out a faulty charge controller without isolating the system first. The moment I disconnected the wires, I saw a spark that made my heart skip a beat. That experience taught me why a DC isolator switch is absolutely essential for protecting your batteries and other components.
Think of your DC isolator as a safety guard that creates a true zero-energy zone for working on your system. When you flip that switch, you’re preventing potentially damaging voltage spikes and current surges that can occur during disconnection. This is especially critical when troubleshooting issues or upgrading components like inverters or charge controllers.
Without proper isolation, even a small mistake during maintenance can send unwanted current through sensitive electronics, frying circuits or reducing battery lifespan. Battery banks are particularly vulnerable because they’re always energized and ready to discharge massive amounts of current if accidentally short-circuited. The isolator switch eliminates this risk completely, giving you peace of mind whether you’re replacing a blown fuse, upgrading to a larger array, or simply checking connections during routine maintenance.
Code Compliance (Even When You’re Off-Grid)
Even if you’re building an off-grid system far from the nearest utility pole, electrical codes still apply to your installation. The National Electrical Code (NEC) requires DC disconnect switches in specific locations within your solar array, and there are genuine reasons why code compliance matters beyond just following rules.
I learned this the hard way when a friend’s insurance company denied a claim after a small electrical fire because his solar system wasn’t code-compliant. Homeowner’s insurance policies typically require electrical work to meet NEC standards, regardless of whether you’re connected to the grid. If you ever decide to sell your property, potential buyers will likely require inspection reports, and non-compliant installations can tank a sale or force expensive retrofits.
Beyond the paperwork, these codes exist because they work. They’re written in response to real-world failures and accidents, protecting both you and future owners of your system.
Choosing the Right DC Isolator for Your Solar Array
Voltage Rating: Matching Your Panel Configuration
Getting the voltage rating right on your DC isolator is absolutely critical for safety and performance. I learned this the hard way on my first solar build when I underestimated the voltage and ended up with a switch that couldn’t handle my panel array. Let me walk you through how to get this right from the start.
Your isolator’s voltage rating must exceed your system’s maximum DC voltage, which isn’t just your battery voltage. Solar panels produce higher voltages than their rated output, especially in cold weather or when they’re open circuit. Here’s a simple formula: take your panel’s open circuit voltage (Voc), multiply by the number of panels in series, then add 25% safety margin.
For example, if you have a 12V system with panels rated at 22V Voc, you’re actually looking at around 27.5V maximum. A 32V rated isolator would work here. For 24V systems with two panels in series (44V total), you’d need at least a 63V isolator, though 100V is more common and gives better headroom.
Most 48V off-grid systems use four panels in series. With typical 22V Voc panels, that’s 88V maximum, so you’ll want a 150V or 200V rated isolator. Commercial systems often go with 600V or 1000V isolators as standard practice.
Remember, voltage ratings aren’t something to cut close. Always round up to the next available rating, and when in doubt, go bigger. The small extra cost is worth the peace of mind and long-term reliability of your solar investment.
Current Rating: Don’t Undersize This Critical Spec
Getting the current rating right is absolutely crucial—I learned this the hard way when a friend’s first DIY setup had a switch that kept tripping because he based his calculations on the panel’s nameplate voltage without factoring in real-world conditions.
Here’s the straightforward approach: Start with your solar array’s short-circuit current (Isc), which you’ll find on each panel’s spec sheet. Multiply that by the number of panels in parallel. For example, if each panel has an Isc of 10 amps and you have three panels in parallel, that’s 30 amps baseline.
Now here’s where many DIYers go wrong—they stop right there. Don’t do that. You need to add a safety margin of at least 25% to account for temperature variations and sunny day current surges. So that 30-amp calculation becomes 37.5 amps, meaning you’d want a 40-amp rated switch minimum. The National Electrical Code actually requires this buffer, and it’s not just bureaucracy—it’s genuine fire prevention.
Think about it like sizing your inverter: you’re planning for peak conditions, not average ones. Bright, cold mornings can push your panels beyond their rated output, sometimes by 15-20%.
Common mistakes include using AC-rated switches for DC applications (different arc characteristics entirely), assuming all panels contribute equally when some might be partially shaded, and forgetting that wire gauge and switch rating need to match. A 40-amp switch means nothing if you’re running 14-gauge wire that maxes out at 15 amps.
When in doubt, size up one rating level. The cost difference is minimal, but the safety benefit is substantial.
Pole Configuration and Enclosure Types
Choosing the right pole configuration depends on your system voltage. A 2-pole switch works for most smaller systems where you’re disconnecting the positive and negative conductors from a single string of panels. Think of it like flipping two switches at once—one for each wire.
Now, if you’re working with a larger system that has multiple strings or operates at higher voltages (typically over 600V), you’ll need a 4-pole switch. This handles two separate positive and negative pairs, giving you complete isolation across your entire array. I learned this the hard way during my first medium-sized installation—I initially bought a 2-pole switch for a dual-string setup and had to make a second trip to the supplier.
For enclosure types, the decision comes down to where your switch lives. Indoor-rated enclosures (usually marked IP20 or IP40) are fine if your isolator sits in a protected garage, basement, or utility room. They’re typically more affordable and easier to access for maintenance.
Outdoor installations need weather-resistant enclosures rated IP65 or higher. These protect against rain, dust, and UV damage—essential for rooftop or ground-mount arrays. The extra cost pays off in longevity, especially in harsh climates. Look for UV-stabilized materials if you’re mounting in direct sunlight.
Installing Your DC Isolator Switch the Right Way
Location, Location, Location: Where to Mount Your Isolator
Getting your DC isolator in the right spot is crucial for both safety and practicality. I learned this the hard way on my first installation when I mounted mine too low, and every time I needed to access it, I was crawling around solar panel frames like an awkward spider.
For rooftop systems, mount your isolator at the point where DC cables enter the building, typically near the roof penetration but accessible without climbing onto the roof itself. Think about the poor maintenance person (probably you) who’ll need to reach it on a windy day. Position it at eye level, protected from direct weather exposure, ideally under an eave or inside a weatherproof enclosure rated for outdoor use.
For ground-mounted arrays, place the isolator between your panels and charge controller, close enough to the array for emergency shutoff but far enough to avoid panel shadows affecting your placement. A small weatherproof box mounted on a post works perfectly.
Always check your local electrical codes, as many jurisdictions require the isolator to be visible from the inverter location and easily accessible by emergency responders. Some areas mandate specific signage and maximum distances from equipment. Position yours where someone unfamiliar with your system can quickly identify and operate it during an emergency.
Wiring Connections That Won’t Fail
Getting your wiring connections right is where many DIY solar projects run into trouble down the road, but it doesn’t have to be complicated. Think of it this way: your DC isolator switch is only as reliable as the wires connected to it.
Start with wire sizing. Your wire gauge needs to handle the maximum current your array will produce, plus some safety margin. Most residential systems use 10 AWG or 8 AWG wire for the array connections, but always check your system’s specifications. Undersized wires create resistance, heat, and potential fire hazards, while oversized wires can be difficult to terminate properly in the switch terminals.
I learned about proper torque the hard way on my first installation. I thought “tighter is better” and cranked down those terminal screws with gusto. Six months later, I had intermittent connection issues because I’d actually deformed the wire strands. Every DC isolator switch has a torque specification, usually stamped right on the terminal block or listed in the manual. It’s typically between 7 and 15 inch-pounds. Invest in an inexpensive torque screwdriver – it’s worth every penny for peace of mind.
Before making connections, strip just enough insulation to reach the full depth of the terminal without exposing bare wire outside it. About half an inch is usually right. Use a proper wire stripper, not a knife, to avoid nicking the copper strands.
Here’s my connection checklist: ensure all strands are captured in the terminal, apply anti-oxidant compound to copper connections, tighten to specification, and give each wire a firm tug to verify it’s secure. For outdoor installations, use heat-shrink tubing over any exposed connection points for additional weather protection.
Proper wire termination with correctly sized cables and secure connections ensures safe, reliable DC isolation switch operation.
Labeling and Lockout Procedures
Clear labeling is your first line of defense when seconds count during an emergency. I learned this the hard way when a friend’s panel caught fire and everyone frantically searched for the right switch while precious time slipped away. Use weatherproof labels that clearly state “PV ARRAY DC ISOLATOR” along with voltage and current ratings. Position labels so they’re visible from your typical working stance, not tucked underneath or at awkward angles.
Implementing lockout/tagout procedures isn’t just for industrial facilities. Create a simple checklist that includes verifying the switch is open, testing for voltage absence, and placing a physical lock through the mechanism during maintenance. Keep a bright red tag attached that says “DO NOT OPERATE” with space to write your name and date. This protects you from someone accidentally closing the switch while you’re working on the system.
Think about your family members or future homeowners who’ll interact with your system. Create a laminated one-page guide showing the isolator’s location and basic operation steps. Include this in your home documentation alongside information about your critical load panel and other electrical systems. Take photos of switch positions for reference, and consider color-coding your switches if you have multiple disconnects. Making your system intuitive today prevents dangerous confusion tomorrow.
Common DC Isolator Mistakes DIYers Make
Using the Wrong Switch Type (And Why It’s Dangerous)
I learned this lesson the hard way during my second solar installation. A friend tried saving money by using a standard AC-rated switch for his DC isolator, thinking “a switch is a switch.” Within months, he noticed scorch marks around the contacts. Here’s why that’s terrifying.
DC current behaves fundamentally differently than AC. When you flip an AC switch, the current naturally crosses zero 60 times per second, making it easier to break the circuit cleanly. DC current never crosses zero – it flows constantly in one direction. When you open a switch under DC load, an electrical arc forms and sustains itself much longer, generating intense heat.
Using a standard AC switch or non-rated disconnect in your solar array creates serious risks. The contacts aren’t designed to extinguish DC arcs, which can reach temperatures exceeding 3,000 degrees Fahrenheit. This sustained arcing degrades the switch contacts, causes melting and welding, and can ignite nearby materials. You’re essentially creating a controlled fire hazard on your roof.
DC-rated isolators include special arc-extinguishing chambers and contact materials specifically engineered for DC applications. They’re not optional safety equipment – they’re essential fire prevention devices. The few dollars saved using the wrong switch simply isn’t worth your home or your family’s safety.
Using an improperly rated switch for DC solar applications can result in catastrophic failure, equipment damage, and fire hazards.
Installation Order and Timing Mistakes
I learned this lesson the hard way on my first solar installation. I was so eager to see those panels producing power that I wired them together on the ground before mounting the DC isolator switch. When it came time to actually install the switch, I had live wires to deal with – definitely not the safest approach, and I’m lucky nothing went wrong.
Here’s the right sequence: Install your DC isolator switch on the wall or mounting location before you make any electrical connections between panels. The switch should be one of the first components you mount, right after your charge controller or inverter location is determined. Think of it as building the emergency exit before you light the fire.
Never connect your solar panels into a series or parallel configuration until your isolator is physically mounted and ready to receive those cables. Even on a cloudy day, panels generate voltage, and you want that switch available from the very first moment your array becomes electrically active.
During commissioning, follow this safe procedure: First, verify your isolator is in the OFF position. Then make your panel connections, double-check all your wiring, and only then switch the isolator ON while monitoring your system. This gives you complete control from the start and eliminates those heart-stopping moments of working with live DC current.
Maintenance and Testing Your DC Isolator
Regular Inspection Checklist
Regular maintenance keeps your DC isolator switch reliable and safe. I learned this the hard way when I discovered corrosion on a friend’s switch after just two years—could’ve been prevented with simple checks!
Inspect your DC isolator every six months, or quarterly if you live in coastal or humid areas where corrosion happens faster. During each inspection, look for these key issues:
Start by checking for corrosion on terminals and connections. Even minor discoloration or buildup can increase resistance and create dangerous hot spots. If you spot any greenish or white crusty deposits, it’s time to clean or replace affected parts.
Next, examine all connections for tightness. Temperature cycling naturally causes fasteners to loosen over time. Use a torque screwdriver to verify connections meet manufacturer specifications—never just guess by feel.
Inspect the enclosure carefully. Look for cracks, damaged seals, or gaps where moisture could enter. Water intrusion is the enemy of electrical components. Check that the weatherproof rating remains intact, especially around cable entry points.
Finally, test the switch operation. It should move smoothly between positions with a solid, positive click. Any sticking, grinding, or loose feel indicates internal wear requiring immediate attention.
Document each inspection with photos and notes. This habit helps you spot developing problems before they become emergencies.
Regular testing and inspection of DC isolator switches ensures continued safe operation throughout the system’s lifespan.
When to Replace Your Isolator Switch
Knowing when to replace your DC isolator switch can save you from unexpected system failures and safety hazards. During my years working with solar systems, I’ve learned to watch for several telltale signs.
First, inspect the switch housing regularly for physical damage like cracks, melting, or discoloration around the terminals. These often indicate overheating, which compromises safety. If you notice the switch becoming difficult to operate, sticking, or not clicking firmly into position, that’s your cue for replacement.
Another red flag is visible corrosion on terminals or connection points, especially common in outdoor installations. Moisture intrusion can lead to poor conductivity and dangerous arcing. I once discovered a switch where water had seeped in through a worn seal, creating greenish corrosion that increased resistance and heat buildup.
Most quality DC isolator switches have a lifespan of 10-15 years under normal conditions, though harsh environments may shorten this. However, don’t wait for the full lifespan if you spot problems earlier. If your switch has experienced a short circuit or fault condition, replace it immediately, even if it appears functional.
Remember, this is a critical safety component. When in doubt, replace it. The modest cost of a new switch is nothing compared to the risks of electrical fire or system damage.
Look, I’ll be straight with you—skipping the DC isolator switch in your solar setup isn’t just cutting corners, it’s genuinely dangerous. I’ve seen too many DIY projects where folks thought they could save a few bucks by leaving this component out, and trust me, it never ends well. That little switch is your safety net, your emergency brake, and your insurance policy all rolled into one affordable package.
Throughout my years tinkering with off-grid systems, I’ve learned that proper planning beats hasty shortcuts every single time. That DC isolator gives you the power to safely disconnect your array when you need to work on your system, troubleshoot issues, or handle emergencies. It’s not optional—it’s essential.
Ready to design your complete off-grid solar system the right way? Head over to Spheral Solar’s interactive calculators to properly size every component, including your DC isolator. These tools will help you understand exactly what you need based on your specific setup.
And here’s my ask: once you’ve installed your system, come back and share your experience with our community. What challenges did you face? What surprised you? Your story could be the guidance someone else needs to confidently start their solar journey. Drop your thoughts in the comments below!
How useful was this post?
Click on a star to rate it!
Average rating 0 / 5. Vote count: 0
No votes so far! Be the first to rate this post.
We are sorry that this post was not useful for you!
Let us improve this post!
Tell us how we can improve this post?
charlesnoble
Here at Spheral Solar, I’m a hands-on solar power enthusiast, constantly exploring and experimenting with DIY solutions. I’m dedicated to sharing my discoveries, insights, and even the bumps I hit along the way, all in the pursuit of a more sustainable future.
Why Your Solar Array Needs a Disconnect (And How to… by Charlesnoble January 5, 2026 Picture this: You’ve just finished wiring your solar panels to your charge controller, feeling pretty accomplished, when someone asks, “Where’s your disconnect?” Your confident smile fades. That little switch you skipped to save fifty bucks? It’s actually the difference between a safe solar installation and a potentially dangerous one that…
Why Your Backup System Needs a Critical Load Panel… by Charlesnoble December 28, 2025 Picture this: It’s 2 AM, the power’s out, and your backup battery system is silently draining itself trying to keep your pool pump, water heater, and every other non-essential appliance running. By morning, you’re out of power—right when you actually need it for your refrigerator and medical equipment. I learned…
Why Grid Code Compliance Matters (Even When You’re… by Charlesnoble January 16, 2026 Check your local utility’s interconnection requirements before assuming your off-grid system is exempt from grid codes—many jurisdictions now require compliance even for systems with no planned grid connection, especially if your property remains connected to utility lines. Download your utility’s technical standards document and your state’s electrical code amendments, then…
How Much Battery Backup Do You Really Need? (Sizing… by Charlesnoble March 6, 2026 Calculate your actual power needs before committing to a 5kW battery backup system by listing every device you want to run during an outage and adding up their wattages. A 5kW system means you can draw 5,000 watts of power at any given moment, but the real question is for…
The Stream Behind Your House Could Power It (Here’s… by Charlesnoble March 26, 2026 Walk down to your nearest stream with a five-gallon bucket and a stopwatch. Fill that bucket and time how long it takes—this simple test reveals whether you have enough flowing water to power your off-grid home. If you can fill it in under 10 seconds from a source that drops…
Why Your Off-Grid Battery System Fails (And How to… by Charlesnoble January 4, 2026 Calculate your daily energy consumption in watt-hours by listing every device you’ll power, its wattage, and hours of daily use—this single number determines whether you need a 5kWh system or a 50kWh system. Most first-time builders overestimate their needs by 40% or underestimate by forgetting phantom loads like WiFi routers…
Subscribe for handpicked DIY projects, exclusive tips, and giveaways.
Position your solar panels at an angle equal to your latitude for year-round performance, or adjust seasonally by adding 15 degrees in winter and subtracting 15 degrees in summer to capture maximum sunlight during each season’s sun path. Use a simple angle finder app on your smartphone against the back of your panel to verify… Read more: The Right Tilt Angle Can Boost Your Solar Panel Output by 30% (Here’s How to Find It)
Route your PV wires through UV-resistant conduit within 18 inches of leaving the solar array, securing it every 3 feet with proper clamps to prevent wind damage and code violations. This single step prevents 80% of the wire degradation issues I’ve seen in DIY solar installations over the past decade. Group your positive and negative… Read more: Why Your PV Wire Management Could Fail Inspection (And How to Fix It)
Understand that 6000 volts sounds terrifying but delivers surprisingly low amperage—typically around 120 milliamps for just 3/10,000th of a second per pulse. This combination creates an unforgettable shock that trains animals to avoid the fence without causing lasting harm. The voltage pushes current through thick fur and hide, while the minimal amperage and microsecond duration… Read more: Why 6000 Volts Won’t Kill Your Livestock (But Will Stop Predators Cold)


")
")
")
")
")
")
")
")
")
")
")
")


