Why NiMH Batteries Keep Your Solar Lights Running (When Others Fail)
Updated:
Choose rechargeable NiMH batteries rated between 600-1000mAh for most standard solar garden lights, matching the voltage of your original batteries—typically 1.2V AA or AAA sizes. These batteries outperform regular alkaline batteries because they handle the constant charge-discharge cycles that solar lights demand daily, lasting 2-3 years compared to just months with alkalines.
Replace your solar light batteries when you notice dimmer illumination or shorter runtime, even if the batteries aren’t completely dead. I learned this the hard way when my pathway lights barely lasted past sunset—swapping in fresh NiMH batteries immediately restored them to full brightness for 8+ hours nightly.
Install batteries with correct polarity and give them 2-3 sunny days for the initial charge cycle before expecting full performance. Clean your solar panel surface monthly with a damp cloth since dirt and debris reduce charging efficiency by up to 30%, causing premature battery failure that has nothing to do with the battery quality itself.
Avoid mixing old and new batteries in multi-cell solar fixtures, and never substitute non-rechargeable batteries as they can leak or rupture under solar charging conditions. Store spare NiMH batteries in a cool, dry location and recharge them every 3-4 months if unused to prevent capacity loss.
Understanding which battery chemistry works best for solar applications saves money and frustration while keeping your outdoor lighting reliable year-round.
What Makes NiMH Batteries Different from Other Rechargeable Options
NiMH rechargeable batteries are specifically designed to handle the variable charging patterns of solar-powered lighting systems.
The Solar Charging Advantage
Here’s what makes NiMH batteries and solar panels such a perfect match: they’re practically made for each other. When I first started tinkering with solar lights in my backyard, I was amazed at how forgiving NiMH technology is with the quirky charging patterns that solar panels deliver.
Unlike the steady, controlled charging you get from a wall outlet, solar charging is unpredictable. Cloud cover, seasonal changes, and even tree shadows create constantly fluctuating power levels. NiMH batteries handle this beautifully because they tolerate trickle charging without damage. They can accept small amounts of power throughout the day without overheating or degrading quickly. This is a huge advantage compared to NiCd vs NiMH batteries, where the older NiCd technology suffered from memory effect issues.
Temperature tolerance is another winning feature. Your solar lights live outdoors year-round, facing summer heat and winter cold. NiMH batteries typically operate effectively between minus 4 and 122 degrees Fahrenheit. While extreme temperatures still affect performance, they’re remarkably resilient compared to many alternatives.
The variable sunlight issue is where NiMH really shines. On partly cloudy days, your solar panel might charge for a few minutes, stop, then restart. NiMH batteries don’t mind these interrupted charging cycles. They efficiently capture whatever energy is available, even if it arrives in small bursts throughout the day.
This compatibility means less stress on your batteries and longer overall lifespan, making them the practical choice for solar applications.
Capacity and Performance in Real-World Conditions
When shopping for NiMH batteries for your solar lights, you’ll notice different mAh (milliamp-hour) ratings, typically ranging from 600mAh to 1000mAh for standard AA size batteries. Think of mAh as your battery’s fuel tank size – higher numbers mean longer runtime. For most pathway or garden solar lights, 600-800mAh batteries work perfectly fine, giving you about 6-8 hours of illumination on a full charge. I learned this the hard way when I initially bought 1000mAh batteries for simple pathway lights, only to realize they took longer to fully charge and didn’t provide noticeably better performance for that application.
Temperature performance is where NiMH really shines compared to older NiCd batteries. These batteries operate reliably in temperatures from about 0°F to 120°F, making them suitable for most climates. However, charging efficiency does drop in extreme cold – below 40°F, your batteries might not fully charge during winter days. In my Minnesota garden, I noticed my solar lights ran about 30% shorter during January compared to July, which is completely normal.
For realistic expectations, a typical solar garden light with a 600mAh NiMH battery will provide 6-8 hours of soft lighting when fully charged. Brighter spotlights or motion-sensor lights drain faster, usually running 4-6 hours. These runtimes assume your solar panel gets adequate sunlight – partial shade can significantly reduce charging and subsequent runtime.
Where NiMH Batteries Excel (And Where They Don’t)
Perfect Applications for NiMH
NiMH batteries shine brightest in applications where they can do what they do best: provide steady, reliable power over extended periods. I learned this firsthand when I replaced the batteries in my garden pathway lights three years ago, and they’re still going strong.
Solar garden lights are the perfect match for NiMH technology. These lights typically draw moderate power for 4-8 hours each night, which sits right in NiMH’s sweet spot. The batteries charge slowly during the day and discharge gradually after sunset, exactly the kind of gentle cycling that extends NiMH lifespan. Plus, they handle temperature swings better than many alternatives, so your lights keep working through spring showers and summer heat.
Pathway and accent lighting work wonderfully too. These fixtures usually have small solar panels that deliver a trickle charge throughout the day. NiMH batteries excel at accepting this slow, steady charging without developing the memory issues that plagued older rechargeable technologies. You get consistent brightness night after night.
For camping lanterns and portable solar setups, NiMH batteries offer that sweet combination of decent capacity and environmental durability. They won’t give you the absolute longest runtime like lithium options might, but they’re more forgiving when temperatures drop around the campfire.
The key is matching NiMH to low-to-moderate drain devices. Think lights that sip power rather than gulp it. High-drain applications like solar security lights with motion sensors might benefit from other battery types, but for your everyday decorative and functional outdoor lighting, NiMH delivers reliability without breaking the bank.
Solar garden pathway lights rely on quality NiMH batteries to provide consistent illumination throughout the night.
When to Choose Something Else
While NiMH batteries work great for most solar lighting projects, there are times when you’ll want to consider alternatives. Let me share what I’ve learned from experience.
If you’re working with high-drain devices that need quick bursts of power, like solar-powered security cameras or motion-activated floodlights, lithium-ion batteries might serve you better. They handle high current draws more efficiently than NiMH. I discovered this the hard way when my solar motion sensor kept dimming during activation.
Extreme cold is another challenge. When temperatures regularly drop below 14°F (-10°C), NiMH batteries struggle. For those harsh winter climates, lithium batteries maintain performance much better in freezing conditions.
For very large solar systems powering sheds, workshops, or off-grid cabins, lead-acid or lithium battery banks become more practical and cost-effective. NiMH batteries shine in small to medium applications, but scaling up gets expensive quickly.
Finally, if you need batteries that can sit unused for months without losing charge, consider lithium options. Standard NiMH batteries self-discharge relatively quickly, though low self-discharge versions help address this issue.
Think about your specific needs and environment before making your choice. There’s no shame in picking the right tool for the job.
Charles’s Experience: Upgrading My Garden Path Lights
I’ll be honest with you – I learned about quality NiMH batteries the hard way. A few years back, I installed eight solar path lights along my garden walkway, and they worked great for about three months. Then they started barely glowing for an hour after sunset. Frustrated, I opened one up and found these generic batteries that looked like they’d been through a war.
I replaced them all with quality NiMH batteries rated at 600mAh, and wow, what a difference! Not only did my lights shine brightly for six to seven hours each night, but they also survived two winters without losing performance. The cheap batteries I removed? They’d cost me about a dollar each. The good NiMH ones were three dollars each, but they’ve been going strong for three years now. That extra two dollars per battery saved me from replacing them annually and dealing with dim, disappointing lights. Sometimes spending a bit more upfront really does pay off.
Choosing the Right NiMH Batteries for Your Solar Project
Understanding Battery Sizes and Capacities
When I first started tinkering with solar lights, I’ll admit the alphabet soup of battery sizes left me scratching my head. Let me break this down in a way that actually makes sense for your projects.
NiMH batteries for solar lights typically come in three main sizes. AA batteries are the most common – you’ll find these in garden path lights and decorative fixtures. AAA batteries appear in smaller accent lights and compact designs. Then there’s sub-C, a chunkier cylindrical battery used in larger outdoor fixtures that need more staying power through the night.
Now, about capacity ratings – that mAh number stamped on the battery. Think of milliamp-hours (mAh) as your battery’s fuel tank size. A 600mAh battery can deliver 600 milliamps for one hour, or 300 milliamps for two hours. Simple math that tells you how long your lights will shine.
For basic pathway lights that run a few LEDs, 600-800mAh AA batteries work beautifully. Medium-sized decorative lights perform better with 1000-1200mAh. If you’re powering security lights or larger fixtures with multiple LEDs, you’ll want 1500-2000mAh or even higher mAh capacity batteries.
Here’s my rule of thumb: match your battery capacity to your light’s brightness and how long you need it running. A tiny solar stake light doesn’t need a massive battery – that’s overkill and waste. But underpowering a bright security light means disappointment when it dims after just an hour.
Pre-Charged vs. Standard NiMH
When I first started replacing batteries in my solar garden lights, I didn’t realize there were two types of NiMH batteries, and it made all the difference once I learned.
Standard NiMH batteries lose their charge pretty quickly when sitting idle, typically dropping about 30% of their capacity per month. That’s a real problem for solar lights that might sit through cloudy stretches without fully recharging. You’d end up with batteries that drain themselves even when they’re supposed to be storing energy.
Pre-charged NiMH batteries, also called Low Self-Discharge (LSD) batteries, were game-changers for me. They only lose about 15-20% of their charge per year, not per month. For solar applications, this means your lights will work better during those gray winter weeks when sunlight is scarce.
I recommend LSD batteries for almost all solar light projects. Yes, they cost slightly more upfront, but they’ll maintain their charge through seasonal changes and unexpected weather patterns. Brands like Eneloop and Amazon Basics pre-charged are reliable choices I’ve used successfully.
The exception? If you live somewhere with consistent, year-round sunshine and your lights cycle daily, standard NiMH might work fine. But for most of us dealing with real-world weather, LSD batteries are worth every penny.
Quality Matters: What to Look For
Not all NiMH batteries are created equal, and I learned this the hard way when my first batch of budget batteries died within months. When choosing best rechargeable batteries for your solar lights, focus on capacity first. Look for batteries rated between 600-1000 mAh for standard garden lights, with higher capacities for larger fixtures. The mAh number tells you how much energy the battery can store, which directly affects how long your lights will shine after sunset.
Reputable brands like Panasonic, Eneloop, and Tenergy consistently outperform generic alternatives because they maintain their charge capacity through more cycles. Check for batteries specifically labeled “solar rechargeable” or “low self-discharge,” as these are optimized for the slow charging conditions your lights provide.
Temperature tolerance matters too. Quality NiMH batteries should operate between -4°F and 122°F, essential for outdoor use. Avoid batteries with suspiciously low prices or no brand identification. While they might work initially, cheap alternatives often contain less actual material inside, leading to rapid degradation. Investing a few extra dollars upfront saves you from replacing batteries every season.
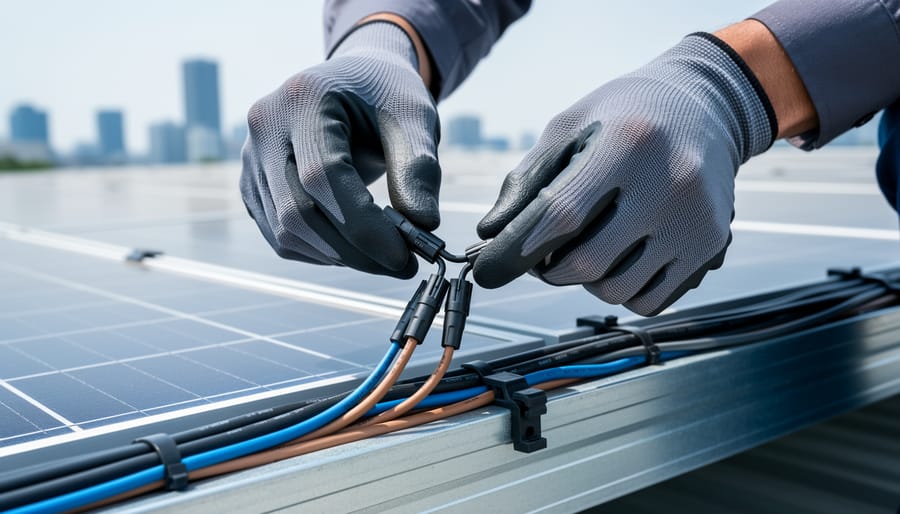
Installing and Maintaining NiMH Batteries in Solar Lights
Proper installation of NiMH batteries ensures optimal contact and charging performance in solar lighting fixtures.
Installation Best Practices
Getting your NiMH batteries properly installed might seem straightforward, but a few simple best practices can save you frustration and extend your battery life significantly.
First things first: polarity matters. I learned this the hard way when I excitedly swapped batteries in my pathway lights without checking the orientation. Most solar lights have markings inside the battery compartment showing which end goes where. The positive terminal (typically marked with a plus sign or bump) needs to align with the corresponding positive contact. Take a quick photo before removing the old battery if you’re uncertain.
Contact quality is equally important. Before inserting new batteries, gently clean the metal contacts inside your solar light with a dry cloth or cotton swab. Corrosion or dirt buildup creates resistance, preventing proper charging. If you spot green or white crusty deposits, a light scrub with a pencil eraser works wonders.
Here’s something many people overlook: your brand-new NiMH batteries might arrive partially discharged. Give them a proper initial charge by placing your solar lights in direct sunlight for at least two full sunny days before expecting peak performance. This conditioning period helps the batteries reach their full capacity potential.
What if your solar light still doesn’t work after installation? Double-check the solar panel itself isn’t dirty or shaded. Sometimes the issue isn’t the battery at all. If problems persist, verify your light actually accepts NiMH batteries. Some older models were designed specifically for NiCd batteries and may need different charging voltages. When in doubt, consult your manufacturer’s specifications or consider upgrading to a more modern solar light fixture.
Maximizing Battery Life and Performance
Getting the most from your NiMH batteries doesn’t require a degree in electrical engineering—just a few smart habits that I’ve picked up over years of tinkering with solar setups. Let me share what actually works.
First up, keep those solar panels clean. I learned this the hard way when my pathway lights started dimming after just a few months. A quick wipe with a damp cloth every couple of weeks makes a massive difference. Dust, pollen, and bird droppings block sunlight, which means your batteries never get a full charge. It’s like trying to fill a glass with a partially blocked funnel—frustrating and inefficient.
Seasonal changes matter more than you’d think. During winter months with shorter days, your batteries may not fully charge between uses. If you’re in a region with harsh winters, consider bringing your solar lights indoors and storing them with batteries at around 40-50% charge in a cool, dry place. This prevents the deep discharge that can shorten battery lifespan.
Here’s a simple test I use to know when batteries need replacing: if your lights barely last two hours after a full sunny day, it’s time. Quality NiMH batteries typically last 2-3 years with proper care, but this varies based on usage and climate.
To maximize battery life, avoid mixing old and new batteries in the same fixture, and always replace the entire set together. I also recommend giving batteries a complete discharge and recharge cycle every few months—just turn the lights on manually and let them run completely down before the next charging cycle begins.
Regular cleaning of solar panels maximizes charging efficiency and extends the life of NiMH batteries in solar lights.
Common Problems and How to Fix Them
Lights Not Turning On or Dim Performance
When your solar lights refuse to shine or barely glow, don’t worry—you’re not alone in this frustration! I remember Charles telling me about his pathway lights that suddenly looked like faint fireflies instead of proper illumination. Let’s walk through the common culprits.
First, check if your batteries are getting charged at all. Clean the solar panel thoroughly—dust and debris can block up to 70% of sunlight absorption. Use a soft cloth with a bit of water, and you’ll be amazed at the difference.
Next, inspect the batteries themselves. If they’ve been in use for over two years, they might be reaching the end of their lifespan. Remove them and look for corrosion on the contacts—that white or green crusty stuff blocks electrical flow. Clean contacts with a cotton swab dipped in white vinegar, then dry completely.
Test your lights by placing them in direct sunlight for a full sunny day. If they still underperform, try fresh NiMH batteries. Make sure you’re using the correct capacity—undersized batteries won’t store enough energy for nighttime operation.
Here’s a pro tip from Charles: occasionally let your batteries fully discharge before recharging. This helps prevent the memory effect that can reduce their effective capacity over time, keeping your lights bright and reliable.
Batteries Not Holding Charge
When your solar lights aren’t holding charge, it can be frustrating, but the good news is you can usually pinpoint the culprit with some simple detective work. I learned this the hard way when half my pathway lights stopped working last spring—turned out it was three different issues across different lights!
Start by testing the battery itself. Remove it and check for corrosion on the terminals (that white or green crusty stuff). If you have a multimeter, test the voltage—a fully charged AA NiMH should read around 1.2-1.4 volts. Anything below 1.0 volts likely means the battery is toast. No multimeter? Try swapping in a battery from a working light to see if that fixes things.
Next, examine the solar panel. Wipe it clean—you’d be amazed how much dirt accumulates—and check if it’s getting direct sunlight for at least 6-8 hours daily. Shade from growing plants is a sneaky problem that develops gradually.
Finally, inspect the charging circuit inside the light housing. Look for water damage, loose wires, or corroded connections. If everything looks good but the light still won’t charge, the circuit board itself may have failed.
The fix depends on what you find: replace dead batteries, relocate shaded lights, clean corroded contacts with white vinegar, or replace the entire fixture if the circuit is damaged.
Cost Analysis: Is NiMH Worth the Investment?
I’ll be honest with you – when I first switched to NiMH batteries for my garden solar lights, I hesitated at the checkout. They cost about three times more than the NiCd batteries I’d been using. But here’s what I discovered after tracking my expenses for two years: those “expensive” batteries actually saved me money.
Let’s break down the real numbers. A decent NiMH battery typically costs between $2-4 per cell, while basic NiCd or alkaline batteries run $1-2. Seems like a clear winner for the cheaper option, right? Not so fast. NiMH batteries last 500-1000 charge cycles compared to 300-500 for NiCd batteries. That means you’re replacing cheap batteries twice as often.
Here’s a simple way to calculate your own situation. Take the upfront cost of your battery choice and divide it by the number of years it’ll realistically last. For NiMH, that’s usually $3 divided by 3-5 years (roughly $0.60-1.00 per year). For cheaper alternatives, you’re looking at $1.50 divided by 1-2 years (about $0.75-1.50 per year).
But the real kicker is performance. My solar lights with NiMH batteries shine 20-30% brighter and stay lit about an hour longer each night. During winter months, that difference is even more noticeable. The cheap batteries I used before would barely hold a charge when temperatures dropped.
Think about your solar light setup. How many batteries do you need? How accessible are they for replacement? If you’ve got 20 landscape lights and they’re a pain to access, spending an extra $40 upfront to avoid replacements for several more years makes perfect sense. That’s been my experience, anyway.
After years of experimenting with solar lights in my own backyard, I can confidently say that NiMH batteries remain the reliable workhorse for most solar lighting applications. They strike that sweet spot between performance, affordability, and environmental responsibility that’s hard to beat. Whether you’re lighting up a garden path or creating ambient outdoor spaces, NiMH technology gives you consistent results without breaking the bank.
I’d love to hear about your own experiences with solar lighting projects. Have you found tricks for extending battery life? Discovered creative ways to position your lights for better charging? Our community thrives on shared knowledge, so drop a comment below and let’s learn from each other.
Before you head out, take a moment to explore our other resources. We’ve got solar calculators that help you size systems perfectly and detailed equipment reviews based on real-world testing. If you’re diving deeper into solar projects, our guide on choosing the right solar battery covers everything from small lights to whole-home systems. Happy building, and remember that every solar light you install is a small step toward a cleaner, more sustainable future.
How useful was this post?
Click on a star to rate it!
Average rating 0 / 5. Vote count: 0
No votes so far! Be the first to rate this post.
We are sorry that this post was not useful for you!
Let us improve this post!
Tell us how we can improve this post?
charlesnoble
Here at Spheral Solar, I’m a hands-on solar power enthusiast, constantly exploring and experimenting with DIY solutions. I’m dedicated to sharing my discoveries, insights, and even the bumps I hit along the way, all in the pursuit of a more sustainable future.
Lithium vs Alkaline Batteries for Solar: A Detailed… by Charlesnoble September 8, 2023 Lithium and alkaline batteries store and provide power for solar lights, gardens, outdoor solar lighting, and off-grid solar systems. However, they have very different compositions and characteristics, making each better suited for certain uses. In this article, we will compare alkaline and lithium batteries in-depth, looking at aspects like construction,…
10 Best Rechargeable Batteries for Solar Lights by Nick April 23, 2021 While lithium-ion batteries have long been touted as the future of the solar battery world, some close rivals are giving them a run for their money. This blog post gives you a closer look at the best rechargeable batteries for solar lights currently available for solar light applications. We’ve covered…
Why NiCd Batteries Keep Your Solar Lights Alive… by Charlesnoble April 25, 2026 Check your existing solar lights before buying new batteries by removing the old NiCd cells and testing them with a multimeter—most failures stem from corroded battery contacts, not dead batteries. Clean the terminals with white vinegar and a wire brush, and you’ll likely resurrect 60% of “dead” lights without spending…
Why LFP Batteries Changed Everything About Solar… by Charlesnoble April 3, 2026 Match your LFP battery capacity to your actual lighting needs by calculating your nightly watt-hour consumption and multiplying by three—this gives you enough storage for cloudy stretches without overspending on unused capacity. A 20-watt LED running five hours nightly needs a 300Wh minimum battery, which translates to a 100Ah 12V…
Why Your Solar Lights Keep Dying (and How 9V… by Charlesnoble January 25, 2026 Match your solar panel’s voltage output to your 9V battery’s charging requirements by selecting panels rated between 9-12 volts to prevent undercharging or damaging overcharge. Test your panel’s actual output with a multimeter in full sunlight before connecting any battery—you’ll often find advertised voltages don’t match real-world performance, especially on…
NiCd vs NiMH for Solar Lights by Charlesnoble September 15, 2023 Nickel Metal Hydride batteries (NiMH batteries) are generally the better choice over Nickel Cadmium batteries (NiCd batteries) for most solar light applications today. NiMH offers a higher capacity to store more energy from the sun, lasts longer through more recharge cycles, and is more eco-friendly. However, NiCd can be a…
Subscribe for handpicked DIY projects, exclusive tips, and giveaways.
Monitor your greenhouse temperature daily during peak sun hours—if it consistently exceeds 85°F or condensation builds up on interior surfaces, you’re losing crops to heat stress and creating the perfect environment for fungal diseases. A greenhouse solar ventilation fan addresses both problems without adding a penny to your electricity bill, making it one of the… Read more: Why Your Greenhouse Needs a Solar Ventilation Fan (Before Summer Hits)
Press and hold the adjust button (usually bottom-left) on your G-Shock for three seconds until the time display starts flashing—this unlocks manual time adjustment on most models. Navigate between hours, minutes, and date using the mode button, then use the forward/reverse buttons to change values. If you own a radio-controlled G-Shock with Multi-Band 6 technology,… Read more: How to Adjust Time on Your G-Shock Solar Watch (Without Breaking It)
Picture this: you’ve just installed your third solar panel on the roof, wires dangling everywhere, and suddenly you realize your two-panel string needs to connect with your new addition. You need a solar branch connector, but you’re staring at product listings wondering if you’re about to make an expensive mistake. Solar branch connectors are the… Read more: Why Your Solar Array Needs Branch Connectors (And How to Install Them Right)


")
")
")


")
")
")