Solar-Powered Attic Fans That Actually Pay for Themselves
Updated:
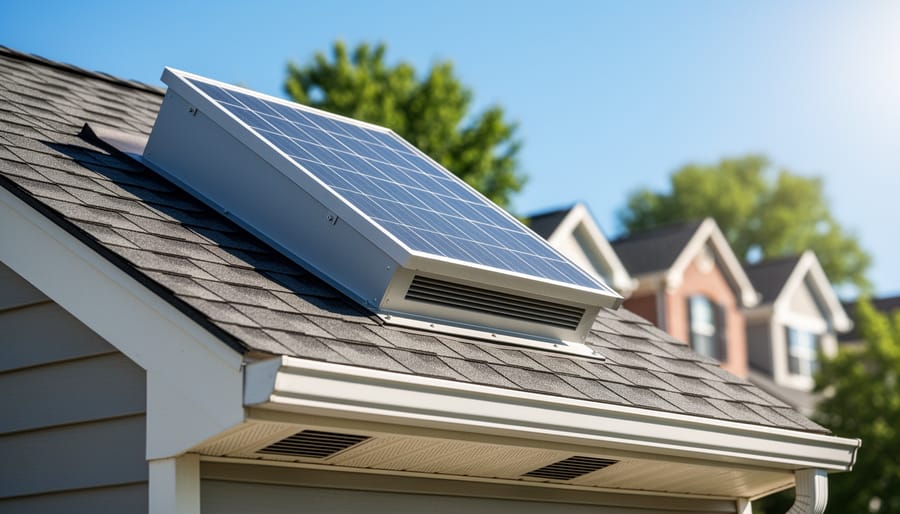
Install solar-powered attic fans on south-facing roof sections where they’ll capture 6-8 hours of direct sunlight daily, positioning them between rafters near the roof peak for maximum hot air extraction. These systems work without touching your electrical panel, pulling superheated air out before it radiates down into your living space and forces your air conditioner into overdrive.
Connect your solar attic ventilator to a smart thermostat controller that triggers operation only when attic temperatures exceed 100°F, preventing unnecessary runtime during cooler months and extending equipment lifespan by 3-5 years. This automated approach means you’re not wasting ventilation capacity when your attic is already at acceptable temperatures.
Calculate your attic’s square footage and multiply by 0.7 to determine your minimum CFM (cubic feet per minute) requirement. A 1,500 square foot attic needs at least 1,050 CFM of ventilation capacity, which typically requires one 30-watt solar fan or two smaller 15-watt units strategically placed for cross-ventilation.
Balance your powered exhaust with adequate passive intake vents along your soffits, maintaining a 1:1 ratio between intake and exhaust. Without proper intake, your solar fan creates negative pressure that can pull conditioned air from your home through ceiling penetrations, actually increasing cooling costs instead of reducing them.
I learned this the hard way when my first solar attic installation dropped my cooling bills by only 8% until I added soffit vents, which immediately boosted savings to 23%. The difference between mediocre results and genuinely effective attic ventilation comes down to treating it as a complete system rather than just slapping a fan on your roof.
Why Your Attic Is Sabotaging Your Energy Bills
Here’s something I learned the hard way during my first summer in my old craftsman home: my energy bills skyrocketed to nearly $400 a month, and I couldn’t figure out why. Turns out, my attic was working against me the entire time.
Think of your attic as a giant solar oven sitting right above your living space. When the sun beats down on your roof all day, that heat gets trapped inside, and temperatures can easily reach 140-150°F up there. Now here’s where things get expensive: all that superheated air radiates down through your ceiling insulation into your home below.
Your HVAC system notices the temperature climbing and kicks into overdrive trying to maintain a comfortable 72°F. It’s essentially fighting a losing battle against a furnace in your ceiling. The harder your air conditioner works, the more electricity it guzzles, and the faster your meter spins.
Without proper ventilation, this cycle continues all day long. Your AC runs constantly, struggling to overcome the heat pressing down from above. It’s like trying to cool your house with the oven door open. I’ve seen homeowners with poorly ventilated attics run their systems 30-40% more than necessary, which translates directly to hundreds of dollars wasted annually.
The science is straightforward: hot air naturally rises and needs somewhere to escape. When it can’t, it builds up and radiates through your insulation barrier. Even high-quality insulation can only slow down heat transfer, not stop it entirely.
The good news? Understanding this problem is the first step toward solving it. By learning how to reduce attic heat buildup through proper ventilation, especially with solar-powered solutions, you can break this expensive cycle and reclaim control over your energy bills. Your HVAC system will thank you, and so will your wallet.
Inadequate attic ventilation allows extreme heat buildup that forces your HVAC system to work overtime, significantly increasing cooling costs.
How Solar Attic Ventilation Actually Works
Solar-powered attic fans combine photovoltaic panels with ventilation systems to remove hot air without adding to your electricity bill.
The Two Types of Solar Attic Ventilation Systems
When it comes to solar attic ventilation, you’ve got two main players: passive solar vents and active solar-powered fans. Let me break down the differences so you can figure out which one fits your home best.
Passive solar vents are the quiet, hands-off option. These are essentially specially designed roof vents that use natural convection and the sun’s heat to create airflow. As the sun warms the vent housing, hot air rises and escapes through the vent, pulling cooler air in from below. The beauty here is simplicity—no moving parts, no maintenance, and zero energy consumption. They work great in moderate climates and smaller attics. The downside? They’re not as powerful, so if you’ve got a large attic or live somewhere brutally hot, they might not move enough air to make a real difference.
Active solar-powered fans, on the other hand, are the workhorses. These units have actual fan blades powered by built-in solar panels, moving significantly more air—sometimes 10 to 20 times what passive vents can manage. I installed one in my own attic three summers ago, and the temperature drop was impressive, cutting my cooling costs noticeably. They’re perfect for larger spaces or homes in hot, sunny regions where you need serious ventilation. The trade-off is that they have moving parts that can eventually wear out, though quality units typically last 15-20 years.
Your choice really depends on your attic size, climate, and how hands-on you want to be with maintenance.
What Makes Them Different from Regular Attic Fans
Solar attic fans bring some compelling advantages to the table that separate them from their traditional electric cousins. Let me share what I’ve learned from testing both types in my own workshop.
The most obvious difference is energy independence. Solar-powered units run entirely on sunlight, which means zero impact on your electric bill. When I first installed one, I was amazed that it worked hardest during the hottest, sunniest parts of the day, exactly when my attic needed cooling most. Conventional fans require dedicated electrical wiring, while solar versions simply mount to your roof with minimal effort.
Installation is considerably simpler too. You won’t need an electrician or worry about running wires through your attic. Most solar fans come as complete packages, ready to install in an afternoon with basic tools. This DIY-friendly approach saves hundreds in installation costs alone.
The ongoing savings tell the real story though. While understanding the complete picture of solar versus grid-powered fans involves several factors, the absence of monthly operating costs makes solar units financially attractive over time. Plus, there’s something satisfying about harnessing free energy from the sun to keep your home comfortable. The environmental benefits are just icing on the cake.
Smart Controls That Make Your System Think for Itself
Smart temperature and humidity sensors automate your solar attic ventilation system, triggering fans only when conditions require cooling.
Temperature and Humidity Sensors You Can Install This Weekend
Here’s where things get really exciting – adding smart sensors to your solar-powered attic ventilation system transforms it from a basic setup into an intelligent climate control solution. I learned this the hard way when my first solar fan ran constantly, even on cool mornings when it wasn’t needed. Adding temperature and humidity sensors changed everything.
The good news? You can install these sensors in a single weekend with basic tools you probably already have. For most DIYers, I recommend starting with combination temperature and humidity sensors in the 20 to 40 dollar range. The SensorPush or Govee models work beautifully and connect via Bluetooth or WiFi to your smartphone, giving you real-time data without complicated wiring.
Here’s my practical installation approach. Mount your primary sensor in the center of your attic, about two feet below the roof peak. This location gives you the most accurate reading of your overall attic temperature. I use a simple plastic mounting bracket attached to a rafter – nothing fancy required. For larger attics over 1,500 square feet, consider adding a second sensor at the opposite end to catch temperature variations.
The real power comes when you pair these sensors with a smart relay or controller. Many affordable options let you set trigger points – like activating your solar fan when temperature exceeds 100 degrees or humidity hits 60 percent. You can find relay modules for under 30 dollars that work with popular home automation systems.
Pro tip from experience: weatherproof your sensor connections with heat-shrink tubing, even inside your attic. Summer temperatures can make things brutal up there, and protecting those connections saves headaches later. The whole installation typically takes two to three hours, and you’ll immediately see the difference in how efficiently your system operates.
Smart Home Integration for Total Control
Modern solar attic fans have come a long way from simple on-off switches. These days, you can monitor and control your ventilation system right from your smartphone, creating a truly responsive home environment that adapts to changing conditions.
I remember when I first connected my attic fan to a smart system – I was amazed to discover my attic was hitting 140°F on summer afternoons! Being able to track this in real-time completely changed how I thought about home cooling.
For beginners, Wi-Fi enabled solar attic fans offer the simplest entry point. Many manufacturers now include built-in Wi-Fi modules that connect directly to their proprietary apps. You simply plug in your home network credentials, and within minutes you’re viewing temperature readings and fan speed data. These apps typically let you set temperature thresholds, create schedules, and receive alerts when conditions exceed your comfort zone.
Tech-savvy homeowners can take things further by integrating fans into comprehensive smart home platforms. Home Assistant is particularly popular in the DIY solar community because it’s open-source and incredibly flexible. You can connect compatible smart plugs or relays to control traditional solar fans, or use Zigbee and Z-Wave controllers for more sophisticated automation. SmartThings offers similar capabilities with a more polished interface, perfect if you’re already invested in Samsung’s ecosystem.
The real magic happens when you create automations. Picture this: your attic temperature sensor triggers the fan at 100°F, but only if your home thermostat shows the AC is running. Or the fan ramps up speed gradually based on temperature curves rather than simple on-off cycling. You can even coordinate with weather forecasts to pre-cool your attic before heat waves arrive.
Most integrations require basic wiring knowledge and patience following online tutorials, but the energy savings and peace of mind make it worthwhile.
Sizing Your Solar Attic Ventilation System
The Simple Formula for CFM Requirements
Let me tell you about a lightbulb moment I had when first figuring out attic ventilation. I was standing in my sweltering attic one July afternoon, sweating through my shirt, thinking there had to be a better way. That’s when I discovered the beauty of the CFM formula—it’s surprisingly straightforward once you break it down.
The basic calculation is simple: take your attic’s square footage and divide it by 2. That gives you the minimum CFM (cubic feet per minute) your ventilation system needs. For example, if you have a 1,200 square foot attic, you’d need at least 600 CFM of ventilation capacity (1,200 ÷ 2 = 600). This rule of thumb assumes you’re aiming for complete air exchange roughly every two minutes, which is the sweet spot for most residential applications.
Now, here’s where it gets practical. Let’s say your attic measures 40 feet by 30 feet. Multiply those dimensions to get 1,200 square feet, then apply our formula. You’d want a solar attic fan rated for 600 CFM or higher. If you live in particularly hot climates—think Arizona or Texas—I’d recommend bumping that number up by 20-30 percent to handle extreme heat loads.
Calculating CFM requirements becomes even easier when you factor in online calculators that account for roof pitch, insulation levels, and local climate conditions. These tools helped me dial in the perfect setup for my own home, and they’ve made the process accessible for countless DIYers in our community.
Matching Solar Panel Wattage to Your Fan
Getting the right solar panel size for your attic fan is crucial for reliable performance, and I learned this the hard way when my first setup kept cutting out on cloudy days. Here’s my practical approach to matching them properly.
Start by checking your fan’s wattage requirement, typically between 10 to 40 watts for residential attic fans. The golden rule I follow is to add 20-30% capacity beyond your fan’s needs. So if your fan uses 20 watts, aim for a 25-30 watt panel. This buffer ensures consistent operation even when sunlight isn’t optimal.
Your roof’s sun exposure makes a huge difference. South-facing installations in sunny climates can work with panels closer to the minimum requirement. However, if your roof gets partial shade from trees or nearby buildings, you’ll want to bump up to the higher end or even consider a 50% larger panel. East or west-facing installations also benefit from oversized panels since they receive less direct sunlight throughout the day.
During winter months, the sun sits lower in the sky, reducing panel efficiency by 15-25%. If year-round ventilation matters to you, factor this seasonal variation into your calculations. Most manufacturers provide sun-hour charts to help you estimate your location’s solar potential, making the sizing process much more straightforward than it sounds.
Installing Your DIY Solar Attic Ventilation System
Tools and Materials You’ll Need
Getting your solar-powered attic ventilation project off the ground doesn’t require breaking the bank. Here’s what you’ll need to gather before starting.
For the main components, budget between $150-400 for quality best solar attic fans depending on CFM ratings and features. I learned this the hard way when I initially purchased a cheaper unit that couldn’t keep up with my attic’s heat load. Big box stores like Home Depot and Lowe’s stock reliable options, while online retailers like Amazon often offer competitive pricing with customer reviews to guide your choice.
You’ll need basic installation tools: a drill with hole saw attachments (2-4 inch diameter, around $20-30), measuring tape ($8-12), roofing sealant ($10-15), screwdrivers, and safety equipment including gloves and safety glasses (budget $15-20 total). For smart automation integration, allocate $50-150 for wifi-enabled controllers or smart plugs compatible with your home automation system.
Consider picking up a digital thermometer with remote sensors ($20-35) to monitor temperature differences before and after installation. This helps you track your system’s performance and optimize settings.
Local hardware stores often price-match online retailers, and don’t overlook salvage stores for tools. Shopping during seasonal sales can save you 20-30 percent on your total investment.
Installing a solar attic ventilation system is a straightforward DIY project that most homeowners can complete in a weekend with basic tools.
The Installation Process Simplified
Installing a solar-powered attic ventilation system is more straightforward than you might think. I remember my first installation – I was worried about the electrical work, but it turned out to be surprisingly manageable with basic precautions. Let me walk you through the process so you can tackle this project with confidence.
Start by selecting the optimal location on your roof. You want maximum sun exposure throughout the day, typically a south-facing section if you’re in the Northern Hemisphere. Most solar attic fans include a mounting template, which makes positioning much easier. Mark your cut lines carefully and use a reciprocating saw to create the opening. Pro tip: work from inside the attic first to avoid any surprise encounters with roof supports.
Once your opening is ready, apply a generous bead of roofing sealant around the perimeter before positioning the fan unit. Slide the flashing underneath your existing shingles – this is crucial for preventing leaks. Secure the unit with the provided screws, but don’t overtighten, as this can crack the housing.
For the electrical connections, most solar units are refreshingly simple since they’re self-contained. However, if you’re adding automation controls, you’ll need to run low-voltage wiring to your control panel. The wiring typically connects to temperature and humidity sensors that trigger the fan based on preset conditions. Our DIY installation guide provides detailed wiring diagrams for various control setups.
When connecting smart controllers, follow the color-coded wire instructions carefully. Most systems use simple push-in connectors that don’t require wire nuts or soldering. Mount your control panel in an accessible location where you can easily adjust settings.
Finally, test everything before sealing up your work. On a sunny day, watch the fan spin up and verify that your automation controls respond correctly to temperature changes. This simple verification step can save you from climbing back onto the roof later.
Real-World Performance: What to Actually Expect
Let me share what you can realistically expect from a solar-powered attic ventilation system, because I think setting honest expectations is crucial before you invest time and money into any project.
When I helped my neighbor Charles install his solar attic fan system two summers ago, we tracked his results closely. His 1,800 square foot ranch-style home in North Carolina saw attic temperatures drop from a sweltering 150°F to around 110°F on the hottest days. That’s significant, but here’s the reality check: his actual cooling bills dropped by about 15-20% during peak summer months, not the 30-40% some manufacturers claim.
Temperature reduction is where you’ll see the most immediate impact. Most homeowners report attic temperatures dropping by 30-50 degrees Fahrenheit once their solar ventilation system is running consistently. This makes a genuine difference in how hard your AC works, especially if your HVAC ducts run through the attic space.
For energy savings, expect modest but meaningful results. The average household saves between $200-400 annually on cooling costs, depending on your climate zone and how well your home is insulated. In Charles’s case, he spent about $800 on his complete DIY solar ventilation setup. With his average savings of $250 per year, he’s looking at a payback period of roughly 3-4 years.
The real bonus comes from extending your HVAC system’s lifespan. When your air conditioner doesn’t work as hard fighting against superheated attic air, it experiences less wear and tear. Charles’s HVAC technician noted his system was running fewer cycles per hour after the installation.
One community member in Arizona reported even better results, cutting cooling costs by 25% because her climate demands more aggressive ventilation. Your mileage will vary based on insulation quality, roof color, home size, and local climate conditions, but these numbers represent what typical DIYers actually experience in the field.
Troubleshooting Common Issues
Even the best solar attic ventilation systems can hit a few snags, but don’t worry – most issues have straightforward fixes. Let me walk you through the most common problems I’ve seen DIYers encounter.
If your solar fan isn’t running at all, start with the basics. Check that the solar panel is getting direct sunlight and isn’t covered by debris or shade from nearby trees. I remember installing my first system and scratching my head for twenty minutes before realizing a single overhanging branch was casting just enough shadow to drop the power output by half. Clean the panel surface with a damp cloth – you’d be amazed how much dust and pollen can reduce efficiency.
When your fan runs inconsistently, it’s usually a voltage issue. Use a multimeter to test if your solar panel is generating at least 12-14 volts in full sun. If it’s lower, you might have a damaged panel or loose wiring connections. Check every terminal and crimp connector, especially in the attic where temperature fluctuations can loosen connections over time.
For automation problems, verify your thermostat placement. It should be mounted away from direct sunlight and heat sources like chimneys or HVAC ducts. If your automated system keeps cycling on and off rapidly, adjust the temperature differential setting – most thermostats work best with a 5-10 degree spread.
Battery backup systems that aren’t holding charge often have corroded terminals or connections. Clean them with a wire brush and apply dielectric grease to prevent future corrosion. If the battery still won’t hold charge after cleaning, it’s probably reached the end of its 3-5 year lifespan and needs replacement.
So there you have it – a comprehensive guide to transforming your attic ventilation with solar power and smart controls. When I first tackled this project in my own home, I was amazed at how much difference it made, not just in temperature control but also in my monthly energy bills. The beauty of solar-powered attic ventilation is that it works hardest when you need it most – those scorching sunny days when your attic turns into an oven.
What makes this project particularly appealing is its DIY-friendly nature. You don’t need to be an HVAC expert or an electrician to pull this off. With basic tools, a weekend afternoon, and the confidence to follow instructions, you can install a system that pays dividends for years to come. The smart controls add that extra layer of efficiency, letting your ventilation system respond intelligently to temperature changes without constant manual adjustments.
The environmental benefits are equally compelling. By harnessing free solar energy to cool your home, you’re reducing your carbon footprint while protecting your roof structure from heat damage and moisture buildup. It’s a win-win situation that aligns perfectly with sustainable living goals.
Ready to get started? Head over to our calculator tools to estimate your potential savings and determine the right system size for your attic space. And don’t forget to join our community forum where fellow DIY solar enthusiasts share tips, troubleshoot challenges, and celebrate their successes. Your cooler, more efficient home is just one project away.
How useful was this post?
Click on a star to rate it!
Average rating 0 / 5. Vote count: 0
No votes so far! Be the first to rate this post.
We are sorry that this post was not useful for you!
Let us improve this post!
Tell us how we can improve this post?
charlesnoble
Here at Spheral Solar, I’m a hands-on solar power enthusiast, constantly exploring and experimenting with DIY solutions. I’m dedicated to sharing my discoveries, insights, and even the bumps I hit along the way, all in the pursuit of a more sustainable future.
Solar-Powered Ventilation That Slashes Your Energy… by Charlesnoble March 11, 2026 Calculate your home’s air exchange rate by dividing your square footage by 60—most homes need complete air replacement every 1-3 hours to prevent moisture buildup, stale air, and indoor pollutants that trigger allergies and respiratory issues. A 1,500 square foot home requires roughly 25-50 cubic feet per minute of continuous…
How Do Attic Fans Work? by Adeyomola June 21, 2021 Attic fans work primarily by augmenting the movement of hot air rising out of the attic. They do this by transmitting the mechanical energy (kinetic energy) from their rotation to the molecules of the air around them, thus increasing the rate of convection. As attic fans promote the escape of…
Solar Ventilation Just Saved My Attic (And Cut My… by Charlesnoble November 3, 2025 **Assess your home’s air quality by standing in your living space right now—if you notice stale odors, condensation on windows, or that stuffy feeling when you walk in the door, your home is telling you it needs better ventilation.** Most homes built in the last 30 years are sealed tight…
Why Your Attic Needs a Solar Roof Vent (Before Summer Hits) by Charlesnoble February 21, 2026 Your attic is probably hotter than you think. On a summer day, temperatures up there can soar past 150°F, turning your top floor into an oven and forcing your air conditioner to work overtime. A solar ventilation fan for your roof tackles this problem head-on by pulling hot air out…
Why Your Attic Needs Exactly This Much Ventilation… by Charlesnoble November 22, 2025 Calculate your attic’s square footage by multiplying length times width, then divide by 150 to determine the minimum net free ventilation area (NFVA) required in square inches. For example, a 30-foot by 40-foot attic (1,200 square feet) needs at least 8 square inches of ventilation. Split this requirement evenly between…
6 Best Solar Attic Fan Reviews in 2023 by Adeyomola September 30, 2021 High CFM rating, versatility, durability, easy installation, and high solar panel wattage – these features typify the best solar attic fan. A solar-powered attic fan will be installed somewhere on the roof. This means it will be exposed to the elements – UV rays from the sun exposure, rain, snow,…
Subscribe for handpicked DIY projects, exclusive tips, and giveaways.
A portable power station will typically run your camping devices for anywhere from a few hours to several days on a single charge, depending on what you’re powering and the station’s capacity. As for lifespan, most quality units last between 3 to 10 years before the battery degrades enough to need replacement. The distinction matters… Read more: Your Portable Power Station Won’t Last as Long as You Think (Here’s Why)
A J1772 solar charger combines a standard J1772 charging connector (the same Type 1 plug used by most North American EVs and electric bikes) with solar panels and battery components to create an off-grid or grid-supplemented charging system. You’ll need three core elements: solar panels (typically 400-800 watts for practical ebike charging), a battery storage… Read more: How to Choose a J1772 Solar Charger for Your Ebike: A Buying Guide
Installing a whole house ventilation system powered by solar takes about 6 to 8 hours for a moderately skilled DIYer and delivers continuous fresh air circulation without touching your electric bill. The core method involves mounting a solar panel on your roof to power an intake or exhaust fan, routing ductwork through your attic or… Read more: How to Install a Whole House Ventilation System Using Solar Power


")
")
")


")
")
")


