How to Adjust Time on Your G-Shock Solar Watch (Without Breaking It)
Updated:
Press and hold the adjust button (usually bottom-left) on your G-Shock for three seconds until the time display starts flashing—this unlocks manual time adjustment on most models. Navigate between hours, minutes, and date using the mode button, then use the forward/reverse buttons to change values. If you own a radio-controlled G-Shock with Multi-Band 6 technology, simply press the lower-right button for three seconds to trigger automatic time synchronization with atomic clock signals. For newer Bluetooth-enabled models, download the official G-Shock Connected app, pair your watch via smartphone settings, and enable auto time adjustment to eliminate manual tweaking entirely.
I learned this the hard way during a camping trip when my G-Shock picked up the wrong time zone signal after crossing state lines. The manual method saved me, but understanding which adjustment approach your specific model supports makes all the difference. G-Shock’s Tough Solar technology powers these watches indefinitely with proper light exposure, contributing to impressive solar watch longevity that often exceeds two decades.
The confusion most users face stems from G-Shock’s diverse lineup—over 50 current models use different button combinations and feature sets. Your adjustment method depends on whether you have a basic Tough Solar model, a Multi-Band atomic sync version, or a smartphone-connected edition. This guide breaks down each approach with clear troubleshooting steps for common issues like frozen displays, incorrect time zones, and failed synchronization attempts. Whether you’re a first-time owner or simply switching between daylight saving periods, you’ll master time adjustment in under five minutes.
Understanding Your G-Shock Solar Power System
The Solar Cell and Capacitor System
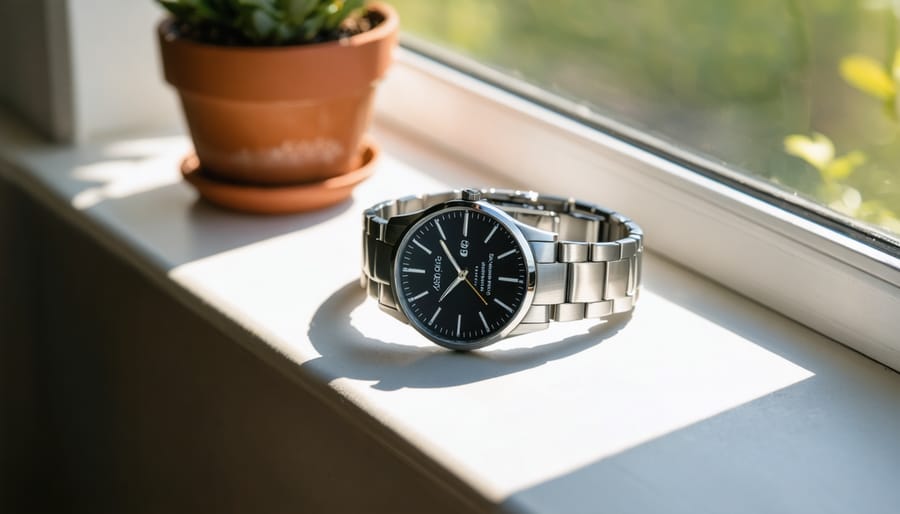
Your G-Shock solar watch is essentially a miniature power plant on your wrist, and understanding how it works will help you maintain it better. The watch face contains a small solar panel made up of photovoltaic cells that absorb light energy from any source—sunlight, indoor lighting, even your desk lamp. When light hits these cells, they create an electrical current through a process similar to the panels you might install on your roof, just scaled down to fit under the watch crystal.
Here’s where it gets interesting: instead of traditional batteries that eventually die and need replacing, G-Shock watches use a rechargeable capacitor system. These capacitors directly convert and store solar energy efficiently, holding a charge that can power your watch for months in complete darkness once fully charged. I’ve worn my G-Shock through winter camping trips where it saw minimal light for weeks, and it kept ticking thanks to this system.
The beauty of this setup is its longevity—with proper solar charging habits, your watch can operate for years without battery replacement. Before adjusting your time, always check the power indicator to ensure adequate charge, as low power can affect timekeeping accuracy.
G-Shock solar watches convert light into power through solar cells integrated beneath the watch face, storing energy in a rechargeable capacitor system.
Checking Your Power Reserve Status
Before you start adjusting your G-Shock solar watch, you’ll want to make sure it has enough juice in the tank. I learned this the hard way when I tried to set my watch after leaving it in a drawer for months—it simply wouldn’t respond to button presses because the battery was too depleted.
Most G-Shock solar models display a charge indicator right on the watch face. Look for a small battery icon or the letters “H” (high), “M” (medium), or “L” (low). Some newer models show a numerical charge level from 0-5. If you see “L” or levels 0-1, your watch needs sunlight before you attempt any adjustments. Place it near a window or under a lamp for at least an hour.
Here’s a quick tip from my experience: different G-Shock models display charge status differently. The classic square models often show the indicator when you press the lower left button, while analog-digital versions might display it continuously on a small LCD panel. Check your specific model’s manual if you’re unsure where to look.
If your charge indicator shows medium or high, you’re ready to proceed with time adjustments. A well-charged solar watch responds crisply to button presses and ensures your settings save properly.
Step-by-Step: Adjusting Time on Digital G-Shock Solar Models
Entering Time-Setting Mode
Before you can adjust the time on your G-Shock solar watch, you need to access time-setting mode using the watch’s button interface. Most G-Shock models feature four buttons, typically labeled A, B, C, and D, positioned around the watch face. Don’t worry if your model uses different labels—the principle remains the same.
Start by locating the bottom-left button (usually button D or “Adjust”). Press and hold this button for approximately 3 seconds until you see the display start to flash. This flashing indicates you’ve successfully entered time-setting mode. When I first got my G-Shock, I made the rookie mistake of tapping the button quickly instead of holding it—nothing happened! The key is that firm, sustained press.
Once the display flashes, you’ll notice different elements blinking in sequence—this could be the hour, minutes, or city code, depending on your model. You’ll navigate between these settings using the mode button (typically button C on the right side). The top-right button (A) usually increases values, while the bottom-right button (B) decreases them.
If nothing happens after holding the button, ensure your watch has adequate solar charge, as low battery can disable certain functions.
Adjusting time on digital G-Shock models requires navigating the four-button interface using specific button combinations and sequences.
Adjusting Hours, Minutes, and Date
Now let’s walk through the actual adjustment process. I remember the first time I tried this with my own G-Shock – I pressed buttons randomly for about five minutes before figuring out the pattern! Here’s the straightforward method to save you that frustration.
Start by holding down the top-left button (usually labeled “A” or “Adjust”) for about three seconds until the seconds digits start flashing on your display. This is your signal that you’re in time-setting mode. Don’t worry if you accidentally exit – just start over.
Once you’re in, you’ll cycle through different settings using the bottom-right button. Each press moves you to the next adjustable field: seconds, hours, minutes, year, month, and date. The flashing digits show which value you’re currently changing.
To adjust each flashing value, use the top-right and bottom-right buttons. One increases the number, the other decreases it. A quick tip from experience: holding these buttons down makes the numbers scroll faster, which is handy when you need to jump from January to December.
Here’s the typical sequence: reset seconds to zero first, then adjust hours (watch for AM/PM indicator), then minutes, followed by year, month, and finally the date. After making each adjustment, press that bottom-right button again to move forward.
When everything looks correct, press the top-left button one final time to save your settings and exit adjustment mode.
Saving Your Settings
Once you’ve set your time, the good news is that your G-Shock does most of the saving work for you. Simply press the adjust button one final time (usually button A or C, depending on your model) to exit the time-setting mode. Your watch will automatically return to the normal timekeeping display, and your adjustments are locked in.
Here’s a quick tip from my own experience: after making changes, I always wait a few seconds before pressing any other buttons. This ensures the watch has fully exited adjustment mode and your settings are secure. You’ll know you’re back to normal mode when the display stops flashing.
To confirm everything saved correctly, check that your time matches your reference source and that all indicators (AM/PM, date) appear as expected. If something looks off, don’t worry—just repeat the adjustment process. The beauty of these solar-powered timepieces is that they’re designed for repeated adjustments without draining battery life, making them perfect companions for DIY projects where precise timing matters.
Using Atomic Timekeeping and Radio-Controlled Features
Enabling Auto Time Adjustment
If your G-Shock supports radio-controlled timekeeping, enabling auto time adjustment is one of the smartest features you can activate. I learned this the hard way after manually adjusting my watch twice a year for daylight saving time before discovering this gem of a function.
First, locate your watch’s manual to confirm it has Multi-Band 6 or similar radio wave reception capabilities. Most solar G-Shocks manufactured after 2010 include this feature, but it’s worth double-checking.
To enable automatic time adjustment, press and hold the adjust button (usually lower left) for about three seconds until the settings menu appears. Navigate using the mode button until you see the Auto Receive setting, typically displayed as “AUTO” or with a radio tower icon. Toggle this to “ON” using the adjust buttons.
Next, set your home city correctly. The watch needs to know your time zone to receive the proper signal. Scroll through the city codes until you find yours—North American users typically select LAX, DEN, CHI, or NYC depending on their location.
For optimal signal reception, place your watch near a window overnight with the face pointing outward. The watch automatically attempts to sync between midnight and 5 AM. A successful reception is indicated by a small antenna icon or “GET” message on your display, confirming your watch is now maintaining perfect accuracy automatically.
Manual Signal Reception
Sometimes your G-Shock just needs a little nudge to sync up with the atomic time signal. I learned this the hard way when I was camping in a valley—my watch couldn’t pick up the signal automatically because of the terrain blocking it. Manual signal reception became my go-to solution.
First, make sure you’re in a location where signal reception is possible. Move away from electronics, metal structures, or concrete buildings that might interfere. Position your watch near a window, ideally facing the direction of your nearest atomic clock transmitter. In North America, that’s usually westward toward Fort Collins, Colorado.
Here’s how to trigger manual reception: Press and hold the adjust button (usually bottom left) for about two seconds until you see “RC” or a signal indicator on the display. Your watch will now actively search for the time signal. This typically takes between two to seven minutes, so patience is key. You’ll see an antenna icon or bars moving on the display while it searches.
During this time, keep your watch still and horizontal—I usually set mine on a windowsill and walk away. Movement can disrupt reception. If successful, you’ll see a confirmation message like “GET” or a full signal strength indicator. The time will automatically update to the precise atomic time.
If reception fails after several attempts, try again during nighttime hours when signals typically travel better, or consider adjusting the time manually using the standard method instead.
Smartphone-Connected G-Shock Time Adjustment
If you’ve got one of the newer Bluetooth-enabled G-Shock solar watches, you’re in for a treat. I remember when I first connected my G-Shock to my smartphone—it felt like stepping into the future. Gone are the days of fumbling through button combinations. The G-Shock Connected app handles time adjustment automatically, and honestly, it’s one of those features that makes you wonder how you ever managed without it.
First things first: download the G-Shock Connected app from your phone’s app store. It’s available for both iOS and Android devices. Once installed, open the app and create an account if prompted. Now here’s where the magic happens.
On your watch, press and hold the lower left button for about two seconds until you see the Bluetooth icon flash on the display. This puts your watch into pairing mode. Back on your phone, tap the “Connect” button in the app, and it should detect your watch within seconds. Follow the on-screen prompts to complete the pairing process—it’s genuinely straightforward, even if you’re not particularly tech-savvy.
Once connected, the app automatically syncs your watch to your phone’s time, which pulls from cellular networks and is incredibly accurate. The best part? Your watch will sync automatically up to four times daily when it’s in Bluetooth range of your phone, keeping everything perfectly aligned without any effort on your part.
Managing timezones becomes beautifully simple too. Traveling for work or vacation? Your watch adjusts automatically when your phone connects to local networks. You can also manually select your timezone in the app if you prefer having that control.
The app offers additional benefits beyond time adjustment. You can customize alarms, set world time cities, and even locate your phone using the watch—a feature I’ve used more times than I’d like to admit when my phone slips between couch cushions.
One quick tip from personal experience: keep your watch’s solar battery well-charged for reliable Bluetooth performance. The connection drains slightly more power than basic timekeeping, so regular light exposure ensures consistent connectivity.
Solar Watch Maintenance Best Practices for Time Accuracy
Keeping your G-Shock running on time isn’t just about pushing the right buttons—it’s about creating habits that support long-term accuracy. I learned this the hard way when my first solar watch started drifting by minutes each week. Turns out, I’d been storing it in a drawer and wondering why it wasn’t keeping time like it should.
The connection between power and precision is straightforward: your watch needs consistent solar charging to maintain accurate timekeeping. When the battery level drops below optimal, the watch may enter power-save mode or simply lack the energy to keep precise time. Think of it like trying to run a calculator on dying batteries—the display might work, but the performance suffers.
Here’s the reality check: proper solar watch maintenance directly impacts how often you’ll need to adjust the time. A well-maintained solar watch can keep accuracy within seconds per month, while a neglected one might drift noticeably within days.
Frequency
Maintenance Task
Impact on Time Accuracy
Daily
Expose to natural or bright indoor light for 5-8 hours
Prevents power-save mode activation
Weekly
Check charge indicator; clean solar panel surface
Ensures consistent power flow
Monthly
Verify time accuracy against reliable source; store in lit area if not wearing
Catches drift early; maintains charge level
Seasonally
Full charge cycle (expose to bright light for 6-8 hours)
Maximizes battery health and timing precision
Storage matters more than most people realize. When I travel for work, I leave my G-Shock on a windowsill rather than packing it away. This simple habit keeps it charged and ready. If you’re rotating between multiple watches, store the ones you’re not wearing face-up near a light source—not in a dark drawer or watch box.
Temperature extremes also affect accuracy. Avoid leaving your watch in hot cars or freezing environments for extended periods. The quartz movement inside performs best at room temperature, and dramatic temperature swings can temporarily affect timekeeping precision.
The solar panel itself needs occasional cleaning. Use a soft, slightly damp cloth to wipe away dust, skin oils, or debris that might block light absorption. A clean panel charges more efficiently, which translates to better timekeeping performance. This takes 30 seconds and makes a real difference over time.
Regular exposure to natural or artificial light maintains optimal power reserves and ensures accurate timekeeping in solar-powered G-Shock watches.
Troubleshooting Common Time Adjustment Issues
Even seasoned DIYers sometimes hit a snag when adjusting their G-Shock solar watches. Let me walk you through the most common issues I’ve encountered over the years, along with straightforward solutions that’ll get you back on track.
The most frequent problem? Buttons that don’t seem to respond. If pressing the mode button does nothing, your watch battery might be completely depleted despite being solar-powered. I learned this the hard way when my G-Shock sat in a drawer for months. Place your watch directly under a bright light source or natural sunlight for at least 8 hours. The solar panel needs adequate charging before it can power the display functions. Think of it like your phone—you can’t adjust settings when the battery hits zero.
Another frustration happens when the watch keeps reverting to the wrong time after manual adjustment. This typically occurs with radio-controlled models that automatically sync with atomic clock signals. Your watch might be receiving weak or incorrect signals from nearby electronic devices. To fix this, enter the settings menu and temporarily disable the auto-receive function. After manually setting the correct time, you can re-enable it later when you’re in a location with better signal reception.
Sometimes the adjustment mode simply won’t activate, leaving you stuck in timekeeping mode. This usually means you’re not holding the button long enough. Most G-Shock models require a 2-3 second press, not a quick tap. Count slowly to three while holding the adjust button—patience is key here.
If your watch displays the wrong time zone despite correct adjustments, double-check that you’ve set the city code properly. Many DIYers forget this step. The city code determines your time zone offset, so even perfect time adjustments will appear wrong if the zone setting is off.
Finally, if buttons feel stuck or unresponsive to touch, accumulated dirt around the button edges might be blocking proper contact. Gently clean around the buttons with a soft, slightly damp cloth to restore full functionality without damaging the solar panel surface.
Maximizing Solar Efficiency While Maintaining Your Watch
I’ll be honest with you—when I first got into solar-powered watches, I made a rookie mistake. I treated my G-Shock solar like any other watch, tucking it away in a drawer overnight. Big mistake. Within weeks, my watch was losing accuracy, and I couldn’t figure out why the time kept drifting. That’s when I realized: solar watches thrive on the same principle as my rooftop panels—consistent light exposure equals reliable performance.
The secret to maintaining accurate timekeeping isn’t complicated. Your G-Shock needs regular light, just like your larger solar projects need sunshine. I keep mine on my wrist near a window during morning coffee, giving it ambient indoor light even on cloudy days. This habit alone transformed my watch’s performance. Natural sunlight works fastest—about 2 hours in direct sun fully charges most models—but even fluorescent office lighting contributes throughout your day.
Key Takeaway: Consistent daily light exposure, whether from sunlight or indoor lighting, keeps your G-Shock’s battery healthy and prevents time drift. Treat your watch like a miniature solar panel by positioning it for optimal light exposure during routine activities, ensuring the power reserve stays above the low-battery threshold that affects timekeeping accuracy.
Here’s my practical routine: I position my watch face-up on my desk during work hours, maximizing exposure to overhead lights. During outdoor projects—whether installing panels or garden work—my watch soaks up premium solar energy. Avoid the temptation to “save” your watch by storing it in darkness. Solar capacitors actually prefer regular charging cycles over sporadic intense sessions.
One game-changing tip: check your power reserve indicator monthly. When it drops to medium or low, your watch enters power-saving mode, which can affect automatic time adjustments. A well-maintained solar watch with healthy charge levels rarely needs manual time correction, since the atomic sync feature works optimally when power is abundant.
Mastering time adjustment on your G-Shock solar watch is more than just a practical skill—it’s part of embracing a sustainable lifestyle powered by renewable energy. I’ve found that once you understand how to maintain one solar device, those principles naturally extend to everything from garden lights to outdoor speakers. Your watch becomes a gateway to appreciating how solar technology works in everyday life.
The beauty of these DIY skills is that they empower you to take control of your devices rather than relying on service centers for simple tasks. I remember the first time I successfully synced my G-Shock after moving time zones—it felt like unlocking a small victory in self-sufficiency. That same confidence carries over when troubleshooting other solar gadgets around your home.
Don’t let your learning stop here. Try applying these button-sequence techniques to other digital devices you own, and notice how similar many interfaces are once you understand the logic. We’d love to hear about your experiences—what worked for you, what challenges you faced, or creative solutions you discovered. Share your stories in the comments below and help build our community of solar enthusiasts learning together. Every adjustment you master is another step toward energy independence.
How useful was this post?
Click on a star to rate it!
Average rating 0 / 5. Vote count: 0
No votes so far! Be the first to rate this post.
We are sorry that this post was not useful for you!
Let us improve this post!
Tell us how we can improve this post?
charlesnoble
Here at Spheral Solar, I’m a hands-on solar power enthusiast, constantly exploring and experimenting with DIY solutions. I’m dedicated to sharing my discoveries, insights, and even the bumps I hit along the way, all in the pursuit of a more sustainable future.
Why Your Solar Watch Needs Different Care Than… by Charlesnoble November 27, 2025 Protect your solar watch investment by exposing the dial to bright light for at least 8 hours monthly, even when fully charged. This prevents the lithium battery from deep discharge, which permanently reduces its lifespan. Position your watch near a window during work hours or wear it outdoors regularly to…
Powering Your Wrist: Automatic vs. Solar Watch Comparison by Charlesnoble October 31, 2023 In a world where technology continues to shape how we interact with time, wristwatches have evolved beyond mere timekeepers. The choice between an automatic vs solar watch has become a defining feature for watch enthusiasts and everyday wearers alike. Automatic watches, powered by wrist movement, excel in craftsmanship but may…
How to Charge a Solar Watch by Charlesnoble October 28, 2023 A solar watch is powered by light energy from the sun. It converts sunlight into electricity using solar cells to charge an internal battery in the solar watch. This allows the watch to run without ever needing a battery replacement. But to keep a solar watch powered, you must regularly…
Why Your Solar Panels Need Proper Grounding (And How… by Charlesnoble March 17, 2026 Connect your solar panel frame directly to a grounding rod using 6-gauge bare copper wire and listed grounding lugs—this single action protects your system from lightning strikes and prevents dangerous electrical shocks. Strip back half an inch of wire, insert it into the grounding lug attached to your panel’s frame…
Solar-Powered Irrigation Changed How I Water My… by Charlesnoble November 15, 2025 Last summer, I watched my neighbor haul gasoline cans across his property every few days just to keep his garden watered. Meanwhile, my own irrigation system was running silently on pure sunshine, costing me nothing after the initial setup. That’s the beauty of solar-powered irrigation—it transforms water management from a…
How Long Do Solar Watches Last? by Charlesnoble October 28, 2023 Solar watches can last a long time, some even for decades if you take good care of them. In this article, we will discuss the average lifespan of solar watches, what can make them last longer, and how to keep yours running for a long time. So, without further ado,…
Subscribe for handpicked DIY projects, exclusive tips, and giveaways.
Low voltage circuit protection in DIY solar systems boils down to matching the right fuse or breaker to your wire size and expected current, not to the capacity of your battery bank or inverter. Most fires and equipment failures happen when people oversize protection devices, thinking bigger is safer, when the opposite is true. Your… Read more: How to Size Low Voltage Circuit Protection for Your DIY Solar System
Crimping 8-gauge wire correctly takes about 2 minutes per connection once you’ve got the hang of it, but those two minutes make the difference between a solar installation that lasts 25 years and one that fails in the first storm. An 8-gauge wire crimper is a heavy-duty hand tool designed to cold-forge lugs and terminals… Read more: How to Use an 8 Wire Crimper for Solar Panel and Battery Connections
Building a solar powered outdoor table takes about 8 to 12 hours and requires basic woodworking skills plus some familiarity with electrical connections. You’ll mount solar panels directly onto a custom-built or modified outdoor table, wire them to a charge controller and battery system housed underneath, and add USB ports or AC outlets for charging… Read more: How to Build a Solar Powered Outdoor Table for Your Camping Setup