How to Choose a J1772 Solar Charger for Your Ebike: A Buying Guide
Updated:
A J1772 solar charger combines a standard J1772 charging connector (the same Type 1 plug used by most North American EVs and electric bikes) with solar panels and battery components to create an off-grid or grid-supplemented charging system. You’ll need three core elements: solar panels (typically 400-800 watts for practical ebike charging), a battery storage system (lithium batteries in the 100-300Ah range work best), and an EVSE (Electric Vehicle Supply Equipment) with a J1772 output rated for Level 1 or Level 2 charging. Most DIY builders spend between $800 and $2,500 depending on whether they want portable, semi-permanent, or fully integrated setups.
Here’s what most people get wrong when they start researching: they assume any solar panel can directly charge through a J1772 port. It can’t. The J1772 standard requires specific communication protocols and safety features that raw solar panels don’t provide. You’re essentially building a small solar power station that happens to output through a J1772 connector instead of a regular outlet.
I’ve been helping DIYers navigate solar projects since 2015, and the J1772 ebike charging question has exploded over the past two years as more premium ebikes adopted the automotive-grade connector. The good news? The components are more accessible and affordable than ever. The bad news? There’s a lot of misleading information out there about what actually works.
This guide cuts through the confusion. You’ll learn exactly which components are compatible, how to size your system for real-world riding patterns (not theoretical maximums that waste your money), and which pre-built options deliver the best value if you’d rather buy than build. We’ll compare portable solar generators with J1772 outputs against custom DIY battery systems, break down the actual charging speeds you can expect from different wattage configurations, and walk through the specific mistakes that cost builders hundreds in incompatible parts.
Whether you’re trying to charge your ebike at a remote cabin, reduce grid dependence at home, or create a truly mobile charging solution for bikepacking adventures, you’ll know exactly what to buy and how to set it up by the end.
Key Takeaway: J1772 connectors bring standardization to high-end ebikes, letting you use universal charging equipment instead of proprietary adapters. This makes solar charging setups more flexible and future-proof, though you must still verify electrical compatibility with your specific battery.
What Makes J1772 Solar Charging Different for Ebikes
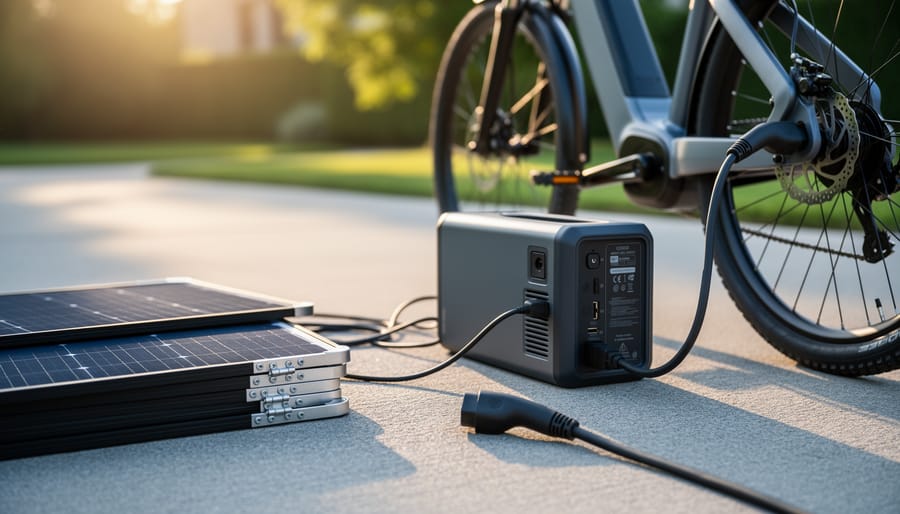
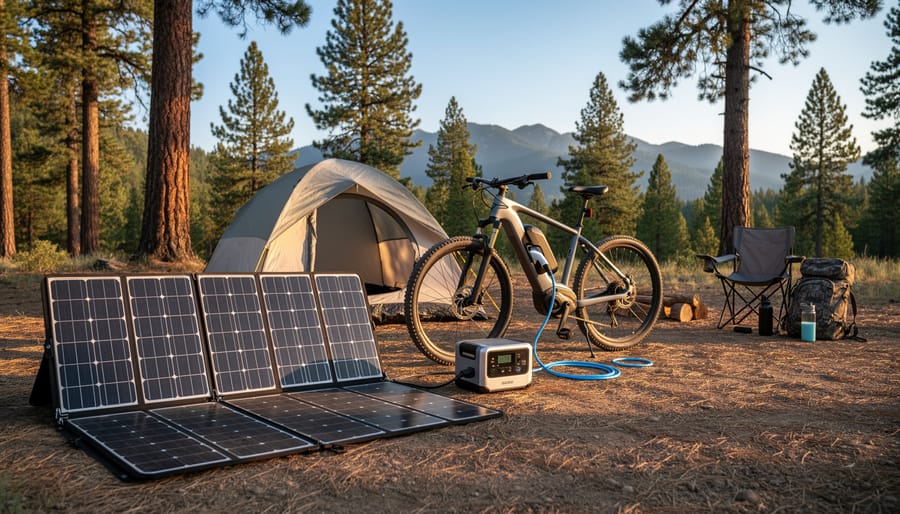
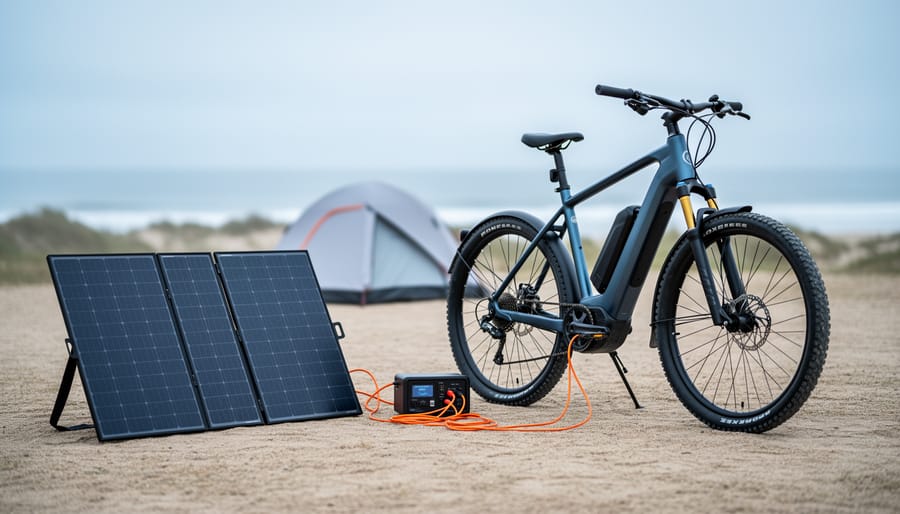
A portable solar setup charging an ebike at a campsite shows how J1772 solar charging fits real-world off-grid adventures.
The J1772 connector might look familiar if you’ve seen electric cars charging, and there’s a good reason for that. This standardized plug was originally developed as the SAE J1772 for EVs in North America, designed to create a universal charging interface that any electric vehicle could use. Now, some premium ebike manufacturers are adopting this same connector, and it’s changing how we think about solar-powered bike charging.
Traditional ebikes use proprietary charging ports, each manufacturer designs their own connector that only works with their specific charger. You’ve probably experienced the frustration: lost your charger, and you can’t just grab any replacement. Need to charge at a friend’s place? Unless they own the exact same bike brand, you’re out of luck.
J1772 breaks this cycle. When your ebike uses this standard connector, you’re tapping into the same charging infrastructure that powers electric cars. That means any J1772-compatible charging station, whether it’s a solar setup, a home wall unit, or a public charging post, can potentially work with your bike. The key word is “potentially,” because you still need to match voltage and amperage specs, but the physical connection is universal.
The power delivery capabilities set J1772 apart from typical ebike ports too. While standard ebike chargers usually handle 2-5 amps at 36-48 volts, J1772 systems are built for higher power throughput, up to 80 amps in some configurations, though ebikes typically use much less. This overhead means the connector and communication protocols are designed with safety and scalability in mind.
Another advantage is the built-in communication. J1772 isn’t just a dumb plug, it includes signal pins that allow the charger and vehicle (or ebike) to “talk” to each other. The connector verifies that it’s properly seated before power flows, and it can communicate charging status and power limits. This matters for solar setups because a smart J1772 charger can adjust its output based on available sunlight, protecting your battery from irregular power delivery.
Higher-end ebike brands like Stromer and some custom builds now use J1772 precisely because it’s overengineered for reliability. You’re getting automotive-grade weather sealing, locking mechanisms, and safety standards that consumer electronics connectors simply don’t match.
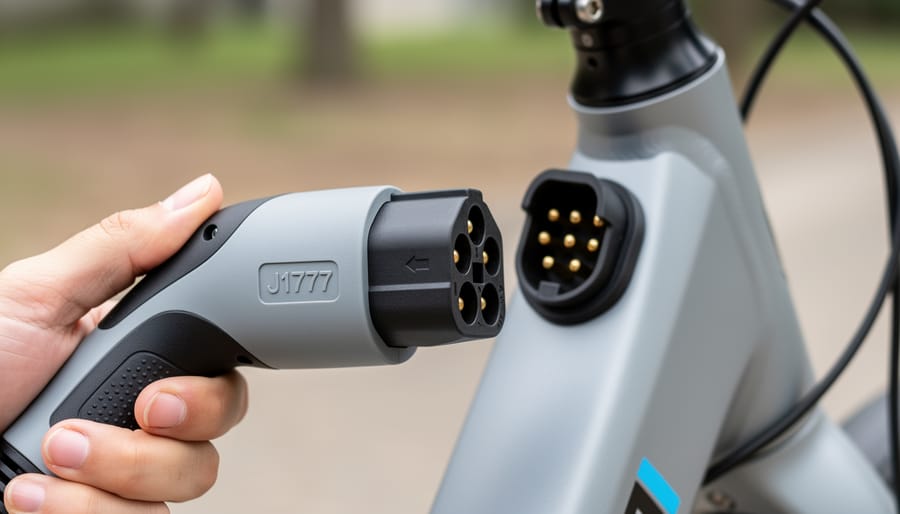
A close-up of the J1772 connector and ebike charging inlet emphasizes the physical compatibility readers need to confirm.
What to Look for When Choosing a J1772 Solar Charger
Matching Power Output to Your Ebike’s Needs
Getting the power output right is crucial, too little and you’ll be waiting days for a full charge, too much and you might damage your battery or waste money on oversized equipment.
Start by checking your ebike’s battery specifications. Most ebike batteries are labeled with voltage (commonly 36V, 48V, or 52V) and capacity in amp-hours (Ah) or watt-hours (Wh). If you only have Ah, multiply it by voltage to get Wh. For example, a 48V 14Ah battery equals 672Wh (48 × 14).
Now think about your charging timeline. A 100W solar panel in ideal conditions produces roughly 100W for about 5 peak sun hours per day (500Wh total). That same 672Wh battery would take over a day to charge from a single 100W panel, accounting for system losses. If you want a full charge in 5-6 hours of good sun, you’d need around 150-200W of solar capacity.
Here’s a quick estimation: divide your battery’s watt-hours by your desired charging time in hours, then add 20-30% for conversion losses. A 500Wh battery charged in 4 hours needs about 160W minimum (500 ÷ 4 = 125W, plus 30% overhead).
Real-world conditions rarely match peak output. Cloud cover, panel angle, and seasonal variations can cut production by 30-50%. I learned this the hard way on a summer camping trip when my supposedly adequate 100W setup took two full days to recharge my 600Wh battery because of morning fog.
The solar calculator on Spheral Solar lets you input your battery specs and location to get realistic charging estimates. It accounts for seasonal sunlight variation and helps you size your system for the worst-case months you’ll actually be riding.
Portability vs. Fixed Installation Considerations
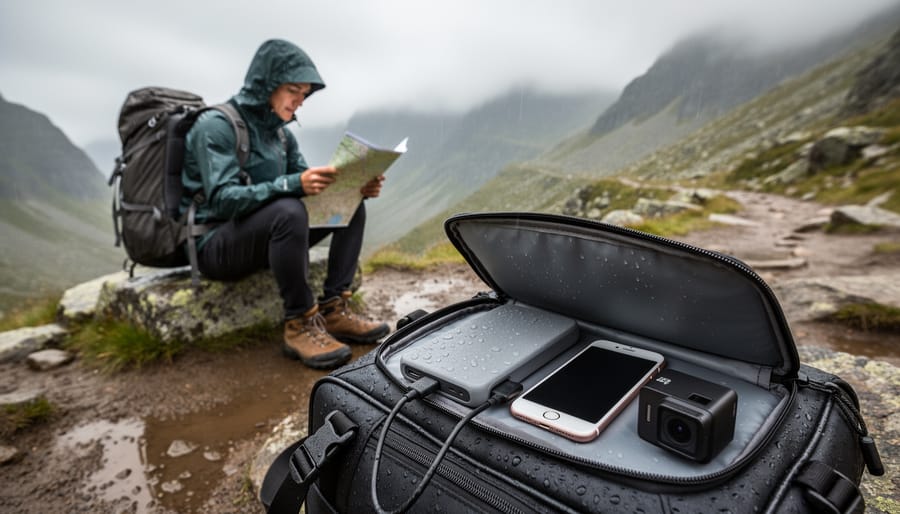
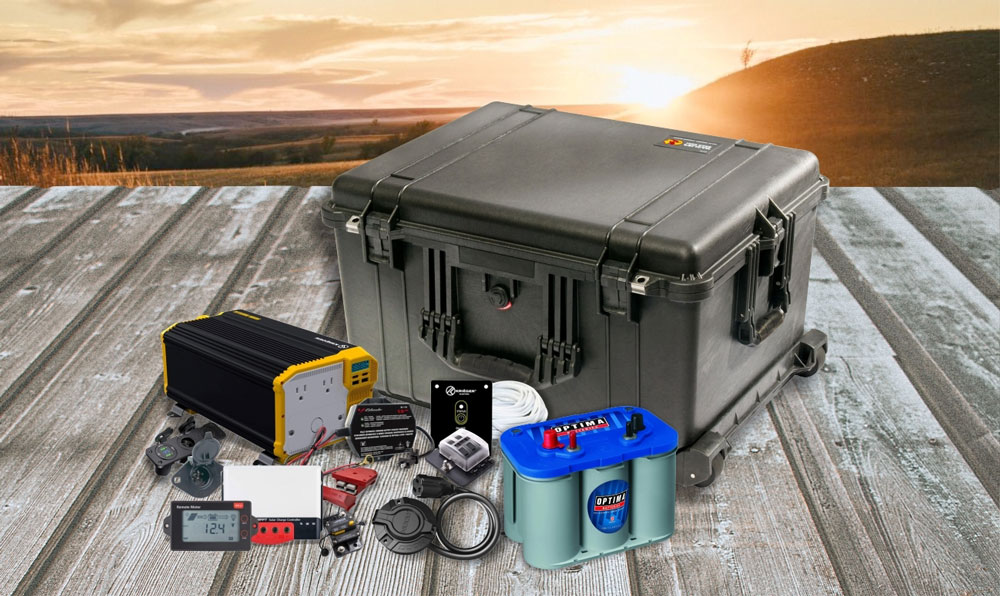
This rugged outdoor scene visually reinforces the importance of portability and weather protection for charging while traveling.
Choosing between a portable and fixed J1772 solar setup fundamentally depends on where you charge your ebike. Each approach involves distinct trade-offs in cost, convenience, and performance.
Portable systems excel at flexibility. You can position folding panels for optimal sun exposure throughout the day, move them away from shade, and pack everything when you travel. They’re perfect for bike touring, camping trips, or renters who can’t modify their property. The downside? You’ll spend time setting up and breaking down your array, and storage space becomes a consideration. Portable panels also cost more per watt than fixed panels, and you’ll need weatherproof cases or bags.
Fixed installations offer set-it-and-forget-it convenience. Mount panels on your roof, garage, or RV, run wiring once, and you’re done. You’ll generate power automatically whenever the sun shines, even when you’re not home. Fixed systems typically deliver better cost-per-watt and can handle larger arrays without the weight constraints of portable gear. However, you’re locked into one location. If you rent or frequently relocate, permanent mounting isn’t practical. Installation also requires more DIY skills or professional help.
For RV owners, there’s a middle ground: semi-permanent roof mounts with removable J1772 charging stations. You get most benefits of fixed solar while maintaining some portability.
Consider where you’ll use your ebike most. Weekend warriors might prefer portable; daily commuters with a garage benefit more from fixed installations.
Types of J1772 Solar Charging Setups Compared
Portable Solar Panel Systems with J1772 Adapters
Portable solar panel systems offer the most flexibility for cyclists who want to charge on the go. These setups typically include a foldable solar array (usually 100-200W), an MPPT charge controller, and a J1772 adapter that connects to your ebike’s charging port.
The beauty of this approach is simplicity. You unfold your panels at camp, connect them to the charge controller, and plug the J1772 adapter directly into your bike. Most systems pack down to roughly the size of a folded camping chair and weigh between 15-30 pounds depending on wattage. That’s manageable weight if you’re bike touring with panniers or a trailer, though it’s probably too much for credit card touring.
Expect charging times of 4-8 hours in good sun for a typical 500Wh ebike battery with a 150W panel. That means you can top up during a long lunch stop or fully recharge while you set up camp and cook dinner. The real limitation is weather, cloudy days will extend charging times significantly, and you obviously can’t charge while riding.
The charge controller is critical here. A quality MPPT unit will extract 20-30% more power from your panels than a basic PWM controller, which matters when you’re working with limited panel area. Look for controllers with built-in display screens so you can monitor voltage and current in real time. Pair this with a J1772 adapter rated for your bike’s charging specs, and you’ve got a reliable touring charging solution that costs $400-700 total.
Permanent Solar Arrays with Charging Stations
If you’re charging your J1772 ebike at the same location regularly, whether that’s your home garage, cabin, or RV, a permanent solar array makes more sense than lugging portable solar power setups around. These installations typically use rooftop or ground-mounted panels wired to a proper J1772 EVSE charging station, giving you a dedicated charging point that works just like plugging into the grid.
The advantage here is scale and convenience. You can install enough panels to generate real power, 600W to 2000W or more, which dramatically cuts charging time compared to portable rigs. A 1000W rooftop array can fully charge a typical 500Wh ebike battery in well under an hour of good sun, assuming efficient charge control. You’ll need a quality MPPT charge controller rated for your panel output, proper mounting hardware, and a Level 1 or Level 2 J1772 EVSE unit designed for outdoor installation.
For RV owners, rooftop solar paired with a J1772 outlet becomes an elegant solution, your ebike charges automatically as you drive or camp, and you’re not sacrificing cargo space for panels. Home installations work similarly: mount panels on a shed or garage roof, run weatherproof conduit to your J1772 station, and you’ve got a permanent charging solution that adds property value.
The upfront cost runs higher, expect $800 to $3000 depending on system size and whether you DIY the installation, but the long-term convenience and charging speed justify the investment for regular users.
Battery Buffer Systems
A clean, safe power-storage moment illustrates how buffering can help steady solar charging performance, especially when conditions shift.
A battery buffer system sits between your solar panels and J1772 charger, storing energy as it’s generated throughout the day. This gives you consistent charging power regardless of cloud cover and lets you charge your ebike after sunset when solar production stops.
The setup typically includes solar panels feeding into a lithium battery bank (12V or 24V configurations are common), managed by an MPPT charge controller, plus a J1772 EVSE that draws from the battery. The buffer smooths out voltage fluctuations that direct solar charging often produces, protecting your ebike’s battery management system.
The trade-off? Increased complexity and cost. You’re essentially building two charging systems that talk to each other, which means more components to install, more potential failure points, and an extra conversion step that loses 10-15% efficiency. However, if you’re frequently charging at night or in variable weather, that flexibility often justifies the added expense.
For weekend warriors, a buffer system might be overkill. For full-time van-lifers or off-grid homesteaders, it transforms solar ebike charging from a sunny-day option into a reliable daily solution.
Recommended J1772 Solar Charging Solutions for 2026
Budget-Friendly Portable Setup
For riders who want to test solar charging without major investment, a 100-200W folding panel setup offers a practical entry point. You’ll need three core components: a portable solar panel (around 100-150W runs $150-250), a basic MPPT charge controller ($40-80), and a J1772 adapter cable ($60-120).
This configuration works best for occasional top-ups during day trips or weekend camping. Expect charging times of 6-10 hours for a typical 500Wh ebike battery in good sun, meaning you’ll likely need a full day to replenish after a ride. The setup folds to briefcase size and weighs under 20 pounds total.
Keep your expectations realistic. This isn’t a fast-charging solution, and cloudy weather will slow things considerably. But for casual riders who park their bikes in sunny spots while hiking or exploring, it eliminates range anxiety without requiring a permanent installation. Start with 100W if you’re uncertain about commitment; you can always add a second panel later and wire them in parallel for faster charging.
Mid-Range Touring Setup
For long-distance bike touring where you need reliable daily charging and can’t afford downtime, a 300-400W portable solar array paired with a battery buffer hits the sweet spot. This setup typically costs $800-1,200 but gives you genuine off-grid independence for multi-day trips.
The core components include three to four 100W foldable panels that pack down to suitcase size, a 40-50A MPPT charge controller, a 500-1000Wh lithium battery bank (often a portable power station with built-in J1772 output), and a quality J1772 EVSE rated for at least 16A. The battery buffer is crucial here, it lets you charge your ebike battery overnight from stored solar energy collected during the day, and smooths out inconsistent sun conditions while you’re touring through varied terrain.
Look for panels with reinforced corners and water-resistant construction rated IP65 or better. A power station with multiple outputs gives you flexibility to charge phones, lights, and other gear simultaneously. This configuration typically delivers a full ebike charge per sunny day, with enough reserve capacity for cloudy conditions or partial shade.
Premium Home/RV Installation
For year-round ebike charging at home or in an RV, a fixed 600W+ solar array offers the most seamless solution. Mount six to eight 100W panels on your roof, wire them through an MPPT charge controller to a battery bank (typically 48V lithium for best compatibility), and install a wall-mounted J1772 EVSE unit in your garage or under your RV awning. This setup charges your ebike even when you’re not home and provides surplus power for other uses.
The battery bank acts as a buffer, storing daytime solar production for evening charging sessions and smoothing out cloudy-day fluctuations. A 5kWh battery paired with 800W of panels can fully charge most ebike batteries daily with energy to spare. Some installers skip the battery and use a grid-tie system, but that only works if you’re charging during daylight hours and defeats the off-grid advantage many RV owners want.
This approach mirrors a scaled-down DIY solar generator system but with dedicated J1772 output instead of AC inverter outlets. Expect $2,500, $4,500 in components depending on panel quality and battery capacity. The upside? You’ll charge your ebike for free indefinitely, and the system adds value to your property or RV while powering other 12V devices simultaneously.
Common Mistakes to Avoid
I’ve seen too many enthusiastic DIYers rush into their first J1772 solar setup only to hit expensive roadblocks. My friend Charles learned this the hard way when he confidently assembled what looked like a perfect system, only to discover his charge controller couldn’t handle the voltage spikes from his oversized panel array. The controller fried on the first sunny day, and he had to start over. These kinds of setbacks are avoidable if you know the pitfalls.
The most common mistakes that trip up first-time builders include:
Mismatching voltage between solar panels and charge controller specifications
Skipping UL or CE safety certifications on J1772 adapters and EVSE units
Underestimating actual power needs by 30-40% for real-world charging
Using indoor-rated components in outdoor installations without proper enclosures
Buying generic J1772 adapters that lack proper communication protocols
Forgetting to ground the system properly, creating shock and fire hazards
Voltage mismatches cause the most damage because they’re not always immediately obvious. Your charge controller might work fine on a cloudy morning, then fail catastrophically when full sun hits and panel voltage spikes above its maximum input rating. Always leave a 25% voltage buffer and double-check that your open-circuit voltage stays within specs.
Safety certifications matter more than you’d think. That bargain J1772 adapter from an unknown seller might work initially, but uncertified components can fail in dangerous ways or lack the proper handshake communication that tells your ebike when charging is safe. Spend the extra money on UL-listed equipment.
Power underestimation sneaks up on you because theoretical wattage looks great on paper. Reality includes conversion losses, cloudy periods, suboptimal panel angles, and cable resistance. If your calculations say you need 300W, build for 400W to avoid setup mistakes that leave you with insufficient charging capacity.
Weather protection deserves serious attention even if you think your installation is sheltered. Morning dew, unexpected rain, and humidity will find every unsealed connection. Use proper weatherproof enclosures rated IP65 or better for anything exposed to the elements, and apply dielectric grease to all electrical connections.
Building Your First J1772 Solar Charging Setup
Starting your first J1772 solar charging project feels intimidating, but breaking it into clear steps makes it manageable. I’ve built several iterations of these systems, and the process gets easier once you understand the basic workflow.
Begin by assessing your actual needs. How often will you charge? Where will you use it? What’s your ebike’s battery capacity? These questions drive every other decision. A weekend camper needs a different setup than someone planning to charge an ebike daily at home. Write down your typical riding distance, charging frequency, and whether you need portability or can install permanent panels.
Next, calculate your power requirements. Take your battery’s watt-hours (usually printed on the pack) and divide by four or five to find a reasonable solar panel wattage. A 500Wh battery charges well from a 100-125W panel in good sun, though bigger is better if you can manage it. Our calculator tools at Spheral Solar can help you dial this in precisely.
Source your components carefully. You’ll need solar panels, an MPPT charge controller rated for your panel output, and either a J1772 EVSE adapter or a proper J1772 charging station depending on your setup complexity. If you’re going portable, add a battery buffer to charge when the sun isn’t shining. For a proven starting point, check out my 48V ebike build which walks through component selection and wiring.
Start small and test thoroughly before committing to expensive components. A basic 100W panel setup teaches you the fundamentals without breaking the bank. You can always add more panels later, upgrade your charge controller, or integrate battery storage once you understand how your system performs in real conditions. The beauty of solar charging is its modularity, every improvement builds on what you’ve already learned.
Frequently Asked Questions
Can any ebike use a J1772 charger?
No, only ebikes specifically designed with J1772 charging ports can use these chargers. Most standard ebikes use proprietary charging ports or barrel connectors, and adapters between J1772 and standard ebike connectors aren’t widely available or safe.
How long does it take to solar charge an ebike through J1772?
Charging time depends on your battery capacity and solar panel wattage. A 500Wh ebike battery with a 200W solar panel setup in ideal conditions might take 3-4 hours, while a 300W array could cut that to 2-3 hours. Cloudy weather or winter sun can double or triple these times.
Can I charge my ebike while riding?
Technically possible but not practical. You’d need panels mounted on the bike or a trailer, and the charging rate would be minimal compared to what you’re consuming while riding, maybe 50-100W generation versus 200-500W consumption depending on assist level.
What happens on cloudy days?
Solar output drops to 10-25% of rated capacity depending on cloud thickness. You’ll still get some charge, but plan for significantly longer charging times or consider adding a battery buffer that you can charge when the sun’s out and draw from later.
Do I really need a battery bank in my system?
Not strictly necessary if you only charge during the day, but a battery buffer gives you flexibility to charge your ebike in the evening, smooth out power delivery, and store excess solar energy. For serious touring or off-grid use, it’s worth the added complexity.
Is a J1772 solar charging setup worth the investment?
Depends on your use case. If you’re regularly bike touring in sunny locations or living off-grid, the freedom and fuel savings add up quickly. For occasional weekend rides with grid access nearby, a standard wall charger is more practical and costs a fraction of a full solar setup.
These questions come up constantly in the Spheral Solar community forums, and they’re all valid concerns. The J1772 standard brings some advantages to ebike charging, but it’s not a magic bullet that solves every challenge.
One thing I’ve noticed is that people often underestimate how much their riding habits affect whether solar charging makes sense. If you’re doing multi-day tours where you’re camping each night and have time to set up panels, solar charging becomes genuinely practical. You can ride 40-60 miles, set up camp, deploy your panels, and have a full battery by morning. That’s the sweet spot.
The weather question is real, though. I learned this the hard way on a week-long trip through Oregon where I hit three consecutive overcast days. My 300W array was barely putting out 50W at times, and I ended up needing to find a cafe with an outlet. Now I always carry a small battery buffer that holds at least one full ebike charge, which lets me bank energy on sunny days and draw it down when clouds roll in.
For home use, the math shifts. If you’ve already got a solar panel setup on your roof or property, adding J1772 charging capability is relatively straightforward, you’re mainly adding the EVSE unit and running the wiring. But building a dedicated solar array just for ebike charging rarely pencils out unless electricity costs are extremely high in your area or you’re completely off-grid.
The charging-while-riding idea sounds appealing, but the physics just don’t work. Even a large trailer-mounted array might give you an extra 5-10 miles of range over a full day of riding, while adding significant weight and wind resistance that costs you range. Better to stop for lunch, deploy portable panels, and grab a meaningful charge in an hour or two.
Choosing the right J1772 solar charging setup comes down to honestly assessing how you’ll actually use it. A weekend camper needs something completely different from someone installing a permanent home charging station, and there’s no point overspending on capacity you’ll never use or skimping so much that your system can’t keep up with your riding habits.
Start by nailing down your power requirements using real numbers from your ebike’s battery specs, then decide whether portability or permanence matters more for your situation. The beauty of solar charging is that you can begin with a modest portable setup and expand as you learn what works. I’ve seen plenty of folks start with a single 100W panel and a basic adapter, then gradually build out to multi-panel arrays once they understand their actual charging patterns.
The J1772 standard makes this easier than ever because you’re working with a connector that’s built for reliable, safe power delivery. You’re not cobbling together proprietary charging solutions or worrying about compatibility nightmares down the road.
If you’re feeling stuck on the calculations, head over to our solar charging calculator tool, it takes the guesswork out of sizing your system. And don’t underestimate the value of learning from others who’ve already done this. Our community forums are full of real-world setups, troubleshooting advice, and creative solutions I never would have thought of myself.
Solar ebike charging isn’t just about cutting your carbon footprint or saving money on electricity. It’s about the freedom to ride anywhere and know you can recharge using nothing but sunshine. That’s worth the effort of getting your setup right from the start.
How useful was this post?
Click on a star to rate it!
Average rating 0 / 5. Vote count: 0
No votes so far! Be the first to rate this post.
We are sorry that this post was not useful for you!
Let us improve this post!
Tell us how we can improve this post?
charlesnoble
Here at Spheral Solar, I’m a hands-on solar power enthusiast, constantly exploring and experimenting with DIY solutions. I’m dedicated to sharing my discoveries, insights, and even the bumps I hit along the way, all in the pursuit of a more sustainable future.
How I Built a 48V Ebike Solar Charger That Works Anywhere by Charlesnoble January 14, 2026 Calculate your ebike’s battery capacity in watt-hours by multiplying 48 volts by your amp-hour rating—this determines the minimum solar panel wattage you’ll need. A standard 48V 14Ah ebike battery holds 672Wh, requiring at least a 200-watt solar panel for a full day’s charge in optimal sunlight conditions. Match your solar…
How to Charge an Electric Bike With Solar Power by Charlesnoble November 26, 2023 The most straightforward way to charge an electric bike with solar power is by using portable solar chargers, including solar panels, an inverter, charge controllers, and cables to connect everything to the e-bike battery. You can also build a custom solar charging system by wiring the solar panel directly to…
DIY Solar Generator – Complete Guide With Diagrams by Paul July 17, 2021 Building a weatherproof DIY solar generator involves mounting and wiring a battery, charge controller, inverter, trickle charger, and fusing inside a weatherproof case. Then all the relevant input and output sockets are wired and mounted on the outside of the case where they are easily accessible. What Exactly Are Solar…
How UMN Students Built a Solar Car That Changed Everything by Charlesnoble May 8, 2026 The University of Minnesota Solar Vehicle Project represents one of collegiate engineering’s most ambitious renewable energy challenges, where student teams design, build, and race solar-powered cars across thousands of miles. Since 1990, UMN’s solar racing team has competed in events like the American Solar Challenge and Formula Sun Grand Prix,…
How Orlando Airport’s Solar EV Charging Could… by Charlesnoble April 30, 2026 Picture this: You’ve just landed at Orlando International Airport after a long flight, your electric vehicle waiting in long-term parking with a battery that’s somehow fuller than when you left it. Sound like science fiction? It’s happening right now at MCO, where solar-powered EV charging stations are transforming how travelers…
How Does a Solar-Powered Drip Irrigation System Work by Paul September 13, 2021 Heads up: some links here are affiliate links, and purchases through them support the site. As an Amazon Associate I earn from qualifying purchases. Solar-powered drip irrigation can be installed in most gardens using a small solar system, readily available irrigation materials, and minimal tools. If you already have a…
Subscribe for handpicked DIY projects, exclusive tips, and giveaways.
Nine times out of ten, an RV generator that won’t start has a stale fuel problem. If your generator hasn’t run in more than 30 days, degraded gasoline is likely gumming up the carburetor and preventing ignition. Before you panic or call for expensive roadside service, try this: turn on the generator’s fuel valve (if… Read more: RV Generator Troubleshooting: Common Problems and How to Fix Them
A 5kW solar system occupies between 250 and 350 square feet of roof or ground space and produces roughly 20 to 25 kilowatt-hours of electricity per day in most U.S. locations. That’s enough to power a typical three-bedroom home with moderate energy use, though your exact needs depend on your daily consumption patterns, climate zone,… Read more: How to Size a 5kW Solar System for Your Home or RV
Installing a home solar system yourself takes 2-4 weekends for an average 5kW setup, requires solid electrical knowledge and comfort working at heights, and can save you $5,000-$8,000 in labor costs if you tackle everything except the final utility interconnection. The process breaks down into five main phases: permitting and design, mounting the racking system,… Read more: Solar Power Installation Step by Step: Complete DIY Guide From Start to Finish