How I Built a Zero Energy Home Without Breaking the Bank
Updated:
**Imagine slashing your electricity bill to zero—permanently.** A zero energy home produces as much renewable energy as it consumes over the course of a year, transforming your house from an energy drain into a self-sustaining powerhouse. It’s not science fiction or reserved for millionaires; thousands of homeowners are already living this reality, and solar energy is the cornerstone that makes it possible.
The secret isn’t just slapping panels on your roof and hoping for the best. True zero energy starts with ruthless efficiency—sealing air leaks, upgrading insulation, and replacing energy-hogging appliances—before generating a single watt. This “efficiency first” approach can cut your energy needs by 30-50%, meaning you’ll need fewer solar panels and spend significantly less upfront.
Here’s what I’ve learned after years of helping DIYers navigate this journey: reaching net-zero is absolutely achievable for most homes, but it requires understanding your baseline consumption, right-sizing your solar array to match your actual needs (not guesswork), and leveraging incentives that can cut costs by 30% or more. Whether you’re planning a DIY installation to maximize savings or working with professionals, the roadmap is clearer than ever.
In this guide, we’ll walk through exactly how solar enables zero energy living, what it realistically costs and takes to get there, and the practical steps you can start taking today—even if you’ve never touched a solar panel before.
What Actually Makes a Home ‘Zero Energy’?
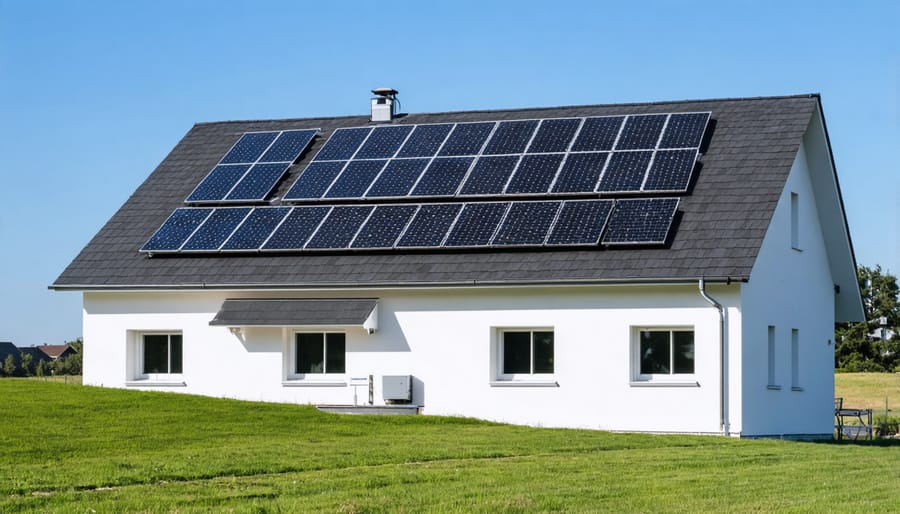
A well-designed zero energy home combines energy-efficient construction with properly sized solar arrays to achieve net-zero status.
The Net-Zero Energy Balance Explained Simply
Think of your home’s energy use like a bank account. A net-zero energy home means that over the course of a year, the energy deposits you make (solar production) equal or exceed the energy withdrawals you take (electricity use). You’re essentially breaking even with the grid.
Here’s how it works in practice: Let’s say your home uses 30 kilowatt-hours (kWh) of electricity per day on average—that’s about 900 kWh monthly or roughly 11,000 kWh annually. To achieve net-zero, your solar system needs to produce that same 11,000 kWh over the year. Understanding how solar produces electricity helps you see how this balance becomes possible.
The beauty of this approach is seasonal balancing. During summer, your panels might produce 40 kWh daily while you only use 25 kWh—those extra 15 kWh get credited to your account through net metering. Come winter, when production drops to 20 kWh but you’re using 35 kWh, you draw from those banked credits.
I learned this firsthand when tracking my own system. Some months I had a $12 electric bill, others showed a $40 credit. But when December rolled around, my annual statement showed I’d produced 102% of what I consumed. That 2% cushion? That’s the sweet spot you’re aiming for—true energy independence with a small buffer for peace of mind.
Zero Energy vs. Off-Grid: What’s the Difference?
Here’s a question I get all the time: “Aren’t zero energy homes the same as off-grid homes?” Not quite! Let me clear up this common confusion.
An **off-grid home** is completely disconnected from the utility grid. You’re on your own—if your solar panels aren’t producing enough power (say, during a cloudy week), you’ll need batteries or a backup generator to keep the lights on. It’s independence, but it comes with significant battery costs and complexity.
A **zero energy home**, on the other hand, stays connected to the grid through something called **net metering**. Here’s how it works: during sunny days, your solar system produces excess electricity that flows back to the grid, spinning your meter backward and earning you credits. At night or during winter, you draw power from the grid, using those credits. Over a full year, your production equals your consumption—hence “net zero.”
For most homeowners, zero energy is the smarter choice. You get the environmental benefits and energy savings without the expense of massive battery banks. The grid essentially acts as your battery, and that’s pretty brilliant if you ask me. Plus, net metering policies in many areas make this financially viable right now.
The Two-Sided Strategy: Reducing First, Then Producing
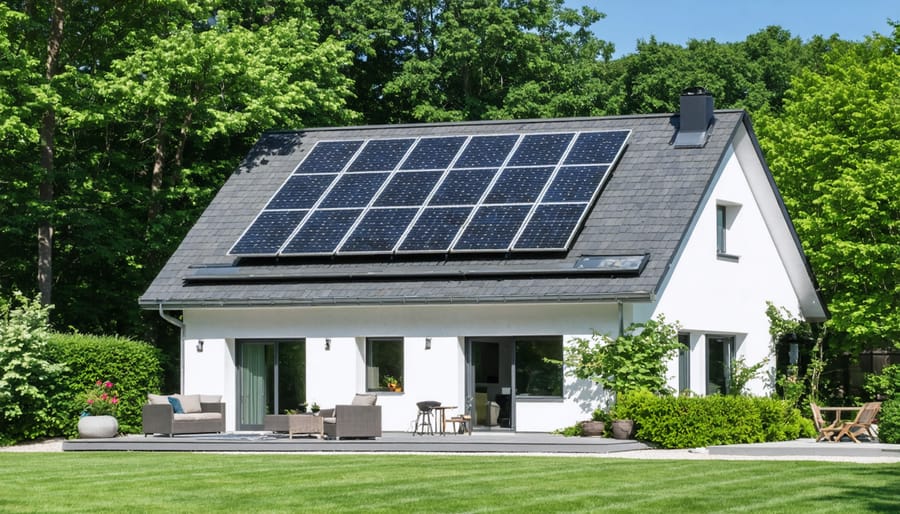
Proper insulation and air sealing are foundational efficiency upgrades that reduce energy needs before adding solar panels.
Efficiency Upgrades That Actually Move the Needle
Before you add a single solar panel to your roof, let’s talk about the unglamorous stuff that actually makes the biggest difference in reaching zero energy. I learned this the hard way when I enthusiastically installed my first panels, only to watch them work overtime compensating for my drafty windows and poorly insulated attic.
Here’s what really moves the needle, ranked by bang-for-your-buck:
**Air Sealing: The Hidden Champion** ($200-$500 DIY, $1,000-$2,000 professional)
This is your absolute starting point. Every crack, gap, and opening in your home’s envelope is literally leaking money. I spent a Saturday with caulk and weatherstripping around windows, doors, and electrical outlets, and my heating bill dropped 15% that first month. Grab a pack of incense sticks on a windy day and watch where the smoke dances—that’s where you’re bleeding energy. The beauty? This is pure DIY territory with immediate returns.
**Insulation Upgrades** ($1,500-$3,000 for attic DIY, $3,000-$7,000 for whole-house professional)
Your attic should have at least R-38 insulation in most climates. Mine had R-19 when I moved in—basically a thermal sieve. Adding blown-in insulation is surprisingly doable as a DIY project with rented equipment, though working in 120°F attic spaces in summer tests your commitment to sustainability.
**LED Lighting** ($100-$300 for whole house)
The easiest win. Period. Switching out every bulb reduces lighting energy by 75-85%. Do this today, not tomorrow.
**Smart Thermostats** ($150-$250 installed)
These programmable units optimize heating and cooling schedules, typically saving 10-15% on HVAC costs. The learning curve is minimal, and installation takes about 30 minutes.
**Efficient Appliances** (varies widely)
When your old fridge dies, replace it with an Energy Star model. Don’t rush to replace working appliances just for efficiency—the embodied energy in manufacturing often outweighs savings.
Together, these improvements can reduce your energy consumption by 30-50% before solar even enters the conversation, meaning fewer panels needed to reach zero.
Calculating Your Reduced Energy Baseline
Before you can design a zero energy home, you need to understand where your energy dollars are actually going. Think of this as creating your home’s energy “footprint”—and trust me, when I first did this with Charles years ago, the results were eye-opening!
Start by gathering your utility bills from the past 12 months. Look for your monthly kilowatt-hour (kWh) usage—this number tells you exactly how much electricity you’re consuming. Add them up to get your annual baseline. Most households use between 10,000-12,000 kWh yearly, but yours might differ significantly based on climate, home size, and lifestyle.
Next, identify your energy hogs. Your HVAC system typically accounts for 40-50% of consumption, followed by water heating (15-20%), and appliances (10-15%). Walk through your home and note the age and efficiency ratings of major systems. That 20-year-old refrigerator? It’s probably using triple the energy of a modern Energy Star model.
Now here’s where it gets practical: use Spheral Solar’s interactive energy calculator to project your post-efficiency consumption. Input your current usage, then adjust for planned upgrades like LED lighting, better insulation, or a heat pump water heater. The calculator shows realistic reduction percentages—often 30-50% before installing a single solar panel.
This reduced number becomes your actual solar system target, making zero energy much more achievable and affordable than you’d expect.
Sizing Your Solar System for Zero Energy
Understanding Your Solar Production Potential
Before you can design a system that gets you to zero energy, you need to understand what your property can realistically produce. I learned this the hard way during my first solar project—I was so excited about the technology that I jumped straight into panel selection without properly assessing my actual solar potential. Don’t make the same mistake!
**Understanding Peak Sun Hours**
Your location receives what we call “peak sun hours,” which isn’t the same as daylight hours. A peak sun hour represents one hour of sunlight at 1000 watts per square meter. Most of the U.S. receives between 3-7 peak sun hours daily, depending on location and season. Southern states like Arizona might see 6-7 hours year-round, while northern regions like Washington might average 3-4 hours, with significant seasonal swings.
**Seasonal Reality Check**
Here’s something that surprised me: your winter production might be only 30-50% of your summer output. This matters enormously for zero energy goals. In December, my system in Colorado produces roughly half of what it generates in June. This means you’ll either need to oversize your array to meet winter demands or accept seasonal grid dependence with annual net-zero as your target.
**Shading Is Your Enemy**
Even partial shading from trees, chimneys, or neighboring buildings can dramatically reduce output. A single shaded panel can affect an entire string’s performance. Walk your property at different times throughout the day and across seasons to identify shade patterns.
**Free Assessment Tools**
Google’s Project Sunroof and PVWatts are excellent starting points for estimating your solar potential. Spheral Solar also offers calculators that help you understand production expectations based on your specific location and roof characteristics. These tools consider your local weather patterns, typical cloud cover, and seasonal variations to give you realistic production estimates.
DIY System Sizing vs. Professional Assessment
When I first started planning my zero energy system, I spent hours with online calculators and spreadsheets—and honestly, that DIY approach worked great for the initial exploration phase. Free tools like PVWatts and basic load calculators gave me ballpark figures that helped me understand if zero energy was even realistic for my home.
For straightforward situations—standard roof angles, minimal shading, and typical consumption patterns—DIY sizing can absolutely get you 90% of the way there. I used my utility bills from the past year, plugged numbers into a simple solar calculator, and had a solid starting point within an afternoon.
However, I learned that professional assessment becomes invaluable in specific scenarios. If you have significant shading issues, complex roof geometry, or plan to add major loads like an EV or heat pump, spending $200-500 on a professional energy audit pays dividends. A certified assessor spotted inefficiencies in my attic insulation that would have undermined my entire zero energy goal—something my spreadsheets couldn’t catch.
My advice? Start with DIY tools to build your knowledge and rough budget. If your situation feels complicated or the investment exceeds $20,000, bring in a pro to validate your assumptions before purchasing equipment.
The DIY Solar Installation Path (And When to Call a Pro)
Many homeowners successfully handle portions of solar installation themselves, particularly mounting and racking assembly with proper safety equipment.
Components You’ll Need for a Grid-Tied Zero Energy System
Building a grid-tied zero energy system requires several key components working together seamlessly. Let me walk you through what you’ll actually need, based on conversations I’ve had with countless DIYers who’ve successfully made the leap.
**Solar Panels** are your primary power generators. You’ll want panels rated between 300-400 watts each for residential systems. I always tell folks: don’t automatically grab the cheapest option. Mid-tier panels from reputable manufacturers offer the sweet spot between performance and budget, typically lasting 25+ years with minimal degradation. Premium panels might squeeze out an extra 2-3% efficiency, but for most homes, that doesn’t justify doubling your cost.
**Inverters** convert your DC solar power into usable AC electricity. You’ve got two main choices here: string inverters (one unit for your whole array) or microinverters (one per panel). String inverters cost less upfront, but microinverters give you better performance if you’ve got shading issues and make solar panel maintenance easier since panels operate independently.
**Mounting systems** secure everything to your roof. Rail-based systems are DIY-friendly and widely available. Budget roughly $0.30-0.50 per watt of capacity for quality racking. Cheap mounts might save you $200 today but could cost thousands if they fail during a windstorm.
**Monitoring equipment** tracks your production and consumption in real-time. Many modern inverters include this functionality, but standalone energy monitors give you granular data about which appliances consume the most power. This information becomes invaluable for optimizing your zero energy goal.
**Electrical components** round out your system: disconnects, junction boxes, rapid shutdown equipment (required by code), and proper gauge wiring. These aren’t glamorous, but cutting corners here creates safety hazards and code violations.
My advice? Invest in quality inverters and monitoring systems since they’re harder to upgrade later, while you can always add more panels as your budget allows.
Navigating Permits, Inspections, and Interconnection
The paperwork side of going solar can feel overwhelming, but I promise it’s more manageable than you’d think! When I installed my first system, I was intimidated by permits and inspections—but breaking it down into steps made everything click.
Start by contacting your local building department early. Most jurisdictions require electrical and structural permits for solar installations. Requirements vary significantly by location, so check your city or county’s specific guidelines. Many areas now offer expedited solar permitting, sometimes even same-day approvals for standard residential systems.
Your utility company is your next stop. You’ll need an interconnection agreement that allows your system to connect to the grid. This document outlines how excess energy gets credited to your account and ensures safety protocols are met. Submit your application early—some utilities process these within weeks, while others take months.
Here’s a time-saver I learned the hard way: gather all your documentation upfront. You’ll typically need site plans, electrical diagrams, equipment specifications, and proof of insurance. Having everything ready prevents frustrating back-and-forth delays.
Inspections happen at key milestones—usually after installation but before energizing your system. Inspectors verify proper mounting, correct wiring, and code compliance. For complex setups requiring professional electrical integration, your electrician can coordinate these inspections.
Pro tip: Join local solar Facebook groups or forums. Community members often share inspector preferences, common pitfall warnings, and municipality-specific quirks that aren’t in official documentation. This collective knowledge can save you considerable headaches and keep your zero-energy dream on track!
Making the Numbers Work: Costs, Incentives, and ROI
Federal Tax Credits and State Incentives You Can Actually Use
Let’s talk about the money you can get back for building your zero energy home—because these incentives are substantial and surprisingly straightforward to claim.
The federal solar Investment Tax Credit (ITC) remains the heavyweight champion of solar incentives. As of 2024, you can claim 30% of your entire solar system cost as a credit on your federal taxes. This isn’t a deduction—it’s a dollar-for-dollar reduction of what you owe. If your system costs $20,000, you’re looking at $6,000 back. The credit covers panels, inverters, batteries, and even installation labor if you hire help.
Here’s something I learned the hard way: the ITC applies to the year you complete installation, not when you purchase equipment. When I staged my solar project across two years, I had to wait until everything was operational to claim the full credit. Plan accordingly.
**How to actually claim it:** You’ll use IRS Form 5695 when filing your taxes. Keep all receipts, invoices, and interconnection documents. If you don’t owe enough taxes in one year to use the full credit, you can roll it forward to future years—no expiration.
Beyond federal credits, many states offer additional incentives. Database resources like DSIRE (Database of State Incentives for Renewables & Efficiency) provide updated, location-specific programs. Some states offer:
– Property tax exemptions (your home value increases, but your taxes don’t)
– Sales tax exemptions on equipment
– State-level tax credits stacking with federal
– Performance-based incentives paying you per kilowatt-hour generated
**Pro tip:** Apply for incentives before purchasing. Some programs have limited funding and operate first-come, first-served. Also, net metering policies—where utilities credit you for excess generation—vary dramatically by state and dramatically affect your payback timeline.
When Does Zero Energy Actually Pay Off?
Payback periods for zero energy homes typically range from 8-15 years, depending on several key factors. Your local electricity rates make a huge difference—higher rates mean faster payback. Available incentives, like the federal solar tax credit, can shave years off your timeline. System size, installation costs, and your home’s energy efficiency baseline all play crucial roles too.
Charles shares his experience: “Before installing our solar system, we averaged $180 monthly electric bills. Now? We pay the $12 grid connection fee, and that’s it. Over a year, we’re saving over $2,000.” With installation costs around $18,000 after incentives, he’s looking at a 9-year payback period.
But here’s what the numbers don’t capture: energy independence during outages, insulation from rising utility rates, increased home value, and the satisfaction of powering your life with sunshine. These financial benefits of solar extend far beyond simple ROI calculations.
The calculation speeds up when you tackle efficiency upgrades first—better insulation and efficient appliances mean smaller, less expensive solar arrays that still achieve zero energy status.
Living in a Zero Energy Home: What Actually Changes
When I first flipped the switch in my net-zero home, I half-expected fireworks or some dramatic moment. Instead, what I got was… normal life. Except now I found myself obsessively checking my energy monitor like it was social media.
Here’s what actually changed: I became weirdly competitive with my own house. During summer months, watching my solar panels generate 45-50 kWh on sunny days while we consumed maybe 25 kWh felt like winning. I’d literally do a victory lap through the kitchen. Winter was humbling, though—those short December days reminded me why battery storage and grid connection matter.
The daily rhythm shifted in subtle ways. I started running the dishwasher and doing laundry mid-day when the sun was cranking. Not because I had to, but because it felt satisfying to see real-time consumption met entirely by production. My kids now check the weather not just for outdoor plans, but to predict our solar generation. “Dad, tomorrow’s sunny—can we run the pool pump extra?”
The unexpected benefits caught me off guard. Our home stays remarkably comfortable year-round thanks to the insulation and air sealing we prioritized. We’re insulated from utility rate hikes—and trust me, watching neighbors complain about 15% increases while your bill stays flat feels pretty good. There’s also this quiet pride knowing our home produces clean energy daily.
Seasonal adjustments became part of the routine. Spring and fall are our “banking” months where we overproduce significantly. Summer requires more strategic thinking with AC loads. Winter means accepting some grid draw, especially during those gray weeks.
The monitoring system became my unexpected hobby. Tracking production patterns, identifying phantom loads, optimizing consumption timing—it’s like having a puzzle that never quite finishes. But honestly? After the first year, it just becomes life. A really comfortable, affordable, guilt-free life.
Living in a zero energy home provides not only financial savings but also the satisfaction of energy independence and reduced environmental impact.
I’ll be honest with you—when I first started down the zero energy path, I thought it would be a quick weekend project. Flash forward a few years, and I’m still tweaking, learning, and discovering better ways to optimize my home’s energy balance. And you know what? That’s exactly how it should be.
Zero energy isn’t a finish line you cross once and forget about. It’s an ongoing journey of small improvements, smart decisions, and continuous learning. The beauty is that every step you take—whether it’s adding insulation, installing your first solar panel, or simply understanding your energy usage—moves you closer to true energy independence.
So where do you start? Right here, right now. Begin by calculating your home’s current energy consumption using our interactive tools. Then tackle the low-hanging fruit: seal those air leaks, upgrade to LED bulbs, and audit your major appliances. From there, you can explore solar sizing options that match your budget and goals.
Remember, you’re not alone in this journey. The Spheral Solar community is filled with folks just like you—homeowners who’ve made mistakes, celebrated victories, and learned countless lessons along the way. Share your progress, ask questions, and learn from others who’ve walked this path before you.
Your zero energy future starts with a single intentional step. What will yours be today?
How useful was this post?
Click on a star to rate it!
Average rating 0 / 5. Vote count: 0
No votes so far! Be the first to rate this post.
We are sorry that this post was not useful for you!
Let us improve this post!
Tell us how we can improve this post?
charlesnoble
Here at Spheral Solar, I’m a hands-on solar power enthusiast, constantly exploring and experimenting with DIY solutions. I’m dedicated to sharing my discoveries, insights, and even the bumps I hit along the way, all in the pursuit of a more sustainable future.
Your Dream Home Can Run on Pure Sunshine (Here’s How) by Charlesnoble October 12, 2025 Transform your home into a self-sustaining powerhouse that produces as much energy as it consumes. Zero-energy homes represent the pinnacle of sustainable living, combining advanced architectural design with cutting-edge renewable technology to eliminate utility bills while maximizing comfort. Through strategic implementation of benefits of solar energy, superior insulation, and smart…
Six Energy Sources That Work With Your Solar Panels… by Charlesnoble December 16, 2025 Harness the sun’s energy streaming onto your roof right now—solar panels convert sunlight into electricity that powers your home while slashing monthly utility bills. Capture moving air with residential wind turbines mounted on your property, generating supplemental power during breezy days and nights when solar production drops. Tap into the…
Why Florida Homeowners Are Going Solar (And How You Can Too) by Charlesnoble March 6, 2026 Calculate your home’s solar potential by checking your annual electricity bills and measuring your available south-facing roof space—Florida homes typically need 20-30 panels to offset 100% of energy usage. Contact your utility provider to understand net metering policies, as companies like Duke Energy, FPL, and Tampa Electric have different buyback…
Why Your Rooftop Solar Installation Needs… by Charlesnoble January 28, 2026 Seal every penetration point where your solar mounting hardware breaks through the deck surface with marine-grade polyurethane caulk rated for continuous UV exposure and thermal cycling. I learned this the hard way after my first DIY installation when I assumed standard silicone would suffice—three months later, I discovered water pooling…
How Sunlight Becomes Electricity in Your Home (The… by Charlesnoble November 3, 2025 Understand the photovoltaic effect—when sunlight hits solar panels, photons knock electrons loose from silicon atoms, creating an electrical current through a principle Einstein won a Nobel Prize for discovering. Your solar panels generate direct current (DC) electricity, which then flows to an inverter that converts it into alternating current (AC)…
Why Commercial Rooftop Solar Isn’t Just for Experts… by Charlesnoble January 2, 2026 Calculate your building’s solar potential by measuring the usable roof area—subtract space for HVAC units, vents, and required maintenance walkways, then multiply by 15 watts per square foot for a quick capacity estimate. Most commercial roofs between 5,000 and 50,000 square feet can support systems ranging from 30kW to 400kW,…
Subscribe for handpicked DIY projects, exclusive tips, and giveaways.
Understand that 6000 volts sounds terrifying but delivers surprisingly low amperage—typically around 120 milliamps for just 3/10,000th of a second per pulse. This combination creates an unforgettable shock that trains animals to avoid the fence without causing lasting harm. The voltage pushes current through thick fur and hide, while the minimal amperage and microsecond duration… Read more: Why 6000 Volts Won’t Kill Your Livestock (But Will Stop Predators Cold)
Check the maximum voltage and current ratings first—these determine whether your controller can actually handle your solar panel array without frying itself on the first sunny day. I learned this the hard way when my first DIY system shut down every afternoon because I’d paired 600 watts of panels with a controller rated for only… Read more: Why Your Solar Setup Needs Both a Charge Controller and Inverter (And How to Pick the Right Ones)
Grab a 9-volt solar panel from your local electronics supplier and test it with a multimeter in direct sunlight—if it produces 9-12 volts under load, you’ve got a working unit ready for small-scale projects. These compact panels excel at trickle-charging rechargeable 9V batteries, powering LED lighting systems for camping, or running low-draw electronics like portable… Read more: Why 9 Volt Solar Panels Are Perfect for Your First Portable Power Setup


")
")
")
")
")
")
")
")
")
")
")
")


