Why Your DIY Solar Trench Could Cave In (And How to Prevent It)
Updated:
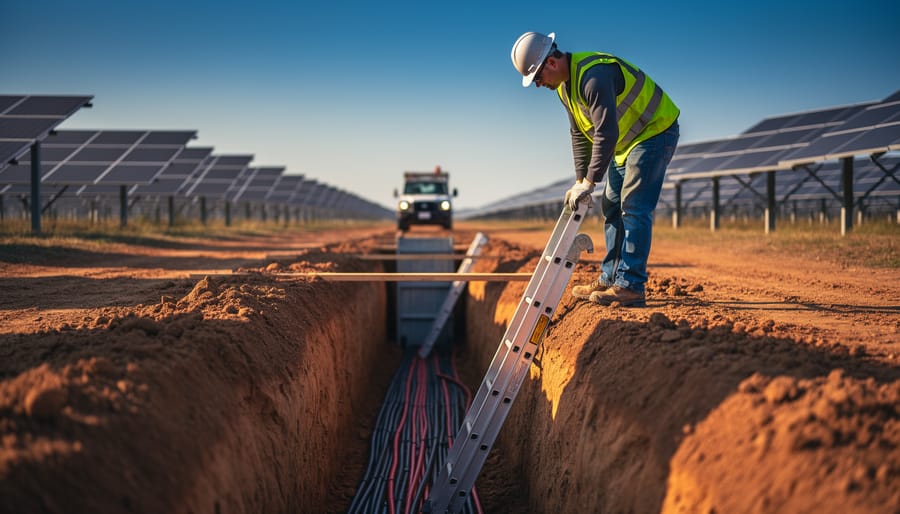
Dig a trench deeper than four feet for your ground-mounted solar array, and you’re entering territory where the walls can collapse without warning—burying you in seconds under thousands of pounds of soil. I learned this the hard way when planning my first major DIY solar project: what seemed like simple ditch-digging for conduit runs turned into a crash course in OSHA regulations and life-saving protective systems.
Most DIY solar enthusiasts don’t realize that trenches deeper than five feet legally require protective systems, and even shallower trenches can be deadly depending on soil conditions. The statistics are sobering—trench collapses kill workers faster than you can call for help, and unlike other solar installation safety concerns that give you a fighting chance, being trapped in a trench collapse offers almost none.
Here’s the reality: you have three primary protection options when digging trenches for your solar installation. Sloping or benching the trench walls back to a safe angle costs nothing but space and extra digging. Shoring systems use supports to hold trench walls in place, while trench boxes create a protected workspace you can move along as you work. Each method has specific applications, costs, and limitations that dramatically affect your project’s feasibility.
This guide translates commercial trench safety requirements into practical DIY terms. You’ll learn how to assess your soil type using simple field tests, determine which protection method matches your project scope and budget, and recognize when calling professionals isn’t just smart—it’s the only safe choice. We’ll walk through rental equipment options, cost breakdowns, and decision frameworks that help ambitious DIYers complete underground solar installations without gambling with their lives.
When DIY Solar Projects Require Trenching
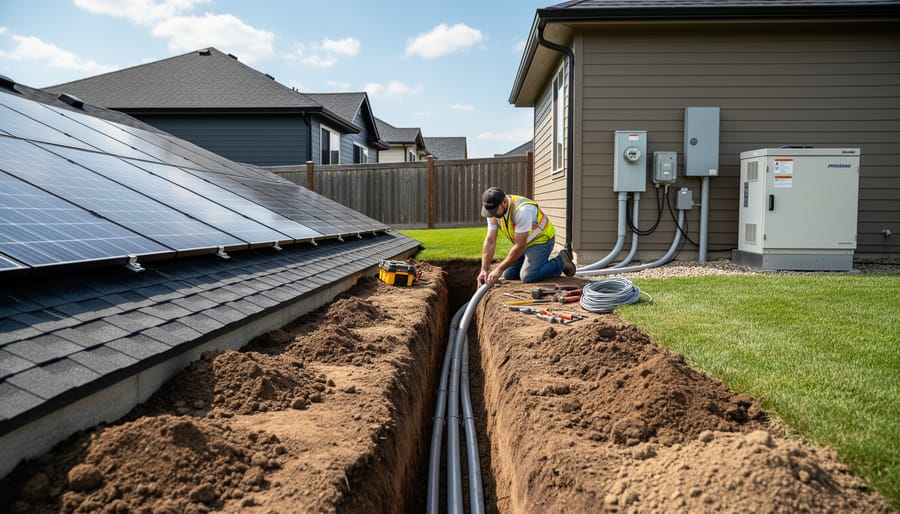
Residential solar installations often require trenching to run conduit from roof-mounted panels to battery systems or ground-mounted arrays to the home.
Understanding Trench Depth and Your Legal Obligations
Here’s something I learned the hard way while digging trenches for my first ground-mounted solar array: depth matters more than you might think. I was about three feet down when a neighbor who works in construction stopped by and asked if I knew about the five-foot rule. I didn’t.
According to OSHA (the Occupational Safety and Health Administration), any trench that’s five feet deep or more requires protective systems. That’s the magic number where the risk of cave-ins becomes serious enough to mandate protection. If your trench is between five and twenty feet deep, you need either shoring, shielding, or sloping to keep workers safe.
Now, you might be thinking, “But I’m just a DIYer working on my own property, not a professional crew.” I get it. However, these regulations exist because soil is heavy and unpredictable. A cubic yard of soil weighs about a ton, and when it collapses, it can trap or crush someone in seconds. While OSHA technically regulates workplaces and employers, the physics of trench collapse doesn’t care whether you’re a professional or a weekend warrior.
Even if you’re working on trenches under five feet, conditions like unstable soil, water accumulation, or vibrations from nearby traffic can make shallower trenches dangerous too. The takeaway? Don’t assume safety rules only apply to commercial jobs. Your wellbeing matters just as much as any professional installer’s.
The Real Dangers Hiding in Your Solar Trench
What Makes Trenches Collapse (It’s Not What You Think)
Here’s what really causes trenches to fail—and it might surprise you. When I dug my first trench for a ground-mounted solar array, I thought solid-looking dirt meant safe dirt. I was wrong, and learning why probably saved me from a serious accident.
Let’s start with soil types, because not all dirt is created equal. You’ve got four basic categories: Type A is the stable stuff (hard clay, cemented soils), Type B is your medium-strength soil (angular gravel, silty soils), Type C is the sketchy material (sand, soft clay, previously disturbed soil), and there’s also Type D which is basically unstable muck. Most backyards contain Type B or C soil, meaning they need protection at shallow depths. That Instagram-worthy hard-packed dirt? It’s probably Type C once you disturb it.
Water changes everything. Even if you’re digging during dry weather, underground water tables can saturate soil from below, turning stable ground into a collapsing hazard. I learned this the hard way when my “dry” trench started showing moisture two feet down. Water adds massive weight to soil and destroys whatever cohesion held it together.
Vibration is the silent killer. Your excavator running nearby, traffic on the street, even a heavy generator can send tremors through the ground. These vibrations break the bonds between soil particles, causing sudden collapse without warning.
Weather impacts happen faster than you’d think. Rain obviously softens soil, but even freeze-thaw cycles weaken trench walls. That trench you dug yesterday? Today’s afternoon shower made it significantly more dangerous. This is why professional operations reassess conditions daily, and you should too.
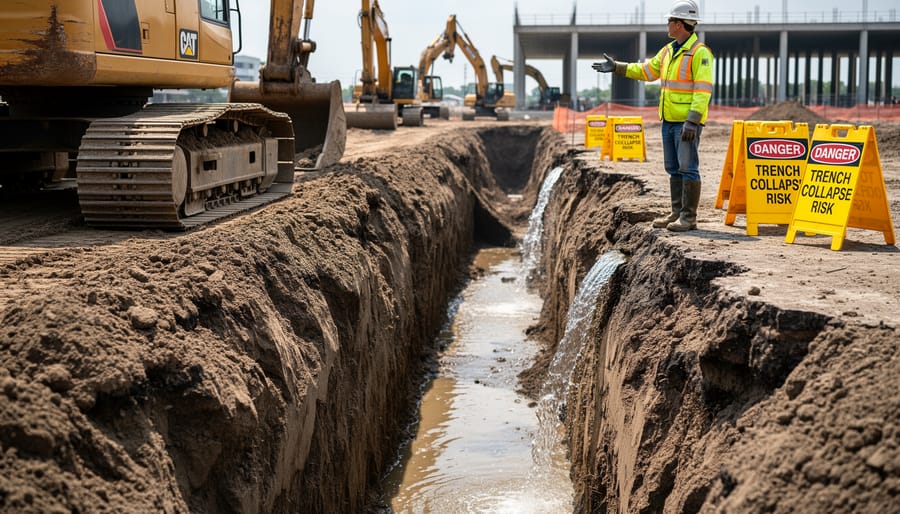
Trench collapses can occur suddenly due to soil type, water saturation, or vibration from nearby equipment, posing serious safety risks.
Three Types of Trench Protective Systems Explained
Sloping and Benching: The Simplest Protection Method
If you’re planning a trench for running conduit to your ground-mounted solar array, sloping and benching might be your simplest option. Here’s the good news: this method doesn’t require any special equipment or complicated setups. You’re essentially cutting the trench walls at an angle that prevents collapse, letting gravity work in your favor.
Think of it like building a sandcastle at the beach. If you dig straight down, the walls cave in. But if you scoop out at an angle, the sand stays put. Same principle applies here, just on a larger scale.
When this method works best really depends on your situation. Sloping shines when you have plenty of space around your trench and relatively stable soil. If you’re running a 50-foot conduit run across an open yard to connect solar panels to your battery bank, you’ve got room to work with. But if you’re squeezing between your house foundation and a fence line, sloping probably won’t fit.
Here’s a practical rule of thumb I learned from Charles, who’s been helping DIYers with solar projects for years: for most residential soil conditions, use a 1.5:1 slope ratio. That means for every foot you dig down, you slope back 1.5 feet horizontally. So a 4-foot-deep trench needs about 6 feet of width at the top.
You can eyeball this pretty easily. Imagine a staircase with really wide, shallow steps. If your slope looks gentler than a typical playground slide, you’re in the ballpark.
Clay soil holds together better and can handle steeper angles, while sandy or gravelly soil needs gentler slopes. If your soil is moist, crumbly, or has been recently disturbed, always err on the gentler side.
The trade-off? You’ll move more dirt. That 4-foot trench might require excavating a space 8 feet wide when you account for sloping both sides. But you’ll sleep better knowing those walls won’t collapse while you’re laying conduit.
Shoring Systems: When You Need Extra Support
When you’re dealing with trenches deeper than four feet or working in less-than-ideal soil conditions, shoring systems become your safety net—literally. Think of shoring as artificial walls that hold back soil, giving you that secure workspace you need to run cables or install conduit for your solar array.
Let me share something from my own experience: I once watched a neighbor attempt a deep trench for his ground-mount system without proper support. The walls started slumping after just an hour. Scary stuff. That’s when I really understood why shoring matters.
There are three main types you’ll encounter. Timber shoring is the old-school approach—wooden planks and cross-braces that create a framework. It’s customizable but labor-intensive, and honestly, unless you’re experienced in carpentry and engineering, it’s tricky to get right. Aluminum shoring uses prefabricated panels that slide into place, creating solid walls quickly. It’s lighter and reusable, which makes it popular for rental. Hydraulic shoring is the modern solution—adjustable metal cylinders that you position and then pump to create pressure against the trench walls. It’s fast, efficient, and doesn’t require the same installation skills as timber.
Here’s my honest take: if you’re considering renting shoring equipment, you need to understand that assembly isn’t always intuitive. Hydraulic systems seem straightforward, but positioning them correctly requires understanding soil mechanics and load distribution. Most rental companies offer basic training, and I strongly recommend taking advantage of it.
The reality check? If your trench is deeper than five feet, the soil is sandy or previously disturbed, or you’re working near existing structures, this moves into professional territory. The equipment rental might cost $100-300 per day, but improper installation puts you at serious risk. Some projects are worth the investment in professional excavation contractors who bring not just equipment but years of experience reading soil conditions and adapting protection systems accordingly.
Consider shoring rental for straightforward projects in stable soil where you’ve had proper training. Everything else deserves a professional consultation.
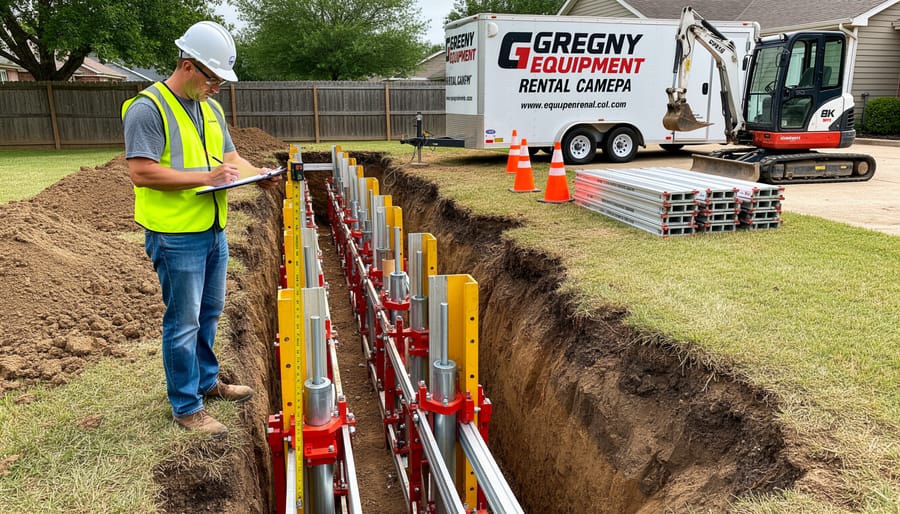
Hydraulic shoring systems provide adjustable support for trench walls, available through equipment rental companies for DIY projects requiring deeper excavation.
Trench Boxes (Shields): The Rental Solution
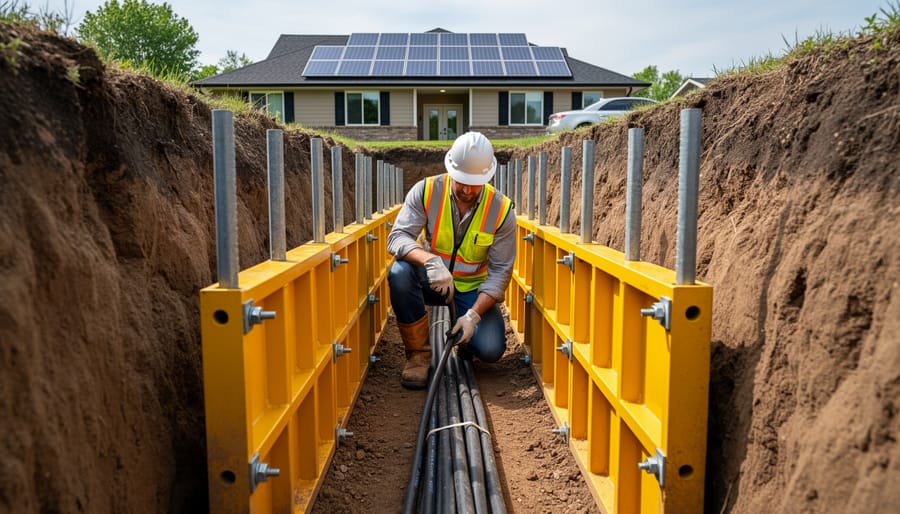
Think of trench boxes as portable fortresses for your trench work. Also called trench shields, these are heavy-duty steel or aluminum structures that slide into your excavation to create a safe working zone. Unlike shoring that pushes outward against the walls, trench boxes simply provide a protected space where you can work without worrying about cave-ins.
Here’s how they work: the box gets lowered into your trench, creating a cage-like barrier between you and the surrounding soil. You do your work inside the protected area, then move the box forward as you progress. The soil outside can shift all it wants, but you’re shielded from danger inside the structure.
For DIY solar installations, renting a trench box makes sense for trenches deeper than 5 feet where you’re running conduit for ground-mounted arrays or connecting battery banks to your home. I learned this the hard way on my second solar project when I hit clay at 6 feet and realized my sloping wasn’t going to cut it in that narrow space.
Rental costs typically run between 200 to 500 dollars per week, depending on the size and your location. Most equipment rental companies stock smaller boxes suitable for residential work. You’ll need machinery to move them since even compact models weigh several hundred pounds, but many rental places include delivery and pickup in the price.
The smart choice? If your trench exceeds 5 feet deep, you’re working in unstable soil, or you need a narrow trench where sloping isn’t practical, renting a trench box transforms a risky situation into a manageable project. Your safety is worth the rental fee.
Trench boxes create a protective shield around workers, offering rental solutions for DIY solar installers working in deeper trenches where collapse risks are highest.
Choosing the Right Protection for Your Solar Installation
Choosing the right protection for your solar trenching project doesn’t have to feel overwhelming. I remember when I first faced this decision on my own property—I stood there with my shovel, looking at the route from my solar array to the house, wondering if I was being overly cautious or not cautious enough. Here’s the framework I wish I’d had back then.
Start with depth. If your trench is staying above 4 feet deep, you’re in safer territory where basic precautions like maintaining proper slope angles might suffice for many soil types. Once you’re going deeper than 5 feet, protective systems become non-negotiable, and honestly, that’s when I’d seriously consider bringing in professionals.
Next, evaluate your soil. Grab a handful after digging down a foot or two. Does it clump together nicely, or does it crumble and slide? Sandy or loose soil demands more protection than stable clay. If you’re seeing any signs of water seepage or the sides start slumping on their own, that’s your soil telling you it needs support.
Consider your available space. Sloping requires significantly more room—you’ll need to excavate much wider than your actual cable or conduit needs. If you’re working in a tight spot between your house and fence line, trench boxes or shields might be your only realistic option, though these typically require equipment rental.
Budget matters too. Sloping costs mainly your time and sweat equity. Aluminum hydraulic shores run several hundred dollars to rent. Trench boxes require both rental fees and equipment to move them, quickly pushing smaller projects toward professional territory.
Here’s my simple decision tree: Shallow trench (under 4 feet) plus stable soil plus plenty of space equals slope it yourself. Deeper than 5 feet or unstable soil or tight spaces equals call for professional assessment. Everything in between requires honest evaluation of your skills, physical capability, and risk tolerance. There’s zero shame in recognizing when a project exceeds your comfort zone—safety always trumps saving money.
Before You Dig: Essential Preparation Steps
Here’s the thing about trenching: the few hours you spend preparing might just be the most important part of your entire project. I learned this the hard way during my first solar trench when I was 20 minutes into digging and realized I had no idea where the water line ran. Not my finest moment.
Let’s start with the absolute non-negotiable: Call 811 at least two to three days before you plan to dig. This free service locates underground utilities like gas, electric, water, and communication lines. Yes, even for your backyard solar project. Those little flags they plant might seem like overkill, but hitting a gas line isn’t something you want to experience firsthand.
Next up is understanding your soil. You don’t need a PhD in geology, but you should know whether you’re dealing with stable clay, sandy soil, or something in between. Grab a shovel and dig a small test hole about two feet deep. Does the soil hold its shape or crumble immediately? This tells you how aggressive your protective measures need to be and connects directly to decisions you’ll make later about shoring or sloping.
Equipment-wise, have your protective gear ready before breaking ground. This includes your trench boxes or shoring materials, a sturdy ladder for entry and exit, and proper personal protective equipment.
Finally, and I can’t stress this enough: never trench alone. Have someone on-site who can help if things go wrong, and establish a rescue plan. Keep a charged phone nearby, and make sure your helper knows basic emergency procedures. This isn’t about being paranoid; it’s about being prepared, especially if you’re also tackling challenging tasks like ground rod installation that might require deeper excavation.
When to Call the Professionals Instead
Let me be straight with you: there’s a line where DIY confidence crosses into dangerous territory, and trenching often sits right on that edge.
If you’re digging deeper than four feet, dealing with loose or sandy soil, working near property lines where existing utilities might lurk, or facing groundwater issues, it’s time to call in the excavation pros. I learned this the hard way on my second solar project when I hit clay that turned to soup after a rainstorm. What seemed like stable walls at 9 AM became a collapse risk by noon.
Here’s the thing about soil: it’s unpredictable. Professional excavators have soil analysis tools and decades of experience reading ground conditions. They also carry liability insurance that covers cave-ins, utility strikes, and property damage. Your homeowner’s policy probably doesn’t cover commercial-scale trenching accidents, and that’s a financial risk worth considering seriously.
The smart compromise many DIYers miss? Hire professionals for the excavation and protective system installation, then handle the electrical conduit work yourself. You’ll avoid the most dangerous DIY solar mistakes while still saving money and learning valuable skills. The excavation crew might even give you tips about proper conduit placement.
Remember, knowing your limits isn’t admitting defeat. It’s recognizing that some jobs require specialized equipment, training, and insurance coverage that simply doesn’t make sense for a one-time home project. Your solar system will work just as well whether you dug the trench yourself or not.
Here’s the truth I’ve learned from years of DIY solar projects: the most successful installations aren’t just the ones that produce the most power—they’re the ones where everyone goes home safe at the end of each day. Trench protective systems might seem like an unnecessary expense when you’re already stretching your budget for panels and inverters, but they’re actually an investment in completing your project the right way.
I remember standing at the edge of my first deep trench, feeling that mix of pride and nervousness. That’s when my neighbor, a retired contractor, asked me one simple question: “Would you let your kid stand in there?” That changed my perspective completely. Proper trench protection isn’t about following rules—it’s about respecting the real dangers that exist underground.
The beautiful thing about the DIY solar community is that we prove every day that ambitious projects are within reach for regular people. But ambitious doesn’t mean reckless. By planning for trench safety from the beginning—whether that means renting shoring equipment, hiring professionals for the deep sections, or redesigning your layout to avoid deep trenches altogether—you’re not compromising your DIY spirit. You’re honoring it by doing things properly. Your solar installation should power your home for decades. Make sure you’re around to enjoy every sunny day of it.
How useful was this post?
Click on a star to rate it!
Average rating 0 / 5. Vote count: 0
No votes so far! Be the first to rate this post.
We are sorry that this post was not useful for you!
Let us improve this post!
Tell us how we can improve this post?
charlesnoble
Here at Spheral Solar, I’m a hands-on solar power enthusiast, constantly exploring and experimenting with DIY solutions. I’m dedicated to sharing my discoveries, insights, and even the bumps I hit along the way, all in the pursuit of a more sustainable future.
Why Your Solar Conduit Installation Could Start a… by Charlesnoble March 27, 2026 Measure your conduit run before purchasing materials by mapping the exact path from your solar array to the inverter and battery location, accounting for a 10% waste factor and additional length for bends. PVC electrical conduit remains the most cost-effective protective solution for DIY solar installations, but improper installation creates…
Why Your 6-Wire Solar Setup Needs the Right Conduit… by Charlesnoble March 6, 2026 Measure your wire gauge and count of six conductors before selecting conduit—most residential solar installations running six AWG 10 wires require 1-inch conduit, while six AWG 6 wires need 1.5-inch conduit, and six AWG 2/0 wires demand 2.5-inch conduit minimum. Calculate fill capacity using the 40% rule for three or…
Don’t Risk Your Life Installing Solar Panels: Fall… by Charlesnoble December 26, 2025 Secure yourself with a personal fall arrest system before stepping onto any roof pitch over 4:12—that’s a harness, lanyard, and proper anchor point rated for 5,000 pounds per worker. Install temporary roof anchors at the ridge line or use permanent mount anchors if you’re planning multiple trips up for maintenance,…
Why Your Solar Ground Rod Might Be Too Short (And… by Charlesnoble January 15, 2026 Drive your 8-foot copper-clad steel grounding rod at least eight feet into the earth, or to the depth where you meet solid bedrock. This isn’t arbitrary—the National Electrical Code requires this specific length because it ensures your solar panels and battery storage system have a reliable path to dissipate dangerous…
Why Your DIY Solar System Needs Proper Grounding… by Charlesnoble January 31, 2026 Ground your solar system before you connect a single wire—improper grounding has destroyed thousands of dollars in equipment and created deadly shock hazards in homes just like yours. I learned this the hard way when a lightning strike fried my neighbor’s ungrounded inverter, teaching me that grounding isn’t optional paperwork…
This Single Mistake Could Destroy Your Entire Solar… by Charlesnoble January 4, 2026 Ground your lightning protection system with at least two 8-foot copper-clad ground rods driven into moist soil and spaced 16 feet apart, then bond them together with 6 AWG bare copper wire. This creates the essential foundation that channels lightning strikes safely into the earth, protecting your solar panels, inverter,…
Subscribe for handpicked DIY projects, exclusive tips, and giveaways.
Match your solar panels to microinverters or power optimizers based on your roof’s shading patterns—even partial shade from a chimney or tree during morning hours means module-level power electronics will recover 15-25% more energy than string inverters lose to the weakest panel. Install power optimizers when you’re working with mixed panel orientations across multiple roof… Read more: Why Smart Solar Modules Could Save Your DIY Array (Before It’s Too Late)
Measure your conduit run before purchasing materials by mapping the exact path from your solar array to the inverter and battery location, accounting for a 10% waste factor and additional length for bends. PVC electrical conduit remains the most cost-effective protective solution for DIY solar installations, but improper installation creates fire hazards, code violations, and… Read more: Why Your Solar Conduit Installation Could Start a Fire (And How to Do It Right)
Walk down to your nearest stream with a five-gallon bucket and a stopwatch. Fill that bucket and time how long it takes—this simple test reveals whether you have enough flowing water to power your off-grid home. If you can fill it in under 10 seconds from a source that drops at least 10 feet in… Read more: The Stream Behind Your House Could Power It (Here’s How Micro Hydro Works)
")
")

")
")
")
")
")

")
")
")

