Your Multimeter Can Tell You Everything About Your Solar AC Power (Here’s How)
Updated:
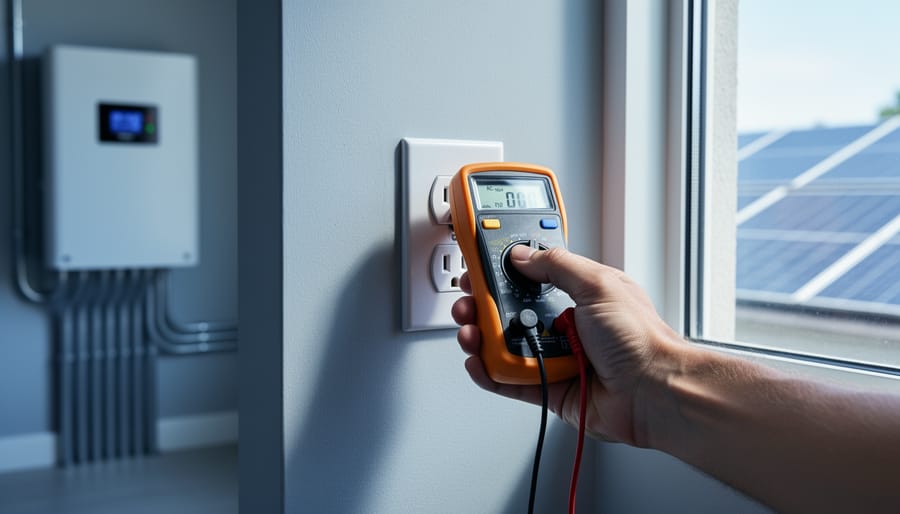
Grab your multimeter and set it to AC voltage mode—typically marked as “V~” or “VAC”—which allows you to measure the alternating current output from your solar inverter, the device that converts your panels’ DC power into usable household electricity. You’ll want to verify that your system is delivering the standard 120 volts (or 240 volts for larger appliances) within an acceptable range of plus or minus 5%, ensuring your solar setup is safely powering your home.
I’ll be honest: the first time I tested AC power on my own solar system, my hands were shaking. I’d already spent months testing solar panels on the DC side, but something about working with AC voltage—the same electricity running through your walls—felt more serious. That nervousness is actually healthy; it keeps you cautious. But here’s what I learned: with the right approach, testing AC power is straightforward and doesn’t require an electrician’s expertise.
Your multimeter is the diagnostic tool that reveals whether your solar inverter is doing its job correctly. Unlike the DC voltage coming directly from your panels, AC power fluctuates in a wave pattern, and your meter reads the effective voltage your appliances actually use. When you test, you’re checking three critical things: voltage level, stability, and safety. A reading that’s too low means your devices won’t run efficiently. Too high, and you risk damaging sensitive electronics. Inconsistent readings often signal inverter problems that need attention before they worsen.
This guide walks you through the entire process, from selecting the right multimeter settings to interpreting what those numbers actually mean for your solar system’s performance—all while keeping you safe.
Why AC Power Quality Makes or Breaks Your Solar System
I learned this lesson the hard way during my first major solar installation. My inverter was technically working—the lights came on, everything seemed fine—but within six months, my laptop charger died, followed by my refrigerator’s compressor. I hadn’t tested the AC power quality coming from my inverter, and it turned out the voltage was fluctuating wildly. Cost me way more in replacements than a simple multimeter test would have.
Here’s the reality: your solar inverter doesn’t just convert DC power to AC—it needs to create clean, stable AC power that matches what your appliances expect. Poor quality AC power shows up as voltage that’s too high or too low, inconsistent frequency, or harmonic distortion. When these issues go unnoticed, they silently damage your equipment.
Your inverter itself suffers first. Most inverters have protection circuits, but constant voltage irregularities stress those components. I’ve seen inverters that should last 10-15 years fail in under five because the owner never monitored their AC output. The warranty claims get denied because “improper maintenance” is cited.
Your appliances take the next hit. Electronics with sensitive power supplies—computers, TVs, modern refrigerators—hate voltage fluctuations. Motors in power tools and HVAC systems overheat when frequency drifts even slightly. LED bulbs flicker and burn out prematurely. These failures happen gradually, so most DIYers never connect the dots back to their solar system.
The financial impact sneaks up on you. A $30 multimeter and fifteen minutes of testing every few months could save thousands in replacement costs. Catching power issues early means you can adjust inverter settings, replace aging components before they fail catastrophically, or identify wiring problems before they cause damage.
Think of AC power quality testing as preventive maintenance for your entire electrical system. Skip it, and you’re gambling with every device plugged into your solar-powered outlets.
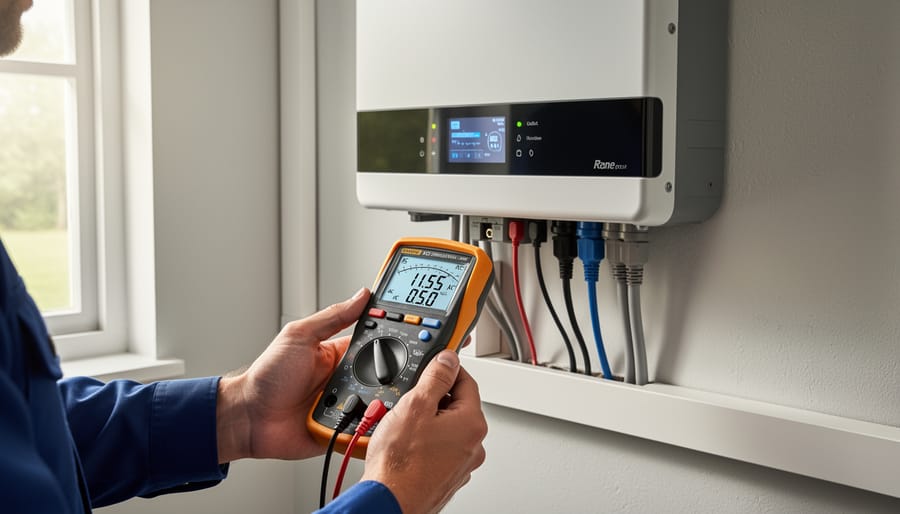
A quality multimeter is essential for monitoring AC power output from your solar inverter and ensuring system health.
What Your Multimeter Actually Needs to Measure
Voltage: The Foundation of Power Quality
Voltage is the electrical pressure that pushes power through your solar system, and checking it properly tells you whether your inverter is doing its job. When I first started testing my own solar setup, I learned that voltage readings are like taking your system’s temperature—they reveal a lot about overall health.
Your multimeter should show readings within specific ranges depending on your location. In North America, expect 110-120V for standard outlets, while most other regions use 220-240V systems. These aren’t rigid numbers, though. A reading between 115-125V (or 230-250V) generally indicates healthy operation.
Here’s what fluctuations tell you: Consistently low voltage suggests your inverter might be struggling under load or experiencing internal issues. If you’re seeing readings below 105V (or 210V), your inverter may need attention. Conversely, voltage spikes above 125V (or 250V) could indicate problems with grid synchronization or inverter regulation.
I remember testing my neighbor’s system last summer and finding voltage swinging wildly between 100V and 130V. Turned out his inverter’s grid-tie function was malfunctioning, causing it to fight against the utility power rather than harmonizing with it. Quick voltage checks like this can catch problems before they damage appliances or reduce your system’s efficiency. Always test at multiple times throughout the day to catch variations you might otherwise miss.
Frequency: Your System’s Heartbeat
Think of frequency as your electrical system’s rhythm—the rate at which AC power alternates direction. In North America, this rhythm beats at 60Hz (60 cycles per second), while most other countries use 50Hz. Your solar inverter needs to match your local grid frequency precisely, or appliances won’t run properly.
Here’s something I learned the hard way: when my first DIY solar setup produced slightly off-frequency power, my microwave hummed strangely and my alarm clock ran fast. Frequency matters because motors, timers, and sensitive electronics are designed for specific rhythms.
Most basic multimeters can’t measure frequency directly—you’ll need a model with a frequency function (look for “Hz” on the dial). If your multimeter has this feature, simply select the Hz setting and touch your probes to hot and neutral, just like measuring voltage. The display should read close to 50 or 60Hz, depending on your location.
Don’t have a frequency-capable multimeter? You can still spot problems. Flickering lights, appliances running too fast or slow, or unusual buzzing sounds often indicate frequency issues with your inverter. If you notice these symptoms, it’s time to check your inverter settings or consult its manual to ensure proper grid synchronization.
Waveform Quality (What You Can and Can’t See)
Here’s something I learned the hard way when I first tested my inverter output: your trusty multimeter can tell you the voltage is right at 120V, but it won’t tell you the whole story about power quality. Let me explain what’s happening behind that simple reading.
Your solar inverter is trying to recreate the smooth, flowing sine wave that comes from the utility grid. Think of it like drawing a perfect hill – the grid makes beautiful, rounded waves. Quality inverters do this pretty well, but some budget models create what’s called a modified sine wave, which looks more like a staircase trying to approximate that hill. Here’s the tricky part: most basic multimeters show the same voltage reading for both.
Why does this matter? Modified sine waves can make sensitive electronics buzz, hum, or run hotter than they should. Your multimeter won’t directly show you waveform quality, but you can look for clues. If devices plugged into your inverter are making unusual noises, running warmer than normal, or LED lights are flickering, these are indirect signs of waveform issues your meter can’t detect.
For true waveform analysis, you’d need an oscilloscope, which is beyond most DIY budgets. The good news? If your voltage readings are stable and your devices run normally without strange sounds or heat, your inverter is probably doing its job just fine.
Choosing the Right Multimeter for Solar AC Testing
Essential Features for Solar DIYers
When I first started testing my solar inverter’s AC output, I quickly learned that not all multimeters are created equal. Here’s what you actually need to reliably test your solar system’s AC power.
First up is True RMS capability. Your inverter creates a modified sine wave or pure sine wave, and a basic multimeter will give you wildly inaccurate readings. True RMS meters measure the actual voltage your appliances experience, not just an estimate. I discovered this the hard way when my cheap meter showed 115V but my refrigerator wasn’t running properly because the real voltage was closer to 108V.
Next, look for an AC voltage range that covers at least 600V. Most home solar systems run at 120V or 240V, but having that extra range gives you safety headroom and lets you test different configurations without switching meters.
Frequency measurement is crucial for solar DIYers. Your inverter should output at 60Hz (or 50Hz depending on your location), and being able to verify this helps diagnose inverter problems before they damage your electronics.
Here’s the non-negotiable feature: CAT ratings. These tell you what electrical environments the meter can safely handle. For home solar work, you want at least a CAT III 600V rating. The “CAT III” means it’s designed for testing permanently installed equipment like your main panel, while “600V” indicates the maximum voltage it can safely measure.
Don’t let the technical terms intimidate you. Think of CAT ratings like safety gear ratings. Just as you wouldn’t use a bicycle helmet for rock climbing, you need the right protection level for electrical work.
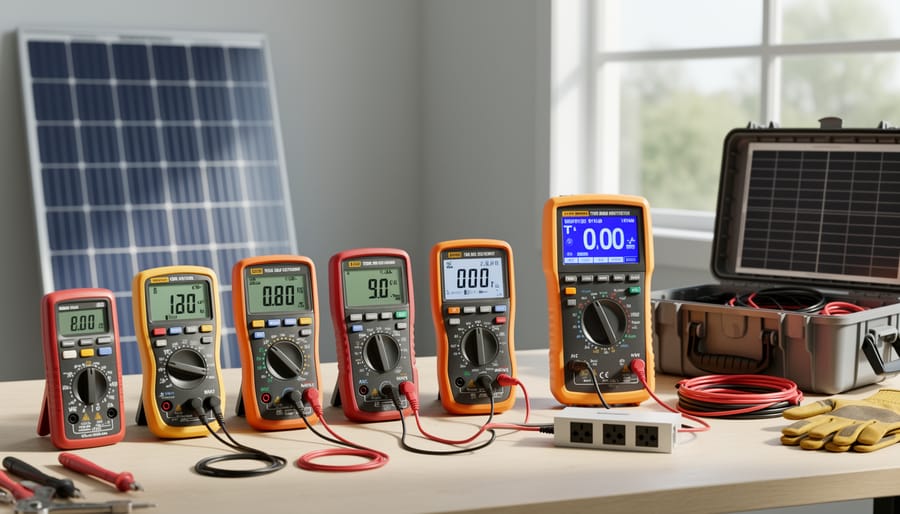
Different multimeter models offer varying features for solar AC testing, from budget-friendly options to advanced True RMS meters.
Charles’s Multimeter Recommendations for Different Budgets
After years of testing solar setups, I’ve developed some honest opinions about multimeters. Here’s what I actually recommend based on what you’ll realistically need.
For entry-level (under $30), the Etekcity MSR-C600 has been my go-to recommendation for beginners. It handles 600V AC, which covers most home solar inverters, and the display is clear enough to read in bright sunlight. The downside? You’ll need to manually switch ranges, which takes practice. But honestly, that teaches you better multimeter habits anyway. I started with something similar, and it worked perfectly fine for basic inverter output checks.
Mid-range ($50-100), the Fluke 115 is what I upgraded to after my second year with solar. It’s auto-ranging, which saves time when you’re juggling test leads and trying to read measurements. The build quality means it’ll survive a few drops off your inverter cabinet. The catch? It doesn’t have all the fancy features, but for AC voltage testing, you genuinely don’t need them.
Advanced (over $150), the Fluke 87V is overkill for most homeowners, but if you’re constantly troubleshooting or working with multiple systems, the true RMS accuracy matters. I borrowed one during a tricky inverter diagnosis, and the precision helped identify a subtle voltage sag issue.
My real advice? Start basic. Most AC power testing needs are straightforward.
Step-by-Step: Testing AC Voltage from Your Solar Inverter
Safety First: Protecting Yourself While Testing Live AC
Before we dive into testing, let’s talk about staying safe—because honestly, AC power deserves serious respect. I learned this the hard way years ago when I got a bit too casual around a live circuit. Nothing catastrophic happened, but that tingle in my fingers was enough to make me rethink my approach entirely.
First things first: always wear insulated gloves rated for electrical work, not just your gardening gloves. Safety glasses are non-negotiable too—you never know when a spark might fly. Make sure you’re standing on a dry surface, preferably on a rubber mat, and remove any jewelry that could accidentally contact live wires.
Before touching anything, turn off your solar system’s AC disconnect switch. Yes, I know you’re eager to test while it’s running, but establishing a safe workspace comes first. Once you’ve confirmed the power is off, you can proceed with careful testing protocols.
Here’s the key: only touch the insulated portions of your multimeter probes, never the metal tips while they’re in contact with live circuits. Keep one hand in your pocket or behind your back when testing—this prevents current from traveling across your chest if something goes wrong.
If you’re ever unsure about what you’re seeing, feel uncomfortable with the setup, or encounter damaged wiring, stop immediately and call a licensed electrician. There’s absolutely no shame in recognizing when a job exceeds your comfort level.
Proper probe placement and safety equipment are critical when testing live AC power from solar systems.
The Actual Testing Process
Alright, here’s where things get real. I remember the first time I tested my inverter’s AC output—hands a little shaky, double-checking everything three times. But once you’ve done it once, it becomes second nature.
Start by setting your multimeter to AC voltage mode. Look for the “V~” symbol or “ACV” on the dial. Most multimeters have multiple voltage ranges, so select one that covers at least 250V to safely measure standard household current. If your multimeter auto-ranges, even better—it’ll adjust automatically.
Now for probe placement. This is crucial: insert the black probe into the COM (common) port and the red probe into the voltage port, usually marked with a “V” symbol. Never use the 10A port for voltage testing—trust me, I’ve seen what happens when someone does that by accident.
With your inverter running and producing power, carefully insert the probes into the AC outlet you’re testing. The black probe goes into the neutral slot (the larger vertical slot on standard outlets), and the red probe into the hot slot (the smaller vertical slot). Keep your fingers behind the probe guards and don’t touch any metal parts.
Watch your display stabilize. For solar inverter systems in North America, you should see readings between 110V and 120V, with 115V being typical. European systems should show 220V to 240V. Anything outside these ranges by more than 5% deserves investigation.
Take several readings over a few minutes to ensure consistency. If your numbers jump around wildly or seem way off, don’t panic—but do power down and recheck your connections before continuing.
Testing Under Load: Why This Changes Everything
Here’s something I learned the hard way during my first solar installation: testing AC power with nothing plugged in is like test-driving a car with no one inside. Sure, the engine runs, but you’re missing half the story.
When your multimeter shows a perfect 120V with no appliances running, that’s what we call a no-load test. It’s useful, but it doesn’t tell you how your solar inverter performs when it’s actually working. Real-world issues like voltage sag, harmonic distortion, and frequency instability often only appear when your system is powering actual devices.
Think of it this way: your inverter might produce clean, stable power when it’s just humming along by itself. But add a few lights, your refrigerator, and maybe a laptop charger, and suddenly you’re asking it to do real work. That’s when weaknesses show up.
I discovered this myself when my inverter tested perfectly in the morning but couldn’t keep my microwave running consistently in the afternoon. The no-load voltage looked great at 122V, but under load it was dropping to 105V, which isn’t enough for many appliances to operate properly.
Testing under load means measuring your AC power while devices are actually drawing current from your system. You’ll want to check voltage stability with different loads, from small (a single LED bulb) to larger combinations (multiple appliances running simultaneously).
For safety, always keep one hand behind your back or in your pocket while testing live circuits. This prevents current from traveling across your chest if you accidentally touch something you shouldn’t. Start by testing with lighter loads and gradually increase to heavier ones, watching for voltage drops or fluctuations on your multimeter.
A healthy solar inverter should maintain voltage within 5% of the nominal value (114-126V for standard 120V circuits) even under significant load. If you’re seeing bigger swings, that’s your real-world data telling you something needs attention before it becomes a bigger problem.
Testing AC power quality under load while appliances are running reveals real-world performance issues that no-load testing might miss.
Reading the Signs: What Your Measurements Actually Mean
When Voltage is Too High or Too Low
When your multimeter shows readings significantly above or below the expected 120V (or 240V, depending on your system), it’s time to investigate. I learned this the hard way when my off-grid cabin’s voltage kept dropping to 105V during cloudy afternoons—turns out my battery bank was undersized for my inverter’s demands.
High voltage, typically above 125V, often points to inverter issues or faulty voltage regulation. For grid-tied systems, this might indicate problems with your utility connection or anti-islanding protection failing. Low voltage readings under 110V usually signal weak batteries in off-grid setups, undersized wiring causing voltage drop, or an inverter struggling under heavy loads.
Here’s what to do immediately: First, disconnect non-essential loads to reduce strain on your system. Check all connections for corrosion or looseness—I’ve fixed countless “mysterious” voltage problems with just a wire brush and wrench. For off-grid systems, test your battery bank’s state of charge; batteries below 50% can cause significant voltage sag. In grid-tied installations, contact your utility if voltage problems persist, as the issue might originate from their side.
Remember, consistent voltage outside the 110-125V range can damage your appliances and indicates your system needs professional attention.
Voltage Drop and What It Tells You
Voltage drop is like water pressure loss in a long garden hose—the farther electricity travels through wires, the more voltage you lose along the way. For your solar setup, excessive voltage drop between your inverter and appliances can signal undersized wiring or loose connections that waste energy and potentially create hazards.
To test for voltage drop, you’ll measure voltage at two points: first at your inverter’s AC output terminals, then at the outlet or appliance you’re powering. I learned this the hard way when Charles mentioned his cabin’s lights were dimming—turned out his wire gauge was too small for the 50-foot run from his inverter.
Set your multimeter to AC voltage and record the reading at your inverter (should be close to 120V). Next, with a load running (like turning on lights or an appliance), measure voltage at the end point. Subtract the second reading from the first. For example, if you get 121V at the inverter but only 116V at your outlet, that’s a 5-volt drop.
Generally, voltage drop shouldn’t exceed 3% for branch circuits (about 3.6V on a 120V system) or 5% total from source to outlet. Higher drops indicate wiring problems—often undersized cables, corroded connections, or excessive wire length. This becomes especially important in off-grid systems where every watt counts and your inverter’s capacity is limited.
Fluctuating Readings and System Instability
When I first started testing my solar system’s AC output, I’d see readings bounce around—122V, then 119V, then 121V—and honestly, it freaked me out a bit. Was my inverter failing? Turns out, some fluctuation is completely normal.
Small voltage variations (within 5-7V of your standard 120V or 240V) typically result from regular grid demand changes throughout the day. When your neighbor’s air conditioner kicks on or off, you’ll see minor shifts. Your multimeter might also show slight bouncing simply because AC voltage is constantly changing in a sine wave pattern—that’s just how alternating current works.
However, larger swings beyond 10V, rapid flickering between vastly different numbers, or readings that steadily drift away from normal ranges signal real problems. These could indicate loose connections at your inverter terminals, undersized wiring, issues with your utility connection, or a struggling inverter.
Here’s my practical approach: Take readings at different times throughout the day—early morning, midday, and evening. Write them down. If they stay within that 5-7V window and your lights aren’t dimming or flickering, you’re likely fine. But if you’re seeing wild swings or consistent out-of-range voltages, it’s time to check all connections for tightness and possibly call in a professional electrician to investigate your system’s grounding and wiring capacity.
Creating Your Solar Power Quality Testing Routine
Here’s something I learned the hard way: testing your solar system once and forgetting about it is like checking your car’s oil only when you buy it. Power quality changes with seasons, equipment age, and even your neighborhood’s electrical demands. The good news? Creating a simple testing routine takes less time than your morning coffee ritual.
For daily checks, keep it simple. If you have a basic display on your inverter, just glance at the voltage reading. It should hover within 5% of your standard voltage (114-126V for North American systems). Think of it as taking your system’s temperature. No multimeter needed unless something looks off.
Monthly testing is where your multimeter earns its keep. Set a reminder for the same day each month, maybe when you’re already checking other home systems. Test voltage at your main service panel and measure current on a typical load. I do mine on the first Saturday morning, which gives me consistent baseline conditions. Write down these numbers in a simple notebook or smartphone note. You’re looking for patterns, not perfection.
Seasonally, conduct your full testing suite every three months. This includes voltage under different load conditions, frequency checks, and testing at multiple outlets throughout your home. Spring and fall are perfect since temperatures affect inverter performance. These comprehensive tests help you catch gradual degradation before it becomes expensive.
For those who love data tracking, check out advanced solar monitoring solutions that automate much of this process. But honestly, a simple spreadsheet with date, voltage, current, and notes columns works brilliantly. Download our free power quality log template to get started today.
When Your Multimeter Isn’t Enough
Let me be honest with you about something I learned the hard way: multimeters are fantastic workhorses, but they have their limits. I once spent three hours trying to diagnose why my neighbor’s solar inverter kept tripping the breaker. My trusty multimeter showed voltage and frequency were perfectly fine, but something was clearly wrong. That’s when I realized I was trying to see problems that existed beyond what my meter could detect.
Your standard multimeter gives you snapshots – voltage at this moment, current right now. But AC power, especially from solar inverters, is dynamic. It has waveforms, harmonics, and quality issues that a basic multimeter simply can’t visualize. Think of it like trying to judge a movie by looking at a single frame.
Here’s the reality check: if you’re experiencing persistent issues like flickering lights, equipment malfunctions, or inverters that won’t stay connected to the grid, you might need deeper analysis. Professional power quality analyzers can show you harmonic distortion, power factor problems, and voltage sags that are invisible to multimeters. These tools start around several hundred dollars, though, which isn’t practical for everyone.
Before you open your wallet, consider these budget-friendly alternatives. Some modern solar inverters have built-in monitoring that reveals power quality data through their apps – check your manual. You can also borrow or rent specialized equipment from tool libraries or maker spaces in your community. I’ve even had success asking my local solar installer if they’d run a quick diagnostic in exchange for coffee and conversation.
Sometimes the best tool isn’t the fanciest one – it’s knowing when to call someone with the right equipment for the job.
You’ve made it this far, and that’s something to celebrate. Understanding how to test AC power in your solar system isn’t just about troubleshooting, it’s about taking ownership of your energy independence. I remember when I first started testing my own system regularly. What felt like a daunting technical task quickly became second nature, and more importantly, it gave me incredible peace of mind knowing exactly what was happening with my power.
Here’s my advice: start simple. Don’t feel like you need to become an electrical engineer overnight. Begin by measuring voltage at your main panel when the sun’s shining. That single reading will tell you so much about whether your inverter is doing its job. Once you’re comfortable with that, add frequency checks to your routine. Before you know it, you’ll be the person your neighbors turn to for solar advice.
I’ve turned testing into a Sunday morning ritual, right alongside my coffee. It takes about ten minutes, and those readings have saved me from potential problems more times than I can count. The key is making it a habit rather than treating it as a chore you dread.
I’d love to hear about your experiences. What challenges have you faced? What victories have you celebrated? Share your story with the Spheral Solar community. We’re all learning together, and your insights might be exactly what someone else needs to hear. Testing your AC power isn’t just maintenance, it’s your gateway to truly understanding and mastering your solar investment.
How useful was this post?
Click on a star to rate it!
Average rating 0 / 5. Vote count: 0
No votes so far! Be the first to rate this post.
We are sorry that this post was not useful for you!
Let us improve this post!
Tell us how we can improve this post?
charlesnoble
Here at Spheral Solar, I’m a hands-on solar power enthusiast, constantly exploring and experimenting with DIY solutions. I’m dedicated to sharing my discoveries, insights, and even the bumps I hit along the way, all in the pursuit of a more sustainable future.
Why Your RV Solar Panels Aren’t Charging (And How to… by Charlesnoble November 30, 2025 Check your multimeter readings at each connection point along your solar charging path—from panels to charge controller to battery—to pinpoint exactly where voltage disappears. Most RV solar systems lose 10-30% of their potential power to voltage drop, but this invisible thief often goes undetected until you systematically measure and compare…
Read Your Solar System Like a Pro: What Every Wire… by Charlesnoble October 31, 2025 Locate the single-line diagram in your solar system documentation—it’s your roadmap to understanding how energy flows from panels through inverters to your home’s electrical panel. This schematic shows every critical component: charge controllers, battery banks, breaker boxes, and safety disconnects, all connected by lines representing wire runs with their corresponding…
Your DIY Solar Inverter Might Be Wasting Power… by Charlesnoble March 31, 2026 Measure your inverter’s efficiency by comparing DC input power to AC output power using a simple multimeter—a ratio below 95% signals it’s time to investigate performance issues. Track voltage and current readings at both the solar panel array and your home’s load center during peak sun hours, then multiply volts…
Never Worry About Your DIY Solar System Again With… by Charlesnoble October 30, 2025 Monitor your DIY solar system’s performance from anywhere using dedicated hardware monitors, smartphone-connected inverters, or cloud-based platforms that track voltage, current, and energy production in real-time. Install a basic Bluetooth-enabled shunt monitor for under $50 to see exactly how many watts your panels generate and how much power your batteries…
Why Your DIY Solar Project Needs a Calibrated… by Charlesnoble February 3, 2026 Point your infrared thermometer at your solar panel surface on a sunny afternoon, and you might get a reading of 145°F—but is that number actually accurate? Without proper calibration, that measurement could be off by 10, 20, or even 30 degrees, leading you to misdiagnose hot spots, overestimate efficiency losses,…
Why Your Solar Meter Numbers Don’t Match Your… by Charlesnoble January 20, 2026 Look at your solar meter display right now and locate the kWh reading—this number tells you exactly how much electricity your panels have generated since installation, and if it’s climbing daily, your system is working. Check whether your meter’s digital arrows or symbols are moving forward (you’re using solar power…
Subscribe for handpicked DIY projects, exclusive tips, and giveaways.
Measure your inverter’s efficiency by comparing DC input power to AC output power using a simple multimeter—a ratio below 95% signals it’s time to investigate performance issues. Track voltage and current readings at both the solar panel array and your home’s load center during peak sun hours, then multiply volts by amps to calculate actual… Read more: Your DIY Solar Inverter Might Be Wasting Power (Here’s How to Find Out)
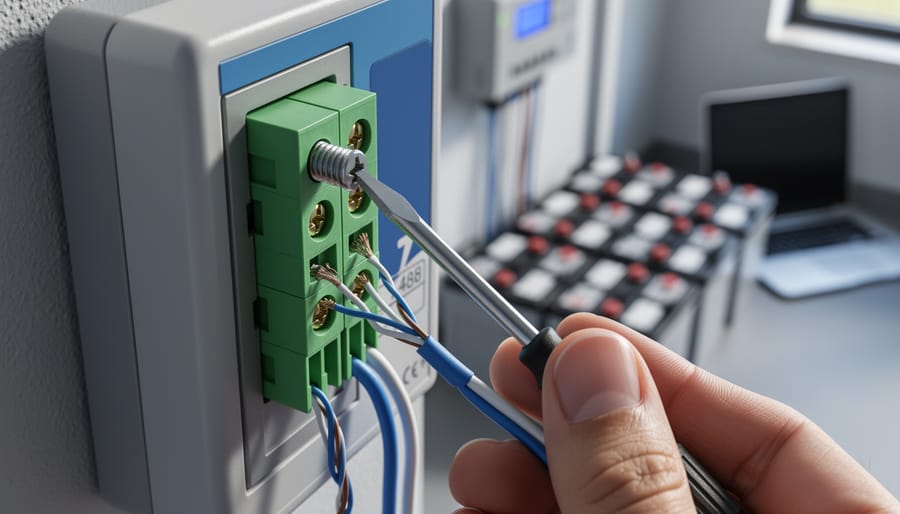
Check your solar inverter’s communication ports right now – if you see two screw terminals labeled A and B (or D+ and D-), you’re looking at 2-wire RS485, the most common communication protocol in DIY solar monitoring setups. This simple two-wire system lets your solar equipment talk to monitoring devices, allowing you to track power… Read more: Why 2-Wire RS485 Is the Smartest Choice for Your DIY Solar Monitoring System
Match your solar panels to microinverters or power optimizers based on your roof’s shading patterns—even partial shade from a chimney or tree during morning hours means module-level power electronics will recover 15-25% more energy than string inverters lose to the weakest panel. Install power optimizers when you’re working with mixed panel orientations across multiple roof… Read more: Why Smart Solar Modules Could Save Your DIY Array (Before It’s Too Late)


")

")

")
")
")

")

")
")