Solar Ventilation Just Saved My Attic (And Cut My Cooling Bills in Half)
Updated:
**Assess your home’s air quality by standing in your living space right now—if you notice stale odors, condensation on windows, or that stuffy feeling when you walk in the door, your home is telling you it needs better ventilation.** Most homes built in the last 30 years are sealed tight for energy efficiency, which traps pollutants, moisture, and carbon dioxide inside. I learned this the hard way when my own “energy-efficient” home developed mold in the bathroom and my family started experiencing unexplained headaches.
**Calculate your ventilation needs using the simple rule: your home requires 15 cubic feet per minute (CFM) of fresh air per person, plus an additional 1 CFM for every 100 square feet of floor space.** For a 2,000-square-foot home with four occupants, that’s 80 CFM minimum—information that transformed how I approached my ventilation project.
**Install a solar-powered ventilation system starting with your hottest problem areas—typically attics, bathrooms, and kitchens—where heat and moisture accumulate most dramatically.** Unlike traditional electric systems that add to your utility bills, solar ventilators operate for free once installed, making them perfect for DIY enthusiasts who want immediate impact without ongoing costs.
**Expect realistic results within 48 hours of installation: reduced indoor temperatures by 10-15°F in ventilated spaces, eliminated moisture problems, and noticeably fresher air throughout your home.** The beauty of solar ventilation lies in its simplicity—no electrical wiring, no complex controls, just panels that work hardest when your ventilation needs are greatest. Whether you’re a complete beginner or experienced DIYer, understanding these fundamentals empowers you to create a healthier home while reducing your environmental footprint.
Why Your Home Actually Needs Better Ventilation (Not Just More AC)
Attic temperatures can reach 150°F or higher on summer days, creating intense heat that radiates into living spaces below.
The Hidden Cost of Poor Attic Ventilation
I learned this lesson the hard way during my first summer in an older home. Without proper attic ventilation, I watched my energy bills skyrocket, and it wasn’t until I climbed up there with a thermometer that I understood why.
On a typical 95°F summer day, an unventilated attic can reach a staggering 150°F to 160°F. That superheated space acts like a giant radiator sitting directly above your living areas. The heat doesn’t just stay up there—it radiates down through your ceiling insulation, warming the rooms below. Even with decent insulation, this relentless heat transfer means your air conditioning system fights an uphill battle all day long.
Here’s what really opened my eyes: When I measured my bedroom ceiling temperature, it was 85°F while my thermostat read 72°F. My AC was constantly cycling, working overtime to compensate for this invisible heat source above me. Energy experts estimate that poor attic ventilation can increase cooling costs by 10-40%, depending on your climate and home design.
The trapped heat doesn’t just affect summer comfort either. In winter, warm air from your living space can get trapped in the attic, creating moisture problems that lead to mold growth and deteriorated insulation. It’s a year-round energy drain that many homeowners don’t even realize they have. Once I installed proper ventilation—which we’ll discuss in detail later—my upstairs temperature stabilized, and my energy consumption dropped noticeably within the first month.
Moisture Problems You Can’t See (Until It’s Too Late)
Here’s the thing about moisture problems – they’re sneaky. I learned this the hard way when I discovered a patch of black mold behind my bedroom dresser last year. The culprit? Poor ventilation that let humid air accumulate with nowhere to go.
When warm, moist air from cooking, showering, or even just breathing meets cold surfaces in your home, condensation forms. Without proper air circulation, this moisture seeps into walls, ceilings, and hidden corners. Before you know it, you’re dealing with mold spores that can trigger allergies and respiratory issues for your family.
The structural damage can be even more alarming. Persistent moisture rots wooden beams, corrodes metal fasteners, and deteriorates insulation – repairs that can cost thousands of dollars. I’ve seen DIY friends dismiss small water stains on their ceiling, only to face major rafter replacement later.
The good news? A proper ventilation system tackles these issues before they escalate. It keeps air moving continuously, preventing that dangerous moisture buildup. Think of it as an insurance policy for your home’s health – one that literally pays for itself by avoiding costly repairs down the road.
How Solar Ventilation Systems Actually Work
The Three Essential Components
When I first started building solar ventilation systems, I was amazed at how just three simple components could make such a difference in my home’s comfort level. Let me break down what you actually need to get fresh air flowing through your space.
**The Solar Panel: Your Power Source**
Think of the solar panel as your system’s battery that never needs charging. It converts sunlight directly into electricity that powers your fan—no wiring to your electrical panel required. For most attic or small room applications, you’ll need a 10-20 watt panel. The beauty here is that solar panels work hardest when the sun is strongest, which is exactly when your home needs ventilation most.
**The Fan Motor: Your Workhorse**
This is where the magic happens. The fan motor pulls hot, stale air out (or pushes fresh air in, depending on your setup). Look for DC motors specifically designed for solar applications—they’re more efficient than standard AC fans and start spinning even in low-light conditions. I’ve found that brushless motors last longer and require virtually zero maintenance.
**Ventilation Design: The Strategy Behind Airflow**
This component isn’t something you buy—it’s how you think about air movement. Effective ventilation needs both an intake and exhaust point. Hot air naturally rises, so placing your solar fan high (like in a gable vent) while ensuring lower intake vents exist creates natural circulation that the fan amplifies. Getting this design right matters more than buying the most expensive equipment.
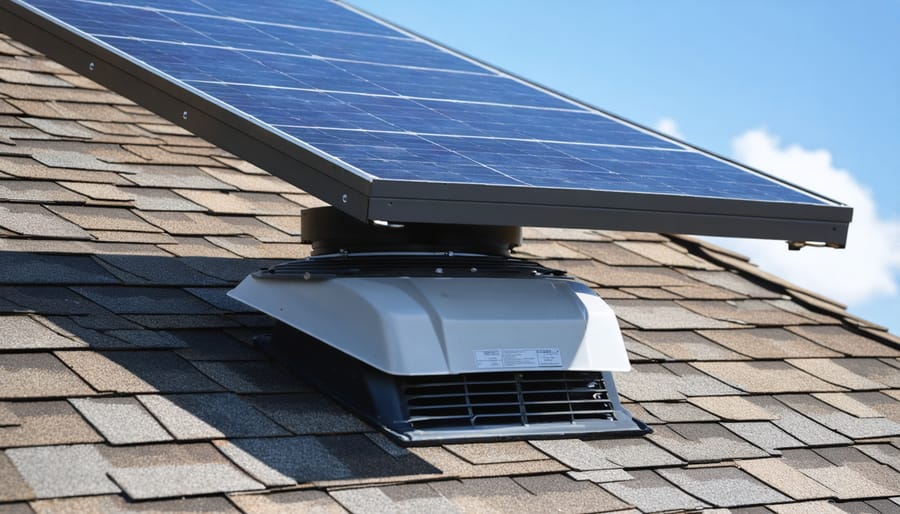
Solar attic fans combine a photovoltaic panel with a ventilation fan, requiring no electrical wiring or batteries.
Why Solar Makes Perfect Sense for Ventilation
Here’s something I love about solar ventilation—it just *makes sense* in a way that feels almost too good to be true. Think about it: when is your attic hottest and most desperate for airflow? During those blazing summer afternoons when the sun beats down relentlessly. And when does your solar panel produce the most power? Exactly the same time.
This natural synchronization is what I call “elegant engineering.” When you need cooling most, you automatically get maximum fan speed. No complicated controls needed, no programming, no thinking required. The system self-regulates based on sunlight intensity, which directly correlates with heat buildup.
The beauty of this solar vs electric approach? You skip the entire electrical infrastructure. No running wiring through walls, no hiring an electrician, no worrying about your electric bill creeping up on hot days. And here’s the kicker—you don’t even need batteries. Direct-drive solar fans operate in real-time, matching their output to the sun’s intensity.
I remember explaining this to my neighbor, who kept asking, “But what about at night?” I smiled and said, “At night, your attic isn’t collecting heat—you don’t need ventilation then anyway.” That lightbulb moment sealed the deal for his own solar ventilation project.
Types of Solar Ventilation Systems for Different Homes
Attic Solar Fans (The Most Popular Choice)
Solar attic fans are the rock stars of home ventilation, and for good reason. I’ll never forget the summer I installed my first one—within hours, I could feel the difference in my upstairs bedrooms. These fans come in two main types: roof-mounted and gable-mounted, and choosing between them depends entirely on your home’s setup.
**Roof-mounted solar fans** sit directly on your roof slope, looking like small skylights. They’re perfect if you don’t have gable vents or want multiple units for larger attics. Most homeowners find these easier to position for maximum sun exposure, which is crucial for performance. Installation does mean cutting through your roof, but don’t let that intimidate you—with proper flashing, it’s totally manageable for a weekend DIYer.
**Gable-mounted fans** replace existing gable vents, making installation simpler since you’re working with an opening that already exists. These work beautifully if your gables face south or west for optimal sun exposure. The tradeoff? You’re limited to where your existing vents are located.
Now, let’s talk CFM (cubic feet per minute)—essentially, how much air the fan moves. Think of CFM like a fan’s horsepower. Most residential solar attic fans range from 500 to 1,600 CFM. A general rule: you need about 1 CFM per square foot of attic space. So a 1,200-square-foot attic needs roughly 1,200 CFM of ventilation capacity.
Check out our guide to the best solar attic fans for specific recommendations that match different attic sizes and budgets.
Solar Wall Vents for Workshops and Garages
Not every building has convenient attic access, and that’s where solar wall vents become your best friend. I learned this the hard way when I wanted to ventilate my detached workshop—no attic, no conventional ventilation options. Wall-mounted solar vents mount directly onto exterior walls and work beautifully for sheds, garages, and standalone structures.
These units operate on the same solar principle as roof vents but install at eye level, making them incredibly easy to set up and maintain. You’ll typically mount them on a south-facing wall for maximum sun exposure. Most workshop solar vents include adjustable panels that tilt toward the sun throughout the day.
The installation process is straightforward: cut an opening in your wall (usually 4-6 inches in diameter), insert the vent housing, seal it weathertight, and you’re done. No roof penetrations, no complicated flashing work. I installed mine in under two hours with just a jigsaw and some silicone caulk.
For workshops where you’re generating sawdust, paint fumes, or welding smoke, these vents are particularly valuable. They continuously exchange stale air without requiring electrical hookups—perfect for outbuildings without dedicated power. Just remember to include a passive intake vent on the opposite wall to create proper airflow.
Whole-House Solar Ventilation Approaches
When single-room solutions aren’t enough, whole-house solar ventilation systems step up to create coordinated airflow throughout your entire home. These systems typically combine multiple solar-powered exhaust fans strategically placed in your attic or upper levels with passive intake vents lower in your home, creating a natural convection current that pulls fresh air through every room.
I’ll be honest—I initially hesitated installing a whole-house system at my place because it seemed intimidating. But after dealing with persistent stuffiness in our upstairs bedrooms, my wife and I took the plunge. The complexity is moderate: you’re essentially installing several coordinated fans rather than one, which means more roof penetrations and careful planning of airflow paths.
These comprehensive approaches make the most sense for homes with significant heat buildup, multiple stories, or open floor plans where air naturally wants to stratify. You’ll need to map your home’s layout, identify high and low points for air entry and exit, and ensure nothing blocks the airflow path between them.
The installation requires basic carpentry skills, weatherproofing knowledge, and patience. Expect a weekend project with a helper. The payoff? Dramatic temperature reductions and genuinely fresh air circulation without touching your electric bill.
Sizing Your Solar Ventilation System (My Simple Calculator Approach)
The Quick Square Footage Method
When I first tackled ventilation for my workshop, I discovered a surprisingly simple formula that takes the guesswork out of calculating CFM needs. Here’s how it works, and trust me—if I can do this math, anyone can!
**The Basic Formula:**
For attics and enclosed spaces, multiply your square footage by 0.7. This gives you the minimum CFM (cubic feet per minute) your ventilation system should move.
**Real Example #1: Standard Attic**
Let’s say you have a 1,500 square foot home with a typical attic:
– 1,500 sq ft × 0.7 = 1,050 CFM minimum
You’d want a solar attic fan rated for at least 1,050 CFM. I typically recommend going 10-20% higher to account for less-than-ideal conditions.
**Real Example #2: Garage Workshop**
My 400 square foot garage needed:
– 400 sq ft × 0.7 = 280 CFM minimum
I installed a 350 CFM solar fan, and the temperature drop was noticeable within days.
**Quick Adjustment Tips:**
If you live in an exceptionally hot climate (think Arizona or Texas), bump that multiplier to 1.0 instead of 0.7. Dark-colored roofs? Add another 15% to your calculation.
Keep this formula handy on your phone—I’ve shared it with dozens of neighbors who were amazed how straightforward proper ventilation sizing can be!
When One Fan Isn’t Enough
When I first tried solar ventilation in my two-story home, I made the classic mistake: I installed three exhaust fans in the attic thinking more was better. Within a week, I noticed doors slamming and my heating bills actually went *up*. What I’d created was a pressure nightmare—all exhaust, no intake.
Here’s what I learned the hard way: **balanced airflow is everything**. For every exhaust fan pulling air out, you need adequate intake capacity. A good rule of thumb is a 1:1 ratio—if your exhaust fans move 1,000 cubic feet per minute (CFM), your intake vents should handle the same volume. Think of your home as a breathing organism; it needs both lungs working together.
For larger homes over 2,000 square feet, you’ll likely need multiple fans positioned strategically. Place exhaust fans at the highest heat points—usually attic gables or roof peaks. Then create intake pathways low and on the opposite side, like soffit vents or lower-level windows with screening.
The biggest mistake I see in our DIY community? Installing powerful exhaust fans without considering where replacement air enters. This creates negative pressure that can backdraft furnaces, pull in garage fumes, or stress your HVAC system. Always map your airflow path *before* drilling holes.
Start with one balanced pair—one exhaust, adequate intake—then add more zones only if temperature monitoring shows you need them. Quality placement beats quantity every time.
DIY Installation Walkthrough (How I Did Mine in 3 Hours)
Tools and Materials You’ll Actually Need
When I built my first solar ventilation system, I quickly learned that you don’t need to break the bank—but you do need the right essentials. Here’s what you’ll actually use:
**Essential Items:**
– **Solar panel** (10-20W): $30-60 from Amazon or hardware stores like Home Depot
– **DC fan** (12V, appropriately sized): $15-40 depending on CFM rating
– **Mounting brackets and screws**: $10-20 (often included with panels)
– **Basic wiring kit** with connectors: $15-25
– **Sealant** (weatherproof silicone): $8-12
**Optional but Helpful:**
– **Charge controller** (prevents overcharging if adding battery): $20-35
– **Battery backup** (for nighttime operation): $40-80
– **Inline fuse**: $5-10 for safety
– **Digital multimeter**: $15-25 (invaluable for troubleshooting)
Total essential cost: roughly $80-150 for a basic system. You can source most components from local hardware stores, though specialty items like solar panels might require online ordering. I’ve found eBay and AliExpress offer budget options, but prioritize quality for items exposed to weather. Start simple—you can always add battery backup later once you’ve tested your system’s performance.
The Installation Process (Easier Than You Think)
I’ll be honest with you—when I first considered installing a solar attic fan, I thought it would be way over my head. But here’s the thing: if you can use a jigsaw and follow directions, you can absolutely do this. Let me walk you through the process so you can see it’s more straightforward than you might think.
**Safety First, Always**
Before anything else, let’s talk safety. You’ll be working on your roof, so choose a calm, dry day. Use a sturdy ladder with someone spotting you below, and wear rubber-soled shoes for better grip. I always work in the morning when the roof is cooler—trust me on this one. Also, turn off power to your attic at the breaker box if you’re adding any electrical connections.
**The Basic Steps**
Start by choosing your fan location from inside the attic. You want it near the roof peak for maximum efficiency, away from obstructions. Mark your spot, then carefully drill a pilot hole through to the outside so you can find it from the roof.
On the roof, use your fan’s template to mark the opening size. Cut carefully with a jigsaw—take your time here. The hole doesn’t need to be perfect, but it should be clean.
**Flashing Makes All the Difference**
Here’s where many beginners worry, but roof flashing is actually pretty forgiving. Slide the flashing under the shingles above your opening and over the shingles below. This creates a water-tight seal that directs rain away from your opening. Apply roofing sealant generously around the edges—don’t skimp here.
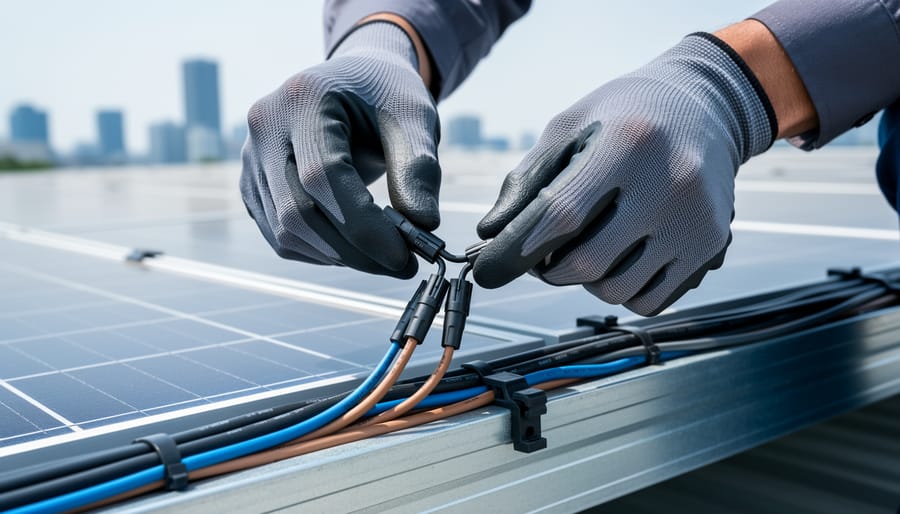
**Wiring Made Simple**
For a solar ventilation system, the beauty is minimal wiring. Most units are self-contained with integrated solar panels. You’re basically just mounting the unit and maybe connecting a battery backup if included. Our complete DIY installation guide covers specific wiring scenarios in detail.
Secure everything with the provided screws, double-check your flashing seal, and you’re done. Most installations take 2-4 hours for first-timers.
Most homeowners can install a solar attic fan in 3-4 hours using basic tools and proper flashing techniques.
My Biggest Mistake (And How to Avoid It)
When I installed my first solar attic vent, I made a rookie mistake that cost me weeks of frustration. I positioned it too close to the ridge line, thinking “higher means better airflow,” right? Wrong. The turbulent air currents up there actually reduced efficiency by about 40%. I learned the hard way that placement matters more than altitude.
The fix? I relocated it to the sweet spot—about two feet below the ridge—and immediately noticed improved performance. My lesson: always follow manufacturer guidelines on positioning, even when your gut says otherwise. Measure twice, mount once, and don’t let overconfidence override the instructions. Trust me, doing it right the first time saves you from climbing back onto that roof in summer heat!
Real-World Performance (What to Actually Expect)
Temperature Drops I’ve Measured
Let me share the actual numbers from my own setup in my 1,800 square foot ranch home here in Pennsylvania. Before installing my solar attic ventilation system, I consistently measured attic temperatures around 135-140°F during July afternoons when outdoor temps hit 85-90°F. That superheated air was radiating straight down through my insulation, making my second floor unbearable.
After installing two 20-watt solar fans strategically on opposite gable ends, the difference was remarkable. My attic now peaks around 95-100°F on those same scorching days—a solid 35-40 degree drop. What surprised me most wasn’t just the cooler attic, but how quickly I felt the difference downstairs. My bedroom went from being a sweatbox at 78°F to a comfortable 72°F, and my AC stopped running constantly.
I tracked my energy bills for three months post-installation and saw a 22% reduction in cooling costs compared to the previous summer. Your results will vary based on your climate zone, insulation quality, and attic size, but these real-world numbers convinced me that solar ventilation delivers tangible benefits beyond just theory.
Regular temperature monitoring helps verify solar ventilation performance and identify potential issues.
When Solar Ventilation Isn’t Enough
Let me be straight with you: solar ventilation isn’t a magic bullet for every situation. I learned this the hard way when a friend tried using solar fans in his finished basement—they simply couldn’t move enough air for that application.
Solar ventilation works brilliantly for attics, garages, and sheds where you need moderate airflow during daylight hours. But if you’re dealing with windowless bathrooms, sealed crawl spaces, or rooms requiring consistent 24/7 ventilation, you’ll need supplementary solutions. The nighttime limitation is real—no sun means no power, which is why I still rely on grid-powered bathroom fans.
Large homes or those with significant moisture issues might require the consistent power of electric systems. Climate matters too; consistently overcast regions won’t generate enough solar energy for reliable operation.
Before investing, honestly evaluate your specific needs. Review the pros and cons carefully. Sometimes combining solar with traditional ventilation creates the best solution—using solar where it excels while maintaining electric systems where reliability is critical. There’s no shame in hybrid approaches; it’s about finding what actually works for your home’s unique situation.
Troubleshooting and Maintenance Tips
Even the best solar ventilation systems can hit a few bumps along the way, but most issues are surprisingly easy to fix. I remember my first system barely moving air after a cloudy week—turns out I’d positioned the panel where afternoon shade crept in earlier than I’d realized. Simple repositioning made all the difference.
**Weak airflow** is the most common complaint. First, check your solar panel for dirt, leaves, or bird droppings—even a thin film can reduce output by 30%. Give it a gentle wipe with a damp cloth every few months. Next, inspect your ducting for kinks or disconnections. I’ve seen elbows that looked fine but were creating major resistance. Straightening runs and minimizing bends really helps.
If your fan **stops working entirely on sunny days**, the issue might be the motor brushes wearing out (common after 3-5 years of heavy use) or loose wiring connections. Check all connections first—vibration can work them loose over time. Most replacement motors cost $20-40 and swap out in minutes with just a screwdriver.
**Noisy operation** usually means something’s obstructing the fan blades or the mounting hardware has loosened. Turn off the system, remove the cover, and look for debris. Tighten all screws while you’re there.
For **minimal maintenance**, adopt this simple routine: Clean your solar panel quarterly, inspect ducting seals twice yearly for gaps or damage, and vacuum out the fan housing annually to prevent dust buildup. Keep a maintenance log—even just dates on your phone calendar helps you catch patterns.
One tip from experience: before winter, check that your backdraft damper closes properly. A stuck-open damper is like leaving a window cracked all season, and you’ll wonder why your heating bills jumped unexpectedly.
Setting up a solar-powered ventilation system in your home is one of those projects that checks all the boxes—it’s environmentally friendly, surprisingly affordable, and genuinely improves your daily comfort. Whether you’re dealing with a stuffy attic, a humid bathroom, or just want to reduce your cooling costs, solar ventilation offers a practical solution that pays dividends year after year.
The beauty of starting with solar ventilation is that you don’t need to dive in headfirst. Begin with a single room or space that needs the most help. Maybe it’s that greenhouse where your tomatoes are wilting, or the garage workshop that feels like a sauna every afternoon. I started with just one solar attic fan years ago, and the difference was so noticeable that I gradually expanded to other areas of my property.
Remember, every home is different, and what works perfectly for your neighbor might need tweaking for your situation. Don’t be afraid to experiment with fan placement, adjust your panel angles, or add battery backup if needed. The learning process is half the fun, and you’ll develop skills that carry over to other DIY solar projects.
I’d love to hear about your ventilation journey! Head over to our community forum to share your project photos, ask questions, or help fellow DIYers troubleshoot their setups. And if you’re still figuring out sizing requirements, check out our solar calculator tools to get personalized recommendations for your space. Happy building!
How useful was this post?
Click on a star to rate it!
Average rating 0 / 5. Vote count: 0
No votes so far! Be the first to rate this post.
We are sorry that this post was not useful for you!
Let us improve this post!
Tell us how we can improve this post?
charlesnoble
Here at Spheral Solar, I’m a hands-on solar power enthusiast, constantly exploring and experimenting with DIY solutions. I’m dedicated to sharing my discoveries, insights, and even the bumps I hit along the way, all in the pursuit of a more sustainable future.
Why Your Attic Solar System is Dripping Wet (And How… by Charlesnoble April 18, 2026 Look up at your attic ceiling on a cold morning and spot water droplets collecting near your solar equipment. That moisture isn’t coming from a roof leak—it’s condensation, and if you’ve recently installed solar components in your attic space, you’re not alone in dealing with this frustrating issue. Condensation forms…
How Do Attic Fans Work? by Adeyomola June 21, 2021 Attic fans work primarily by augmenting the movement of hot air rising out of the attic. They do this by transmitting the mechanical energy (kinetic energy) from their rotation to the molecules of the air around them, thus increasing the rate of convection. As attic fans promote the escape of…
Solar-Powered Ventilation That Slashes Your Energy… by Charlesnoble March 11, 2026 Calculate your home’s air exchange rate by dividing your square footage by 60—most homes need complete air replacement every 1-3 hours to prevent moisture buildup, stale air, and indoor pollutants that trigger allergies and respiratory issues. A 1,500 square foot home requires roughly 25-50 cubic feet per minute of continuous…
Best Way to Keep Attic Cool – 7 Energy Efficient Ways by Adeyomola June 1, 2021 Fixing the leaks and opening the skylights might help make your attic cool, but harnessing the sun’s power – transforming it from problem to solution – could be the answer to keeping your attic cool. But how can you keep your attic cool using the sun? Well, you can improve…
6 Best Solar Attic Fan Reviews in 2023 by Adeyomola September 30, 2021 High CFM rating, versatility, durability, easy installation, and high solar panel wattage – these features typify the best solar attic fan. A solar-powered attic fan will be installed somewhere on the roof. This means it will be exposed to the elements – UV rays from the sun exposure, rain, snow,…
Solar-Powered Attic Fans That Actually Pay for Themselves by Charlesnoble January 21, 2026 Install solar-powered attic fans on south-facing roof sections where they’ll capture 6-8 hours of direct sunlight daily, positioning them between rafters near the roof peak for maximum hot air extraction. These systems work without touching your electrical panel, pulling superheated air out before it radiates down into your living space…
Subscribe for handpicked DIY projects, exclusive tips, and giveaways.
Monitor your greenhouse temperature daily during peak sun hours—if it consistently exceeds 85°F or condensation builds up on interior surfaces, you’re losing crops to heat stress and creating the perfect environment for fungal diseases. A greenhouse solar ventilation fan addresses both problems without adding a penny to your electricity bill, making it one of the… Read more: Why Your Greenhouse Needs a Solar Ventilation Fan (Before Summer Hits)
Press and hold the adjust button (usually bottom-left) on your G-Shock for three seconds until the time display starts flashing—this unlocks manual time adjustment on most models. Navigate between hours, minutes, and date using the mode button, then use the forward/reverse buttons to change values. If you own a radio-controlled G-Shock with Multi-Band 6 technology,… Read more: How to Adjust Time on Your G-Shock Solar Watch (Without Breaking It)
Picture this: you’ve just installed your third solar panel on the roof, wires dangling everywhere, and suddenly you realize your two-panel string needs to connect with your new addition. You need a solar branch connector, but you’re staring at product listings wondering if you’re about to make an expensive mistake. Solar branch connectors are the… Read more: Why Your Solar Array Needs Branch Connectors (And How to Install Them Right)


")


")