Why Your Solar Ground Rod Might Be Too Short (And What Actually Works)
Updated:
Drive your 8-foot copper-clad steel grounding rod at least eight feet into the earth, or to the depth where you meet solid bedrock. This isn’t arbitrary—the National Electrical Code requires this specific length because it ensures your solar panels and battery storage system have a reliable path to dissipate dangerous electrical surges, lightning strikes, and fault currents that could otherwise damage your equipment or create fire hazards.
Position the rod within two feet of your inverter or combiner box, keeping the grounding wire run as short and straight as possible. Longer wire runs increase electrical resistance, which defeats the entire purpose of grounding. If your soil is rocky or you hit bedrock before reaching eight feet, you have two options: angle the rod up to 45 degrees to reach full depth, or install a second rod at least six feet away from the first and bond them together with copper wire.
Test your ground resistance with a multimeter after installation—you’re looking for 25 ohms or less. Sandy, dry soil often produces poor results, requiring multiple rods or ground enhancement material around the rod. Clay and moist soil typically provide excellent conductivity. I learned this the hard way during my first solar installation when I assumed one rod in desert sand would suffice, only to measure 80 ohms resistance and spend an afternoon installing three additional rods.
Clean the rod’s top thoroughly before attaching your grounding wire with an approved clamp—corrosion at this connection point creates resistance that compromises your entire safety system. Apply antioxidant paste to prevent future deterioration, especially in coastal or humid environments.
What Is an 8-Foot Grounding Rod and Why Does It Matter?
A grounding rod is essentially a metal stake driven deep into the earth that creates a safe pathway for excess electricity to dissipate into the ground. Think of it as an emergency exit for electrical energy that has nowhere else to go. When lightning strikes your solar panels or when an electrical fault occurs in your system, that energy needs somewhere safe to travel, and the grounding rod ensures it goes into the earth rather than through your equipment or worse, through you.
The physics behind this is surprisingly straightforward. Earth is an excellent conductor of electricity, and when we create a solid connection between our electrical systems and the ground, we’re essentially giving dangerous currents the path of least resistance. The electricity will always choose the easiest route, and a properly installed grounding rod makes that route away from your valuable inverters, batteries, and other components.
So why 8 feet? I remember when I first started tinkering with solar systems, I assumed longer would always be better. The 8-foot standard actually comes from the National Electrical Code, which determined this length provides optimal contact with moist soil layers below the dry surface. In most soil conditions, 8 feet reaches deep enough to maintain consistent contact with ground moisture year-round, which is essential for effective grounding.
That consistent moisture is the key. Dry soil is actually a poor conductor, but once you get below the surface layer, soil typically contains enough moisture to conduct electricity effectively. The 8-foot depth also provides enough surface area along the rod’s length to dissipate electrical energy safely.
This matters for two critical reasons: protecting your equipment from damage during electrical faults or lightning strikes, and more importantly, protecting you and your family. A properly grounded system ensures that if something goes wrong, the dangerous electricity flows harmlessly into the earth rather than creating shock hazards or fire risks. It’s not the most exciting part of your solar installation, but it’s absolutely one of the most important safety features you’ll implement.
An 8-foot copper-clad grounding rod being properly installed provides essential electrical safety for solar installations.
The Real Dangers of Skipping Proper Grounding
Let me share something that still gives me chills. A fellow DIYer I met at a solar workshop once told me about his “budget-friendly” installation where he skipped the proper grounding rod to save a few bucks. Three months later, during a summer thunderstorm, a nearby lightning strike sent a surge through his system. The result? Over $4,000 in fried inverters, charred wiring, and a very expensive lesson learned. This is just one of many mistakes that destroy solar systems that you can completely avoid.
Here’s what really happens when grounding gets overlooked. Without a proper grounding path, electrical faults have nowhere to go except through your equipment. Imagine your inverter suddenly experiencing a voltage spike. With adequate grounding, that excess energy flows harmlessly into the earth. Without it, that energy courses through sensitive electronics, creating heat, sparking, and potentially starting fires.
The lightning scenario is dramatic, but everyday risks are just as concerning. A simple insulation breakdown in your system can create a “hot” metal frame on your solar panels. Touch it, and you become the path to ground. I’ve heard stories of DIYers getting serious shocks from improperly grounded arrays, turning routine maintenance into emergency room visits.
Equipment manufacturers also void warranties if grounding isn’t done to code. That $3,000 inverter you just installed? If it fails and they discover improper grounding, you’re on your own for replacement costs.
The truth is, proper grounding isn’t just about following rules. It’s about protecting your investment, your home, and most importantly, the people you care about. That 8-foot grounding rod represents peace of mind, and honestly, that’s priceless.
Understanding Grounding vs. Bonding in Your Solar System
What Grounding Does
Think of grounding as creating a direct highway for electricity to safely reach the earth. When I first learned about grounding for my solar setup, my mentor Charles explained it brilliantly: “It’s like giving lightning and fault currents an invitation to take the path of least resistance straight into the ground, instead of through your expensive equipment or, worse, through you.”
Here’s what actually happens: Your grounding rod creates an electrical connection between your solar system’s metal components and the earth itself. When a fault occurs—maybe a wire comes loose, or lightning strikes nearby—that dangerous electrical energy needs somewhere to go. Without proper grounding, it might arc through your inverter, charge controller, or battery system, causing fires or equipment damage.
The grounding system does two critical jobs. First, it dissipates fault currents by providing that low-resistance path directly into the soil. Second, it helps equalize voltage differences during lightning events. While a grounding rod won’t magically prevent a direct lightning strike, it gives that massive surge a safe route to earth rather than letting it cook your electronics. The deeper your rod penetrates—which is why that 8-foot length matters—the better contact it makes with moisture and minerals in the soil that conduct electricity away safely.
What Bonding Does
While grounding sends fault current safely into the earth, bonding creates a unified electrical system by connecting all your metal components together. Think of it as creating a team where everyone’s on the same page—no component gets left at a different voltage level than its neighbors.
When I first installed my solar system, I’ll admit I thought bonding was just “extra wiring.” But here’s what it really does: it connects your solar panel frames, mounting racks, inverter chassis, battery enclosures, and any other metal parts into one continuous electrical path. This prevents dangerous voltage differences from developing between components that you might touch at the same time.
Imagine touching your inverter with one hand and a solar panel frame with the other. Without proper bonding, these could be at different voltages, and you’d become the path that electricity takes to equalize them—ouch! Bonding ensures they’re always at the same electrical potential.
This connected network then ties back to your grounding electrode system, which includes that 8-foot grounding rod. Together, bonding and grounding work as partners: bonding keeps everything at equal voltage, while grounding provides the actual connection to earth that dissipates fault currents and lightning strikes safely away from your equipment and your family.
Choosing the Right 8-Foot Grounding Rod for Your Installation
Walking into the hardware store to buy a grounding rod, I remember Charles telling me, “Don’t just grab the cheapest one you see!” He was right, and here’s what you need to know to make the best choice for your solar installation.
Most grounding rods come in two main materials: copper-clad steel and solid copper. Copper-clad steel features a steel core wrapped in copper, offering excellent corrosion resistance at a reasonable price. This is what most residential installations use, and honestly, it’s probably what you’ll need too. Solid copper rods cost significantly more but shine in highly corrosive soil conditions, like coastal areas with salt exposure or locations with acidic soil. Unless you’re dealing with extreme conditions, copper-clad steel will serve you well.
Diameter matters more than you might think. The standard options are 5/8 inch and 3/4 inch. For most residential solar systems, 5/8 inch diameter rods meet code requirements and provide adequate grounding. However, larger commercial installations or areas with rocky soil might benefit from the thicker 3/4 inch rod, which resists bending during installation and offers lower resistance.
Before purchasing, check your local electrical code. Some jurisdictions have specific requirements about rod thickness or material based on local soil conditions. Your building inspector can be a valuable resource here, not an adversary.
Consider your soil type too. Sandy or loose soil? Standard copper-clad works great. Rocky terrain? You might want the beefier 3/4 inch diameter to prevent bending. Highly corrosive conditions near saltwater or industrial sites? Solid copper becomes worth the investment.
Remember, this isn’t the place to cut corners. Quality grounding protects your entire solar investment from lightning strikes and electrical faults.
Installing Your 8-Foot Grounding Rod: A Step-by-Step Walkthrough
Tools and Materials You’ll Actually Need
Let me walk you through what you’ll actually need for this project, based on my own experience wrestling with grounding rods in everything from clay to rocky soil.
First, the essentials you can’t skip: an 8-foot copper-clad steel grounding rod (spend the extra few dollars on quality here – cheap rods bend), a grounding rod driver or post driver (around $30-40, absolutely worth it versus the hammer method that nearly threw out my back), and a proper grounding clamp rated for direct burial. You’ll also need a wire stripper, adjustable wrench, and whatever gauge copper wire your system requires (typically 6 AWG or larger for solar installations).
Now for the “spend smart” items: If you hit rocks frequently in your area, rent a jackhammer or rotary hammer for the day instead of buying one. A garden hose helps soften the ground beforehand – simple but effective. Safety-wise, you’ll need work gloves and safety glasses as standard safety precautions for installation.
One thing I learned the hard way: keep a level handy. A crooked rod drives harder and looks unprofessional. Some folks swear by bentonite clay for improving conductivity in sandy soil, though it’s optional for most residential setups.
Finding the Best Location for Your Ground Rod
Choosing where to install your 8-foot grounding rod might seem straightforward, but the right location makes a real difference in how well your system protects your equipment. I learned this the hard way when I placed my first rod in a sandy, dry spot and had to relocate it after getting poor resistance readings.
Start by looking for naturally moist soil if possible. Areas near downspouts, slightly lower ground, or spots with clay content conduct electricity better than dry, sandy, or rocky soil. However, never install in standing water or areas that flood regularly, as this creates corrosion issues.
Your grounding rod should be as close to your solar inverter or battery system as practical, ideally within 10 feet. This minimizes resistance in your grounding conductor. Keep it at least 6 feet away from building foundations to prevent structural interference with lightning discharge.
Check your local electrical code requirements, which typically mandate specific distances from utility grounds and other metal systems. Some jurisdictions require two grounding rods spaced at least 6 feet apart if soil conditions are poor.
Avoid areas where you might dig later for landscaping or construction. Mark the location clearly after installation. If your soil is extremely rocky or you hit bedrock, you might need to angle the rod up to 45 degrees or consider alternative grounding methods.
Driving the Rod Into the Ground
Now comes the moment of truth – getting that 8-foot rod into the earth. I’ll be honest with you: the first time I did this, I thought it would be a quick twenty-minute job. Two hours and some sore shoulders later, I learned to respect the process.
Start by marking your rod at one-foot intervals with tape or a marker. This helps you track progress and maintain motivation when you’re only halfway through. Position the rod vertically at your chosen spot and have someone hold it steady while you take your first swings with a sledgehammer or use a rotary hammer with a driving adapter.
Here’s my best tip: let gravity do the work. Raise the hammer and let it drop rather than muscling it down. You’ll conserve energy and maintain better accuracy. Aim for steady, controlled strikes rather than frantic whacking. Check vertical alignment every six inches by stepping back and viewing from two perpendicular angles.
Rocky soil is where things get interesting. If you hit a rock and can’t get past it after a few solid attempts, try these tricks: pour water around the rod to soften the soil, use a smaller pilot hole with a long drill bit, or shift your location slightly. Sometimes moving just twelve inches makes all the difference.
If you’ve driven three feet and still can’t make progress, or if your rod is bending noticeably, it’s time to call a professional. There’s no shame in this – some soil conditions genuinely require specialized equipment like hydraulic drivers. Remember, a properly installed grounding rod protects your entire solar investment, so it’s worth doing right.
Using the right tools and proper technique makes driving an 8-foot grounding rod achievable for DIY solar installers.
Making Proper Connections That Won’t Fail
Getting your grounding rod properly connected is just as important as driving it into the earth. I learned this lesson the hard way during my first solar installation when a connection I thought was secure ended up corroding within months.
You’ll need an approved grounding clamp, specifically designed for direct burial applications. These are typically bronze or copper-based and rated for the conductor size you’re using. The most common types are acorn clamps for single connections or split-bolt connectors for joining multiple wires. Never use regular hardware store clamps – they aren’t designed to handle the electrical demands or resist corrosion.
Before attaching your clamp, use a wire brush to clean both the grounding rod and the bare copper conductor. This removes any oxidation that could create resistance in your connection. Slide the clamp onto the rod, position your conductor, and tighten according to manufacturer specifications – usually firm enough that the connection won’t move, but not so tight that you damage the threads.
Here’s where weatherproofing becomes crucial. Even underground connections face moisture. Apply an anti-oxidant compound to all bare metal surfaces before assembly, then wrap the completed connection with self-amalgamating tape or use a pre-filled grounding well. This creates a moisture barrier that extends the life of your connection significantly.
Always verify your connection is below the final grade level to protect it from physical damage and UV exposure.
Proper grounding connections using approved clamps ensure reliable electrical pathways and long-term system safety.
When One Rod Isn’t Enough: Multiple Ground Rod Requirements
Here’s the reality I learned the hard way during my first solar installation: sometimes one ground rod just doesn’t cut it. I spent a Saturday pounding in what I thought was a perfect 8-foot rod, only to have my electrician friend test it and shake his head. The resistance was too high.
The National Electrical Code requires that if your single ground rod has a resistance greater than 25 ohms to earth, you need to install a second rod. Most DIYers won’t have the testing equipment to measure this, which is why many jurisdictions simply require two rods by default for solar installations. It’s easier than testing, and honestly, it’s better safe than sorry when you’re dealing with thousands of watts of power.
When you need multiple rods, spacing matters tremendously. The code requires at least 6 feet between rods, though many professionals recommend spacing them at least 8 feet apart (the length of the rod itself). Why? Ground rods create spheres of electrical influence underground. If you place them too close together, these spheres overlap, and you don’t gain much additional grounding benefit.
Connecting multiple rods is straightforward but crucial. You’ll use a continuous copper wire, typically the same gauge as your grounding conductor, running from rod to rod. Use approved clamps at each connection point, and make sure the wire between rods stays either buried or protected. Some folks prefer running the wire underground in conduit for extra protection.
Think of multiple ground rods like insurance policies for your solar system. The extra hour of work gives you exponentially better protection against electrical faults and lightning strikes.
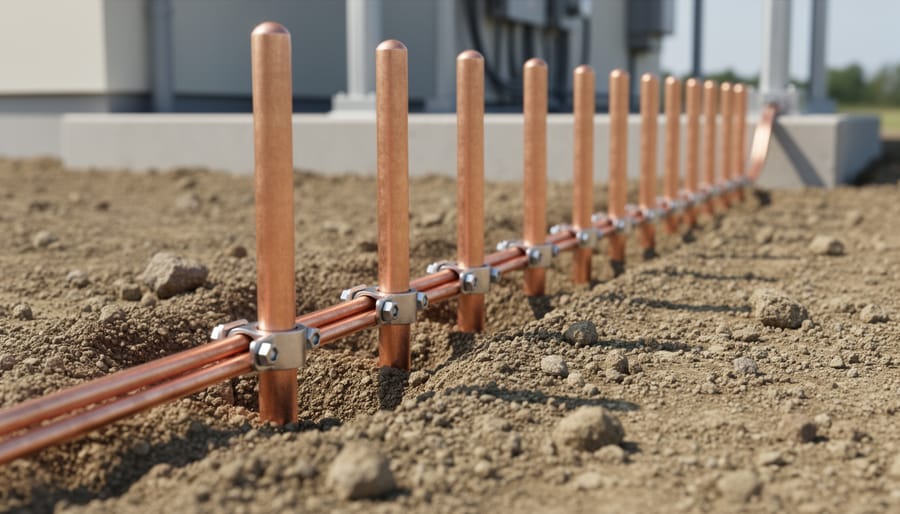
Multiple grounding rods properly spaced and bonded together provide enhanced grounding when soil conditions require it.
Testing Your Ground Rod Installation
Once your ground rod is installed, you’ll want to make sure it’s actually doing its job. The good news? You can start with a simple visual inspection that anyone can do.
First, check that your copper wire connection is secure and shows no signs of corrosion or damage. Give it a gentle tug to ensure it’s firmly attached with your grounding clamp. Look for any exposed or frayed wiring that might compromise your system’s safety.
I learned this the hard way during my first solar installation—I thought everything looked fine until a rainy season revealed water pooling near my ground rod, which eventually loosened the connection. Now I always check the surrounding soil hasn’t eroded away, leaving too much rod exposed above ground.
For a basic continuity check, you can use a multimeter to verify there’s electrical connection between your grounding rod and your solar equipment. However, this doesn’t tell you if your system meets code requirements for ground resistance.
Here’s where professional testing becomes valuable. Local electrical codes typically require ground resistance below 25 ohms. Professional electricians use specialized earth ground resistance testers that measure this precisely. While you can purchase these testers yourself, hiring a licensed electrician for annual inspections ensures your system stays compliant and safe—especially important for insurance and warranty purposes.
Common Mistakes DIYers Make With Grounding Rods
Let me tell you, I’ve seen some pretty creative interpretations of grounding rod installation over the years, and not all of them end well. One buddy of mine thought he could save time by only driving his 8-foot rod down about 5 feet, figuring “close enough, right?” Wrong. The NEC requires at least 8 feet of contact with the earth for good reason, and skimping on depth is one of the most common DIY solar mistakes that can leave your whole system vulnerable.
The number one error? Not driving the rod deep enough. If you hit rock or dense clay and think you’re done, think again. You’ll need to either angle the rod up to 45 degrees and keep going, or dig a trench and lay it horizontally. Either way, you need that full 8 feet in the ground.
Poor connections come in a close second. I’ve watched folks wrap bare copper wire around the rod and call it a day. That’s asking for corrosion and connection failure. Always use approved grounding clamps, specifically listed for direct burial, and make sure they’re tight. A loose connection is almost as bad as no connection at all.
Material mix-ups happen more than you’d think. Using galvanized clamps with copper rods creates a galvanic reaction that leads to corrosion. Stick with copper clamps for copper rods, and avoid aluminum wire for grounding, it’s simply not code-compliant.
Finally, failing to properly bond your grounding rod to your electrical panel is a critical oversight. Your ground rod needs to connect to your service panel’s grounding bus bar through continuous copper wire, typically 6 AWG minimum for most residential systems. Don’t cut corners here, proper bonding protects both your equipment and your family.
Code Compliance: What You Need to Know Before You Dig
Before you start driving that 8-foot grounding rod into the earth, let’s talk about the rules of the game. I learned this lesson the hard way years ago when I had to redo an entire grounding system because I skipped checking my local requirements first. Trust me, spending an hour on research now beats redoing everything later.
The National Electrical Code (NEC) Article 250 sets the baseline standards for grounding systems in the United States, including solar installations. The 8-foot minimum depth requirement comes directly from these standards, specifically NEC 250.53. But here’s the thing: the NEC is just the starting point. Your local jurisdiction might have additional requirements or specific amendments.
Think of code compliance for solar like following a recipe with regional variations. The basics stay the same, but your city or county might add their own ingredients to the mix.
Before purchasing materials or breaking ground, contact your local building department. Ask specifically about:
– Permit requirements for solar grounding systems
– Any soil resistivity testing requirements
– Inspection procedures and schedules
– Whether supplemental grounding electrodes are needed
Most jurisdictions require permits for solar installations, and grounding is a critical inspection point. Some areas even require licensed electricians to handle certain aspects of the work. This isn’t about red tape, it’s about safety and ensuring your system won’t create hazards.
The good news? Many DIYers successfully handle grounding rod installation themselves under proper permits. Be honest about your skill level, follow the code, and don’t hesitate to bring in a professional for the final connections or inspections.
Look, I’ll be honest with you—when I first started working with solar systems, grounding felt like the most intimidating part of the whole project. But here’s what I’ve learned after years of helping DIYers like yourself: proper grounding isn’t just another box to check. It’s the difference between a safe, reliable system and a potential disaster waiting to happen.
Yes, it might seem tempting to cut corners—maybe use a shorter rod, skip the soil testing, or rush through the installation. But this is one area where doing it right the first time truly matters. Your family’s safety depends on it, and so does your investment in solar energy.
The good news? You absolutely can do this. Thousands of DIYers successfully install grounding systems every year, and you can be one of them. Take your time, follow the guidelines we’ve covered, and don’t hesitate to ask for help when you need it.
Have specific questions about your situation? Head over to our site calculators to help determine your exact requirements, or engage with our community forum where experienced DIYers and experts are ready to help. Remember, there’s no such thing as a silly safety question. We’re all learning together, and your careful approach today means a safer, more reliable solar system for years to come.
How useful was this post?
Click on a star to rate it!
Average rating 0 / 5. Vote count: 0
No votes so far! Be the first to rate this post.
We are sorry that this post was not useful for you!
Let us improve this post!
Tell us how we can improve this post?
charlesnoble
Here at Spheral Solar, I’m a hands-on solar power enthusiast, constantly exploring and experimenting with DIY solutions. I’m dedicated to sharing my discoveries, insights, and even the bumps I hit along the way, all in the pursuit of a more sustainable future.
Why Your DIY Solar System Needs Proper Grounding… by Charlesnoble January 31, 2026 Ground your solar system before you connect a single wire—improper grounding has destroyed thousands of dollars in equipment and created deadly shock hazards in homes just like yours. I learned this the hard way when a lightning strike fried my neighbor’s ungrounded inverter, teaching me that grounding isn’t optional paperwork…
Why Your PV Wire Management Could Fail Inspection… by Charlesnoble April 9, 2026 Route your PV wires through UV-resistant conduit within 18 inches of leaving the solar array, securing it every 3 feet with proper clamps to prevent wind damage and code violations. This single step prevents 80% of the wire degradation issues I’ve seen in DIY solar installations over the past decade.…
Why Your Solar Conduit Installation Could Start a… by Charlesnoble March 27, 2026 Measure your conduit run before purchasing materials by mapping the exact path from your solar array to the inverter and battery location, accounting for a 10% waste factor and additional length for bends. PVC electrical conduit remains the most cost-effective protective solution for DIY solar installations, but improper installation creates…
Why Your 6-Wire Solar Setup Needs the Right Conduit… by Charlesnoble March 6, 2026 Measure your wire gauge and count of six conductors before selecting conduit—most residential solar installations running six AWG 10 wires require 1-inch conduit, while six AWG 6 wires need 1.5-inch conduit, and six AWG 2/0 wires demand 2.5-inch conduit minimum. Calculate fill capacity using the 40% rule for three or…
Why Your Rooftop Solar Could Block Firefighters (And… by Charlesnoble January 8, 2026 Measure three feet from your roof’s eaves before placing any solar panels—this clearance creates a critical pathway firefighters use to ventilate roofs during emergencies. When flames engulf a building, firefighters climb onto roofs and cut ventilation holes near the eaves to release heat and smoke, giving occupants precious escape time…
Why Your Battery Storage System Needs Better Airflow… by Charlesnoble December 31, 2025 Position your Energy Storage System at least three feet away from walls and combustible materials to ensure adequate air circulation prevents dangerous gas buildup and heat accumulation. Last summer, I learned this lesson when a friend’s improperly ventilated battery bank overheated during a heatwave—the batteries swelled, and we had to…
Subscribe for handpicked DIY projects, exclusive tips, and giveaways.
Electricity powers our homes from five main sources: solar panels, wind turbines, hydroelectric generators, fossil fuel generators, and battery storage systems. If you’re building a reliable off-grid setup or backing up your solar array, understanding how these sources work together transforms a single-point-of-failure system into resilient, year-round power. I learned this the hard way during… Read more: 5 Sources of Electrical Energy Every Solar DIYer Should Know for Complete Off-Grid Power
Connect your panels to a charge controller or battery system by running positive terminals to positive and negative to negative. This parallel configuration doubles your available current (amperage) while keeping voltage the same, which is exactly what you need when your system demands more power than a single panel can deliver. I learned this the… Read more: Why Two Solar Panels Beat One Every Time (Parallel Connection Explained)
Monitor your greenhouse temperature daily during peak sun hours—if it consistently exceeds 85°F or condensation builds up on interior surfaces, you’re losing crops to heat stress and creating the perfect environment for fungal diseases. A greenhouse solar ventilation fan addresses both problems without adding a penny to your electricity bill, making it one of the… Read more: Why Your Greenhouse Needs a Solar Ventilation Fan (Before Summer Hits)


")
")
")
")
")
")
")
")
")
")
")
")


