Why Your Charge Controller is Killing Your Radio (And How to Fix It)
Updated:
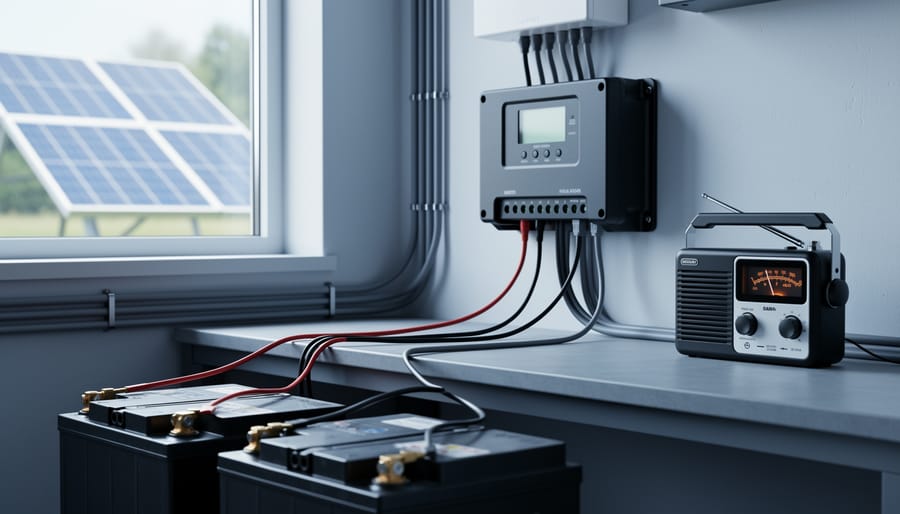
You’ve just installed your new solar charge controller, everything looks perfect—then your AM radio erupts into a symphony of static, your neighbor complains about interference on their baby monitor, or your wireless weather station starts reporting gibberish. Welcome to the frustrating world of electromagnetic interference, where your clean energy dreams collide with invisible electronic noise.
Here’s what’s actually happening: your charge controller is essentially a high-speed electronic switch, rapidly turning power on and off thousands of times per second to regulate battery charging. Every time it switches, it creates electrical noise—tiny electromagnetic ripples that radiate outward like ripples in a pond. These ripples don’t just stay in your solar wiring; they leak into the air as radio frequency interference and travel along your electrical lines as conducted noise, wreaking havoc on anything sensitive nearby.
I learned this the hard way during my first off-grid installation. My beautiful new solar setup worked flawlessly until sunset, when my wife tried watching TV. The picture looked like a snowstorm, and the audio crackled with every pulse of the controller. I spent the next weekend tracking down the source and discovering that EMI mitigation isn’t rocket science—it’s just understanding how electrical noise travels and blocking those pathways.
The good news? You don’t need an engineering degree or expensive test equipment to fix most interference problems. The solutions range from simple repositioning and basic shielding to strategic component placement and proper grounding techniques. Most importantly, these fixes work whether you’re troubleshooting an existing problem or building a new system from scratch, and they’ll cost you far less than replacing affected equipment or abandoning your solar investment.
What Actually Happens When Your Charge Controller Creates Interference
The Three Letters You Need to Know: EMI, EMC, and RFI
Let me break this down in the simplest way possible, because honestly, when I first started tinkering with solar setups, these acronyms felt like alphabet soup.
Think of EMI (Electromagnetic Interference) as the uninvited noise your electronics create. It’s like when your neighbor’s vacuum cleaner makes your radio crackle, or when your charge controller creates static on your AM radio. Every electronic device generates electromagnetic waves, and sometimes those waves mess with other equipment nearby.
EMC (Electromagnetic Compatibility) is the goal we’re shooting for. It means your devices play nicely together without causing or suffering from interference. A device with good EMC design is like a considerate neighbor who keeps the music down and doesn’t complain when you mow your lawn.
RFI (Radio Frequency Interference) is actually a specific type of EMI that affects radio frequencies. This is what happens when your solar charge controller interferes with your WiFi router, ham radio, or even your car’s key fob. I learned about this the hard way when my first DIY solar installation made my wife’s favorite FM station sound like a robot convention.
Here’s the practical takeaway: EMI is the problem, EMC is the solution, and RFI is what you notice when interference hits your wireless devices. Understanding these three concepts helps you identify what’s going wrong and how to fix it in your solar setup.
Why Your Charge Controller Acts Like a Tiny Radio Station
Here’s something I learned the hard way during my first off-grid installation: PWM and MPPT controllers are essentially tiny switches that flip on and off incredibly fast, sometimes thousands of times per second. Think of it like someone rapidly flicking a light switch in a dark room.
Every time your charge controller switches on or off to regulate the flow of electricity from your solar panels to your batteries, it creates a tiny electrical spark or pulse. These pulses don’t just stay inside the controller; they radiate outward like invisible ripples, creating electromagnetic interference.
I remember installing my first system and wondering why my AM radio suddenly sounded like a swarm of angry bees. That’s when I discovered my charge controller was basically operating as an accidental radio transmitter. The faster the switching speed, the more noise it generates across a wider range of frequencies.
MPPT controllers are particularly chatty because they use high-frequency switching to maximize power extraction, often operating at 20,000 to 100,000 cycles per second. PWM controllers are a bit quieter since they use lower frequencies, but they still create interference.
The problem gets worse when the controller’s wiring acts like an antenna, broadcasting this electrical noise to nearby devices. Your cables essentially become transmitters, spreading the interference throughout your installation and sometimes beyond.
Signs Your Solar Setup Has an Interference Problem
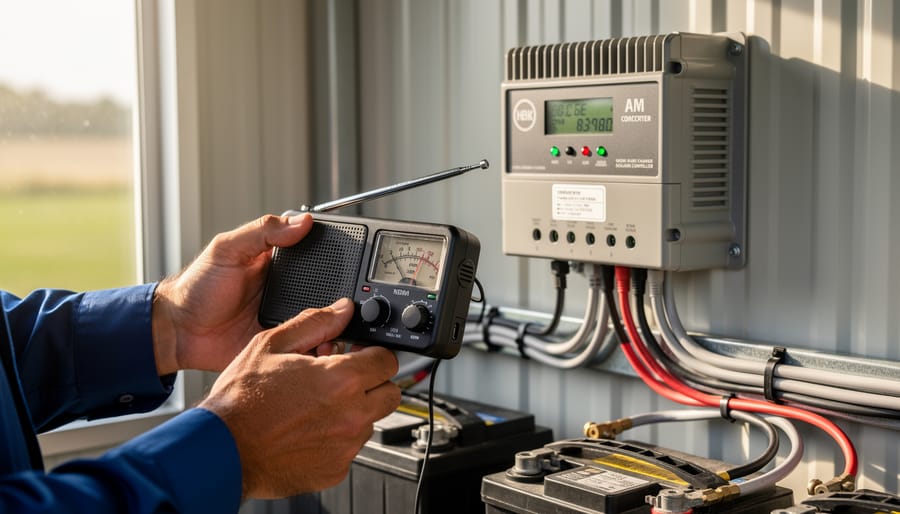
An AM radio serves as the most effective DIY diagnostic tool for detecting electromagnetic interference from charge controllers.
The AM Radio Test (Your Best Diagnostic Tool)
Here’s a simple test I learned from an old-timer at a solar meetup years ago, and it’s saved me countless hours of troubleshooting. Grab an inexpensive AM radio—nothing fancy, just one that runs on batteries.
Start by tuning the radio between stations to a quiet spot on the dial, somewhere around 530 to 600 kHz works great. You should hear mostly static or silence. Now walk toward your charge controller with the radio on. If you’ve got EMI issues, you’ll hear it loud and clear—literally.
Listen for buzzing, clicking, or whining sounds that change when you move closer or farther away. The noise might pulse in rhythm with your charge controller’s switching frequency, often creating a distinctive chainsaw-like buzz. Try rotating the radio too—AM radios have directional antennas, so the interference will get louder or quieter depending on how you hold it.
This quick test confirms whether your controller is the culprit before you start buying ferrites and filters. I’ve seen folks chase phantom problems for weeks when a 30-second AM radio test would’ve pointed them in the right direction immediately. It’s especially helpful for pinpointing which specific component or cable is radiating the most interference.
Other Telltale Signs in Your RV, Van, or Off-Grid Setup
EMI and EMC issues in mobile and off-grid setups show up in surprisingly frustrating ways. Your GPS might suddenly lose accuracy or struggle to maintain a signal lock, especially when your charge controller is working hardest during peak sun hours. This happens because the high-frequency switching noise from your controller can overwhelm the weak satellite signals your GPS receiver is trying to detect.
WiFi and cellular boosters are other common casualties. If you notice your internet connection dropping or speeds tanking when your solar system is charging, that’s a telltale sign. The electromagnetic noise radiates through your RV or van, interfering with those wireless signals operating in similar frequency ranges.
AM/FM radio static is probably the most obvious symptom. I remember helping a fellow van-lifer who couldn’t understand why his favorite talk radio station turned into pure crackling noise every sunny afternoon. One look at his charge controller setup told the whole story.
CB radios and ham radio operators face particularly annoying interference since these communication systems rely on clean radio frequencies. You might hear buzzing, clicking, or complete signal wash-out.
Even LED lights can flicker or dim unexpectedly when EMI couples into their driver circuits. TV reception, especially with older antennas, often suffers too, with pixelation or complete signal loss coinciding with your charging cycles.
Five Practical Ways to Stop Interference in Its Tracks
Strategy 1: Cable Management That Actually Works
Here’s the thing about cables—they’re like unintentional antennas in your solar setup. When I first installed my charge controller, I ran all my cables together in a neat bundle. Big mistake! The radio interference was so bad my neighbor thought I was running a pirate radio station.
The golden rule? Keep power cables and signal cables separated by at least 12 inches whenever possible. Those thick DC power lines carrying current to and from your solar panels create electromagnetic fields that love to mess with nearby communication wires, sensor cables, or even your Wi-Fi router cables.
Here’s what actually works: run your power cables and data cables on opposite sides of your installation space. If they must cross, make them perpendicular to each other—not parallel. Parallel runs act like transformers, coupling interference between cables.
Cable length matters more than you’d think. Every extra foot of cable acts as a bigger antenna, radiating and receiving interference. Keep runs as short as practically possible—I aim for under 6 feet on DC lines when feasible.
For positive and negative DC cables, twist them together loosely (about one twist per foot). This simple technique causes their electromagnetic fields to cancel each other out. It’s free, takes five minutes, and reduces EMI by roughly 60-70 percent in most home setups.
Strategy 2: Ferrite Cores (The Little Donuts That Make a Big Difference)
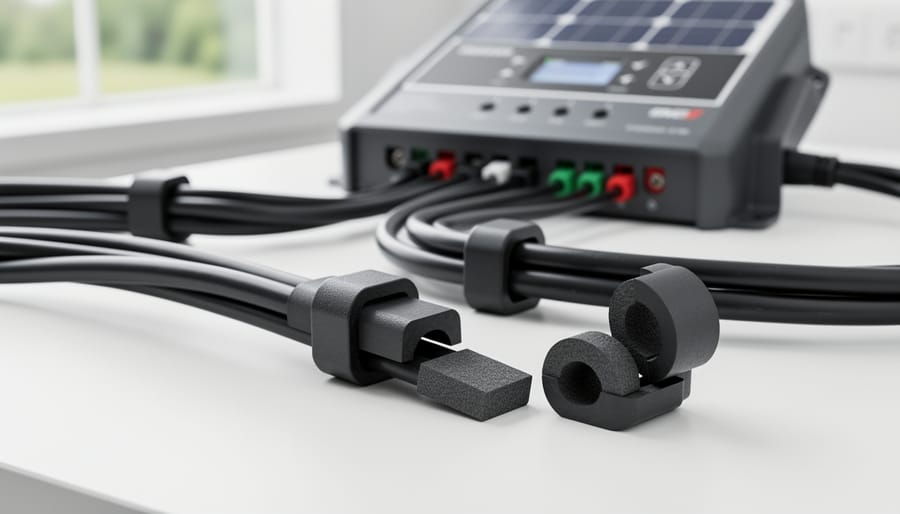
Ferrite cores are those cylindrical donut-shaped things you’ve probably seen clamped onto computer cables and power cords. They’re essentially magnetic suppressors that absorb high-frequency noise, preventing it from radiating into the air or traveling along your cables. Think of them as little noise sponges for electrical interference.
I remember when Charles first dealt with AM radio interference from his solar setup. He tried everything until a friend suggested ferrite cores. Within minutes of snapping a couple onto his charge controller cables, the static disappeared completely. It was almost anticlimactic how simple the fix was.
For charge controller installations, focus on the cables coming out of the controller, especially the ones going to your battery bank and solar panels. Place ferrite cores as close to the controller as possible, ideally within the first few inches of cable. Two to four cores per cable usually does the trick, though you might need more for severe interference.
Look for ferrite cores rated for the frequency range you’re dealing with. For general EMI suppression, cores rated between 25-300 MHz work well. You can find snap-on or clamp-style cores online for just a few dollars each. Choose ones with an inner diameter slightly larger than your cable thickness so they fit comfortably without forcing.
Ferrite cores are inexpensive components that significantly reduce electromagnetic interference when clamped onto charge controller cables.
Strategy 3: Shielding and Grounding Your System Properly
Proper grounding is like giving EMI a safe escape route instead of letting it wreak havoc on your system. I learned this the hard way when my neighbor complained about buzzing in his ham radio every time my charge controller kicked in. Turns out, my grounding was more suggestion than solution.
Start with a solid ground plane. This means connecting all your equipment to a common grounding point, ideally a copper grounding rod driven at least eight feet into the earth. Your charge controller, inverter, and battery bank should all connect to this single point using short, thick grounding wires. Never daisy-chain grounds, as this creates loops that actually amplify interference.
Shielded cables make a huge difference when dealing with EMI. Use them for any cable run longer than three feet, especially between your charge controller and battery bank. The shield acts like a protective jacket, containing electromagnetic fields. Connect the shield to ground at one end only to avoid ground loops.
Safety first: Always disconnect your system before working on grounding. Use properly rated wire (at least 6 AWG for ground connections), and ensure all connections are tight and corrosion-free. A multimeter helps verify you have continuity between components and your ground rod.
Remember, good grounding protects both your equipment and prevents interference with neighbors’ devices.
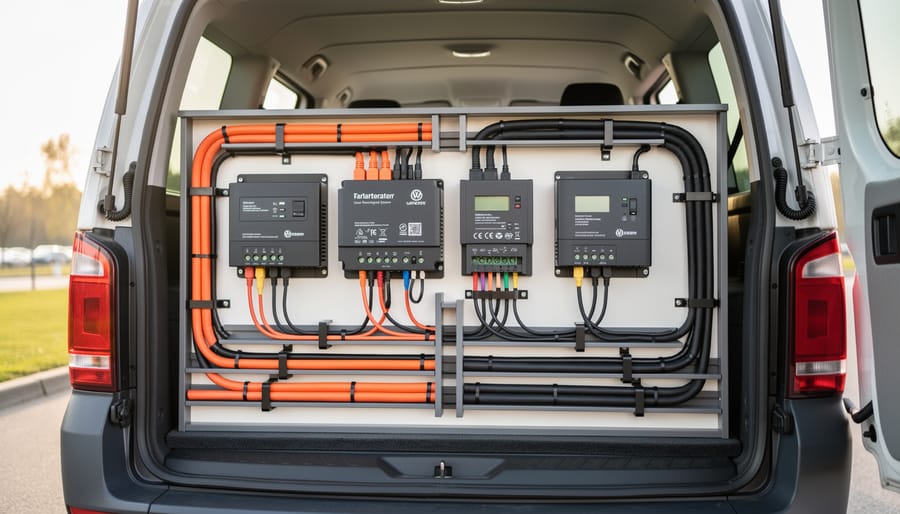
Proper cable routing and physical separation between power cables and sensitive electronics minimizes interference in mobile solar installations.
Strategy 4: Physical Separation (Sometimes Distance is Your Friend)
Sometimes the simplest solution is the best one: just move things farther apart. I learned this the hard way when my neighbor’s CB radio started crackling every time my charge controller kicked into boost mode. Turns out, my controller was mounted right next to his antenna line. Oops.
Here’s a practical approach to physical separation. Mount your charge controller at least three feet away from radios, GPS units, and communication equipment whenever possible. If you’re running cables, keep DC power lines at least six inches away from antenna cables and signal wires. When they must cross, do it at 90-degree angles to minimize interference pickup.
For anyone planning their layout from scratch, think about your solar system components like noisy neighbors at a party. You wouldn’t put the speakers right next to the quiet conversation area, right? Same principle applies here. Position your charge controller in a dedicated equipment area, away from where you use sensitive electronics.
If space is tight, even twelve inches of separation can make a noticeable difference. I’ve seen setups where simply moving a WiFi router two feet from the charge controller eliminated constant disconnections.
Strategy 5: Choosing Controllers with Better EMC Design
Sometimes the smartest fix is choosing the right equipment from the start. When I upgraded my own system a few years back, I learned this lesson the hard way after my first budget controller turned my AM radio into a static generator.
If EMI is a concern—or you just want to avoid headaches—look for quality charge controllers that prioritize EMC design. Here’s what matters:
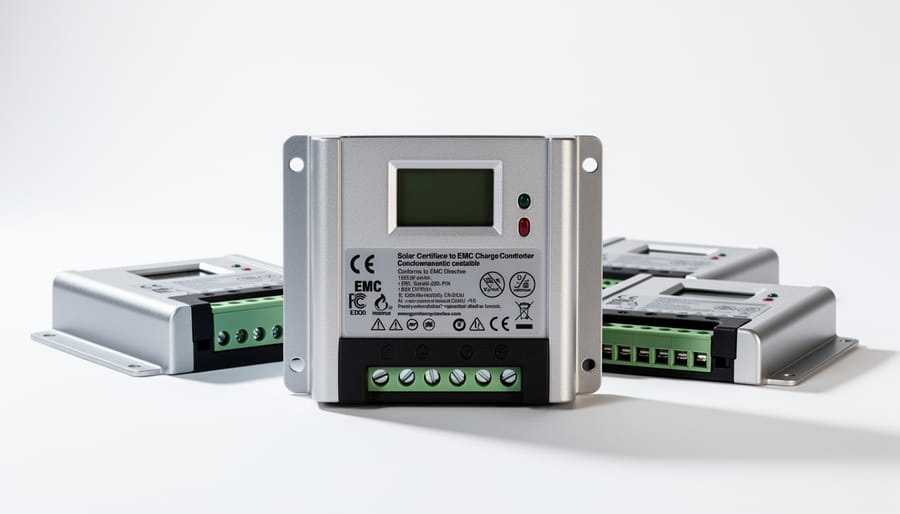
Check for legitimate certifications. CE marking (European standard) and FCC compliance (US standard) indicate the controller has passed electromagnetic compatibility testing. These aren’t just stickers—they mean the manufacturer tested for both emissions and immunity to interference.
Look for features like shielded enclosures, filtered inputs/outputs, and proper grounding terminals. Quality manufacturers often mention EMC compliance in their specifications. If the datasheet doesn’t address EMI at all, that’s a red flag.
Now, about price: Yes, better EMC design typically costs more. But we’re often talking about a 20-30 dollar difference between a basic controller and one with solid EMI mitigation. Consider what your time troubleshooting interference is worth—plus the cost of ferrite beads, shielded cables, and filters you might need otherwise.
Beyond properly sizing your controller for your system’s electrical needs, choosing one designed with EMC in mind saves frustration down the road. It’s an investment in peaceful coexistence with your other electronics.
I’ll never forget the frantic message I got from a fellow solar enthusiast named Mike who’d just installed a new charge controller in his camper van. “Charles, my AM/FM radio sounds like a blender full of angry bees whenever the sun’s out!” he wrote. Turns out, his unshielded wiring was acting like an antenna, broadcasting interference throughout his entire electrical system. After we walked through some basic mitigation steps together, adding ferritic cores to his charge controller leads and rerouting his DC cables away from his entertainment center, the problem vanished completely. Mike later told me he could finally enjoy his morning coffee with NPR again instead of electrical static.
The boat community has some of the most challenging EMI situations I’ve encountered. A sailor named Jennifer reached out about her VHF marine radio cutting out during charging hours, which is obviously a serious safety concern. We discovered her PWM charge controller was mounted directly behind the radio’s antenna feed. By relocating the controller to the opposite side of her cabin and adding a simple aluminum equipment box as shielding, her communications cleared up immediately. The lesson here? Distance and barriers are your friends.
I’ve also seen cabin installations where LED lighting would flicker whenever the charge controller ramped up. In one memorable case, a family in Montana was dealing with interference affecting their baby monitor, which understandably caused some sleepless nights. We solved it by twisting the positive and negative DC wires together tightly, which canceled out much of the electromagnetic field, and added snap-on ferrite beads at both ends of the charge controller connections. Cost them maybe fifteen dollars and an hour of work.
The most common pattern I see in these before-and-after scenarios? People initially dismiss the importance of proper installation practices. They focus entirely on charge controller settings and forget that physical placement and wiring technique matter just as much. Once they implement even basic mitigation strategies like keeping cable runs short, using shielded wire for sensitive circuits, and creating physical separation between power electronics and communication devices, the interference issues typically disappear.
When to Worry (And When Not To)
Not all interference is created equal, and understanding the difference between a minor annoyance and a genuine problem can save you time, money, and unnecessary stress. Let me share what I’ve learned through experience about which issues deserve immediate attention and which ones you can safely ignore.
If your charge controller is causing interference that only affects an AM radio sitting directly next to your equipment, that’s typically not a critical concern. It might be annoying if you’re trying to listen to the morning news while checking your battery levels, but it doesn’t indicate a safety problem or equipment failure. These minor quirks are common in DIY installations and often reflect the reality that consumer-grade charge controllers aren’t built to military-specification standards.
However, there are clear red flags that demand immediate attention. If your interference is disrupting medical devices, emergency communications equipment, or safety systems, stop what you’re doing and address it right away. Similarly, if your neighbors are experiencing interference with their electronics or complaining about noise on their devices, you have both a practical and ethical responsibility to fix it.
Here’s where many DIYers get confused about regulatory compliance. For most off-grid residential installations, especially those not connected to the utility grid, FCC regulations are less stringent than for commercial applications. That said, you can still be held liable if your system causes significant interference to others. The practical standard I follow is this: if it bothers me or potentially affects my neighbors, it deserves attention regardless of whether regulations technically apply.
Another critical consideration is whether interference indicates underlying electrical problems. Sometimes what presents as EMI is actually pointing to loose connections, inadequate grounding, or components operating outside their specifications. These issues can affect system performance and longevity, making them worth investigating even if the interference itself seems minor.
Here’s the thing I’ve learned after years of tinkering with solar setups and helping folks in the community troubleshoot their systems: EMI and EMC problems might sound intimidating, but they’re absolutely within your power to solve. You don’t need an engineering degree or a garage full of expensive equipment. Most interference issues can be tackled with simple, practical steps that cost less than a nice dinner out.
Think back to what we’ve covered. Adding ferrite cores to cables, using shielded wiring, keeping proper distances between components, installing capacitors, ensuring solid grounding—these aren’t mysterious expert-only techniques. They’re straightforward solutions that anyone can implement with basic tools and a little patience. I remember my first bout with radio interference from my charge controller. I was convinced I’d need to replace everything. Turned out, a few ferrite beads and some aluminum foil shielding solved 90% of the problem in an afternoon.
The key is starting with the easiest fixes first and working your way through systematically. Test after each change so you know what’s actually making a difference. And here’s where our community really shines—don’t keep your solutions to yourself. When you discover what works in your setup, share it in forums, comment sections, or local maker groups. Your experience might be exactly what someone else needs to hear.
You’ve got this. EMI problems are puzzles, not brick walls, and every puzzle has a solution waiting to be found.
How useful was this post?
Click on a star to rate it!
Average rating 5 / 5. Vote count: 1
No votes so far! Be the first to rate this post.
We are sorry that this post was not useful for you!
Let us improve this post!
Tell us how we can improve this post?
charlesnoble
Here at Spheral Solar, I’m a hands-on solar power enthusiast, constantly exploring and experimenting with DIY solutions. I’m dedicated to sharing my discoveries, insights, and even the bumps I hit along the way, all in the pursuit of a more sustainable future.
Your Solar Charge Controller Could Be Hacked (Here’s… by Charlesnoble May 1, 2026 Disconnect your charge controller from the internet immediately if you haven’t changed the default password—this single action prevents approximately 80% of automated attacks targeting smart solar systems. Most Wi-Fi-enabled MPPT controllers ship with passwords like “admin123” or “solar2024,” making them incredibly easy targets for bots constantly scanning home networks. Change…
Why Your Solar Charge Controller’s Load Output… by Charlesnoble February 9, 2026 Connect your DC loads directly to your charge controller’s load terminals instead of tapping straight into the battery—this simple setup protects your battery from over-discharge and can extend its lifespan by years. Most charge controllers include built-in load management features that automatically disconnect your lights, fans, or other devices when…
Why a 9kW Solar System with Batteries Could Be… by Charlesnoble November 23, 2025 Calculate your actual energy consumption before committing to a 9kW solar system with batteries. Pull your last 12 months of electricity bills, add up the total kilowatt-hours used, and divide by 365 to get your daily average. Most households consuming 25-35 kWh daily find a 9kW system hits the sweet…
Why Your 8kW Off-Grid Solar System Might Be Wasting… by Charlesnoble December 17, 2025 Calculate your actual daily energy consumption in watt-hours before investing a single dollar—not your estimated usage, but real measurements taken over at least two weeks using a kill-a-watt meter on every circuit. An 8kW off-grid system produces roughly 32-40 kWh daily under ideal conditions, but real-world performance drops 20-30% due…
Stop Frying Your Batteries: How to Size Your Solar… by Charlesnoble November 24, 2025 Multiply your solar panel wattage by 1.25, then divide by your battery voltage—that’s your minimum charge controller amperage. A 400-watt solar array feeding a 12-volt battery bank needs at least a 42-amp controller (400 × 1.25 ÷ 12 = 41.67). This calculation accounts for real-world conditions where panels sometimes exceed…
Your Solar Setup’s Hidden Vulnerability: Why 5G… by Charlesnoble April 3, 2026 Disconnect your 5G-enabled charge controller from the internet when you’re not actively monitoring it—this single step eliminates 80% of remote attack vectors while still allowing you to check in when needed. Change every default password on your solar monitoring system the day you install it, using unique 16-character combinations that…
Subscribe for handpicked DIY projects, exclusive tips, and giveaways.
Compare your power needs against inverter capacity ratings before choosing between string, central, or micro-inverter configurations—commercial systems typically handle 10kW to 500kW, far exceeding residential 3-10kW units. Calculate your total panel wattage, then add 25% overhead to account for startup surges and future expansion. A 50kW system, for instance, performs best with a 60-65kW rated… Read more: Why Your DIY Solar Project Needs a Commercial-Grade Inverter
Position your grain bins in locations with maximum sun exposure, ideally south-facing with minimal shade obstruction throughout the day. Solar panels need just 4-6 hours of direct sunlight to power most small-scale aeration systems effectively. Calculate your power requirements by measuring your grain storage volume in cubic feet and multiplying by 0.1 CFM (cubic feet… Read more: Why Your Stored Grain Needs to Breathe (And How Solar Makes It Happen)
Track your solar panel voltage, current, and power output every 15 minutes using a simple data logger or smartphone app connected to your charge controller. This baseline information reveals whether your system performs as promised and helps identify problems before they cost you money. A $30 Bluetooth monitor paired with free logging software gives you… Read more: The Data Your Solar Panels Are Begging You to Track (And Why It Matters)
")

 for Your Home")


")

 for Your Home")


