Why Your DIY Solar Setup Could Be a Hacker’s Next Target (And How to Stop Them)
Updated:
Disconnect your charge controller from the internet immediately if you’re not actively monitoring it—most DIY solar setups don’t need constant connectivity, and an offline system can’t be hacked remotely. Change every default password on your solar equipment right now, using unique 15+ character combinations that include numbers, symbols, and mixed-case letters, because default credentials like “admin/admin” are the first thing attackers try when scanning for vulnerable devices.
Set up a separate network specifically for your solar equipment, isolating it from your home WiFi where laptops, phones, and smart devices create multiple entry points for security breaches. This guest network approach means even if your main network gets compromised through a phishing email or infected device, your solar system remains protected behind its own digital wall.
Disable remote access features unless absolutely necessary, and if you must use them, implement a VPN connection rather than exposing your charge controller directly to the internet—I learned this lesson the hard way when I found suspicious login attempts from IP addresses in countries I’ve never visited. Update your controller’s firmware within 48 hours of any security patch release, checking manufacturer websites monthly since many solar equipment makers don’t send automatic notifications about critical updates.
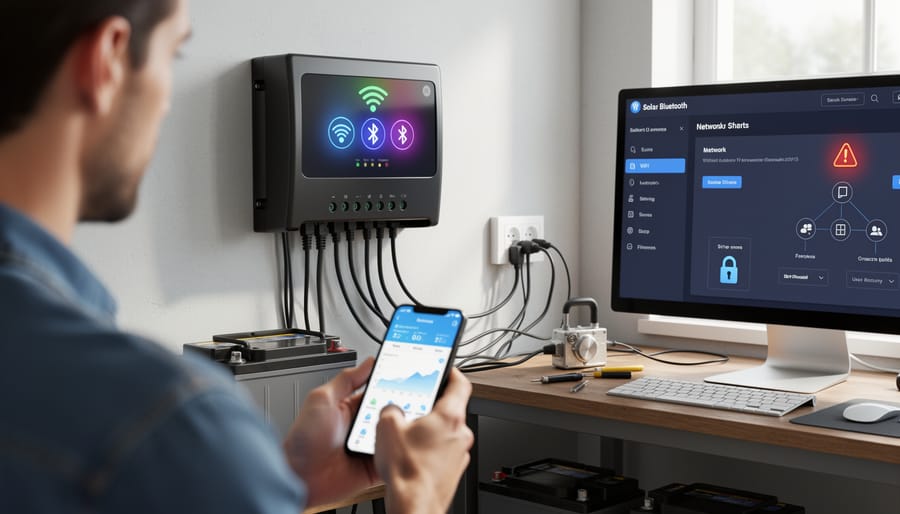
The reality facing DIY solar enthusiasts today is sobering: the same connectivity features that let you monitor your battery levels from your smartphone also create vulnerabilities that malicious actors actively exploit. Your off-grid dream can become a cybersecurity nightmare when charge controllers, inverters, and monitoring systems connect to networks without proper hardening. This guide translates enterprise-level security concepts into practical steps you can implement this weekend, protecting your investment without needing an IT degree or expensive security consultants.
When Your Charge Controller Becomes a Security Risk
Modern charge controllers with WiFi and Bluetooth connectivity offer convenience but introduce potential security vulnerabilities that DIY solar enthusiasts need to address.
The Data Your Solar System Shares
Modern charge controllers are essentially tiny computers that constantly communicate with your solar system—and potentially beyond. When I first upgraded to a “smart” charge controller, I was thrilled to check my battery levels from my phone. What I didn’t realize was just how much information these devices were sharing.
Your charge controller transmits surprisingly detailed data. At a basic level, it sends battery voltage, charge status, and solar panel production rates. However, many internet-connected models also share timestamps of your energy usage patterns, which can reveal when you’re home or away. Some controllers communicate with other smart home devices on your network, creating a map of your connected ecosystem. If you’re using monitoring apps, this data travels through cloud servers owned by the manufacturer—servers you have no control over.
Here’s why this matters: energy usage patterns are incredibly revealing. They can indicate your daily schedule, when you travel, and even what appliances you’re using. In the wrong hands, this information becomes a security risk. Beyond privacy concerns, compromised charge controllers can be manipulated to damage your battery bank by overcharging or discharging improperly—an expensive problem when you’ve invested time in properly sizing your charge controller and batteries.
The good news? Understanding what data flows through your system is the first step toward protecting it. Most vulnerabilities can be addressed with straightforward security measures that don’t require advanced technical knowledge.
Real Threats to Hobby Solar Setups
Let me be honest with you—when I first connected my charge controller to WiFi, my neighbor (who works in IT) looked at me like I’d just posted my bank password on Facebook. Was he overreacting? Partly. But he also had a point.
The reality is that most hobby solar setups aren’t attractive targets for sophisticated hackers. Your 400-watt rooftop array isn’t exactly critical infrastructure. However, there are genuine risks worth understanding without losing sleep over.
The most realistic threat? Someone on your local network—maybe a guest who connects to your WiFi—accessing your charge controller’s web interface if you haven’t changed the default password. I’ve seen this happen at a friend’s place where a visiting relative accidentally changed settings while poking around the network. It wasn’t malicious, just curiosity meeting poor security.
Another legitimate concern is automated bot scanning. These programs constantly sweep the internet looking for devices with default credentials. If your solar setup is directly exposed to the internet without proper router configuration, these bots might find it. They’re not targeting you specifically; they’re just casting a wide net.
Data privacy matters too. Some cloud-connected solar systems transmit usage patterns that reveal when you’re home or away—information that could theoretically be intercepted or accessed through compromised accounts.
The good news? These threats are manageable with straightforward precautions. You don’t need a computer science degree to protect your setup, just some basic awareness and fifteen minutes to implement simple security measures. Think of it like locking your front door—sensible, not paranoid.
Simple Ways to Lock Down Your Charge Controller
Change Those Default Passwords (Yes, Really)
I learned this lesson the hard way when I discovered my charge controller’s web interface was still using “admin/admin” six months after installation. It’s embarrassingly common, and honestly, manufacturers should do better. But until they do, it’s on us.
Most charge controllers with network connectivity ship with laughably simple default credentials. Think “admin/password” or even just “1234.” These are published in manuals available online, making them the first thing anyone trying to access your system would attempt.
Here’s how to fix this on popular models:
For Victron controllers, log into the VRM portal or local interface. Navigate to Settings, then User Management. You’ll find the option to change both the username and password. Don’t just change the password and leave “admin” as your username.
EPEver controllers typically require accessing the web interface through your browser. Look for the System or Security tab in the menu. The default is often “admin/123456.”
Renogy’s monitoring systems usually have password settings under the Account or System Configuration menu in their mobile app or web dashboard.
When creating your new password, resist the temptation to use something solar-related like “sunshine123.” A strong password combines uppercase and lowercase letters, numbers, and symbols. Aim for at least 12 characters. Something like “BlueSky47!Solar#Home” works well because it’s memorable but complex.
Store these credentials securely. A password manager is ideal, but even a notebook in a safe place beats leaving defaults unchanged. And while you’re updating passwords, review your charge controller settings to ensure everything’s configured correctly for your system.
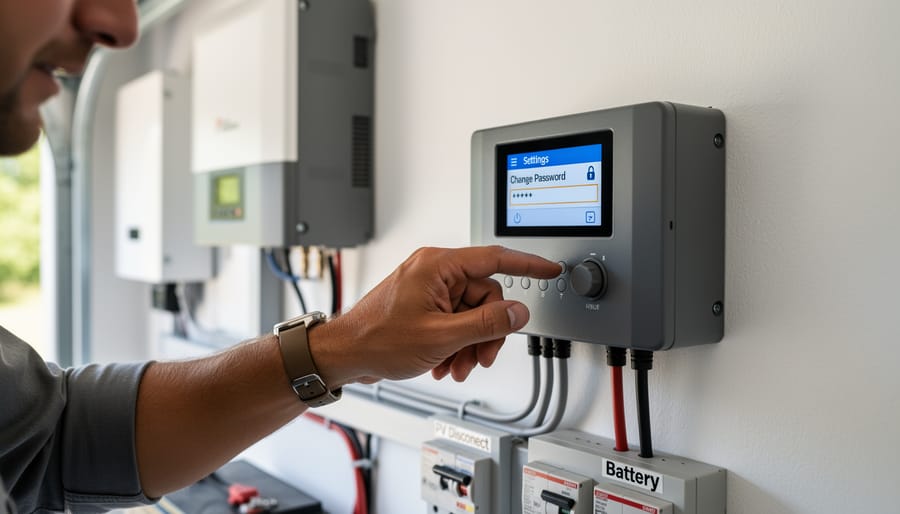
Changing default passwords on solar charge controllers is the first and most critical step in securing your DIY solar system from unauthorized access.
Update Your Firmware Like Your Life Depends on It
Here’s the truth: outdated firmware is like leaving your front door unlocked. I learned this the hard way when a friend discovered his charge controller was running software from three years ago, complete with unpatched security holes that could’ve let anyone on his network mess with his system settings.
Most modern charge controllers receive firmware updates that fix security vulnerabilities, improve performance, and add protective features. Think of firmware as your controller’s operating system – it needs regular updates just like your phone or computer.
Checking for updates is usually straightforward. Visit your manufacturer’s website and look for a support or downloads section. You’ll typically find firmware files and release notes explaining what’s been fixed. Many newer controllers also have companion apps that notify you when updates are available.
Before updating, always back up your current settings by taking photos or notes. The update process varies by manufacturer, but generally involves downloading a file to a USB drive or using the companion app to push the update wirelessly. If something goes wrong and you need help resetting your charge controller, don’t panic – it’s a standard troubleshooting step.
Set a calendar reminder to check quarterly. Those fifteen minutes could prevent serious headaches down the road.
Disable Features You Don’t Actually Use
Here’s something I learned the hard way: when I first set up my solar monitoring system, I enabled every feature available because, well, why not? It turned out to be a security nightmare I didn’t even realize I’d created.
Think of your charge controller like a smartphone. Just because it can connect to everything doesn’t mean it should. Every enabled feature is another potential doorway for unwelcome visitors.
Start by reviewing your device settings. Does your controller have remote access capabilities you’ve never actually used? Turn them off. That cloud dashboard you checked once six months ago? Disable it if you’re not actively monitoring it. Many modern controllers come with Bluetooth, Wi-Fi, and cellular connections all enabled by default, but most of us only need one, if any.
Here’s a practical approach: make a list of features you’ve used in the past month. Everything else gets switched off. You can always turn features back on when you need them, but leaving unused connections active is like leaving your front door unlocked because you might want to use it someday.
Remote firmware updates are particularly tricky. While convenient, they’re also a prime target for attacks. If your system is working well, consider disabling automatic updates and only enabling them manually when needed.
Network Hardening for Solar DIYers
Creating a Separate Network for Your Solar Gear
Think of your home network like a neighborhood. You wouldn’t give strangers the keys to your front door, right? The same logic applies to your solar equipment. Network segmentation is basically creating a separate “neighborhood” for your solar gear, keeping it isolated from your main devices like computers and phones.
I learned this lesson the hard way when a friend’s compromised charge controller started sending weird traffic across his entire network. It was a wake-up call for both of us.
The easiest way to do this is by setting up a guest network on your existing router. Most consumer routers have this feature built right in. Here’s how to get started:
Log into your router’s settings by typing its IP address into your browser, usually something like 192.168.1.1 or 192.168.0.1. Check the sticker on your router if you’re unsure. Look for a section labeled “Guest Network” or “Guest Wi-Fi” in the settings menu. Enable it and give it a unique name, something like “Solar_Equipment_Only.”
The key here is making sure the guest network isolation feature is turned on. This prevents devices on the guest network from talking to devices on your main network. Your solar equipment can still access the internet for monitoring and updates, but if something goes wrong, the problem stays contained.
For wired connections like Ethernet-connected charge controllers, you’ll want to explore VLANs, or Virtual Local Area Networks. This sounds fancy, but many newer routers support basic VLAN setup through their interface. The principle is identical: create a separate virtual network that keeps your solar gear isolated.
Once configured, connect all your solar monitoring equipment, inverters, and charge controllers to this separate network. Your main devices stay protected, and you can still check your solar production from your phone or computer.
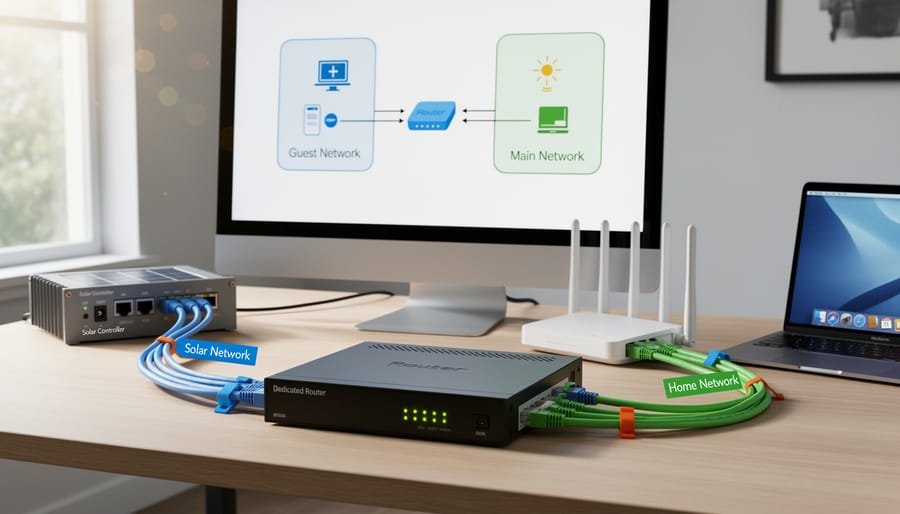
Network segmentation using a dedicated router or guest network keeps solar equipment isolated from your primary home network, reducing security risks.
Firewall Basics That Actually Make Sense
Think of a firewall as a security guard at the entrance to your solar system’s network. Its job is simple: decide who gets in and who stays out. When I first set up my connected solar system, I’ll admit I was intimidated by the whole firewall concept. But once I understood the basics, I realized it’s less complicated than programming my old VCR used to be.
Here’s what a firewall actually does for your solar setup. It monitors the data trying to enter or leave your charge controller, inverter, or monitoring system. Every piece of information has a source and destination, kind of like mail with a return address. The firewall checks these addresses against your rules and either allows the connection or blocks it.
For most home solar systems, you’ll want to configure your firewall with three basic rules. First, block all incoming connections from the internet by default. This prevents random people from stumbling onto your equipment. Second, allow only specific devices on your home network to communicate with your solar components. Third, permit your monitoring apps to send data out when you initiate the connection, not the other way around.
Many modern routers include basic firewall features already turned on. Check your router’s settings page and look for options like “block incoming connections” or “stealth mode.” Enable these. If your charge controller has its own firewall settings, start with the most restrictive preset and only open what you actually need. It’s easier to loosen restrictions later than to recover from a security breach.
When (And When Not) to Connect to the Cloud
Cloud connectivity is incredibly convenient—I’ll admit, checking my solar production from my phone while sipping coffee feels pretty futuristic. But here’s the thing: every connection to the internet is a potential doorway for unwanted visitors.
Think of cloud monitoring like having a window in your home. It lets you see out, but without proper protection, others can see in too. The question isn’t whether cloud features are inherently bad (they’re not), but whether the benefits outweigh the risks for your specific situation.
Consider connecting to the cloud when you genuinely need remote monitoring for systems you can’t easily check in person, like a cabin’s solar setup or when traveling frequently. The convenience makes sense here. However, if your charge controller is in your garage and you walk past it daily, ask yourself: do I really need internet access to this device?
When you do connect, use these safeguards: enable two-factor authentication if available, create unique passwords (never reuse them), regularly update firmware, and consider segmenting your network so solar equipment sits separate from personal devices. Some manufacturers offer more secure cloud platforms than others, so research their security track record before committing.
Remember, you can always start without cloud connectivity and add it later once you’ve implemented proper security measures.
Monitoring Your System Without Exposing It
Local Monitoring Solutions That Keep You Safe
The safest solar setups I’ve seen are often the simplest ones. When I first started worrying about security, I realized my charge controller’s built-in LCD display showed me everything I needed without any internet connection whatsoever. Most modern controllers have excellent local displays that show voltage, current, battery state, and daily production totals right on the unit itself.
If you want more detailed monitoring, consider using a local network setup instead of cloud services. Many charge controllers offer Bluetooth connectivity that works only within a few feet of your device. You can check your system with a smartphone app without ever sending data beyond your property. This gives you convenience without the internet exposure.
For those wanting comprehensive monitoring, a local network solution works beautifully. Connect your charge controller to a dedicated router that isn’t connected to the internet. You can still access detailed data from any device on your home network, but there’s zero risk of remote attacks. I’ve been using this approach for two years now, and honestly, I don’t miss the cloud dashboards at all. The peace of mind knowing my system is truly isolated is worth the minor inconvenience of checking stats only when I’m home.
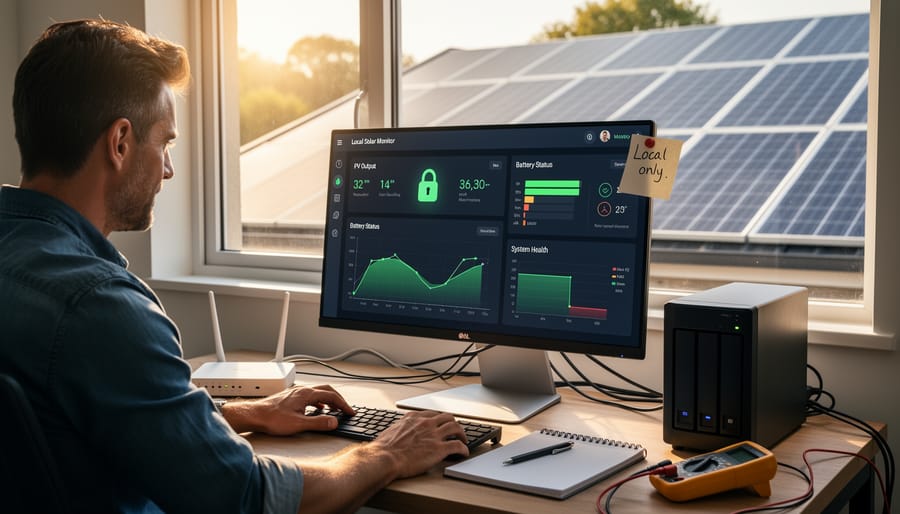
Secure local monitoring solutions allow DIY solar enthusiasts to track system performance without exposing their equipment to internet-based threats.
Setting Up Secure Remote Access (The Right Way)
Sometimes you need to check on your solar system when you’re away from home, and that’s completely reasonable. But opening your charge controller to the internet without protection is like leaving your front door unlocked with a sign saying “nobody’s home.” Let me share what I learned the hard way.
A VPN, or Virtual Private Network, creates a secure tunnel between your phone and your home network. Think of it as a private hallway that only you can walk through, even when you’re miles away. Instead of exposing your charge controller directly to the internet, you connect to your home network first, then access your devices as if you were sitting in your living room.
For most DIYers, I recommend starting with a simple router-based VPN. Many modern routers from brands like Asus, Netgear, or TP-Link have built-in VPN servers you can enable through their settings. The setup usually involves creating a username and password, downloading a configuration file, and installing a free VPN app on your phone. Your router’s manual will have specific instructions, and most take less than 30 minutes.
If your router doesn’t support VPN, consider a Raspberry Pi running PiVPN, which costs about 50 dollars and offers excellent security for beginners. The PiVPN community has fantastic step-by-step guides.
Here’s the golden rule: never use port forwarding to directly access your charge controller from the internet. Always connect through your VPN first. This single practice eliminates the vast majority of remote access risks while still letting you monitor your system from anywhere.
Building Security Into Your Next Solar Project
Choosing Security-Conscious Solar Equipment
When I first started researching solar equipment, I assumed all charge controllers and inverters were created equal. I was wrong. Not all manufacturers prioritize security, and some connected devices ship with vulnerabilities that could expose your entire home network. Here’s what you need to know before making a purchase.
Start by asking manufacturers direct questions about their security practices. Do they release regular firmware updates? How quickly do they patch known vulnerabilities? Can the device function without cloud connectivity? If a company can’t answer these questions clearly, consider that a red flag. The best manufacturers will proudly share their security roadmap and update history.
Look for security-conscious charge controllers and inverters that offer local-only operation modes. Cloud connectivity is convenient, but it’s also a potential entry point for attackers. Equipment that can run entirely on your local network gives you more control over security. Check whether the device requires you to create an account with the manufacturer’s servers or if it can operate independently.
Red flags to avoid include hardcoded default passwords that can’t be changed, devices requiring proprietary apps that haven’t been updated in years, and equipment that forces always-on internet connectivity. Some older models use unencrypted communication protocols, essentially broadcasting your energy data in plain text. If the manufacturer’s website doesn’t mention security features at all, that silence speaks volumes. Remember, you’re not just buying a solar component, you’re potentially adding a connected device to your home network that needs the same security consideration as your computer or smartphone.
Planning Your Network Architecture From Day One
When I first started connecting my solar setup to monitoring systems, I’ll admit—security was an afterthought. Big mistake! Here’s what I’ve learned about planning network architecture from day one.
Start by mapping out every connected device in your system. Your inverter, charge controller, and monitoring equipment are all potential entry points. Think of your solar network like your home—you wouldn’t leave every door unlocked, right?
Create a dedicated network segment just for your solar system components. This means keeping them separate from your main home network where laptops and phones connect. Many modern routers let you set up a guest network—perfect for this purpose.
Document everything as you build. I keep a simple notebook listing each device’s IP address, password, and firmware version. Sounds boring, but when you’re troubleshooting at midnight or planning upgrades, you’ll thank yourself.
Consider physical placement too. That Wi-Fi-enabled charge controller doesn’t need internet access to function—wire it directly to your monitoring hub instead. Fewer wireless connections mean fewer vulnerabilities.
Planning ahead saves headaches later. Trust me on this one!
Here’s the thing I’ve learned from years of tinkering with solar setups: cybersecurity doesn’t have to be this big, scary monster lurking in your network. I get it—when you first hear terms like “network hardening” and “vulnerability assessments,” it sounds like you need a computer science degree just to keep your charge controller safe. But honestly? You’ve already got this.
Think about it this way: you took on the challenge of building your own solar system. You figured out voltage calculations, wiring diagrams, and battery chemistry. Protecting that investment with basic cybersecurity is actually simpler than most of the technical hurdles you’ve already cleared.
The steps we’ve covered—changing default passwords, segmenting your network, keeping firmware updated—these aren’t massive undertakings. They’re afternoon projects that provide serious protection against the most common threats. You don’t need to become a cybersecurity expert; you just need to be security-aware, the same way you’re safety-conscious when working with electrical systems.
I’m always curious about what works in real-world setups, though. Have you discovered any clever security solutions for your DIY solar system? Maybe you’ve run into challenges securing older equipment, or found an approach that works particularly well? Drop your experiences, questions, or even frustrations in the comments below. This community thrives on shared knowledge, and your insights might be exactly what someone else needs to hear. Together, we’re building not just better solar systems, but safer ones too.
How useful was this post?
Click on a star to rate it!
Average rating 0 / 5. Vote count: 0
No votes so far! Be the first to rate this post.
We are sorry that this post was not useful for you!
Let us improve this post!
Tell us how we can improve this post?
charlesnoble
Here at Spheral Solar, I’m a hands-on solar power enthusiast, constantly exploring and experimenting with DIY solutions. I’m dedicated to sharing my discoveries, insights, and even the bumps I hit along the way, all in the pursuit of a more sustainable future.
Your Solar Charge Controller Could Be Hacked (Here’s… by Charlesnoble May 1, 2026 Disconnect your charge controller from the internet immediately if you haven’t changed the default password—this single action prevents approximately 80% of automated attacks targeting smart solar systems. Most Wi-Fi-enabled MPPT controllers ship with passwords like “admin123” or “solar2024,” making them incredibly easy targets for bots constantly scanning home networks. Change…
Your Solar Setup’s Hidden Vulnerability: Why 5G… by Charlesnoble April 3, 2026 Disconnect your 5G-enabled charge controller from the internet when you’re not actively monitoring it—this single step eliminates 80% of remote attack vectors while still allowing you to check in when needed. Change every default password on your solar monitoring system the day you install it, using unique 16-character combinations that…
Why Your Solar Charge Controller’s Load Output… by Charlesnoble February 9, 2026 Connect your DC loads directly to your charge controller’s load terminals instead of tapping straight into the battery—this simple setup protects your battery from over-discharge and can extend its lifespan by years. Most charge controllers include built-in load management features that automatically disconnect your lights, fans, or other devices when…
Why Your Parallel Battery Setup Isn’t Charging… by Charlesnoble March 10, 2026 Connect your parallel batteries to a single charge controller rather than using multiple controllers—this prevents voltage mismatches that cause one battery to overcharge while another sits partially drained. I learned this the hard way when my first dual-battery setup left one battery constantly undercharged because each controller operated independently, creating…
Why a 9kW Solar System with Batteries Could Be… by Charlesnoble November 23, 2025 Calculate your actual energy consumption before committing to a 9kW solar system with batteries. Pull your last 12 months of electricity bills, add up the total kilowatt-hours used, and divide by 365 to get your daily average. Most households consuming 25-35 kWh daily find a 9kW system hits the sweet…
Why Your Battery Needs the Load Output (And How to… by Charlesnoble January 6, 2026 Connect your solar panel to the charge controller’s solar input terminals, then wire the controller to your battery’s positive and negative posts—this creates the essential protection layer that prevents overcharging during sunny days and deep discharge on cloudy ones. Think of your charge controller as a smart traffic cop directing…
Subscribe for handpicked DIY projects, exclusive tips, and giveaways.
A portable power station will typically run your camping devices for anywhere from a few hours to several days on a single charge, depending on what you’re powering and the station’s capacity. As for lifespan, most quality units last between 3 to 10 years before the battery degrades enough to need replacement. The distinction matters… Read more: Your Portable Power Station Won’t Last as Long as You Think (Here’s Why)
A J1772 solar charger combines a standard J1772 charging connector (the same Type 1 plug used by most North American EVs and electric bikes) with solar panels and battery components to create an off-grid or grid-supplemented charging system. You’ll need three core elements: solar panels (typically 400-800 watts for practical ebike charging), a battery storage… Read more: How to Choose a J1772 Solar Charger for Your Ebike: A Buying Guide
Installing a whole house ventilation system powered by solar takes about 6 to 8 hours for a moderately skilled DIYer and delivers continuous fresh air circulation without touching your electric bill. The core method involves mounting a solar panel on your roof to power an intake or exhaust fan, routing ductwork through your attic or… Read more: How to Install a Whole House Ventilation System Using Solar Power

")


")
 for Your Home")
")
")


")
 for Your Home")
")


