The Battery That Keeps Your Off-Grid Solar Running (Even When the Sun Doesn’t)
Updated:
Understand your energy storage needs by calculating your daily power consumption in watt-hours—multiply each appliance’s wattage by hours used, then add 20% for system losses and another 25% for days of autonomy when panels aren’t producing. This calculation determines your minimum battery bank capacity and prevents the costly mistake of undersizing your system.
Choose between lithium iron phosphate (LiFePO4) and lead-acid batteries based on your specific situation. LiFePO4 batteries cost 2-3 times more upfront but deliver 3,000-5,000 cycles at 80% depth of discharge compared to lead-acid’s 500-1,000 cycles at 50% depth, making lithium the better long-term investment for daily-use systems. Lead-acid remains viable for weekend cabins or backup power where cycling is minimal.
Select the correct battery voltage—12V, 24V, or 48V—by matching your inverter specifications and system size. Systems under 1,000 watts work fine at 12V, while 1,000-3,000 watt systems benefit from 24V efficiency, and anything larger demands 48V to reduce current flow and prevent dangerous wire heating.
Account for temperature effects on battery performance since capacity drops 20-30% in freezing conditions. Install batteries in insulated, ventilated spaces where temperatures stay between 50-80°F, or budget for larger capacity to compensate for cold-weather losses.
The success of your off-grid solar setup hinges entirely on choosing the right battery system for your unique power demands, climate conditions, and budget constraints—get this foundation wrong, and even the best solar panels won’t keep your lights on.
Why Your Off-Grid System Lives or Dies by Your Battery Choice
Here’s something I learned the hard way during my first off-grid project: batteries aren’t just nice-to-have accessories in an off-grid system. They’re the beating heart that keeps everything alive. Unlike grid-tied setups where the utility grid acts as your infinite battery, off-grid systems depend entirely on stored energy to bridge the gap between when the sun shines and when you actually need power.
Think about it this way: your solar panels only generate electricity during daylight hours, but your life doesn’t stop when the sun goes down. You need lights at night, your refrigerator runs 24/7, and chances are you’re watching TV or charging devices in the evening. Without adequate battery storage, your off-grid dream becomes a daytime-only reality.
This creates what I call the “day-night challenge.” During peak sun hours, your panels might produce way more power than you’re using at that moment. All that excess energy needs somewhere to go, and that somewhere is your battery bank. Then, from sunset to sunrise (and during cloudy days), your batteries become your only power source, discharging to meet your needs.
This is fundamentally different from backup batteries used in grid-tied systems. Backup batteries might cycle once or twice a month during outages, but off-grid batteries cycle daily, sometimes multiple times. They need to handle deeper discharges, more frequent cycling, and longer periods of sustained output. They’re workhorses, not emergency reserves.
That’s why choosing the right battery technology, capacity, and quality matters so much more in off-grid applications. Your battery choice determines how many days you can weather cloudy conditions, how long your system will last before expensive replacements, and ultimately, whether your off-grid setup provides reliable power or becomes a frustrating money pit.
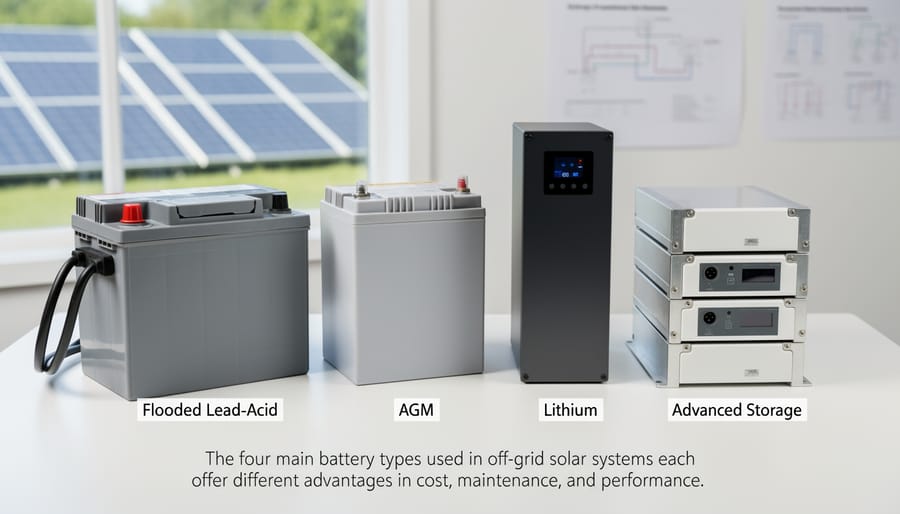
The four main battery types used in off-grid solar systems each offer different advantages in cost, maintenance, and performance.
The Four Battery Types You’ll Actually Encounter (And Which One I Wish I’d Started With)
Flooded Lead-Acid: The Workhorse That Needs Attention
Here’s my honest take on flooded lead-acid batteries: they’re like that reliable old truck that keeps running as long as you remember to check the oil. I learned this the hard way during my first off-grid setup when I chose these batteries primarily because they cost about half what sealed options did.
Flooded lead-acid batteries are the traditional workhorses of off-grid systems. They use liquid electrolyte (a mixture of water and sulfuric acid) that requires regular maintenance. You’ll need to check water levels monthly and top them off with distilled water, plus keep the terminals clean and monitor for corrosion. They also need proper ventilation since they release hydrogen gas during charging.
The big advantage? Cost. You can get started with a flooded battery bank for significantly less money than other technologies. They’re also rebuildable and have a proven track record spanning decades.
They make the most sense if you’re budget-conscious, hands-on with maintenance, have a dedicated battery space with ventilation, and don’t mind checking on them regularly. I spent about 15 minutes monthly on maintenance, which felt reasonable for the money I saved upfront. For weekend cabin setups or starter systems where you’re learning the ropes without breaking the bank, flooded batteries remain a solid choice.
AGM Batteries: The Middle Ground Most People Overlook
Here’s the honest truth: AGM batteries don’t get nearly enough credit in the off-grid world. Everyone’s either chasing the latest lithium technology or pinching pennies with flooded lead-acid, but Absorbent Glass Mat batteries sit right in that sweet spot many folks completely miss.
I learned this firsthand when my neighbor Charles installed AGM batteries in his hunting cabin three years ago. He wanted something reliable but didn’t want to babysit his system during those long stretches between visits. AGM batteries delivered perfectly because they’re completely sealed—no water levels to check, no explosive hydrogen gas venting into your battery compartment.
What makes AGMs special is the fiberglass mat separators that hold the electrolyte like a sponge. This design means they can handle vibration and tilting better than flooded batteries, which explains why RV owners absolutely love them. You’ll typically get 4-7 years of solid performance, which isn’t lithium territory but beats flooded batteries handily.
The trade-off? They cost about twice as much as flooded lead-acid but still run considerably less than lithium. You’ll need proper charging equipment since they’re sensitive to overcharging, but that’s a small price for maintenance-free operation. For weekend cabins, mobile installations, or anyone who values simplicity over maximum efficiency, AGM batteries represent that practical middle ground that just works.
Gel Batteries: A Niche Option for Specific Situations
Gel batteries occupy an interesting middle ground in the off-grid solar world. They’re a variation of lead-acid technology where the electrolyte is suspended in a gel form rather than liquid. This design makes them completely spill-proof and reduces maintenance needs, which sounds great on paper.
The standout feature of gel batteries is their extremely slow self-discharge rate. If you’re setting up a seasonal cabin that sits unused for months, gel batteries will hold their charge better than almost any other option. They also handle deep, slow discharges quite well, making them suitable for systems with consistent, predictable power draws.
However, gel batteries come with notable drawbacks. They’re sensitive to charging voltages and require precise charge controllers to avoid damage. Temperature extremes affect their performance significantly, and they’re generally more expensive than traditional flooded lead-acid batteries while offering less capacity than lithium alternatives.
I’ve seen gel batteries work beautifully in specific scenarios like remote monitoring stations or backup systems that rarely cycle. But for typical off-grid homes with daily power demands, most DIYers find better value and performance with other battery types.
Lithium (LiFePO4): The Premium Choice That’s Getting More Affordable
If you’re serious about off-grid living, LiFePO4 batteries deserve a close look. I remember when Charles first switched to lithium batteries for off-grid systems back in 2018. He was hesitant about the upfront cost, but the math quickly changed his mind.
Here’s what makes lithium iron phosphate batteries stand out: you can safely discharge them down to 80-90% of their capacity without damaging the battery, compared to just 50% with lead-acid. That means a 200Ah lithium battery gives you roughly the same usable energy as a 400Ah lead-acid bank. Right there, you’re looking at a different value proposition.
The numbers get even better when you factor in longevity. While quality lead-acid batteries might give you 500-1000 cycles, LiFePO4 batteries typically deliver 3000-5000 cycles or more. Charles often points out that when you calculate cost-per-cycle, lithium actually becomes the economical choice for systems you plan to use long-term.
Weight matters too, especially if you’re installing batteries yourself or working in a small space. Lithium batteries weigh about a third of what equivalent lead-acid batteries do, making installation and future maintenance much more manageable.
The best news? Prices have dropped significantly over the past five years. What cost $800 per kWh in 2018 now runs closer to $300-400 per kWh for quality systems. That price trend shows no signs of reversing, making lithium increasingly accessible for everyday DIY solar enthusiasts.
How Much Battery Capacity Do You Really Need?
Here’s something I learned the hard way during my first off-grid project: undersizing your battery bank is expensive, but oversizing it wastes money you could spend on other system components. The key is finding that sweet spot, and honestly, it’s easier than you might think.
Let’s start with the basics. Your battery capacity needs to cover three main factors: your daily energy consumption, how many days you want to run without sun (called days of autonomy), and something called depth of discharge, which is how much of your battery’s capacity you can actually use without damaging it.
First, figure out your daily energy consumption. Walk through your space and list everything that uses electricity. A cabin might only need 2-3 kilowatt-hours per day for LED lights, a small fridge, phone charging, and a laptop. A tiny home could jump to 5-8 kWh with added appliances like a coffee maker and water pump. An RV typically falls somewhere in between at 3-5 kWh, depending on whether you’re running air conditioning.
Here’s where it gets practical. Once you know your daily usage, multiply it by your desired days of autonomy. I recommend three days for most situations, giving you a cushion for cloudy weather without breaking the bank. So if you use 5 kWh daily, you need 15 kWh of storage (5 kWh × 3 days).
But wait, there’s one more critical factor: depth of discharge. Lithium batteries can typically discharge to 80-90% of capacity, while lead-acid batteries should only go to 50%. This means if you’re using lead-acid, you need to double your calculated capacity. For our 15 kWh example, you’d need a 30 kWh lead-acid bank but only an 18 kWh lithium bank.
Seasonal variations matter too. Winter days are shorter, and solar panels produce less power. I typically add a 20-25% buffer to my calculations for peace of mind during darker months. If you live somewhere with particularly harsh winters, consider bumping that to 30%.
Let’s work through a real example. Say you’re setting up a weekend cabin that uses 3 kWh daily. With three days of autonomy, that’s 9 kWh. Using lithium batteries at 90% depth of discharge, you’d need about 10 kWh of capacity (9 ÷ 0.9). Add that 25% winter buffer, and you’re looking at roughly 12.5 kWh total.
Spheral Solar offers calculator tools that simplify this entire process, automatically factoring in depth of discharge and seasonal adjustments based on your location. I wish I’d had something like that when I started.
Remember, these calculations give you a baseline. If you’re planning to add more devices later or your energy needs might grow, build in that flexibility now. It’s much cheaper than adding batteries later.
The Voltage Question: 12V, 24V, or 48V Systems
When I first started planning my off-grid setup, I’ll admit I was completely baffled by the voltage options. Should I go 12V like my car battery? Jump to 24V? Or take the plunge with 48V? Turns out, this decision shapes your entire system more than you might think.
Here’s the straightforward breakdown: system voltage directly affects how efficiently electricity flows through your setup. Think of voltage like water pressure in a pipe. Higher voltage means you can push the same amount of power through thinner wires, which saves you money and reduces energy loss as heat.
For small systems under 1,000 watts, like powering a tiny cabin or RV, 12V works perfectly fine. You’ll find tons of affordable 12V appliances, and the batteries are simple to manage. I started here myself with a weekend cabin setup, just running lights, a phone charger, and a small fridge.
Once you’re looking at 1,000 to 3,000 watts, 24V becomes the sweet spot. You’ll cut your wire costs significantly and reduce losses. This range covers most small homes with moderate power needs. For example, a friend of mine runs his workshop on a 24V system with four 200Ah batteries in series-parallel configuration.
Above 3,000 watts, 48V is really your only practical choice. The efficiency gains are substantial, and most quality inverters designed for whole-home power operate at 48V. Yes, you’ll need more batteries in series to reach that voltage, but the trade-off in wire sizing alone makes it worthwhile.
One practical tip from experience: whatever voltage you choose, stick with it. Mixing voltages creates headaches you don’t want. Calculate your maximum power needs first, then choose the voltage that matches your scale. Your future self will thank you when you’re not dealing with oversized cables or overheated connections.
What Battery Specs Actually Matter (And Which Ones Are Just Marketing)
When I first started shopping for off-grid batteries, I felt like I was reading hieroglyphics. The spec sheets were full of numbers, abbreviations, and claims that all sounded impressive but meant nothing to me. After making a few rookie mistakes (and one expensive lesson), I learned which specs actually matter and which ones are just marketing fluff.
Let’s start with capacity, because this one trips people up constantly. You’ll see two different measurements: Amp-hours (Ah) and kilowatt-hours (kWh). Here’s the difference: Ah tells you how much current the battery can deliver over time, but you need to multiply it by voltage to get the real usable energy. A 200Ah battery at 12V gives you 2.4kWh of energy, while a 200Ah battery at 48V gives you 9.6kWh. That’s why kWh is more useful for comparing batteries, it’s apples-to-apples. When you’re sizing your system, think in terms of kWh because that’s what your appliances actually use.
Cycle life is your battery’s lifespan measured in charge-discharge cycles. A battery rated for 3,000 cycles at 80 percent depth of discharge will outlast one rated for 2,000 cycles, simple as that. But here’s the catch: always check what depth of discharge those cycle numbers are based on. Some manufacturers cite cycle life at 50 percent DOD to make their batteries look better.
Speaking of depth of discharge, this tells you how much of the battery’s capacity you can actually use without damaging it. Lithium batteries typically allow 80-100 percent DOD, while lead-acid batteries should only be discharged to 50 percent. That means a 10kWh lead-acid battery really only gives you 5kWh of usable power.
Pay attention to charge and discharge rates too. These tell you how quickly you can pull power out or put it back in. If you’re running power tools or have high startup loads, you need decent discharge rates.
Temperature range matters more than most people think, especially if your battery lives in a garage or shed. Cold temperatures reduce capacity and can prevent charging altogether.
Finally, warranty terms reveal what the manufacturer really believes about their product. Look for warranties that specify both years and cycles, and read the fine print about what voids coverage.
The Hidden Costs Nobody Warns You About
When I first priced out my solar battery system, I thought the batteries themselves were the big expense. Boy, was I in for a surprise! The batteries are just the beginning, and those “little extras” can add 30-40% to your total project cost if you’re not prepared.
Let’s start with charge controllers, which regulate the power flowing into your batteries. A quality MPPT controller for a modest system runs $300-800, and you absolutely need one to protect your investment. Then there’s the battery enclosure situation. I learned this the hard way when I initially planned to keep my batteries in the garage. Turns out, lead-acid batteries need proper ventilation to prevent hydrogen gas buildup (yes, they can be a fire hazard!), while lithium batteries require temperature-controlled environments to maintain warranty coverage and performance.
Speaking of temperature, this was my unexpected budget-buster. I installed my first battery bank during summer, and everything worked great until winter hit. Battery performance drops significantly below 50°F, and freezing temperatures can permanently damage certain chemistries. I ended up spending $400 on insulation and a small heating system to keep things running smoothly. If you live in extreme climates, budget $200-600 for temperature management solutions.
Don’t forget monitoring systems either. These handy devices track your battery’s health, charge levels, and performance, typically costing $150-300. They’re not technically required, but trust me, flying blind with a $3,000+ battery bank is nerve-wracking.
Finally, factor in replacement timelines from day one. Even the best batteries aren’t forever investments. Lead-acid batteries last 3-7 years, while lithium can stretch 10-15 years. Setting aside $200-500 annually in a replacement fund prevents future financial surprises.
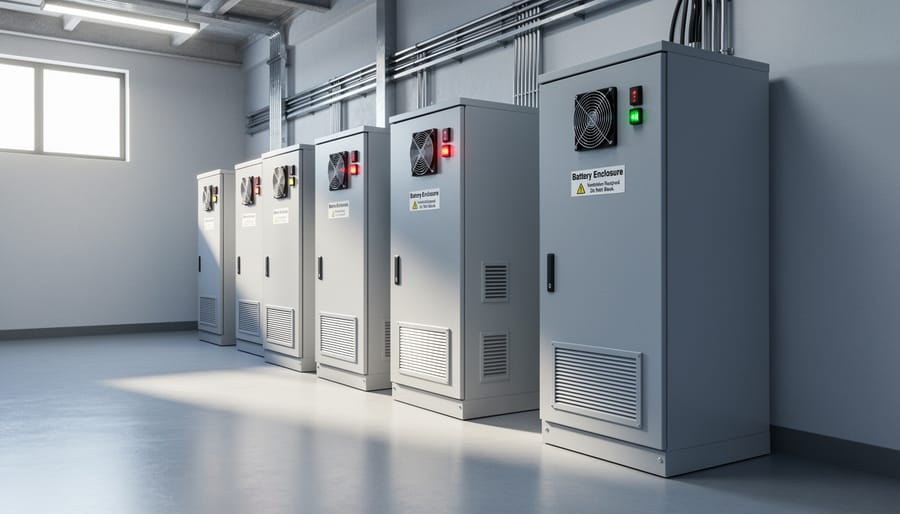
Proper battery enclosures with adequate ventilation and temperature control protect your investment and ensure safe operation.
How to Make Your Batteries Last (Lessons From My Own Mistakes)
I learned this lesson the hard way. Three years into my off-grid journey, I had to replace my entire battery bank much earlier than expected. The culprit? A combination of things I wish I’d known from day one. Let me share what I learned so you can avoid my expensive mistakes.
The biggest killer of batteries is chronic undercharging. I thought I was being clever by running my batteries down to 30% capacity regularly, figuring I was getting my money’s worth. Wrong. Deep discharges stress batteries immensely. For lead-acid batteries, try to keep your depth of discharge above 50%. For lithium batteries, you have more flexibility, but staying above 20% will still extend their lifespan significantly.
Temperature management was my second oversight. Batteries hate extreme temperatures. I installed mine in an uninsulated shed where summer temps hit 95°F and winter dropped below freezing. Heat accelerates chemical degradation, while cold reduces capacity. If you can, keep batteries between 50-80°F. When that’s not possible, insulate the space or consider a small heating or cooling system. The energy cost is minimal compared to premature battery replacement.
Proper charging settings are absolutely critical. I initially used the default settings on my charge controller, which weren’t optimized for my specific battery type. Each chemistry requires different voltage parameters. Take time to match your controller settings to your battery manufacturer’s specifications. This single change added years to my second battery bank’s life.
For lead-acid battery users, equalization charging is essential. This controlled overcharge helps balance individual cells and prevents sulfation buildup. I schedule equalization every 30 days for my flooded lead-acid batteries. It’s like giving them a spa day, and the performance improvement is noticeable.
Finally, monitor your batteries regularly. Check voltage, temperature, and for lead-acid batteries, specific gravity readings. I now use a simple battery monitor that tracks these metrics and alerts me to problems before they become catastrophic. Think of it as preventive maintenance for your power system.
These practices transformed my experience from frustrating and expensive to reliable and cost-effective. Your batteries are the heart of your system, so treat them right and they’ll serve you well for many years.
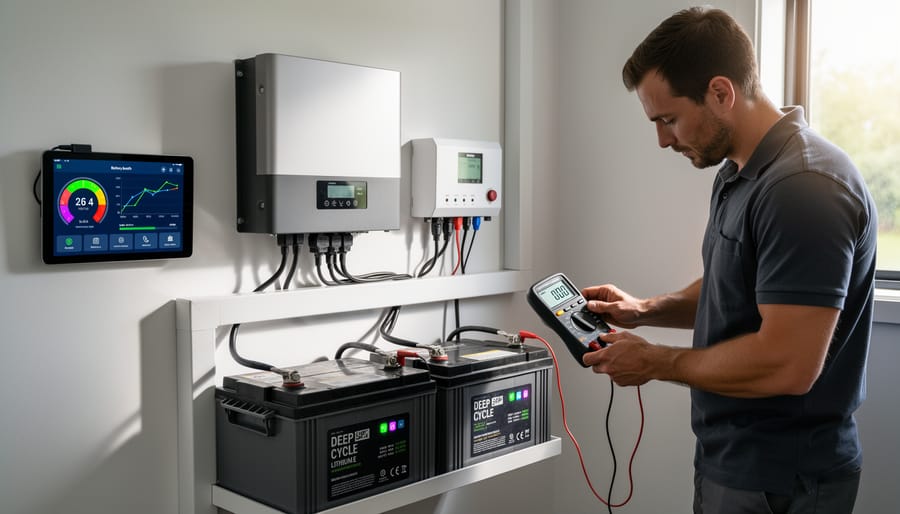
Regular monitoring of battery voltage and health is essential for maximizing the lifespan of your off-grid energy storage system.
Should You Buy Pre-Built or DIY Your Battery Bank?
When I first started planning my off-grid system, I faced this exact dilemma: should I save money by building my own battery bank, or play it safe with a pre-built unit? Here’s what I learned from experience and countless conversations with fellow solar enthusiasts in our community.
Pre-built systems like the Tesla Powerwall or EcoFlow Delta Pro offer plug-and-play convenience. Everything’s already configured—the battery management system (BMS), charging controllers, and safety features are all integrated and tested. You get a manufacturer’s warranty, professional support, and peace of mind knowing certified engineers designed your system. For most homeowners, especially those new to solar, this is the safest route. The trade-off? Higher upfront costs and limited customization options.
Building your own battery bank from individual lithium cells or lead-acid batteries can cut costs by 30-50%. You gain total control over capacity, voltage, and system design. However, this approach requires serious homework. Improperly balanced cells can cause fires or premature failure. You’ll need to understand BMS installation, proper fusing, and thermal management. Most importantly, DIY systems typically void any cell warranties if something goes wrong.
Here’s my honest take: if you’re comfortable with electrical work, enjoy learning through hands-on projects, and have time for troubleshooting, DIY can be incredibly rewarding. Our community member Sarah built a 10kWh system for her tiny home and loves the flexibility it provides.
But if reliability matters more than savings, or you’re not confident working with high-voltage systems, stick with pre-built. There’s no shame in prioritizing safety—I’ve seen too many garage fires from poorly assembled battery banks to recommend DIY for everyone.
My Top Picks for Different Off-Grid Scenarios
After helping dozens of folks design their solar setups over the years, I’ve learned that the right battery choice really depends on how you’ll actually use your system. Let me share what works best for different scenarios.
For a weekend cabin that sees intermittent use, flooded lead-acid batteries are still a solid, budget-friendly choice. You’ll need around 400-600 amp-hours at 12V for basic lighting, a small fridge, and device charging. The key here is that someone needs to check water levels monthly. If you can’t commit to that maintenance, go with AGM batteries instead. They’ll cost about 30% more but require zero upkeep.
Full-time off-grid living is where lithium batteries truly shine. When I helped my neighbor size his off-grid solar system for year-round use, we calculated his daily consumption at 15 kWh. We installed a 30 kWh lithium bank to handle cloudy stretches without constantly cycling to damaging depths. Yes, the upfront cost was steep at around 15,000 dollars, but the 10-year warranty and 80% usable capacity made the math work. With lead-acid, he’d have needed nearly double the capacity and replaced them twice by now.
RV and van life folks should prioritize lithium for its lightweight advantage and ability to handle road vibrations. A typical setup needs 200-400 amp-hours at 12V. That’s enough for laptops, lights, fans, and a small fridge. The space savings alone make lithium worth it in tight quarters.
For emergency backup, I actually recommend starting with one or two quality lithium batteries around 5 kWh total. Keep it simple and focus on essentials: refrigerator, some lights, phone charging, and maybe a medical device. You can always expand later, and a smaller system is easier to maintain and test regularly.
Choosing the right battery for your off-grid solar system isn’t just about picking the most expensive option or the one with the longest warranty. It’s about understanding your unique energy needs, usage patterns, and budget constraints. I’ve seen countless DIYers get overwhelmed by specifications and marketing claims, but here’s what I’ve learned: the best battery is the one that fits your specific situation.
Before you make any final decisions, I encourage you to explore the interactive calculators available on this site. They’ll help you determine exactly what capacity you need based on your real-world consumption patterns. No guesswork, just practical numbers tailored to your home.
Remember, joining our community means you’re never alone in this journey. Share your experiences, ask questions, and learn from others who’ve walked this path before you. The beauty of solar energy is that it’s constantly evolving, and we grow stronger together.
Taking control of your energy independence is one of the most empowering decisions you can make. You’re not just installing batteries; you’re investing in resilience, sustainability, and freedom from rising utility costs. Trust yourself, do your research, and take that first step.
How useful was this post?
Click on a star to rate it!
Average rating 0 / 5. Vote count: 0
No votes so far! Be the first to rate this post.
We are sorry that this post was not useful for you!
Let us improve this post!
Tell us how we can improve this post?
charlesnoble
Here at Spheral Solar, I’m a hands-on solar power enthusiast, constantly exploring and experimenting with DIY solutions. I’m dedicated to sharing my discoveries, insights, and even the bumps I hit along the way, all in the pursuit of a more sustainable future.
Why Lithium Batteries Changed Everything for… by Charlesnoble January 26, 2026 Calculate your daily energy consumption in watt-hours before shopping for any lithium battery by listing every device you’ll power, its wattage, and hours of daily use—this single number determines whether you need a 5kWh system or a 20kWh system and prevents the costly mistake of undersizing. Multiply your daily usage…
Why Your DIY Solar Microgrid Will Fail Without the… by Charlesnoble November 22, 2025 Understand that a microgrid energy storage system is your battery bank plus the smart components that decide when to store solar power, when to use it, and when to pull from the grid or a backup generator. This integrated approach transforms disconnected parts into a cohesive power management solution that…
Why DC Microgrids Are Perfect for Your DIY Solar Setup by Charlesnoble January 7, 2026 Picture this: you’re running LED lights, a laptop, and a small fridge in your off-grid cabin, and every device is drawing power directly from your solar panels without converting DC to AC and back again. That’s the elegant simplicity of a DC microgrid system, where electricity flows in its natural…
Solar Microgrids: Your Path to True Energy Independence by Charlesnoble February 8, 2026 Picture this: the power grid fails during a storm, but your lights stay on, your refrigerator keeps running, and your phone continues charging. That’s the promise of a solar microgrid—a self-contained energy system that generates, stores, and manages its own electricity independently from the utility company. Unlike traditional grid-tied solar…
This Massive Off-Grid Solar System Powers an Entire… by Charlesnoble October 17, 2025 Imagine powering an entire remote community with nothing but sunshine – that’s exactly what the world’s largest off-grid solar installations achieve today. These engineering marvels, some exceeding 100 megawatts in capacity, are revolutionizing how we think about off-grid solar fundamentals and energy independence. From Australia’s massive Pilbara mine site installation…
Why Your Electric Vehicle Needs Solar Panels (And… by Charlesnoble January 19, 2026 Picture yourself pulling into a campsite after hours on the road, your electric vehicle’s battery sitting at 40%, and the nearest charging station is twenty miles back. Now imagine your EV quietly replenishing its own power from panels mounted right on the roof while you set up camp. This isn’t…
Subscribe for handpicked DIY projects, exclusive tips, and giveaways.
Electricity powers our homes from five main sources: solar panels, wind turbines, hydroelectric generators, fossil fuel generators, and battery storage systems. If you’re building a reliable off-grid setup or backing up your solar array, understanding how these sources work together transforms a single-point-of-failure system into resilient, year-round power. I learned this the hard way during… Read more: 5 Sources of Electrical Energy Every Solar DIYer Should Know for Complete Off-Grid Power
Connect your panels to a charge controller or battery system by running positive terminals to positive and negative to negative. This parallel configuration doubles your available current (amperage) while keeping voltage the same, which is exactly what you need when your system demands more power than a single panel can deliver. I learned this the… Read more: Why Two Solar Panels Beat One Every Time (Parallel Connection Explained)
Monitor your greenhouse temperature daily during peak sun hours—if it consistently exceeds 85°F or condensation builds up on interior surfaces, you’re losing crops to heat stress and creating the perfect environment for fungal diseases. A greenhouse solar ventilation fan addresses both problems without adding a penny to your electricity bill, making it one of the… Read more: Why Your Greenhouse Needs a Solar Ventilation Fan (Before Summer Hits)
")


")
")


")


