Why 6000 Volts Won’t Kill Your Livestock (But Will Stop Predators Cold)
Updated:
Understand that 6000 volts sounds terrifying but delivers surprisingly low amperage—typically around 120 milliamps for just 3/10,000th of a second per pulse. This combination creates an unforgettable shock that trains animals to avoid the fence without causing lasting harm. The voltage pushes current through thick fur and hide, while the minimal amperage and microsecond duration prevent the cardiac disruption that makes household current dangerous.
Test your fence voltage regularly using a proper voltmeter, as voltage drops significantly over distance and through vegetation. A fence reading 6000V at the energizer might deliver only 3000V a quarter-mile away through overgrown wire, rendering it ineffective. Clear a three-foot zone around fence lines, check connections monthly, and replace corroded clamps immediately. Most fence failures happen not from inadequate voltage but from poor grounding—install at least three six-foot ground rods spaced ten feet apart in moist soil.
Calculate your power requirements before purchasing an energizer. A 6000V solar-powered unit needs approximately 0.5 to 2 watts depending on fence length and vegetation contact, meaning a modest 10-watt solar panel with a 12V deep-cycle battery handles most residential applications. Position panels facing true south at your latitude angle, and size your battery for five days of autonomy to maintain consistent shocking power through cloudy periods.
Match your energizer output to your application—6000V works perfectly for cattle, horses, and perimeter security but may prove excessive for small livestock like chickens or rabbits, which respond adequately to 2000-4000V systems. Predator deterrence around coops, gardens, or campsites requires the full 6000V punch since bears, coyotes, and wild hogs have pain tolerance far exceeding domestic animals. When properly installed and maintained, these systems provide decades of reliable, solar-powered protection without monthly electric bills.
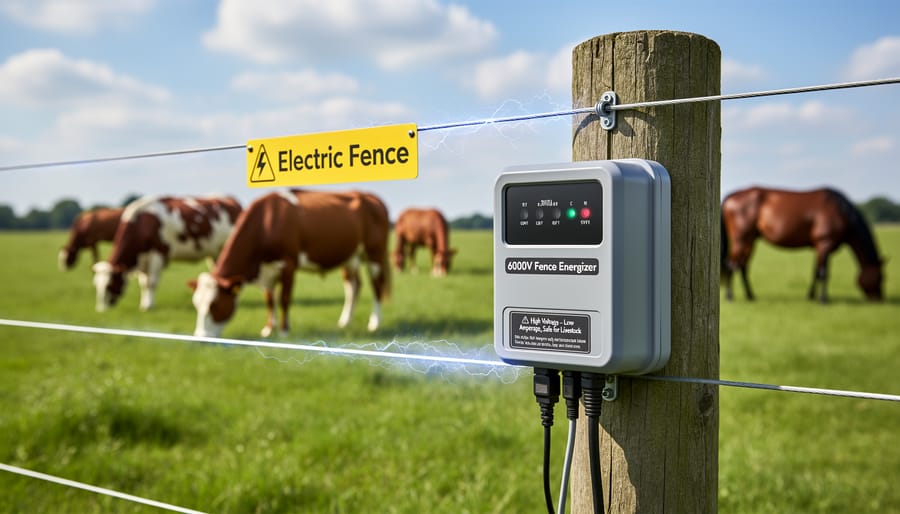
Understanding the 6000 Volt Rating: What It Really Means
A 6000-volt fence energizer delivers high voltage at safe, low amperage to create an effective deterrent without danger to livestock.
Voltage vs. Amperage: The Critical Difference
When I first started exploring electric fencing for my property, I had the same concern many of you probably have right now: 6000 volts sounds terrifying! But here’s the thing that changed my perspective completely – voltage and amperage are two very different players in the electrical safety game.
Think of it like water flowing through a hose. Voltage is like water pressure – it’s the force pushing the water forward. Amperage, on the other hand, is the actual volume of water flowing through. You can have incredibly high pressure coming through a tiny opening (like those pressure washers), but the amount of water is minimal. That’s exactly how electric fences work.
A 6000-volt electric fence operates at only 3-5 milliamps of current. To put that in perspective, it takes around 100-200 milliamps flowing through your heart to cause serious harm. The fence delivers just a fraction of that – enough to create an uncomfortable, memorable zap that animals (and curious humans) definitely want to avoid, but nowhere near dangerous levels.
The high voltage is necessary to overcome resistance – think of an animal’s thick hide or fur, dry conditions, or the distance the pulse needs to travel along fence wires. But that low amperage is your safety net. It’s why farmers have used electric fences for decades without significant injury concerns.
This combination creates what I call the “perfect deterrent” – uncomfortable enough to train animals to respect boundaries, but safe enough that accidental contact won’t cause lasting harm. It’s really quite brilliant engineering when you understand the science behind it.
How the Pulse System Keeps Everything Safe
Here’s something I learned the hard way while setting up my first solar-powered electric fence: high voltage doesn’t automatically mean high danger. The secret lies in how that electricity is delivered, and understanding this changed everything about how I approached electric fencing.
Electric fences operate on a pulse system, which is fundamentally different from the continuous current flowing through your home’s electrical outlets. Instead of delivering a constant stream of electricity, these systems send out brief pulses—typically lasting just 1/300th of a second. That’s faster than the blink of an eye! These pulses occur roughly once per second, meaning the fence is actually “off” about 99.7% of the time.
This pulsing mechanism is the cornerstone of electric fence safety. When an animal or person touches the fence, they receive a sharp, uncomfortable shock that’s memorable enough to create a psychological barrier, but brief enough to prevent serious injury. The extremely short duration means the electrical current doesn’t have time to disrupt heart rhythms or cause muscle contractions that could prevent someone from letting go—two major concerns with continuous electrical current.
Think of it like touching a hot stove. The brief contact teaches you not to touch it again, but you’re able to pull your hand away immediately. The pulse system works the same way, creating an effective deterrent without the risks associated with sustained electrical exposure. This is why a 6000-volt electric fence can be both highly effective at containing livestock and safe for both animals and humans who might accidentally contact it.
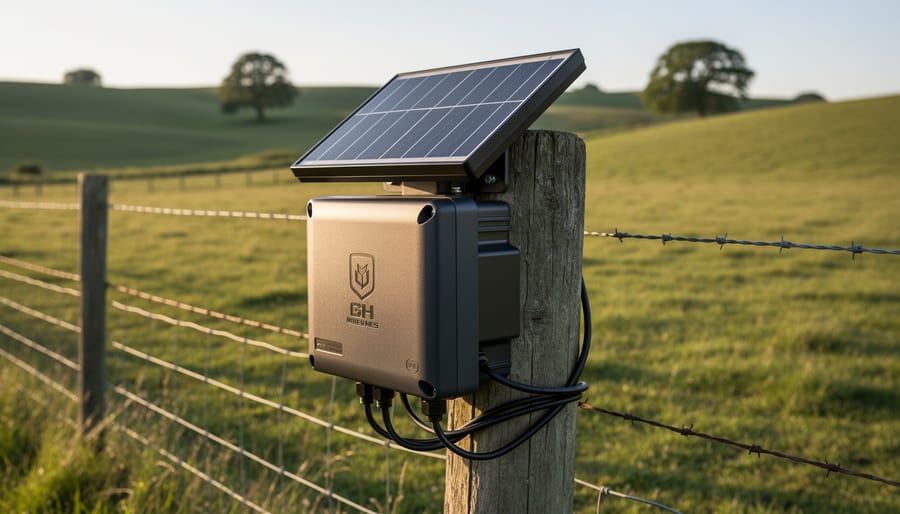
Why Solar Power Is Perfect for Your 6000V Electric Fence
Solar-powered fence energizers integrate the panel and battery system into a single weatherproof unit, perfect for remote off-grid locations.
The Math Behind Solar-Powered Fence Energizers
When I first started exploring solar-powered fence energizers, I’ll admit the math seemed intimidating. But here’s the good news: it’s more straightforward than you might think, and getting it right means your 6000V fence runs reliably without constant battery checks.
Let’s break down what you actually need. A typical 6000V fence energizer draws between 0.5 to 2 watts continuously, depending on your model and fence length. That might not sound like much, but remember it’s running 24/7. Over a full day, you’re looking at roughly 12-48 watt-hours of consumption. To account for cloudy days and seasonal variations, I always recommend planning for at least three days of backup power.
For solar panel sizing, a 10-20 watt panel usually does the trick for most residential applications. This gives you enough juice to keep the battery topped off while accounting for inefficiencies and less-than-perfect sun angles. If you’re new to this, checking out solar panel setup basics will help you understand positioning and angle optimization.
Battery storage is equally important. A 12-volt deep-cycle battery with 20-35 amp-hours capacity provides that crucial three-day buffer. Think of it as your reliability insurance during those stretches of overcast weather.
The real game-changer? Using Spheral Solar’s interactive calculators takes the guesswork out entirely. Just input your fence length, energizer specifications, and location, and you’ll get personalized recommendations for panel size and battery capacity. I wish I’d had this tool when I started—it would have saved me from over-sizing my first system by nearly double.
Where Solar Electric Fencing Shines
Solar electric fencing really comes into its own when you’re working beyond the reach of traditional power sources. I learned this firsthand when helping my neighbor set up protection for his remote pasture about three miles from the nearest outlet. Running grid power would’ve cost thousands, but a solar setup had him operational in an afternoon for a fraction of the price.
Remote pastures are the obvious winner here. Whether you’re rotating livestock through different grazing areas or managing animals on the back forty, solar energizers eliminate the hassle and expense of trenching power lines. The 6000-volt punch is perfect for keeping cattle, horses, and goats contained, even in large acreage situations.
Wildlife management is another stellar application. If you’re dealing with deer ravaging your garden or predators threatening chickens, a solar-powered deer fence delivers consistent protection without monthly electric bills. The psychological deterrent works wonders, and once animals learn to avoid it, intrusions drop dramatically.
Temporary fencing situations are where solar truly shines. Setting up camping perimeters, protecting seasonal crops, or creating portable livestock enclosures becomes incredibly flexible. You can relocate your fence as needs change without worrying about power access.
The beauty of solar electric fencing is its independence. You’re not tethered to infrastructure, which means freedom to protect what matters wherever it happens to be. For DIYers who value self-sufficiency and practical renewable energy applications, it’s hard to beat the combination of effectiveness and portability.
Choosing the Right Solar-Powered 6000V Fence Energizer
Matching Output Power to Your Fence Length
Understanding joule ratings might sound technical, but it’s actually pretty straightforward once you break it down. Think of joules as the fuel tank for your electric fence. A larger joule rating means more power to push that 6000-volt pulse through longer distances and tougher conditions.
Here’s what I’ve learned from my own setups: most 6000V energizers range from 0.5 to 5 joules. A basic 0.5-joule unit works great for small paddocks up to about 5 acres with minimal vegetation. Once you’re looking at 10-25 acres or dealing with brush and weeds touching your fence line, you’ll want at least 2-3 joules to maintain effectiveness.
The fence charger range gets dramatically reduced by real-world conditions. I remember installing my first fence and being puzzled why the far corner barely registered a charge. Turns out, vegetation touching the wire was bleeding power like crazy. Same goes for rusty wire, poor connections, and inadequate grounding.
Speaking of grounding, this is where many people stumble. Your fence is only as effective as your ground system. Dry, sandy, or rocky soil requires more ground rods, sometimes 6-8 feet deep and spaced 10 feet apart. Clay soil conducts better and needs fewer rods.
A helpful rule of thumb: calculate one joule per mile of fence under ideal conditions, then double it for challenging terrain or heavy vegetation. Better to have extra capacity than a fence that barely functions.
Key Features to Look For
When I was setting up my first solar-powered electric fence, I learned the hard way that not all energizers are created equal. Let me walk you through the features that actually matter when you’re choosing a solar fence energizer for your 6000-volt system.
First, consider whether you want built-in or external solar panels. Built-in panels offer convenience and a cleaner look, but external panels can be positioned for optimal sun exposure throughout the day. I’ve found that adjustable external panels typically charge faster, especially if your fence line runs through shaded areas.
Battery type makes a huge difference in performance. Most quality units use deep-cycle batteries, either sealed lead-acid or lithium-ion. Lithium batteries cost more upfront but last longer and perform better in cold weather. Look for energizers with at least a 12-volt battery capacity to ensure consistent power delivery, even during cloudy stretches.
Weatherproofing is non-negotiable. Your energizer needs an IP65 rating or higher to withstand rain, snow, and dust. Check that all connection points have protective seals and that the housing is UV-resistant to prevent sun damage over time.
A low-battery indicator is your early warning system. The best models feature LED lights or audible alarms that alert you before power drops below effective levels. This feature saved my neighbor’s goat herd when his battery started failing during a week of overcast weather.
Finally, lightning protection circuits are essential. Quality energizers include surge protection that diverts lightning strikes safely to ground, protecting both your equipment investment and the animals depending on your fence.
Building Your Solar Electric Fence System: A DIY Approach
Essential Components and Tools
Getting your 6000-volt electric fence up and running requires a straightforward set of components that work together as a system. At the heart of your setup is the energizer, which converts low-voltage power into those sharp, safe pulses. For a solar-powered system, you’ll need a solar panel (typically 10-20 watts for most setups) and a deep-cycle battery to store energy for nighttime operation.
The fence itself uses either high-tensile wire or polytape, which I’ve found polytape particularly useful since it’s more visible to animals. You’ll also need sturdy posts—wooden or fiberglass work great—and insulators to keep the charged wire separated from those posts. This is crucial for maintaining voltage.
Don’t overlook your grounding system. You’ll need at least three grounding rods, each 6-8 feet long, driven into moist soil. Charles often reminds me that proper grounding makes the difference between an effective fence and a frustrating failure.
Finally, invest in a voltage tester. This simple device lets you verify your fence is working properly without guesswork. When building a solar-powered electric fence, having all these components ready before you start saves time and ensures a smooth installation process.
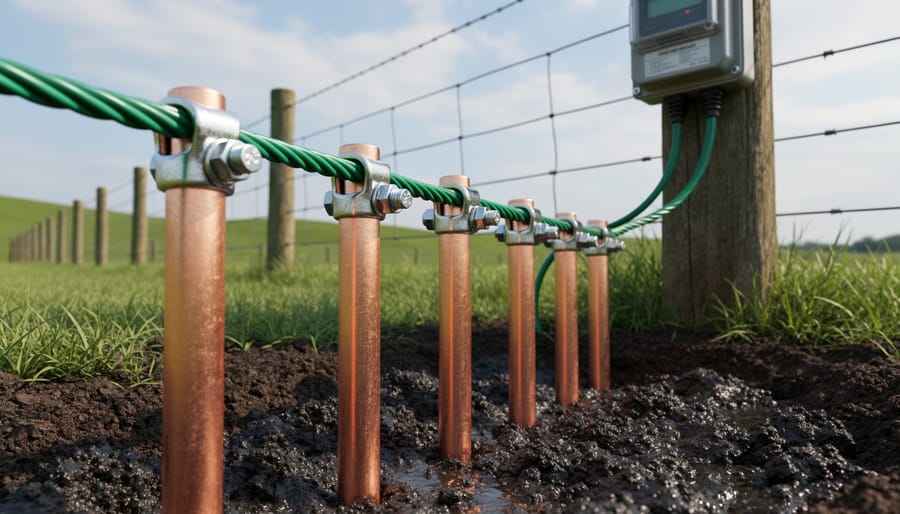
Proper grounding with multiple copper rods driven deep into moist soil is the most critical component of an effective electric fence system.
Proper Grounding: The Most Critical Step
Here’s something I learned the hard way: a 6000-volt fence is only as good as its ground system. When I first installed my electric fence, I thought grounding was just a formality. I hammered in two ground rods, connected them, and called it done. The fence worked, but barely. Animals would touch it and seem mildly annoyed rather than deterred. Turns out, my “good enough” approach to grounding was sabotaging the entire system.
Think of grounding like this: electricity needs to complete a circuit. When an animal touches your fence, the shock travels through their body, into the ground, through your ground rods, and back to the energizer. Without proper grounding, that circuit can’t complete effectively, and you’re left with a very expensive, very ineffective fence.
For a 6000-volt system, you’ll need at least three ground rods, each 6-8 feet long, made of galvanized steel or copper-clad material. Space them 10 feet apart in a straight line. Drive them deep into the soil, leaving just 2-4 inches above ground for connections. Use insulated ground clamps and thick galvanized wire to connect all rods together.
Here’s the crucial part: testing. After installation, water the area around your ground rods thoroughly. Then touch a metal rod to your fence wire while standing barefoot on damp ground about 100 feet from your energizer. Ask someone to check the voltage at the fence. If it drops below 3000 volts, you need additional ground rods. This simple test saved me from months of frustration and finally gave me a fence that actually worked.
Wire Selection and Installation Tips
When I first built my electric fence, I spent way too long staring at the wire options at my local farm supply store. Let me save you that confusion by breaking down what actually matters.
Polywire is your budget-friendly starter option. It’s lightweight, easy to handle, and works great for temporary setups or rotational grazing. The braided strands conduct electricity through thin metal filaments woven into the plastic. However, it stretches over time and doesn’t hold up well in windy conditions or if animals push against it regularly.
Polytape offers better visibility than polywire, which helps animals learn fence boundaries faster. The wider surface area (usually half-inch to two inches) makes it easier for livestock to see, reducing accidental collisions. It’s my go-to recommendation for horses and cattle, though it can flap in the wind and eventually wear at connection points.
High-tensile wire is the permanent solution. This galvanized steel wire stays taut, resists corrosion, and lasts for decades. Yes, it costs more upfront and requires proper tensioning tools, but you’ll thank yourself later when you’re not constantly repairing sagging fence lines.
For height recommendations, think about your animals’ shoulder height. Cattle need fencing around 40-48 inches, while goats and sheep do well with multiple strands between 12-36 inches. Predator control for chickens or small livestock requires wires as low as 6 inches from the ground.
Here’s something crucial everyone overlooks: vegetation management. Keep at least a three-foot clear zone around your fence line. Tall grass and weeds touching your wire will drain your 6000-volt charge faster than you’d believe, rendering your solar-powered system ineffective. I learned this the hard way during my first wet spring when mysterious power losses kept happening. Regular trimming with a weed whacker or careful herbicide application keeps your voltage where it needs to be.
Maintaining Peak Performance in Your Solar Fence System
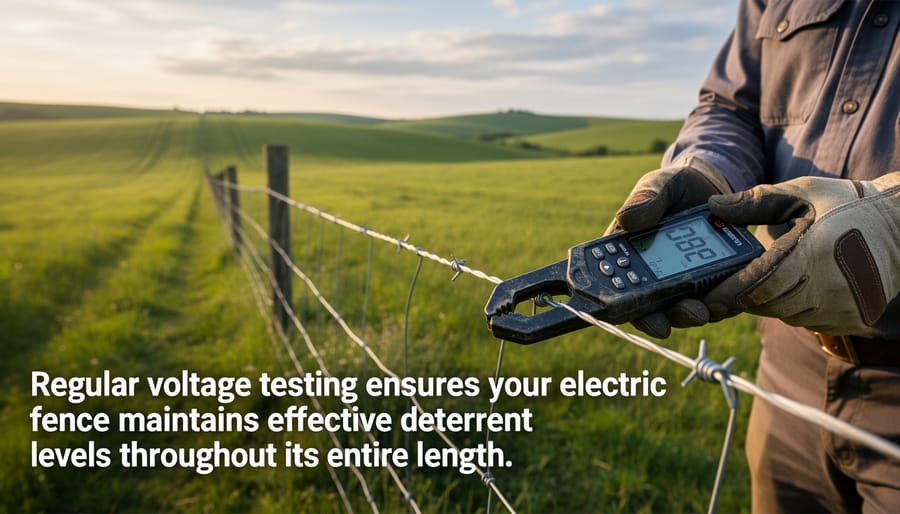
Regular voltage testing ensures your electric fence maintains effective deterrent levels throughout its entire length.
Monitoring Voltage and Testing Your Fence
Keeping your 6000-volt electric fence running smoothly starts with regular monitoring, and honestly, it’s easier than you might think. I learned this lesson the hard way when a curious deer found a weak spot in my pasture fence—turns out a sagging wire was touching a fence post, draining power from the entire line.
The most essential tool you’ll need is a digital fence tester, which you can pick up for around $25-40 at most farm supply stores. These handy devices have a ground probe and a contact probe that measure the voltage at any point along your fence line. To use one, simply push the ground probe into the soil and touch the contact probe to your fence wire. The display will show you the exact voltage reading.
Here’s what you should expect to see: At the energizer, you should read close to 6000 volts (5500-6000V is normal). About 500 feet from the energizer, expect around 5000-5500 volts. At 1000 feet, you’re still looking for 4500-5000 volts. Anything below 4000 volts at any point means something’s wrong and needs attention.
Common culprits for voltage drops include vegetation touching the wires, corroded connections, damaged insulators, or inadequate grounding. Walk your fence line weekly during growing season, testing every few hundred feet. When you find a section with lower voltage, work backward toward the energizer to pinpoint exactly where the problem starts. Look for burned grass beneath the wire, melted insulators, or discolored connection points—these visual clues often reveal shorts before your tester does.
Solar Panel and Battery Care
Keeping your solar-powered fence system running smoothly is easier than you might think. I learned this the hard way when my first setup went haywire after a dusty summer—turns out, dirty panels can reduce charging efficiency by up to 25 percent!
Clean your solar panels every four to six weeks using just water and a soft cloth. Avoid harsh chemicals that might damage the protective coating. While you’re at it, check the battery charge level using the built-in indicator or a simple multimeter. Your battery should maintain at least 12 volts for optimal fence performance.
Weather protection is crucial for longevity. Mount your energizer and battery in a weatherproof enclosure, or choose units specifically rated for outdoor use. I’ve seen too many friends lose equipment to unexpected rainstorms because they skimped on proper housing.
Most deep-cycle batteries in fence systems last three to five years, depending on usage and climate. Mark your calendar when you install a new battery so you’re not caught off-guard when performance starts declining. If you’re building your system from scratch, the principles are similar to setting up a DIY solar generator—just scaled for continuous outdoor operation.
Regular maintenance means reliable protection for your property year-round.
Building a 6000-volt solar-powered electric fence might have seemed intimidating at first, but as we’ve explored together, it’s absolutely within your reach as a DIY project. I remember when I first considered setting up an electric fence system on my property – the voltage number felt scary. But after understanding that voltage alone doesn’t determine danger, and that these systems are specifically designed with safety in mind, I moved forward with confidence. Today, my solar-powered fence runs flawlessly, keeping my livestock secure without adding a penny to my electricity bill.
The beauty of combining 6000-volt electric fencing with solar power is that you’re not just protecting your property or livestock – you’re doing it sustainably and independently. You’re taking control of your energy needs while respecting the environment. That’s genuinely empowering.
Remember, you don’t need to be an electrical engineer or a seasoned rancher to make this work. Start with proper planning, use the right components rated for your voltage requirements, follow manufacturer guidelines for safety, and test your system regularly. The resources here at Spheral Solar are designed to support you through every step of the process, from calculating your solar panel needs to troubleshooting common issues.
So take that next step. Whether you’re protecting a small backyard garden or managing acres of pasture land, sustainable off-grid livestock management is completely achievable. Your solar-powered electric fence awaits – and you’ve got everything you need to build it successfully.
How useful was this post?
Click on a star to rate it!
Average rating 0 / 5. Vote count: 0
No votes so far! Be the first to rate this post.
We are sorry that this post was not useful for you!
Let us improve this post!
Tell us how we can improve this post?
charlesnoble
Here at Spheral Solar, I’m a hands-on solar power enthusiast, constantly exploring and experimenting with DIY solutions. I’m dedicated to sharing my discoveries, insights, and even the bumps I hit along the way, all in the pursuit of a more sustainable future.
How Far a 5 Mile Solar Fence Charger Actually… by Charlesnoble November 30, 2025 Understand that the “5 mile” rating on solar fence chargers doesn’t mean your fence will shock animals five miles away—it refers to the maximum length of wire the charger can energize under perfect conditions. In reality, expect effective coverage for 2-3 miles of actual fencing once you factor in vegetation…
How to Build a Solar-powered Electric Fence (With Diagrams) by Paul November 1, 2021 You can build a permanent DIY, 3-acre solar-powered electric fence can with basic technical skills in under a week. And depending on whether you opt for a custom or off-the-shelf solar fence charger, costs between $1,400 and $1, 800. And it could be up and running in a couple of…
Build Your Own Solar-Powered Deer Fence (That… by Charlesnoble October 15, 2025 Transform your garden’s defense with a reliable solar-powered electric fence setup that keeps deer at bay while harnessing clean, renewable energy. Modern solar-powered fence kits combine robust shock delivery with minimal maintenance, offering year-round protection without constant battery changes or utility costs. These systems deliver consistent 7,000-10,000-volt pulses that effectively…
Build a Solar-Powered Car That Actually Wins Your… by Charlesnoble April 5, 2026 Gather a small solar panel (1.5-6 volts), a lightweight toy car chassis or four bottle caps for wheels, a small DC motor, connecting wires, and a hot glue gun to create your science fair winner in an afternoon. Position the solar panel where it catches maximum sunlight—angled slightly toward the…
How I Built a 48V Ebike Solar Charger That Works Anywhere by Charlesnoble January 14, 2026 Calculate your ebike’s battery capacity in watt-hours by multiplying 48 volts by your amp-hour rating—this determines the minimum solar panel wattage you’ll need. A standard 48V 14Ah ebike battery holds 672Wh, requiring at least a 200-watt solar panel for a full day’s charge in optimal sunlight conditions. Match your solar…
DIY Solar Generator – Complete Guide With Diagrams by Paul July 17, 2021 Building a weatherproof DIY solar generator involves mounting and wiring a battery, charge controller, inverter, trickle charger, and fusing inside a weatherproof case. Then all the relevant input and output sockets are wired and mounted on the outside of the case where they are easily accessible. What Exactly Are Solar…
Subscribe for handpicked DIY projects, exclusive tips, and giveaways.
Monitor your greenhouse temperature daily during peak sun hours—if it consistently exceeds 85°F or condensation builds up on interior surfaces, you’re losing crops to heat stress and creating the perfect environment for fungal diseases. A greenhouse solar ventilation fan addresses both problems without adding a penny to your electricity bill, making it one of the… Read more: Why Your Greenhouse Needs a Solar Ventilation Fan (Before Summer Hits)
Press and hold the adjust button (usually bottom-left) on your G-Shock for three seconds until the time display starts flashing—this unlocks manual time adjustment on most models. Navigate between hours, minutes, and date using the mode button, then use the forward/reverse buttons to change values. If you own a radio-controlled G-Shock with Multi-Band 6 technology,… Read more: How to Adjust Time on Your G-Shock Solar Watch (Without Breaking It)
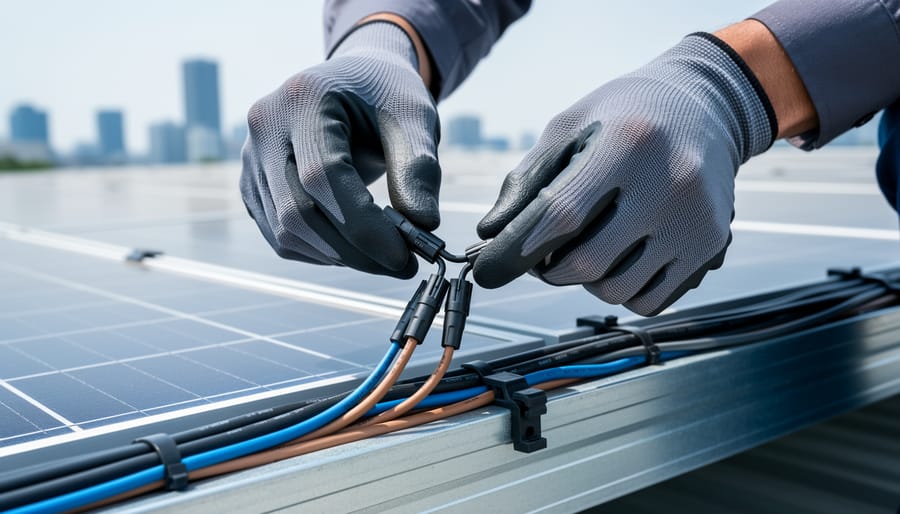
Picture this: you’ve just installed your third solar panel on the roof, wires dangling everywhere, and suddenly you realize your two-panel string needs to connect with your new addition. You need a solar branch connector, but you’re staring at product listings wondering if you’re about to make an expensive mistake. Solar branch connectors are the… Read more: Why Your Solar Array Needs Branch Connectors (And How to Install Them Right)

")
")
")


")
")
")