Build Your Own Home Solar Power System and Actually Save Money
Updated:
Calculate your daily energy consumption by examining your electricity bills for the past year—most households use between 20-30 kilowatt-hours per day, which translates to a 5-7 kilowatt solar array for complete energy independence. This single number determines everything: how many panels you’ll mount, the inverter capacity you’ll need, and whether your budget aligns with reality. I learned this the hard way when I overestimated my first system by 40%, wasting thousands on unnecessary equipment.
Source quality components from established distributors rather than chasing the cheapest options on marketplaces—monocrystalline panels rated at 300-400 watts each, a reliable grid-tie or hybrid inverter, proper mounting hardware rated for your roof type, and appropriately sized wiring that meets electrical codes. The difference between a system that lasts 25 years and one that fails in five often comes down to purchasing certified equipment with legitimate warranties, not shaving 15% off your initial costs.
Understand that DIY solar exists on a spectrum from “completely off-grid with battery backup” to “simple grid-tie system that feeds excess power back to your utility.” Most homeowners achieve the best return on investment with grid-tie systems that eliminate expensive battery banks while still slashing monthly bills by 70-90%. Your local regulations, available roof space, and technical confidence level will determine which approach makes sense for your situation.
Recognize that the physical installation represents only half the challenge—navigating permits, understanding local electrical codes, and connecting safely to your home’s service panel require careful attention to legal requirements that vary dramatically by jurisdiction.
Why DIY Solar Makes Sense for Your Home (And Your Wallet)
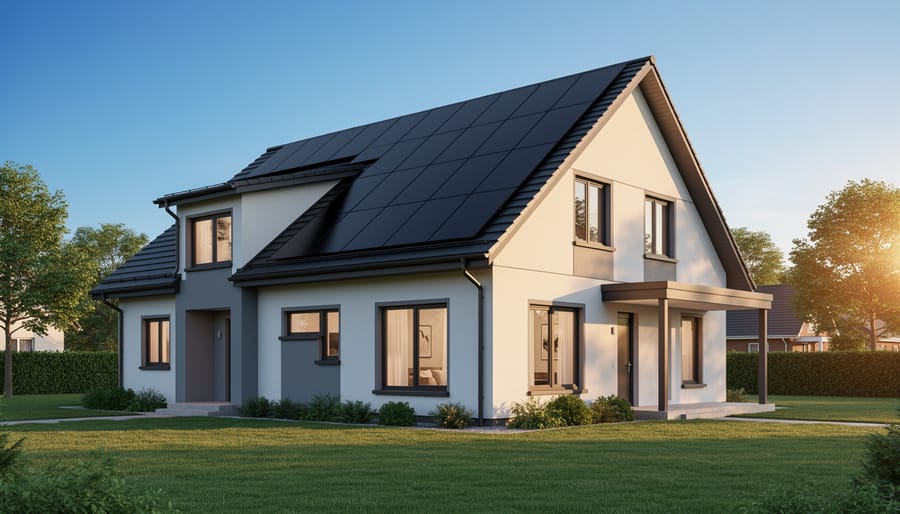
A professionally installed rooftop solar array demonstrates the clean, efficient appearance of a well-planned residential system.
The Real Cost Comparison: Professional vs. DIY
Let’s talk real numbers, because that’s what matters when you’re deciding whether to DIY or hire professionals. When I installed my first system back in 2015, the cost difference literally took my breath away.
For a small system (3kW, enough to offset basic usage), professional installation typically runs $9,000-$12,000 after incentives. Going DIY? You’re looking at $3,500-$5,000 for components—panels, inverter, racking, wiring, and monitoring equipment. That’s roughly 60% savings, though you’ll invest 20-30 hours of your time.
Medium systems (6kW, ideal for average households) show even more dramatic differences. Professional quotes usually land between $15,000-$18,000, while DIY component costs hover around $7,000-$9,000. A neighbor of mine chose the DIY route last year and saved nearly $10,000, using that money to add battery backup instead.
Large systems (10kW, for bigger homes or those wanting to solar power a house completely) get pricey professionally at $25,000-$30,000. DIY costs range from $12,000-$15,000, but here’s the catch—installation complexity increases significantly.
These numbers don’t include potential permit fees (typically $100-$500) or inspection costs. Also remember, professional installations include warranties on labor, while DIY puts troubleshooting squarely on your shoulders. However, component warranties remain identical regardless of who installs them, which levels the playing field considerably for confident DIYers.
What You Actually Need to Know Before Starting
Let me be straight with you: installing a DIY solar system isn’t like assembling IKEA furniture, but it’s also not rocket science. When I tackled my first installation, I had basic electrical knowledge and could confidently use power tools. That’s honestly the baseline you need.
Expect to invest 40-60 hours researching, planning, and installing a typical residential system. You’ll need to understand electrical basics like voltage, amperage, and wiring configurations. Don’t worry if these terms sound intimidating now—you’ll learn them through the process, and there are countless online resources to guide you.
The learning curve breaks down into three phases: understanding system components (2-3 weeks), planning your specific setup (1-2 weeks), and physical installation (2-4 days for most systems). You don’t need an engineering degree, but patience and attention to detail are non-negotiable.
One reality check: local building codes and permits can be surprisingly complex. Some jurisdictions welcome DIY installations with open arms, while others make it frustratingly difficult. Research your local requirements early—this often determines whether DIY is even feasible for you. The good news? Each challenge you overcome builds genuine confidence and knowledge you’ll use for years.
Understanding Your Home’s Solar Potential
Measuring Your Energy Needs (Without Getting Overwhelmed)
Here’s the thing I learned the hard way: you don’t need a fancy energy audit to figure out what size solar system you need. I spent weeks overthinking this before realizing the answer was literally on my electric bill.
Start by grabbing your last 12 months of utility bills. Look for your total kilowatt-hours (kWh) used each month. Add them up and divide by 12 to get your average monthly consumption. That’s your baseline. Most households use between 600-1,200 kWh monthly, but yours might be different depending on your location and lifestyle.
Next, identify your energy hogs. Your refrigerator, HVAC system, water heater, and washer/dryer are usually the biggest culprits. You can pick up an inexpensive electricity monitor that plugs into outlets to measure individual appliance consumption. I was shocked to discover my ancient basement freezer was costing me $30 monthly.
To determine your system size, multiply your average monthly usage by 12, then divide by the annual sun hours in your area. For example, if you use 10,000 kWh yearly and get 1,500 sun hours, you’ll need about a 6.7 kW system. Add 25 percent extra to account for efficiency losses and cloudy days.
Spheral Solar offers free calculator tools that simplify this entire process. They factor in your location, roof angle, and shading to give you accurate estimates. These tools also help you maximize solar panel output based on your specific circumstances.
Site Assessment: Is Your Property Solar-Ready?
Before diving into your DIY solar project, let’s figure out if your property is actually a good candidate for solar panels. I learned this lesson the hard way when I initially planned to install panels on my north-facing garage roof—spoiler alert: not my brightest idea!
Start by observing your sun exposure throughout the day. Spend a full day watching how sunlight hits your potential installation area. Ideally, you want at least 4-6 hours of direct sunlight daily, particularly between 9 AM and 3 PM when the sun is strongest. South-facing roofs work best in the Northern Hemisphere, though east and west orientations can still produce decent energy. Take note of any trees, buildings, or structures casting shadows—even partial shade can significantly reduce solar panel efficiency.
Next, evaluate your roof condition honestly. Your roof should have at least 15-20 years of life remaining since removing and reinstalling solar panels for roof repairs gets expensive quickly. Check for signs of damage, sagging, or water stains in your attic. If your roof needs work, handle those repairs first.
Measure your available space. A typical residential solar panel measures about 65 inches by 39 inches, and most DIY systems need 15-25 panels depending on your energy needs. You’ll need roughly 300-500 square feet of unobstructed roof space for an average system.
Consider your local climate too. While solar works in cloudy regions, consistently overcast areas will produce less energy. Research your area’s average sun hours using online solar calculators—they’re free and incredibly helpful for setting realistic expectations.
Finally, check your local building codes and HOA restrictions before getting too excited. Some communities have specific requirements that might affect your installation plans.
Essential Components of a DIY Home Solar System
Monitoring your DIY solar system’s performance helps ensure maximum efficiency and catch potential issues early.
Solar Panels: Choosing the Right Type and Size
When I first started shopping for solar panels, I stood in the aisle completely overwhelmed by the options. Let me break down what I’ve learned so you don’t have to feel that same confusion.
You’ll primarily encounter two types of panels: monocrystalline and polycrystalline. Monocrystalline panels are the sleek black ones you often see on rooftops. They’re more efficient, meaning they produce more power per square foot, which is great if you have limited roof space. They typically last longer and perform better in low-light conditions, but they cost a bit more upfront. Polycrystalline panels have that distinctive blue, speckled appearance. They’re slightly less efficient but often friendlier to your wallet.
For most DIY home systems, I recommend monocrystalline panels if your budget allows. The efficiency gains usually pay off over time, and you’ll need fewer panels overall.
When considering wattage, residential panels typically range from 250 to 400 watts each. Higher wattage doesn’t automatically mean better value, so calculate your cost per watt to compare options fairly. I’ve found panels in the 300-350 watt range offer the sweet spot between performance and price.
Quality indicators matter more than fancy marketing. Look for panels with at least a 25-year performance warranty, certifications from organizations like UL or IEC, and positive temperature coefficients. Check online reviews from actual DIYers who’ve installed them. Remember, the cheapest panel isn’t always the best deal if it underperforms or fails early.
Batteries and Energy Storage Options
Before you dive into selecting batteries, let’s talk about a question I wish someone had asked me during my first solar project: do you actually need battery storage at all? If you’re building a grid-tied system where net metering is available, you might skip batteries entirely and use the grid as your backup. This saves thousands upfront and simplifies your system considerably.
But if you’re going off-grid or want genuine energy independence during outages, batteries become essential. Here’s where it gets interesting. You’ll encounter two main choices: lithium and lead-acid batteries.
Lithium batteries cost more initially, typically two to three times the price of lead-acid, but they’re game-changers for DIY systems. They’re lighter, last 10-15 years versus 3-5 years for lead-acid, and you can safely use about 80-90% of their capacity without damage. Lead-acid batteries, on the other hand, should only be discharged to about 50% capacity to maintain battery storage longevity.
For capacity calculations, start simple: track your daily energy usage in kilowatt-hours (check your utility bill or use a kill-a-watt meter). Multiply by the number of days of autonomy you want, typically 1-3 days. Then divide by your battery’s usable capacity percentage. If you use 10 kWh daily and want two days of backup with lithium batteries at 80% usable capacity, you’ll need roughly 25 kWh of total battery capacity. Remember, bigger isn’t always better for hobbyist projects. Start small and expand as you learn.
Inverters, Charge Controllers, and Balance of System
Once your panels are soaking up sunshine, you need equipment to make that power usable in your home. Think of inverters as translators, converting the DC electricity your panels produce into the AC electricity your appliances speak. There are string inverters (one central unit for your whole array) and microinverters (one per panel). I learned this the hard way when my string inverter failed and knocked out my entire system for two days. Microinverters cost more upfront but offer redundancy and better performance when partial shading occurs.
Charge controllers are essential if you’re incorporating battery storage. They regulate the voltage and current from your panels to your batteries, preventing overcharging that can destroy expensive battery banks. You’ll encounter two types: PWM (cheaper but less efficient) and MPPT (more expensive but extracts 20-30% more power). For most DIY systems, MPPT controllers are worth the investment.
The balance of system includes mounting hardware, wiring, disconnects, grounding equipment, and junction boxes. These unsexy components often get overlooked during budgeting, but they typically represent 10-15% of total system cost.
A common sizing mistake is buying an inverter that’s too small for your peak loads. Calculate your maximum simultaneous power draw and add 20% headroom. Our DIY solar generator guide includes calculators to help you nail these numbers. Another mistake is skimping on wire gauge, which causes voltage drop and efficiency losses. When in doubt, go one size thicker than minimums suggest.
Planning Your System: Grid-Tied vs. Off-Grid vs. Hybrid
Grid-Tied Systems: The Most Popular DIY Choice
Grid-tied systems connect your solar panels directly to your local utility grid, making them the perfect entry point for DIY solar enthusiasts. Here’s why they’re so popular: when your panels generate more electricity than you’re using, the excess flows back into the grid, spinning your meter backward. When the sun sets or you need more power than your panels produce, you simply draw from the grid as usual.
The real game-changer is net metering. Your utility company essentially acts as a giant battery, crediting you for the power you contribute and debiting when you use grid electricity. In many states, these credits offset your electric bill dollar-for-dollar. I remember talking with Sarah, a DIYer from Oregon, who told me her summer surplus completely wipes out her winter bills.
Grid-tied systems are simpler because you don’t need expensive battery storage. The installation involves fewer components: just panels, mounting hardware, an inverter, and connection equipment. Plus, you maintain grid reliability as a backup, eliminating concerns about cloudy days or high-demand periods.
For beginners, this setup offers the best balance of savings, simplicity, and peace of mind. You’ll avoid the complexity of battery maintenance while still slashing your energy costs and contributing clean power to your community.
Off-Grid Systems: True Energy Independence
Going completely off-grid means disconnecting from your utility company entirely and relying solely on your solar system and battery storage. I’ll be honest with you: it’s the most challenging and expensive solar option, but it can be incredibly rewarding when done right.
The reality is that off-grid systems require significantly larger battery banks than grid-tied setups. You’ll need enough storage to power your home through several cloudy days, which can easily triple your overall system cost. Most off-grid systems run between $30,000 and $60,000 for a typical home, with batteries representing nearly half that expense.
You’ll also need a backup power source for extended periods without sun. Many folks compare solar versus gas generators for this purpose, though some prefer adding extra solar capacity instead.
Off-grid makes the most sense if you’re building in a remote location where utility connection costs exceed $15,000, or if you simply value complete energy independence regardless of cost. The lifestyle adjustment is real too. You’ll become intimately familiar with your energy consumption, learning to run heavy appliances strategically and occasionally making compromises during winter months.
From my experience helping neighbors set up off-grid cabins, start small if possible. A basic system powering essential loads teaches you valuable lessons before committing to a whole-house setup.
Understanding the key components like inverters and their connections is essential for successful DIY solar installation.
Hybrid Systems: The Best of Both Worlds
Hybrid systems give you the safety net of the grid plus the independence of batteries—truly the best of both worlds. When I installed my first hybrid setup, I loved knowing that excess solar energy charged my batteries while still having utility power as backup during extended cloudy periods.
These systems automatically switch between solar, battery, and grid power based on availability and cost. They’re perfect if you experience occasional outages but don’t want to completely disconnect from utility infrastructure. The tradeoff? Hybrid systems are the most complex DIY option, requiring compatible inverters, charge controllers, and careful electrical planning. You’ll need solid electrical knowledge and potentially professional help with permitting. However, for many homeowners wanting resilience without going fully off-grid, the added complexity pays off in peace of mind and energy security.
The Step-by-Step DIY Installation Process
Permits, Permissions, and Playing by the Rules
Here’s the reality that catches many first-time solar DIYers off guard: even though you’re doing the work yourself, you’ll likely still need permits and approvals. I learned this the hard way when I was halfway through my first installation before realizing I needed permission from three different entities.
Most municipalities require electrical permits for solar installations, regardless of system size. Your local building department wants to ensure your setup meets fire codes and structural requirements, especially if you’re mounting panels on your roof. The process typically involves submitting system diagrams and component specifications, then scheduling an inspection once everything’s installed.
Your utility company also needs notification, particularly if you’re connecting to the grid. They’ll review your plans to ensure proper disconnect switches and safety equipment. Some utilities require a net metering agreement, which determines how they’ll credit you for excess power you generate.
Homeowners associations can throw another wrench in the works with aesthetic restrictions, though many states now limit HOA power to block solar installations.
Yes, navigating permits feels tedious when you’re eager to start building. But skipping this step can result in fines, insurance complications, or being forced to remove your entire system. Most local solar installers or permitting services can help DIYers through the paperwork for a reasonable fee, making the process much less intimidating than it initially appears.
Mounting Your Panels Safely and Securely
Getting your panels up safely is where careful planning really pays off. I’ll be honest with you—this is the part where I called in my neighbor Tim, who’s comfortable on roofs. There’s no shame in asking for help with heights!
For roof mounting, you’ll need to locate your roof rafters using a stud finder. Mark their positions clearly, because your mounting rails must attach directly to rafters, not just shingles. The flashing kits that come with most racking systems are your best friends—they create weatherproof seals around each lag bolt. When I did mine, I applied extra roofing sealant around every penetration point. It might seem excessive, but one leak can cause thousands in damage.
Here’s my key safety tip: work on a mild weather day with zero wind. Panels act like sails once you lift them, and I nearly lost one to a surprise gust. Always use a safety harness rated for your weight plus equipment, anchored to a solid point.
If your roof isn’t ideal—too shaded, wrong angle, or you’re just nervous about drilling holes—ground mounting is fantastic. I actually prefer it for maintenance access. You’ll need concrete footings or ground screws depending on your soil type. Ground mounts let you set the perfect tilt angle and make panel cleaning incredibly easy.
The rails should be level within a quarter-inch over their entire length. Use your torpedo level religiously. Once rails are secure, panels click into mid-clamps and end-clamps—this part goes surprisingly fast and feels incredibly satisfying.
Safe mounting techniques and proper installation practices are critical for DIY solar success and long-term system performance.
Wiring, Connecting, and Testing Your System
This is where things get real, and honestly, where I recommend most DIY enthusiasts pause and assess their comfort level. I learned the hard way that electrical work demands respect and, often, professional expertise.
Start by carefully reviewing your local building codes and permit requirements. Many jurisdictions require licensed electricians for grid-tied connections, and for good reason. These systems involve potentially lethal voltages and must integrate safely with utility infrastructure.
For the DC side (panels to charge controller to batteries), you’ll connect using appropriately sized cables with proper polarity. Double-check every connection before energizing. Use a multimeter to verify voltages match your expectations. I always test with a single panel first, confirming the charge controller recognizes the input before adding more panels.
The inverter connection comes next, linking your battery bank to AC loads. Follow manufacturer wiring diagrams exactly. Install proper fusing and disconnect switches at every major junction point. These aren’t optional; they’re your safety net if something goes wrong.
Here’s my honest advice: unless you’re a qualified electrician, hire one for the final grid connection and inspection. The few hundred dollars you’ll spend ensures code compliance, proper grounding, and most importantly, safety for your family. Many insurance policies also require professional installation documentation.
System commissioning involves gradually bringing components online, monitoring for proper voltage levels, verifying ground fault protection works, and confirming your monitoring system accurately tracks production. Take your time with this process; rushing invites costly mistakes.
Common Mistakes and How to Avoid Them
Undersizing (or Oversizing) Your System
Getting your system size right saves you from frustration and wasted money. I learned this the hard way when I first underestimated my family’s energy needs by nearly 40 percent. My panels couldn’t keep up during cloudy stretches, and we constantly ran our backup generator.
Start by tracking your actual energy usage for at least three months, not just estimating from utility bills. Look for seasonal patterns, especially if you use air conditioning or heating. A good rule of thumb is to design for your highest consumption months, then add a 20 percent buffer for future needs and system efficiency losses.
Warning signs you’ve miscalculated include batteries dropping below 50 percent charge regularly, inverters running at maximum capacity for extended periods, or needing grid power more often than expected. On the flip side, if your batteries stay at 100 percent for days and you’re generating excess power with nowhere to send it, you may have oversized.
The beauty of modular solar systems is that you can adjust. Start with a core system that meets 70-80 percent of your needs, then expand by adding panels or battery capacity as your budget allows. Use our interactive calculator to run different scenarios before making your final purchase decisions.
Electrical Safety Mistakes That Could Cost You
I learned this lesson the hard way during my first DIY solar installation. I was rushing to finish before sunset and nearly skipped a crucial grounding step. My neighbor, an electrician, stopped by just in time and probably saved me from a dangerous situation. Let me share the mistakes you absolutely cannot afford to make.
The most common error I see in DIY solar projects is inadequate grounding. Your entire system needs proper protection from electrical surges and lightning strikes. This isn’t optional. Implementing proper grounding techniques means connecting your solar array frame, charge controller, inverter, and battery bank to a dedicated grounding rod. Skip this, and you’re risking equipment damage, fire, or worse.
Another critical mistake is working with live circuits. Always disconnect power sources before making any connections. I use a simple checklist now: turn off the circuit breaker, verify with a multimeter that there’s no voltage present, then proceed. It takes two extra minutes but could save your life.
Many DIYers also underestimate DC voltage dangers. While 12 or 24 volts sounds harmless, DC current doesn’t let go like AC does. Always use properly rated wire, secure all connections tightly, and never work barefoot or on wet surfaces.
Here’s where I draw the line: if you’re connecting to your main electrical panel or working with systems over 48 volts, hire a licensed electrician. Some mistakes simply aren’t worth the risk or potential insurance headaches.
Maintaining Your DIY Solar System for Maximum Performance
Routine Maintenance Tasks You Can’t Skip
Here’s what I’ve learned keeps a DIY solar system running smoothly without eating up your weekends. Monthly (15 minutes): Give your panels a visual once-over from the ground. Look for debris, bird droppings, or shading from growing tree branches. I check mine while having my morning coffee – it’s that quick. Hose off any obvious dirt if you can reach safely, but never climb on your roof without proper safety equipment.
Quarterly (30 minutes): Check your monitoring app or system display for any performance drops. Inspect visible wiring for wear, and tighten any loose connections in your combiner box or inverter area. This is also when I look at my energy production graphs to spot patterns.
Annually (2-3 hours): Deep clean your panels if accessible, or hire a professional service (usually $100-200). Test your battery bank’s voltage and capacity if you have energy storage. Review all electrical connections, and trim back any vegetation that’s grown closer to your array.
Twice yearly: Check mounting hardware for rust or loosening, especially after severe weather. Your system’s longevity depends more on these simple checks than expensive repairs later. Most DIYers find this maintenance routine surprisingly manageable – it’s less demanding than maintaining a lawn mower.
Monitoring Performance and Catching Problems Early
Once your system is up and running, keeping tabs on its performance becomes your new morning ritual—trust me, I check mine with my coffee! Modern solar monitoring is surprisingly accessible, even for DIY setups.
Start with a basic monitoring system that tracks daily energy production. Most inverters include built-in monitoring capabilities, either through LED displays or smartphone apps. These tools show you real-time power generation, helping you understand your system’s rhythm through different weather conditions and seasons.
The key is establishing a baseline. During your first few sunny weeks, note your typical daily output. This becomes your reference point. If production suddenly drops 20-30% on similar weather days, something needs attention—maybe dirt accumulation, shading from growing trees, or a technical issue.
I learned this the hard way when a nearby oak grew just enough to shade two panels during peak hours. My monitoring app showed the dip, and trimming one branch restored full production.
Simple troubleshooting starts with visual inspections. Check for debris, examine connections for corrosion, and ensure nothing’s blocking your panels. Many monitoring systems can identify which specific panels underperform, making diagnostics much easier.
Free online calculators can help you compare expected versus actual output based on your location and weather patterns. This data-driven approach transforms you from panel owner to informed system manager, catching small problems before they become expensive headaches.
Resources and Tools for Your DIY Solar Journey
Building your own solar system doesn’t mean going it alone. I’ve learned over the years that having the right resources can make the difference between a frustrating experience and an enjoyable project. Let me share some tools that have been invaluable on my own solar journey.
Start with Spheral Solar’s online calculators to estimate your system size and potential savings. These free tools take the guesswork out of planning by helping you understand your energy needs and expected costs. When Charles first started experimenting with solar panels fifteen years ago, he had to do all these calculations by hand. Now, you can get accurate estimates in minutes.
For component sourcing, I recommend checking out established suppliers like Renogy, Grape Solar, and Wholesale Solar. These companies offer complete kits and individual components with solid warranties. Online marketplaces like Amazon and eBay can offer deals, but verify product reviews carefully and ensure you’re buying from reputable sellers.
The DIY solar community is incredibly supportive. Join forums like DIY Solar Power Forum and the Solar Panels subreddit to connect with experienced builders who’ve tackled similar projects. I’ve found that most questions have already been answered somewhere in these communities, and people are genuinely eager to help newcomers succeed.
For continuing education, YouTube channels like Will Prowse’s DIY Solar Power offer detailed installation tutorials, while websites like Solar Energy International provide structured online courses. Many local community colleges also offer renewable energy workshops that give you hands-on experience.
Remember, every expert was once a beginner asking questions. These resources exist to support your journey toward energy independence.
You’ve made it this far, and that tells me something important: you’re serious about taking control of your energy future. Building your own home solar power system isn’t just a pipe dream reserved for electrical engineers or hardcore off-grid survivalists. It’s an achievable goal for anyone willing to invest time in learning and planning.
I remember when I installed my first panel. My hands were shaking as I made those connections, double-checking everything three times. But when that first surge of clean, free electricity started flowing, the sense of accomplishment was incredible. You can have that same experience.
The key is starting smart. Don’t rush out and buy panels tomorrow. Take time to calculate your energy needs accurately, understand your local regulations, and choose quality components that match your skill level. There’s no shame in starting small with a basic setup and expanding later. Every journey begins with a single step, and every solar array begins with a single panel.
The beauty of DIY solar is that you’re joining a community of thousands who’ve walked this path before you. We’re here to help, share experiences, and celebrate your successes. Join the Spheral Solar community where you’ll find tools, calculators, and real people ready to answer your questions.
Your energy independence starts now. The sun is waiting, and so is a future where you control your power, reduce your bills, and make a real difference for our planet. Take that first step today.
How useful was this post?
Click on a star to rate it!
Average rating 0 / 5. Vote count: 0
No votes so far! Be the first to rate this post.
We are sorry that this post was not useful for you!
Let us improve this post!
Tell us how we can improve this post?
charlesnoble
Here at Spheral Solar, I’m a hands-on solar power enthusiast, constantly exploring and experimenting with DIY solutions. I’m dedicated to sharing my discoveries, insights, and even the bumps I hit along the way, all in the pursuit of a more sustainable future.
Build Your Own Solar Generator Kit for Under $500… by Charlesnoble December 30, 2025 Gather four essential components—a 100-300 watt solar panel, a charge controller rated for your panel’s output, a deep-cycle battery (lithium or AGM), and a pure sine wave inverter matching your power needs—then connect them in sequence to create a functional solar generator for under $500. I built my first system…
Right-Sizing Your Solar Generator: Why Most People… by Charlesnoble December 9, 2025 Calculate your daily watt-hour consumption by listing every device you plan to power, multiplying each item’s wattage by the hours you’ll run it, then adding everything together. A laptop drawing 65 watts for 4 hours needs 260 watt-hours, while a mini-fridge at 60 watts running 8 hours requires 480 watt-hours.…
Your Kohler Generator Won’t Start? Here’s How I… by Charlesnoble November 12, 2025 **Check your fuel level and oil pressure first**—90% of Kohler generator failures trace back to these two simple issues. I learned this the hard way during a three-day power outage when my generator shut down unexpectedly, leaving my solar battery backup system without its safety net. **Listen to your generator’s…
Why Your Solar Generator Battery Dies Too Soon (And… by Charlesnoble February 4, 2026 Check your battery’s state of charge monthly and recharge before it drops below 50% to prevent sulfation damage that permanently reduces capacity. Store your solar generator in temperatures between 50-77°F, as every 15-degree increase above this range can cut battery lifespan in half. Avoid the common mistake of leaving your…
DIY Solar Generator – Complete Guide With Diagrams by Paul July 17, 2021 Building a weatherproof DIY solar generator involves mounting and wiring a battery, charge controller, inverter, trickle charger, and fusing inside a weatherproof case. Then all the relevant input and output sockets are wired and mounted on the outside of the case where they are easily accessible. What Exactly Are Solar…
Make Your Solar Panels Work Harder: Real kWh Output Secrets by Charlesnoble October 12, 2025 Calculate your solar panel’s daily kilowatt-hour (kWh) output by multiplying its wattage rating by your location’s peak sun hours and applying a 75% efficiency factor. A typical 300-watt panel in a region with 5 peak sun hours generates approximately 1.12 kWh per day, demonstrating the real-world benefits and limitations of…
Subscribe for handpicked DIY projects, exclusive tips, and giveaways.
Route your PV wires through UV-resistant conduit within 18 inches of leaving the solar array, securing it every 3 feet with proper clamps to prevent wind damage and code violations. This single step prevents 80% of the wire degradation issues I’ve seen in DIY solar installations over the past decade. Group your positive and negative… Read more: Why Your PV Wire Management Could Fail Inspection (And How to Fix It)
Understand that 6000 volts sounds terrifying but delivers surprisingly low amperage—typically around 120 milliamps for just 3/10,000th of a second per pulse. This combination creates an unforgettable shock that trains animals to avoid the fence without causing lasting harm. The voltage pushes current through thick fur and hide, while the minimal amperage and microsecond duration… Read more: Why 6000 Volts Won’t Kill Your Livestock (But Will Stop Predators Cold)
Check the maximum voltage and current ratings first—these determine whether your controller can actually handle your solar panel array without frying itself on the first sunny day. I learned this the hard way when my first DIY system shut down every afternoon because I’d paired 600 watts of panels with a controller rated for only… Read more: Why Your Solar Setup Needs Both a Charge Controller and Inverter (And How to Pick the Right Ones)


")
")
")
")


")
")
")
")


