Every Component Your Solar Panel System Actually Needs (And What They Really Do)
Updated:
Picture this: you’re standing in front of a solar panel, ready to harness free energy from the sun, but you’re not quite sure what else you need to make it actually work. I’ve been there. When I first started tinkering with solar in my garage, I quickly learned that panels are just one piece of a larger puzzle.
A photovoltaic system is like a well-orchestrated team where each component plays a specific role in converting sunlight into usable electricity for your home or off-grid setup. Miss one critical piece, and you’re left with expensive equipment that can’t power so much as a light bulb. Get it right, and you’ve built a reliable system that can run for decades.
The core components work together in a simple flow: solar panels capture sunlight and generate direct current electricity, a charge controller regulates that power to safely charge your batteries, batteries store energy for use when the sun isn’t shining, and an inverter converts stored DC power into the alternating current that runs your household appliances. Each component has multiple options, specifications, and compatibility considerations that can make or break your system’s performance.
Whether you’re planning a small 100-watt setup for weekend camping or designing a complete home energy solution, understanding what each component does and how to select the right specifications will save you money, headaches, and countless hours of troubleshooting. Let’s break down exactly what you need to know.
Modern monocrystalline solar panels convert sunlight into electricity through photovoltaic cells, serving as the primary power generators in any solar system.
Solar Panels: Your System’s Power Generators
Understanding Wattage and Efficiency
When I first started shopping for solar panels, I got completely lost in the spec sheets. Let me break down what those numbers actually mean for your project.
Panel wattage tells you the maximum power output under ideal conditions—bright sunshine, perfect angle, cool temperatures. A 100-watt panel produces 100 watts at that perfect moment, but real-world conditions are rarely perfect. In practice, you’ll typically see 70-80% of the rated output throughout the day.
Efficiency refers to how much sunlight the panel converts into electricity. Modern panels range from 15-22% efficient. Higher efficiency means you need less roof space, but it comes at a premium price. For most DIY projects, mid-range efficiency panels work perfectly fine.
Here’s how to calculate your needs: First, figure out your daily energy consumption in watt-hours. Let’s say you need 2,000 watt-hours per day. Divide that by your location’s average sun hours (usually 4-6 hours). That gives you 400-500 watts of panels needed. Add 25% as a buffer for efficiency losses and cloudy days, bringing you to about 600 watts total—so six 100-watt panels would cover your needs. Our site’s solar calculator makes this math easier, accounting for your specific location and seasonal variations.
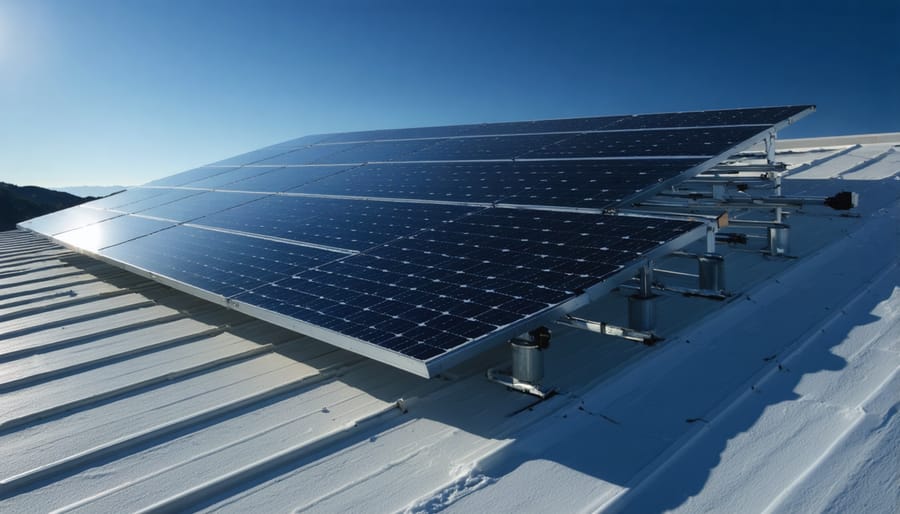
Mounting and Positioning Basics
Where you place your solar panels can make or break your system’s performance. I learned this the hard way during my first rooftop installation—I mounted panels in a spot that seemed perfect until a neighbor’s tree shaded them every afternoon!
For rooftop installations, south-facing orientation works best in the northern hemisphere, angled to match your latitude. Check for shading throughout the day and across seasons. Your roof should be structurally sound and have at least 15-20 years of life remaining before needing replacement.
RV mounting presents unique challenges. Panels must withstand vibration and wind while traveling, so use proper mounting hardware rated for mobile applications. Flat mounting is common on RVs, though you’ll sacrifice some efficiency compared to angled installations. Consider your typical parking spots and any roof obstructions like air conditioners or vents.
Ground mounts offer the most flexibility. You can adjust angle seasonally for maximum production and orient panels perfectly without roof limitations. They’re ideal for properties with shaded roofs or when you want easy access for cleaning and maintenance. Just ensure your mounting structure can handle local wind loads and weather conditions. The installation may require concrete footings depending on your soil type and local codes.
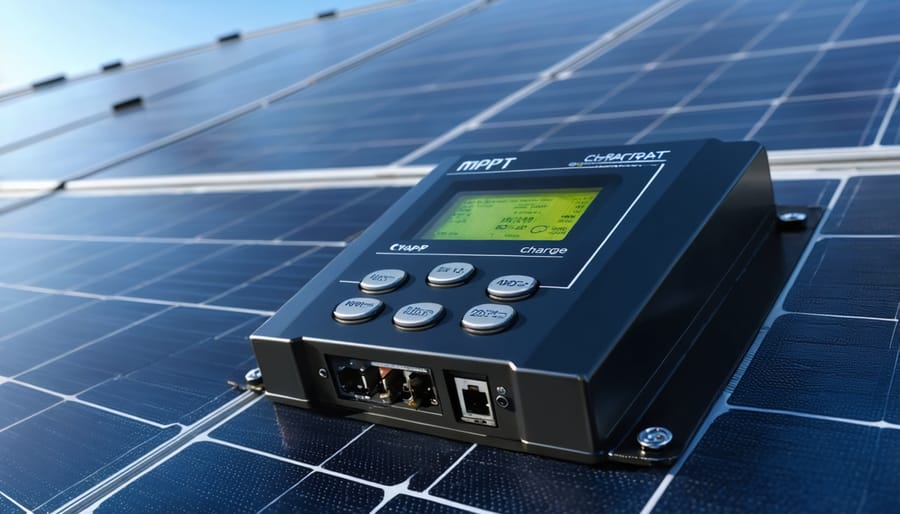
Charge Controllers: The Traffic Cops of Your Solar System
MPPT charge controllers regulate power flow from solar panels to batteries, preventing overcharging while maximizing energy harvest efficiency.
PWM vs MPPT: Which One Do You Really Need?
When I first dove into solar, the PWM versus MPPT debate felt overwhelming. Here’s what I wish someone had told me back then: think of it like shopping for a car. PWM (Pulse Width Modulation) controllers are your reliable economy models, while MPPT (Maximum Power Point Tracking) are the high-performance versions with fancy computers inside.
PWM controllers work great for smaller, simpler setups. If you’re powering a shed, running some lights in your RV, or starting with a basic 100-200 watt system, PWM makes perfect sense. They’re affordable, typically costing $20-50, and they get the job done without fuss. I used a PWM controller for my first garden tool charging station, and it worked beautifully for years.
MPPT controllers shine when you’re scaling up or dealing with challenging conditions. They’re 20-30% more efficient at harvesting power, especially in cold weather or partial shade. Got a 400-watt system or larger? Planning to expand eventually? Living somewhere with frequently cloudy days? MPPT is worth the extra investment, usually $100-300 depending on capacity.
Here’s my practical rule: if your solar array costs less than $300, stick with PWM. If you’re investing more or building a serious off-grid setup, go MPPT. Check out our detailed MPPT vs PWM comparison and reviews of the best charge controllers to find your perfect match.
Sizing Your Charge Controller
Getting the right charge controller size prevents both underperformance and wasted money. The basic formula is straightforward: take your solar array’s total wattage, divide by your battery bank voltage, then add 25% as a safety buffer.
Here’s a quick example. Say you have 400 watts of panels feeding a 12-volt battery system. That’s 400 ÷ 12 = 33.3 amps. Add your 25% safety margin (33.3 × 1.25 = 41.6 amps), so you’d want at least a 45-amp controller.
I learned this the hard way when I undersized my first controller and watched it overheat on a sunny afternoon. Not fun! The safety buffer accounts for those unexpectedly bright days when your panels exceed their rated output.
For step-by-step guidance with real examples, check out our detailed guide on sizing your charge controller. We’ve also built an online calculator that does the math for you, so you can focus on building your system with confidence rather than second-guessing your numbers.
Battery storage systems store excess solar energy for use during nighttime or cloudy conditions, providing energy independence for off-grid applications.
Batteries: Where Your Solar Energy Lives
Battery Types Decoded: Lead-Acid, AGM, Lithium, and More
Choosing the right battery can feel overwhelming, but I’ve learned that matching battery type to your specific needs makes all the difference. Let me break down the most common options.
Lead-acid batteries are the budget-friendly workhorses. These traditional batteries cost less upfront, which makes them attractive for starter systems. I used flooded lead-acid batteries in my first setup, and they worked fine for a small shed project. The downside? They require regular maintenance, need ventilation due to off-gassing, and only last 3-5 years. They’re ideal if you’re testing the solar waters on a tight budget and don’t mind checking water levels monthly.
AGM (Absorbent Glass Mat) batteries represent the middle ground. They’re sealed, maintenance-free, and handle deeper discharges better than standard lead-acid. I switched to AGM for my garage system because they’re safer indoors and more forgiving. They cost about 50% more than flooded lead-acid but deliver better performance and 5-7 year lifespans. Perfect for weekend cabins or backup power systems where you want reliability without constant attention.
Lithium batteries are the premium choice, and honestly, they’re becoming my go-to recommendation despite the sticker shock. Yes, they cost 2-3 times more initially, but they last 10-15 years, charge faster, weigh less, and allow deeper discharges without damage. For daily-use systems or anywhere weight and space matter, lithium makes financial sense over time. One of my community members calculated that lithium actually cost less per usable kilowatt-hour over its lifetime compared to replacing lead-acid batteries multiple times.
How Much Storage Do You Actually Need?
Figuring out battery capacity doesn’t need to be overwhelming. Start by calculating your daily energy usage in watt-hours. Make a list of the devices you want to power, their wattage, and how many hours per day you’ll use them. For example, if you’re running a 50-watt fan for 4 hours and a 10-watt LED light for 5 hours, that’s 250 watt-hours total.
Once you know your daily usage, multiply by the number of days of backup power you want. Most people aim for 2-3 days of autonomy for peace of mind during cloudy weather. Don’t forget to account for battery depth of discharge—lithium batteries can safely discharge to about 80%, while lead-acid batteries should only go to 50%.
Here’s where I learned the hard way: I initially undersized my battery bank because I forgot about inverter efficiency losses, which typically run around 10-15%. Always add a buffer to your calculations.
The good news? You don’t have to do the math alone. Many online solar calculators can help you determine the right battery capacity based on your specific needs. These interactive tools walk you through each step and account for variables like system voltage and temperature effects, making the whole process much more manageable.
Battery Maintenance Tips from the Field
After years of tinkering with battery banks, I’ve learned that a little care goes a long way. Here’s what I wish someone had told me when I started: First, keep your batteries at a consistent temperature. I once stored my first battery bank in an unheated garage during winter, and watched the capacity drop like a rock. Room temperature is ideal, but if that’s not possible, insulation works wonders.
Second, avoid deep discharges whenever possible. Think of it like this: draining your battery to 20% regularly is like running a marathon every day, while keeping it above 50% is more like a gentle jog. Your batteries will thank you with extra years of service.
Third, check water levels monthly if you have flooded lead-acid batteries. I set a phone reminder for the first Sunday of each month. It takes five minutes and prevents costly mistakes.
Finally, keep terminals clean and connections tight. Corrosion builds up quietly, and I’ve seen perfectly good batteries underperform simply because of dirty connections. A wire brush and some baking soda paste work magic here. These simple habits have doubled my battery lifespans compared to my early, more careless days.
Inverters: Converting Sun Power to Usable Energy
Pure Sine Wave vs Modified Sine Wave
When shopping for inverters, you’ll encounter two main types: pure sine wave and modified sine wave. Think of pure sine wave as the smooth, clean electricity that comes from your wall outlet—it creates a perfect wave pattern that mimics grid power exactly. Modified sine wave is more like a staircase approximation of that smooth curve, and while it costs less, it’s pickier about what devices it can power.
Here’s what I learned the hard way during my first DIY setup: I bought a cheaper modified sine wave inverter to run my power tools, and while my drill worked fine, my laptop charger whined annoyingly and ran hot. Some devices simply don’t play nice with modified sine wave power.
Pure sine wave inverters are essential for sensitive electronics like laptops, medical equipment, variable speed tools, audio equipment, and anything with a microprocessor. They’re also crucial for refrigerators, microwaves, and devices with electric motors that need smooth startup power.
Modified sine wave inverters work fine for basic resistive loads like incandescent lights, simple power tools, and phone chargers—though you might notice some buzzing. They’re considerably cheaper, making them tempting for basic applications, but for a whole-home system or anything running sensitive gear, spending extra on pure sine wave prevents headaches and protects your investment.
Choosing the Right Inverter Size
Choosing the right inverter size isn’t just about matching your panel wattage. I learned this the hard way when my first setup kept shutting down every time my power tools kicked on! You need to think about your actual power consumption, not just the theoretical maximum.
Start by calculating your continuous load, which is the steady power draw you’ll need. If you’re running appliances that total 1,500 watts, you’ll want an inverter rated for at least 2,000 watts to give yourself some breathing room. That extra capacity matters more than you might think.
Here’s where surge requirements come in. Many devices, especially anything with a motor like refrigerators, pumps, or power tools, need 2-3 times their running wattage just to start up. That brief surge can trip an undersized inverter instantly. Check your inverter’s surge rating, sometimes called peak power, which should handle these startup demands for a few seconds.
A good rule of thumb? Size your inverter for 1.25 times your continuous load, and verify the surge rating covers your highest-draw appliance’s startup needs. Use our inverter sizing calculator to crunch your specific numbers and avoid the frustrating trial-and-error I went through!
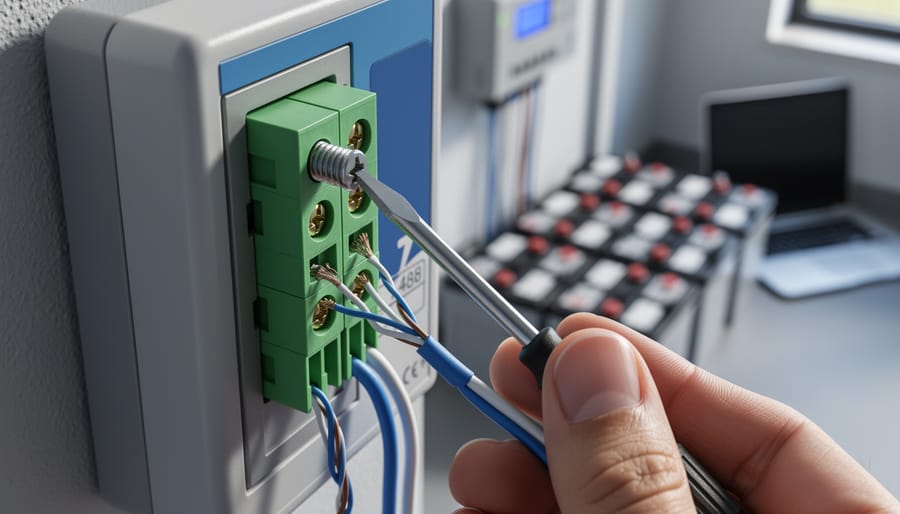
The Supporting Cast: Wiring, Fuses, and Disconnects
Wire Sizing and Why It Matters
Here’s something I learned the hard way during my first solar install: I thought all wire was basically the same and grabbed whatever I had in the garage. Big mistake! Within weeks, I noticed my batteries weren’t charging properly, and some of my connections were getting warm to the touch. Turns out, wire sizing really matters for both safety and system performance.
Think of electrical wire like a water pipe. Just as a narrow pipe restricts water flow, undersized wire restricts electrical current and causes voltage drop. That means power you’ve generated is literally lost as heat before it reaches your batteries or appliances. For most small DIY systems, you’ll need different gauges depending on the application. Short runs between your charge controller and battery might use 10 AWG wire, while longer distances or higher currents need thicker 8 AWG or even 6 AWG.
The two key factors are current and distance. Higher amps or longer wire runs require thicker gauge (remember, lower numbers mean thicker wire). A good rule of thumb is to keep voltage drop under 3 percent for most connections. Many online calculators can help you determine the right size, but when in doubt, go one size thicker. It’s better to oversize than risk overheating or efficiency losses that’ll frustrate you down the road.
Overcurrent Protection and Safety Disconnects
Think of these components as the safety net for your solar system. Just like your home’s electrical panel has circuit breakers to prevent overloads, your PV system needs similar protection to keep everything running smoothly and safely.
Fuses and circuit breakers are your first line of defense against electrical problems. When too much current flows through a circuit, whether from a fault or equipment malfunction, these devices automatically interrupt the power. Fuses contain a metal element that melts when overheated, while breakers use a mechanical switch that trips open. I learned the importance of properly sized breakers the hard way when I first started out – undersizing them means nuisance trips on sunny days, while oversizing defeats their protective purpose.
Disconnect switches serve a different but equally important role. These are manual switches that let you completely isolate parts of your system for maintenance or emergencies. Most codes require a visible disconnect near your inverter so firefighters or technicians can quickly shut down power. Think of it as the emergency stop button for your solar setup.
The beauty of these safety components is they work quietly in the background. When properly installed and sized for your system, you’ll rarely think about them – but they’re always there protecting your investment and your home.
Connectors, Junction Boxes, and Other Hardware
These might seem like minor details, but trust me—I learned the hard way when a loose connection in my first DIY setup caused frustrating voltage drops for weeks. The small stuff really matters! Connectors are what link your panels to each other and to your system, with MC4 connectors being the industry standard for their weatherproof design and easy snap-together installation. Junction boxes protect the electrical connections on the back of your solar panels from moisture and damage. You’ll also need combiner boxes if you’re connecting multiple panel strings, along with proper grounding hardware to keep everything safe. Don’t skimp on quality here—cheap connectors can corrode or fail, creating dangerous situations or system downtime. Budget about 5-10% of your total component costs for these essentials. While they’re not glamorous, proper hardware ensures your system runs reliably for decades.
Optional Components That Expand Your System
Monitoring Systems: Keeping Tabs on Your Power
Installing a monitoring system is like adding a fitness tracker to your solar setup—it shows you exactly what’s happening and helps you catch problems before they become expensive headaches. I learned this the hard way when one of my panels underperformed for weeks before I noticed. A simple monitoring system would have alerted me immediately.
The good news? You don’t need fancy equipment to track your system’s performance. Basic options include plug-and-play monitors that connect to your inverter or charge controller, displaying real-time data on production, consumption, and battery levels. Many modern inverters come with built-in monitoring accessible through smartphone apps, making it easier than ever to keep tabs on your investment.
For DIYers on a budget, even a basic wattmeter can provide valuable insights. More advanced setups can track individual panel performance using solar optimizers, helping you identify shading issues or equipment failures.
The real benefit isn’t just knowing your numbers—it’s understanding your energy patterns. You’ll quickly learn when you generate the most power, how weather affects output, and whether that new appliance is worth the energy cost. This knowledge empowers you to make smarter decisions and maximize your solar investment.
Backup Power Options
Even the best solar setup faces occasional challenges—cloudy stretches, nighttime demand spikes, or unexpected power needs. That’s where backup power options shine. A backup generator, whether gas, propane, or diesel, provides reliable power when solar production falls short. I learned this the hard way during my first winter with solar when three consecutive foggy days caught me unprepared. Now my small propane generator kicks in seamlessly when needed.
Grid-tie systems offer another approach by staying connected to utility power. When your panels produce excess energy, you can sell it back through net metering programs. When production dips, you simply draw from the grid. This hybrid setup eliminates range anxiety while maximizing your solar investment. Some systems combine both approaches—staying grid-connected while maintaining a generator for emergencies. Consider your local climate patterns, power reliability, and budget when deciding which backup solution fits your lifestyle best.
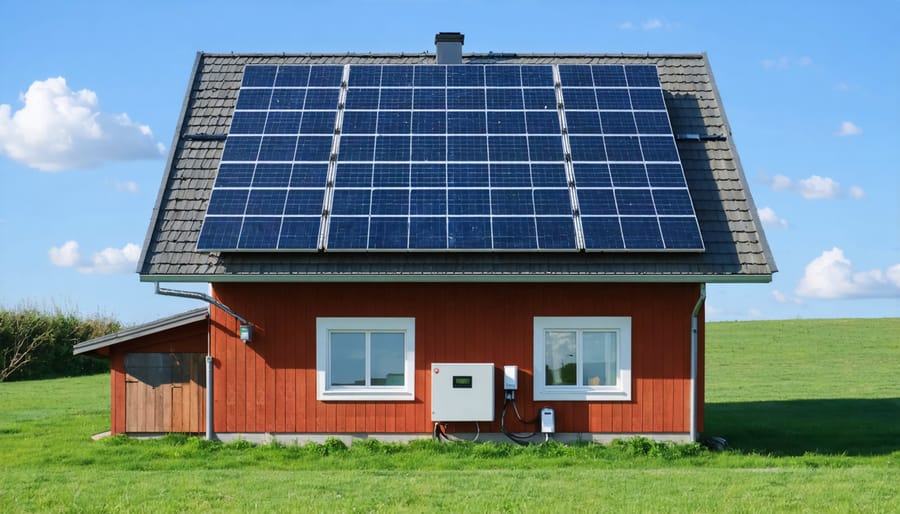
A complete solar power system integrates panels, charge controllers, batteries, and inverters to transform sunlight into usable household electricity.
Putting It All Together: How These Components Actually Work as a System
Let me walk you through exactly what happens from the moment sunlight hits your solar panels to the point where you’re powering your coffee maker or charging your phone. Understanding this flow helped me troubleshoot my first system when things weren’t working quite right, and it’ll give you confidence in your own setup.
Here’s the journey your solar energy takes:
First, sunlight strikes the photovoltaic cells in your solar panels. These cells immediately begin converting that light into direct current electricity. Think of this as raw, unrefined power flowing out of your panels, typically at voltages between 18 to 40 volts per panel, depending on your configuration.
This DC electricity then travels through cables to your charge controller. This is where the magic of protection happens. The charge controller acts like a smart traffic cop, regulating the voltage and current flowing into your battery bank. It prevents overcharging during sunny days and stops reverse current flow at night when your panels aren’t producing. Without this component, you’d quickly damage your batteries.
Next, the properly regulated electricity enters your battery bank for storage. The batteries act as your energy reservoir, storing power for nighttime use or cloudy days. They’re constantly being charged when the sun shines and discharged when you need power.
When you actually need to use that stored energy, it flows from the batteries to your inverter. This is the transformation station where your DC power gets converted into the AC electricity that most household appliances require. The inverter matches the standard 120V or 240V output you’d get from the utility grid.
Finally, that clean AC power flows through your electrical panel or directly to your devices, ready to run everything from lights to laptops. Each component plays its critical role in this chain, and understanding this flow helps you appreciate why you can’t skip any of these elements in a complete system.
Now that you understand the key components that make up a PV system, you’re already miles ahead of where most people start their solar journey. Knowledge truly is power here, and understanding what each piece does and how they work together will help you make smarter decisions, avoid expensive mistakes, and build a system that actually meets your needs.
Here’s my biggest piece of advice after years of tinkering with solar: start small. You don’t need to power your entire house on day one. Begin with a modest setup—maybe a small array to run some outdoor lights, charge your devices, or power a workshop. Get comfortable with how the components interact, learn from the experience, and then expand gradually. This approach is not only easier on your wallet, but it also builds your confidence and expertise one step at a time.
Before you start ordering components, I strongly encourage you to use the calculators available on this site. They’ll help you determine the right panel wattage, battery capacity, and other specifications for your specific situation. There’s nothing worse than realizing halfway through a project that you’ve undersized your charge controller or bought incompatible components.
I’ll leave you with this: there’s something incredibly satisfying about flipping that switch and seeing your own solar-generated electricity powering your life. It’s part science project, part practical solution, and entirely rewarding. The sun is up there waiting—go capture some of that energy for yourself.
How useful was this post?
Click on a star to rate it!
Average rating 0 / 5. Vote count: 0
No votes so far! Be the first to rate this post.
We are sorry that this post was not useful for you!
Let us improve this post!
Tell us how we can improve this post?
charlesnoble
Here at Spheral Solar, I’m a hands-on solar power enthusiast, constantly exploring and experimenting with DIY solutions. I’m dedicated to sharing my discoveries, insights, and even the bumps I hit along the way, all in the pursuit of a more sustainable future.
Why Your Solar Charge Controller’s Load Output… by Charlesnoble February 9, 2026 Connect your DC loads directly to your charge controller’s load terminals instead of tapping straight into the battery—this simple setup protects your battery from over-discharge and can extend its lifespan by years. Most charge controllers include built-in load management features that automatically disconnect your lights, fans, or other devices when…
Why a 9kW Solar System with Batteries Could Be… by Charlesnoble November 23, 2025 Calculate your actual energy consumption before committing to a 9kW solar system with batteries. Pull your last 12 months of electricity bills, add up the total kilowatt-hours used, and divide by 365 to get your daily average. Most households consuming 25-35 kWh daily find a 9kW system hits the sweet…
Why Your 8kW Off-Grid Solar System Might Be Wasting… by Charlesnoble December 17, 2025 Calculate your actual daily energy consumption in watt-hours before investing a single dollar—not your estimated usage, but real measurements taken over at least two weeks using a kill-a-watt meter on every circuit. An 8kW off-grid system produces roughly 32-40 kWh daily under ideal conditions, but real-world performance drops 20-30% due…
Why Your DIY Solar Setup Could Be a Hacker’s Next… by Charlesnoble February 14, 2026 Disconnect your charge controller from the internet immediately if you’re not actively monitoring it—most DIY solar setups don’t need constant connectivity, and an offline system can’t be hacked remotely. Change every default password on your solar equipment right now, using unique 15+ character combinations that include numbers, symbols, and mixed-case…
Stop Frying Your Batteries: How to Size Your Solar… by Charlesnoble November 24, 2025 Multiply your solar panel wattage by 1.25, then divide by your battery voltage—that’s your minimum charge controller amperage. A 400-watt solar array feeding a 12-volt battery bank needs at least a 42-amp controller (400 × 1.25 ÷ 12 = 41.67). This calculation accounts for real-world conditions where panels sometimes exceed…
Why Your Parallel Battery Setup Isn’t Charging… by Charlesnoble March 10, 2026 Connect your parallel batteries to a single charge controller rather than using multiple controllers—this prevents voltage mismatches that cause one battery to overcharge while another sits partially drained. I learned this the hard way when my first dual-battery setup left one battery constantly undercharged because each controller operated independently, creating…
Subscribe for handpicked DIY projects, exclusive tips, and giveaways.
Measure your inverter’s efficiency by comparing DC input power to AC output power using a simple multimeter—a ratio below 95% signals it’s time to investigate performance issues. Track voltage and current readings at both the solar panel array and your home’s load center during peak sun hours, then multiply volts by amps to calculate actual… Read more: Your DIY Solar Inverter Might Be Wasting Power (Here’s How to Find Out)
Check your solar inverter’s communication ports right now – if you see two screw terminals labeled A and B (or D+ and D-), you’re looking at 2-wire RS485, the most common communication protocol in DIY solar monitoring setups. This simple two-wire system lets your solar equipment talk to monitoring devices, allowing you to track power… Read more: Why 2-Wire RS485 Is the Smartest Choice for Your DIY Solar Monitoring System
Match your solar panels to microinverters or power optimizers based on your roof’s shading patterns—even partial shade from a chimney or tree during morning hours means module-level power electronics will recover 15-25% more energy than string inverters lose to the weakest panel. Install power optimizers when you’re working with mixed panel orientations across multiple roof… Read more: Why Smart Solar Modules Could Save Your DIY Array (Before It’s Too Late)


 for Your Home")

")

")

 for Your Home")

")

")