How Far a 5 Mile Solar Fence Charger Actually Reaches (And Which One You Need)
Updated:
Understand that the “5 mile” rating on solar fence chargers doesn’t mean your fence will shock animals five miles away—it refers to the maximum length of wire the charger can energize under perfect conditions. In reality, expect effective coverage for 2-3 miles of actual fencing once you factor in vegetation touching the fence, wire gauge, grounding quality, and how much sun your solar panel receives.
Match the charger’s joule output to your specific needs rather than just distance claims. A unit putting out 0.15 to 0.25 joules handles light brush and smaller animals on properties up to 25 acres, while anything claiming to power five miles of fence in heavy weed conditions needs at least 0.5 joules to maintain a painful shock.
Check whether your property gets six hours of direct sunlight daily before investing in solar. Shaded pastures, dense tree coverage, or locations above the 45th parallel in winter months may leave your battery chronically undercharged, causing the fence to weaken when you need it most—typically at dawn and dusk when animals test boundaries.
Test your ground rod system first, since 80 percent of fence failures trace back to poor grounding rather than inadequate chargers. Drive at least three six-foot galvanized rods into perpetually moist soil, spacing them ten feet apart, and verify you’re getting below 500 ohms resistance.
The right 5-mile solar charger transforms property management by eliminating trenching costs and utility bills while providing reliable livestock control—if you buy strategically and install correctly.
What ‘5 Mile’ Really Means on a Solar Fence Charger
When I first started researching fence chargers for my property, I was convinced that “5 mile” meant I could fence five miles of perimeter. I learned pretty quickly that the box rating tells only part of the story, and understanding what those numbers actually mean saved me from buying the wrong unit.
The “5 mile” rating on a solar fence charger refers to the maximum distance electricity can travel under ideal conditions. Think of it as the manufacturer’s best-case scenario: perfect weather, brand new wire with zero rust, no vegetation touching the fence, excellent grounding, and typically using multi-strand high-tensile wire. In laboratory settings, manufacturers can achieve these ratings, but your backyard isn’t a lab.
Here’s the reality check: most fence chargers deliver about 40-60% of their rated distance in real-world conditions. So that 5-mile charger might effectively power 2-3 miles of fencing on your actual property. Several factors create this gap between the box rating and what you’ll experience.
Resistance is the biggest culprit. Every connection point, gate handle, and insulator adds resistance that saps power from your system. Old or rusty wire dramatically increases resistance compared to new wire. If you’re using single-strand steel wire instead of high-tensile, expect even more power loss.
Vegetation contact acts like tiny vampires draining your fence’s energy. When grass, weeds, or brush touch the wire, they create small electrical leaks. A few contact points won’t kill your system, but dozens of them along your fence line significantly reduce effective range.
Wire type matters more than most people realize. Polytape and polywire, popular for temporary fencing, conduct electricity less efficiently than metal wire. You might only get 30-40% of the rated distance with these materials.
Understanding these limitations helps you choose the right charger. If you need to power three miles of fence, look for a 6-8 mile rated unit to ensure adequate performance when real-world challenges stack up.
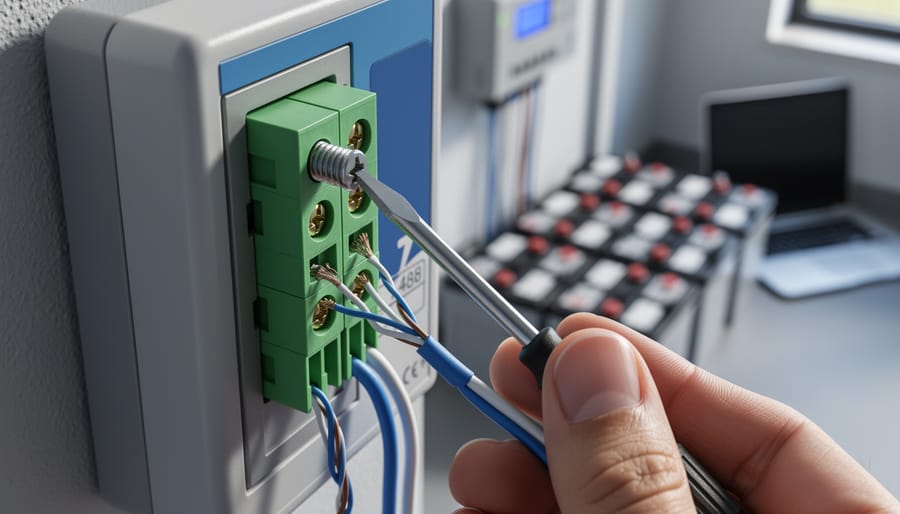
A typical 5-mile solar fence charger installation shows the compact unit that powers electric fencing across farm properties.
How Solar-Powered Fence Chargers Actually Work
Let me tell you, when I first started working with solar fence chargers, I was amazed at how elegantly simple the technology actually is. At its heart, a solar fence charger has just three main components working together in perfect harmony.
First up is the solar panel, which acts as your power generator. During daylight hours, this panel converts sunlight into electrical energy. Even on cloudy days, modern panels capture enough light to keep things running, though you’ll definitely see better performance in direct sunshine.
Next comes the battery storage system, which is honestly the unsung hero of the setup. This rechargeable battery stores all that solar energy for use around the clock. Think of it as your power bank, ensuring your fence delivers pulses 24/7, not just when the sun’s out. Most quality units use deep-cycle batteries designed to handle the constant charging and discharging cycles without wearing out quickly.
The third component is the pulse delivery system, also called the energizer. This clever bit of technology takes the stored battery power and converts it into high-voltage, low-amperage pulses that travel down your fence wire. These pulses typically fire once every second or so, creating that distinctive “tick-tick-tick” sound you might hear near an electric fence.
What makes solar chargers perfect for remote locations is their independence from grid power. No need to run extension cords across acres of land or worry about mounting electricity bills. When building a solar-powered electric fence, you’re essentially creating a self-sustaining system that adapts to your environment, charging during sunny periods and drawing from battery reserves when needed.
Real-World Performance: What to Expect from Your 5 Mile Unit
Ideal Conditions vs. Everyday Reality
Here’s the reality check we all need: when manufacturers test these chargers in perfect lab conditions, they’re using ideal wire, minimal vegetation interference, and carefully calibrated equipment. I learned this the hard way on my cousin’s property when our shiny new 5-mile charger barely reached 3 miles effectively.
In everyday farm settings, several factors reduce that advertised range. Tall grass or weeds touching your fence line can drain power significantly, sometimes cutting your effective range by 30-40%. The wire quality matters too. That budget galvanized wire you picked up might have higher resistance than the premium aluminum wire used in testing. Dry soil conditions, especially during summer months, can reduce ground conductivity, forcing your charger to work harder with less effective reach.
Vegetation growth is probably the biggest culprit. During spring and early summer, plants shoot up fast and create dozens of contact points that slowly bleed energy from your system. Even morning dew on heavy plant growth can create enough conductivity to sap your fence’s strength.
The good news? Understanding these real-world factors means you can plan accordingly. If you need 3 miles of coverage, consider a 5-mile charger as your safety margin. Regular maintenance, like trimming vegetation and checking connections, helps you get closer to that advertised range.
Voltage Drop and Why It Matters
Here’s something I learned the hard way during my first fence installation: electricity doesn’t travel through wire without losing strength, kind of like water pressure dropping as it flows through a garden hose. This phenomenon is called voltage drop, and understanding it makes all the difference between a fence that works and one that doesn’t.
When your solar fence charger sends out power, the voltage gradually decreases as it moves along the wire. Think of it as the electrical energy encountering resistance from the wire itself. The longer the distance, the more voltage you lose. This is why a charger rated for 5 miles might deliver full power at the starting point but significantly less at the far end.
For effective animal deterrence, you need to maintain minimum voltage levels throughout your fence line. Most experts agree that 2,000 volts is the bare minimum for basic control of cattle or horses, while 4,000 to 5,000 volts works better for more challenging animals. Smaller critters or animals with thick coats might need even higher voltage to feel the shock through their fur or hide.
The reality is that on a true 5-mile fence line, voltage drop can reduce your initial 10,000 volts down to 3,000 or less at the farthest point. That’s why understanding your actual voltage requirements matters more than simply trusting the distance rating on the box. Testing voltage at multiple points along your fence helps ensure every section provides adequate deterrence.
Testing fence voltage at various distances helps determine if your solar charger delivers adequate power throughout your property.
Choosing the Right Solar Fence Charger for Your Setup
Matching Charger Power to Your Animals
Not all fences need the same punch. The power requirements vary significantly based on the animals you’re managing and the challenges you face.
For chickens and small poultry, you’re looking at the lower end of the spectrum. These birds need just enough jolt to teach them boundaries without causing harm. A 5-mile charger is often overkill, but if you’re also deterring predators like foxes or raccoons, that extra power becomes valuable.
Goats and sheep require moderate power since they’re curious and will test your fence. Their thick coats also provide some insulation, so you need sufficient output to get their attention through that layer.
Cattle and horses demand more substantial power, especially when you’re covering multiple paddocks or dealing with dense vegetation that might contact the fence. Here’s where a 5-mile charger really earns its keep.
When I first set up my solar-powered deer fence, I learned that predator deterrence requires consistent, reliable power. Bears, coyotes, and deer all need strong jolts to respect boundaries, particularly when they’re motivated by food sources inside your perimeter.
A practical rule: match your charger to the toughest animal you’re managing, not the easiest. It’s better to have excess capacity than come up short when a determined bull tests your setup.
Solar Panel Size and Battery Capacity Considerations
Choosing the right solar panel and battery combo can make or break your fence charger’s performance, especially if you live somewhere that sees more gray skies than sunshine. I learned this the hard way during my first winter with a solar setup—three cloudy days in a row, and my battery was toast!
For a 5-mile fence charger, look for a solar panel rated at least 5-10 watts paired with a 12-volt battery of 7-12 amp-hours. If you’re in a region with frequent cloud cover (think Pacific Northwest or Northeast winters), consider bumping up to a 10-watt panel or adding a second battery. The battery acts as your backup power reservoir, storing enough juice to keep your fence hot during those sunless stretches.
Here’s a practical tip: calculate your average cloudy days per month and multiply your daily power consumption by that number. Your battery should handle at least three consecutive cloudy days without recharging. Similar to building a DIY solar generator, understanding your power needs upfront saves frustration later. Many modern chargers include LED indicators showing battery status—use these to monitor performance and adjust your setup before livestock discover weak spots in your fence.
Installation Tips for Maximum Performance
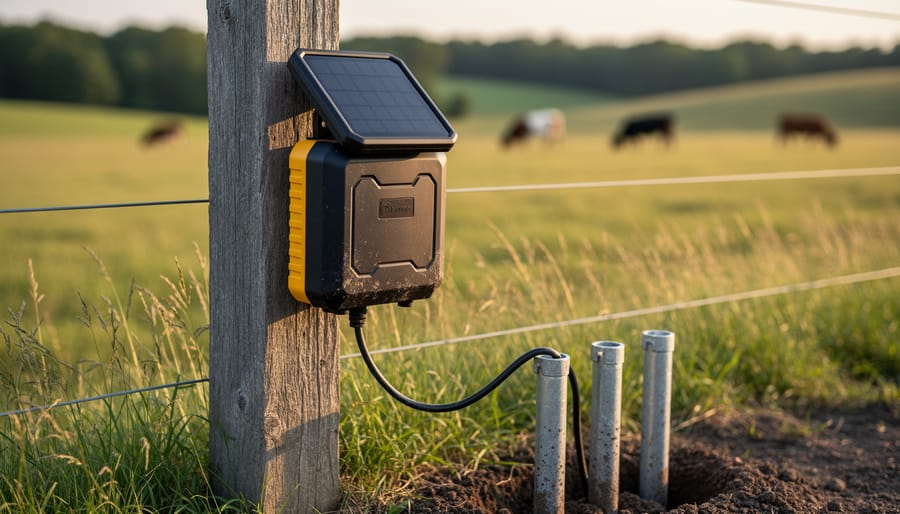
Proper grounding with multiple ground rods ensures your solar fence charger delivers consistent, effective shocks to deter animals.
Proper Grounding: The Secret to Strong Shocks
Here’s something I learned the hard way during my first fence installation: even the most powerful solar charger won’t deliver effective shocks without proper grounding. Think of grounding as the return path for your electrical pulse. Without it, you’re essentially trying to complete a circuit with a missing piece.
For a 5 mile solar fence charger to work at its full potential, you’ll need at least three ground rods, each six feet long and made of galvanized steel or copper. Install them in a straight line about ten feet apart from each other, driving them deep into moist soil near your charger unit. The first rod connects directly to your charger’s ground terminal, then use insulated wire to connect each rod in sequence.
Soil moisture matters tremendously. During my first summer season, I noticed significant performance drops until I realized my ground rods were in bone-dry soil. If you live in an arid climate, consider pouring water around your ground rods periodically or installing them where natural moisture accumulates.
Testing is simple but essential. Use a digital fence tester to measure voltage at various points along your fence. You should see readings above 4,000 volts for effective livestock control. If readings are consistently low despite a fully charged battery, your grounding system likely needs improvement.
Solar Panel Placement and Maintenance
Getting your solar panel positioned correctly makes all the difference between reliable fence operation and frustrating dead spots. I learned this the hard way during my first installation—I mounted my panel facing slightly northeast, thinking “close enough.” Three cloudy days later, my fence was down to half power.
Here’s what actually works: angle your panel toward true south (in the Northern Hemisphere) at roughly your latitude’s angle. For most of us in the continental U.S., that’s between 30-40 degrees. Don’t stress perfection though—being within 15 degrees still gives you about 95% efficiency.
Shade is your enemy. Even a small shadow from a tree branch can reduce output by 50% or more. Walk your property at different times of day, especially during winter when the sun sits lower. That perfect summer spot might be completely shaded come December.
For a comprehensive guide on optimizing your setup, check out our detailed solar panel setup resource.
Maintenance is surprisingly simple: wipe panels down quarterly with plain water and a soft cloth. Dust, pollen, and bird droppings block sunlight. In snowy climates, gently brush off heavy accumulation—the panels need exposure to recharge your system.
One quick tip: mount panels at least 3-4 feet off the ground. This prevents tall grass interference and makes cleaning much easier on your back.
Troubleshooting Common Issues with Solar Fence Chargers
Even the best solar fence charger can hiccup from time to time, but the good news is that most problems have straightforward solutions you can tackle yourself. Let me walk you through the most common issues I’ve encountered and how to fix them without needing any fancy equipment.
If you’re getting weak shocks or no shock at all, start with the basics. First, check your solar panel for dirt, leaves, or snow buildup. I once spent an hour troubleshooting a charger only to realize a layer of pollen had covered the panel after spring storms. A quick wipe with a damp cloth brought it back to full power. Next, test your connections. Loose wires are surprisingly common, especially after weather changes cause expansion and contraction. Give each connection point a gentle tug to ensure it’s secure.
Battery drain is another frequent culprit, particularly during cloudy stretches. Most solar chargers have an indicator light showing battery status. If yours is consistently in the red zone, consider whether nearby trees have grown taller and are now casting shadows on your panel. Charles from our community once repositioned his panel just three feet to the right and gained two extra hours of direct sunlight daily.
For fence testing, here’s a simple method anyone can do: touch a blade of grass to the fence wire. You should hear a distinct clicking sound and see the grass recoil. No click means no charge. Walk your fence line during testing, as breaks often occur where animals push against posts or vegetation creates shorts to ground.
Ground rod problems often masquerade as charger failures. If your soil is dry, pour a bucket of water around your ground rods and retest after 30 minutes. This simple trick resolves issues about half the time.
Choosing the right solar fence charger comes down to understanding your actual needs rather than getting caught up in marketing numbers. That “5-mile” rating is really just a starting point for comparison, not a guarantee your fence will perform at that distance. Focus on your livestock type, fence condition, vegetation management, and local weather patterns when making your selection.
I’ve learned through my own solar projects that practical testing beats marketing claims every time. Just like building a solar charging station requires understanding your real power needs, choosing a fence charger means honestly assessing your property’s challenges.
Before you buy, use our calculator tools at Spheral Solar to help plan your setup and estimate realistic performance. And once you’ve got your system running, we’d love to hear about it! Share your experiences, troubleshooting wins, and lessons learned with our community. Your real-world insights help fellow DIYers make better decisions.
How useful was this post?
Click on a star to rate it!
Average rating 0 / 5. Vote count: 0
No votes so far! Be the first to rate this post.
We are sorry that this post was not useful for you!
Let us improve this post!
Tell us how we can improve this post?
charlesnoble
Here at Spheral Solar, I’m a hands-on solar power enthusiast, constantly exploring and experimenting with DIY solutions. I’m dedicated to sharing my discoveries, insights, and even the bumps I hit along the way, all in the pursuit of a more sustainable future.
How to Build a Solar-powered Electric Fence (With Diagrams) by Paul November 1, 2021 You can build a permanent DIY, 3-acre solar-powered electric fence can with basic technical skills in under a week. And depending on whether you opt for a custom or off-the-shelf solar fence charger, costs between $1,400 and $1, 800. And it could be up and running in a couple of…
Build Your Own Solar-Powered Deer Fence (That… by Charlesnoble October 15, 2025 Transform your garden’s defense with a reliable solar-powered electric fence setup that keeps deer at bay while harnessing clean, renewable energy. Modern solar-powered fence kits combine robust shock delivery with minimal maintenance, offering year-round protection without constant battery changes or utility costs. These systems deliver consistent 7,000-10,000-volt pulses that effectively…
DIY Solar Generator – Complete Guide With Diagrams by Paul July 17, 2021 Building a weatherproof DIY solar generator involves mounting and wiring a battery, charge controller, inverter, trickle charger, and fusing inside a weatherproof case. Then all the relevant input and output sockets are wired and mounted on the outside of the case where they are easily accessible. What Exactly Are Solar…
How I Built a 48V Ebike Solar Charger That Works Anywhere by Charlesnoble January 14, 2026 Calculate your ebike’s battery capacity in watt-hours by multiplying 48 volts by your amp-hour rating—this determines the minimum solar panel wattage you’ll need. A standard 48V 14Ah ebike battery holds 672Wh, requiring at least a 200-watt solar panel for a full day’s charge in optimal sunlight conditions. Match your solar…
Dirty Solar Panels Are Costing You Money (Here’s How… by Nick November 5, 2025 Clean your solar panels every 3-6 months to maintain peak efficiency—dirty panels can lose up to 25% of their energy output. Regular maintenance takes just an hour and requires minimal equipment, making it one of the most cost-effective ways to maximize your solar investment. Start by checking your system’s performance…
Solar Panel Setup: The Easiest Step-by-Step Guide by Charlesnoble May 7, 2023 To set up your first solar panel system, you will need to buy solar panels, batteries, a charge controller, an inverter, and cables to connect everything together. Next, you will need to connect these parts in the right order, making sure they are installed and set up correctly so they…
Subscribe for handpicked DIY projects, exclusive tips, and giveaways.
Check your solar inverter’s communication ports right now – if you see two screw terminals labeled A and B (or D+ and D-), you’re looking at 2-wire RS485, the most common communication protocol in DIY solar monitoring setups. This simple two-wire system lets your solar equipment talk to monitoring devices, allowing you to track power… Read more: Why 2-Wire RS485 Is the Smartest Choice for Your DIY Solar Monitoring System
Match your solar panels to microinverters or power optimizers based on your roof’s shading patterns—even partial shade from a chimney or tree during morning hours means module-level power electronics will recover 15-25% more energy than string inverters lose to the weakest panel. Install power optimizers when you’re working with mixed panel orientations across multiple roof… Read more: Why Smart Solar Modules Could Save Your DIY Array (Before It’s Too Late)
Measure your conduit run before purchasing materials by mapping the exact path from your solar array to the inverter and battery location, accounting for a 10% waste factor and additional length for bends. PVC electrical conduit remains the most cost-effective protective solution for DIY solar installations, but improper installation creates fire hazards, code violations, and… Read more: Why Your Solar Conduit Installation Could Start a Fire (And How to Do It Right)


")
")


")

")
")


")