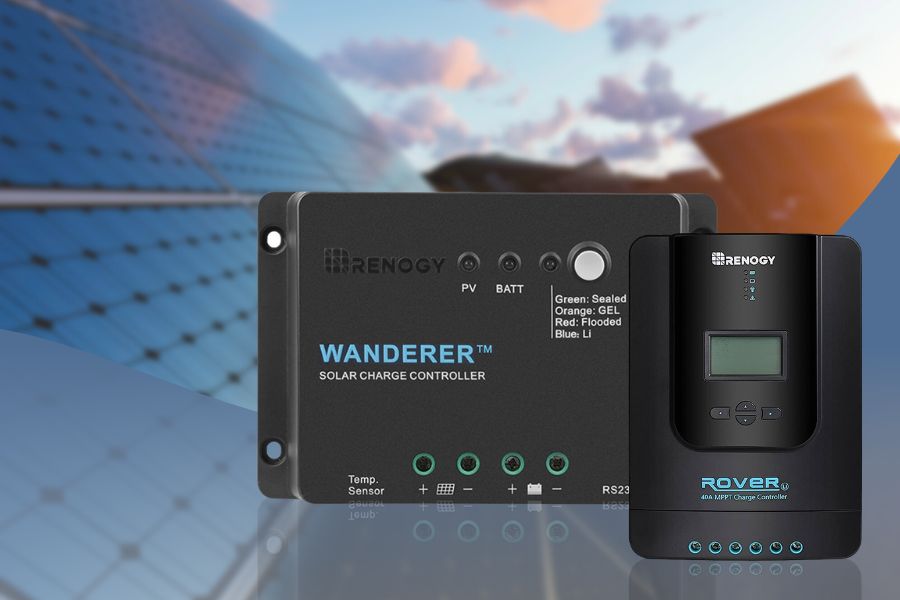
How to Reset Renogy Charge Controller?
Updated:

Resetting your Renogy charge controller can involve either a soft or hard reset. While a soft reset is good enough for minor operational issues, more significant problems require a complete hard or factory reset.
In this article, we’ll provide step-by-step guides on performing both resets to keep your solar system operating at peak performance.
We will also discuss why you need to reset your controller and the common errors you might encounter with Renogy charge controllers.
Types of Resets for Renogy Charge Controllers
Solar charge controllers, such as those from Renogy, typically have two types of resets: soft resets and hard resets. Each reset type serves a different purpose; you can use them under different circumstances.
Understanding the difference between a soft reset and a hard reset, and knowing when to use each, is crucial for maintaining the optimal performance of a solar charge controller.
Soft Reset
A soft reset is a basic form of resetting that doesn’t involve any physical disconnection of the controller from the solar panel or battery.
It’s similar to a simple restart of the controller’s system. You typically use soft resets for minor issues, such as when the controller is not functioning as expected or when you detect some minor errors.
You can perform soft resets without removing the solar panel and battery connections.
Hard Reset
A hard or factory reset is a more comprehensive form of resetting.
This process involves disconnecting the PV module cables and the battery connection from the solar panel controller and is useful when there are significant problems with the controller’s functionality.
Resetting Renogy Charge Controllers: Step-by-Step Guides
Resetting your Renogy charge controller can help resolve minor issues and restore its default settings.
This process involves two types of resets: a soft reset and a hard reset. Here are step-by-step guides on how to perform both.
Soft Resetting a Renogy Charge Controller

Here’s how to perform a soft reset of a Renogy charge controller:
- Locate the buttons on the front of your Renogy Charge Controller. You should see several, each with a different function.
- Press all of these buttons simultaneously. Hold them down for a few seconds.
- Keep an eye on the controller’s display. You should see a ‘RESET’ symbol appear.
- Once you see this symbol, release the buttons. This will initiate the soft reset process.
The controller will now reset its charge parameters. These parameters include the input voltage, output voltage, and battery voltage.
Hard Resetting a Renogy Charge Controller
You can try a hard reset if a soft reset doesn’t resolve the issue. Here’s how to do it:
- Disconnect the Renogy Charge Controller from the solar panel and battery bank. This involves removing the wires that connect these components. Check out this guide to learn the proper way to do so.
- Allow the controller to cool down. This is an important step, ensuring the device’s and its components’ safety.
- After disconnecting, inspect the controller to ensure no visible issues or damages.
- Wait for approximately 30 minutes. This gives the controller ample time to reset and clear any existing settings or data.
- Now, reconnect all the wires correctly. Ensure you connect the solar panel, battery bank, and controller properly.
- Next, reset the charger to factory default settings by performing a soft reset.
- Finally, adjust the charger settings to match your solar system.

Remember, always refer to your Renogy Charge Controller’s user manual for specific instructions for your model.
If you’re uncomfortable performing these steps, don’t hesitate to contact a professional for assistance.
Why do you Need to Reset Solar Charge Controllers?
Resetting a solar charge controller is necessary for a few reasons:
- Troubleshooting: Controllers, like any other electronic device, can experience software glitches and bugs that impede their performance. Resetting can clear these bugs and restore the device’s efficient operation.
- Configuration Errors: If the solar controller is incorrectly set up for the type of battery or solar panel system you’re using, it might not work as expected. A reset allows you to start fresh and input the correct settings.
- Overload Recovery: If your solar system experiences an electrical overload, the charge controller might automatically shut down as a protective measure. A reset can help it recover from this state.
- System Upgrades: If you upgrade your solar system by adding new panels or switching to a different type of battery, your existing controller settings may no longer be optimal. A reset ensures the controller can be reconfigured to match the updated system.
Not resetting a charge controller when needed can lead to several problems for your solar system that can not only affect performance but also damage the system components:
- Reduced Efficiency: A malfunctioning charge controller can’t optimally regulate the power flow from the panels to the batteries. This can lead to less effective charging and lower overall system performance.
- Battery Damage: One of the controller’s main tasks is to prevent overcharging. If the controller isn’t working correctly, it might fail to stop overcharging, shortening battery lifespan and potentially causing damage.
- Increased Energy Costs: A solar power system’s main advantage is its ability to reduce energy costs. If the system isn’t functioning efficiently due to a malfunctioning controller, these cost savings could be undermined.
- Safety Risks: In severe cases, a faulty controller can pose a safety hazard, leading to electrical shorts or even fires. Regularly resetting the controller as needed can help prevent such dangerous situations.
Common Errors with Renogy Charge Controllers
Renogy charge controllers are known for their robust performance, but like any device, they can sometimes exhibit issues or errors.
These error warnings serve as a protective mechanism, preventing potential solar power system components damage.
When they occur, it’s a signal that it might be time to reset your Renogy charge controller or address the underlying issue causing the error.
Here are some common errors that you may encounter:
- Error E01: This indicates an overcharged battery. It usually happens when the battery receives more current than it can handle, leading to an excessively high voltage level.
- Error E02: This error code refers to an over-voltage situation within the battery. It typically occurs when the input voltage exceeds the battery’s voltage limit.
- Error E04: This error signifies a short circuit within the load. A short circuit can occur when there’s a direct connection between the positive and negative terminals, leading to excessive current flow.
- Error E05: This error appears when the load is overloaded, indicating that the demand on the controller exceeds its rated capacity.
- Error E06 occurs when the controller overheats, which can happen when you use the device continuously under high load or in a hot environment.
- Error E08: This is displayed when the Photovoltaic (PV) output exceeds the system’s rated current, indicating the power generated by the solar panels is too high for the controller to handle.
- Error E010: This error code indicates over-voltage within the Photovoltaic (PV) system, implying that the voltage from the solar panels is higher than the system’s capacity.
- Error E013: This points to the inverted polarity of the PV system. It occurs when the positive and negative terminals are swapped during connection, which can potentially damage the controller.
- Error E014: This error implies reverse polarity of the battery, signifying that the battery’s positive and negative terminals are incorrectly connected to the controller.


