Six Energy Sources That Work With Your Solar Panels (And Why You Need Them)
Updated:
Harness the sun’s energy streaming onto your roof right now—solar panels convert sunlight into electricity that powers your home while slashing monthly utility bills. Capture moving air with residential wind turbines mounted on your property, generating supplemental power during breezy days and nights when solar production drops. Tap into the earth’s constant underground temperature through geothermal heat pumps that warm your home in winter and cool it in summer using 50-70% less energy than conventional systems. Channel flowing water on your property into micro-hydroelectric generators that produce steady, round-the-clock electricity if you have even a small stream with modest elevation changes.
I learned this firsthand when my neighbor combined solar panels with a small wind turbine on his rural property. While his solar array handled daytime power beautifully, those winter winds kept his batteries charged through long, cloudy stretches. The combination gave him genuine energy independence that either system alone couldn’t deliver.
Understanding all six renewable resources transforms how you approach home energy. Solar forms the foundation for most residential setups because panels require minimal maintenance and scale easily from a few panels to full-roof installations. But the real power emerges when you layer complementary sources. Wind fills solar’s nighttime gaps. Geothermal handles heating and cooling loads that would otherwise drain your solar batteries. Biomass provides backup heating from wood or agricultural waste you might already have on hand. Even small-scale hydropower contributes steady baseline power if your property supports it.
Each renewable resource brings distinct advantages, installation requirements, and cost considerations. Matching the right combination to your property’s unique characteristics—sun exposure, wind patterns, available land, water features—creates a resilient energy system that works with nature rather than against it.
Why Solar Shouldn’t Stand Alone in Your Home Energy Plan
I’ll be honest with you—I learned this lesson the hard way during my first winter with solar panels. After a glorious summer watching my electric meter spin backwards, December hit like a cold splash of reality. Those short, cloudy days meant my panels generated maybe 20-30% of their summer output, and my backup batteries drained faster than I could say “renewable energy.”
Here’s the thing nobody tells you when you first get excited about solar: it’s absolutely fantastic, but it has some predictable blind spots. At night, your panels produce exactly zero electricity. During extended cloudy periods, output drops dramatically. In northern climates, winter months can feel like an energy drought even on clear days because the sun sits so low in the sky.
This doesn’t mean solar is a bad investment—far from it! But relying solely on solar power means you’re either stuck with an expensive battery system that sits mostly idle during productive months, or you’re still heavily dependent on the grid during your system’s downtime.
That’s where the magic of complementary renewable energy sources comes in. Think of your home energy system like a diverse investment portfolio. Just as financial advisors tell you not to put all your eggs in one basket, the same principle applies to renewable energy. When solar production dips, other renewable sources can pick up the slack.
Throughout my journey experimenting with different renewable technologies, I’ve discovered that the best home energy plans combine multiple sources that naturally complement each other’s weaknesses. Some resources shine when solar doesn’t—literally and figuratively.
In this article, we’ll explore six renewable energy resources that work beautifully together in a residential setting. You’ll discover practical, DIY-friendly options that can fill the gaps in your solar production, helping you move closer to true energy independence. Whether you’re planning your first solar installation or looking to optimize an existing system, understanding these complementary resources will transform how you think about powering your home sustainably.
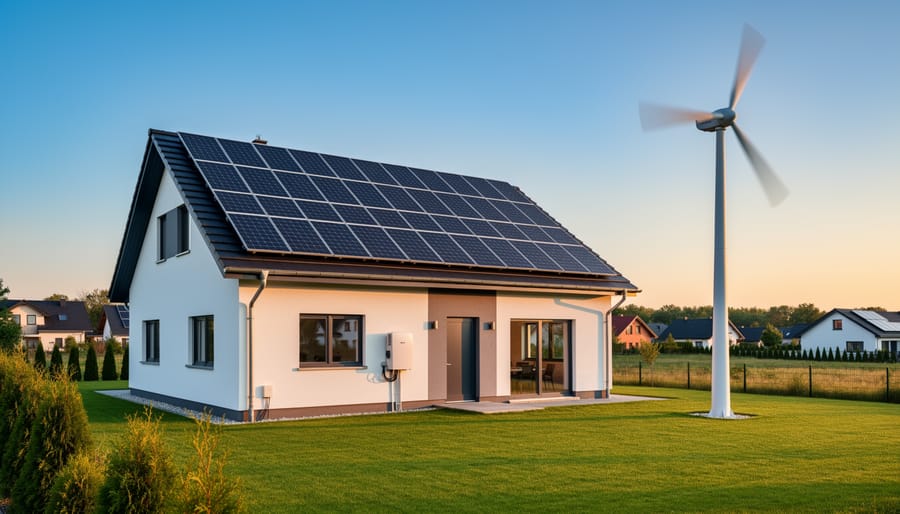
Combining solar panels with complementary wind energy creates a more resilient home renewable energy system that generates power day and night.
Solar Energy: Your Foundation Power Source
How Solar Fits Into Your DIY Energy Journey
When I first explored solar energy years ago, I was overwhelmed by the options. But here’s the thing: starting your solar journey doesn’t have to be complicated. Understanding how solar panels work is just the beginning of making an informed decision.
You’ll encounter three main panel types. Monocrystalline panels offer the highest efficiency, perfect if you have limited roof space. They’re what I eventually chose for my own home. Polycrystalline panels cost less but need more square footage for the same output. Thin-film panels work great for unconventional installations, though they’re less common in residential settings.
Before committing, consider your roof’s condition, orientation, and shading. South-facing roofs with minimal shade deliver optimal results, but east and west orientations can still work well. Your roof should have at least 15 years of life remaining since you don’t want to remove panels for repairs shortly after installation.
Here’s where realistic expectations matter: most residential systems offset 70-90 percent of electricity needs, not necessarily 100 percent. That’s still significant savings, though.
I always recommend using tools like Google’s Project Sunroof or PVWatts Calculator before investing. These free site calculators analyze your specific location, roof angle, and local weather patterns to estimate actual energy production and savings. They’ve helped countless community members avoid costly mistakes and set achievable goals. Input your address, and you’ll get personalized projections within minutes, making your solar decision data-driven rather than guesswork.
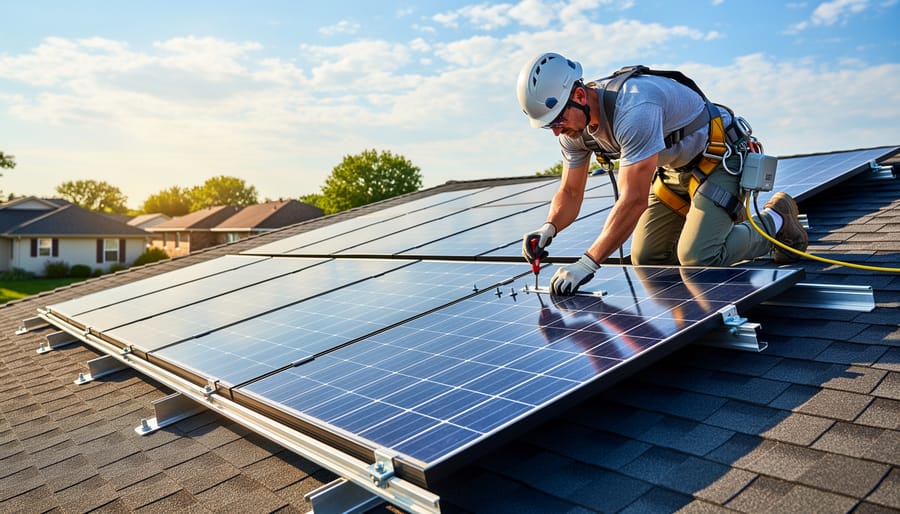
Proper solar panel installation forms the foundation of most DIY home renewable energy systems.
When Solar Works Best (And When It Doesn’t)
Let me be honest with you: solar isn’t a magic solution for everyone, and that’s okay. I learned this the hard way when my neighbor tried installing panels on his heavily shaded north-facing roof. The benefits of solar energy are real, but they shine brightest under the right conditions.
Solar works exceptionally well if you live in sun-rich areas like the Southwest, have south-facing roof space with minimal shade, and use most of your electricity during daylight hours. Your panels will generate consistently, and payback periods shrink dramatically. Even in cloudier regions like the Pacific Northwest, modern panels can still perform well, though you’ll need more of them.
However, solar faces challenges in heavily forested areas, dense urban settings with tall buildings casting shadows, or if you’re a renter without roof access. Seasonal variations matter too. Winter production drops significantly in northern latitudes, sometimes by 50 percent or more.
The good news? Understanding these limitations helps you plan better. If solar alone won’t meet your needs year-round, combining it with other renewable sources like wind or microhydro creates a more resilient energy system. The key is matching your specific situation with realistic expectations.
Wind Energy: The Night Shift Partner for Solar
Micro Wind Turbines for Residential Properties
While solar panels get most of the attention, micro wind turbines offer an intriguing complement to your renewable energy setup, especially if you’re already generating power from the sun. I’ll be honest with you—residential wind is trickier than solar, but it can be a game-changer in the right circumstances.
Micro turbines, typically ranging from 400 watts to 10 kilowatts, work best when you have consistent wind speeds above 10 mph and plenty of open space. Here’s the reality check: most suburban neighborhoods don’t have ideal wind conditions. Trees, buildings, and terrain create turbulence that dramatically reduces efficiency. Before investing, I recommend installing an inexpensive anemometer to measure wind speeds at your property for at least a month.
Zoning is your first major hurdle. Many municipalities restrict turbine height, require setback distances, or simply prohibit them altogether. Always check local ordinances before purchasing equipment. Some homeowners associations are particularly strict about visible turbines.
For DIYers, expect to generate between 200-900 kilowatt-hours monthly with a properly positioned 1-kilowatt turbine in good wind conditions. That’s roughly 10-40 percent of an average home’s electricity needs. The beauty of combining wind with solar is seasonal complementarity—wind often picks up during cloudier months when solar production dips.
Start small, verify your wind resource, and navigate the bureaucracy first. Your renewable energy journey shouldn’t begin with an expensive lesson in local politics.
Combining Wind and Solar: A Real-World Approach
Adding wind power to your existing solar setup creates a powerful hybrid system that generates electricity day and night. Here’s what I’ve learned from combining both technologies at my workshop.
The key is choosing a hybrid charge controller that handles both solar panels and wind turbines simultaneously. These controllers prevent overcharging while managing different input voltages. Look for models rated above your combined wattage—if you have 400W solar and a 400W turbine, aim for at least a 1000W controller for headroom.
Your battery bank becomes even more critical with dual inputs. I upgraded to a larger capacity system to store excess wind energy generated during overnight gusts. This smooths out the intermittent nature of both sources.
Wiring considerations matter too. Wind turbines require dump loads to dissipate excess energy during high winds, protecting your system. Position your turbine at least 30 feet from obstacles for optimal airflow.
For complex setups involving multiple renewable sources, consulting with professional solar integration specialists ensures proper load balancing and code compliance. They’ll help size components correctly and integrate everything safely into your home’s electrical system.
Hydroelectric Power: Tapping Into Moving Water
Do You Have What It Takes for Home Hydro?
Before you start imagining waterwheels turning in your backyard, let’s figure out if your property can actually support a micro-hydro system. I learned this the hard way when I got excited about a tiny creek on my neighbor’s land, only to discover it barely trickled during summer months.
First, you need consistent water flow. We’re talking at least 10 gallons per minute year-round for even the smallest system. Grab a five-gallon bucket and a stopwatch to measure your stream’s flow during the driest month. If it takes more than 30 seconds to fill, you’re probably out of luck.
Next is head height, which is just the vertical distance water drops. You need at least 2 feet, though 10 feet or more is ideal. More drop means more power from less water.
Here’s the crucial part many folks miss: water rights. Even if a stream runs through your property, you might not legally own the rights to divert it. Check with your local water authority before investing a dime. Some regions require permits, environmental assessments, or have seasonal restrictions that could make your project impossible.
If all these boxes check out, you could be generating 24/7 power to complement your solar setup.
Micro-Hydro Setup Basics for DIY Enthusiasts
A micro-hydro system can beautifully complement your solar setup, especially if you have a small stream or creek on your property. I remember visiting a neighbor who had both systems running, and watching his energy meter actually spin backward on cloudy days was incredible.
The basic components you’ll need include a turbine (the heart of your system), a penstock pipe to channel water flow, an alternator to generate electricity, and a charge controller. Think of it as similar to your solar components, but powered by flowing water instead of sunlight.
Installation starts with measuring your water flow rate and vertical drop, called the head. Even a modest 10-foot drop with consistent flow can generate meaningful power. You’ll divert water through your penstock pipe to the turbine, then safely return it to the stream.
The real magic happens when you integrate micro-hydro with your existing solar array. While solar produces during daylight hours, micro-hydro can generate power around the clock if you have consistent water flow. Both systems can feed into the same battery bank and inverter setup, creating a hybrid system that maximizes your energy independence. Many DIYers find this combination provides more reliable year-round power than either system alone.
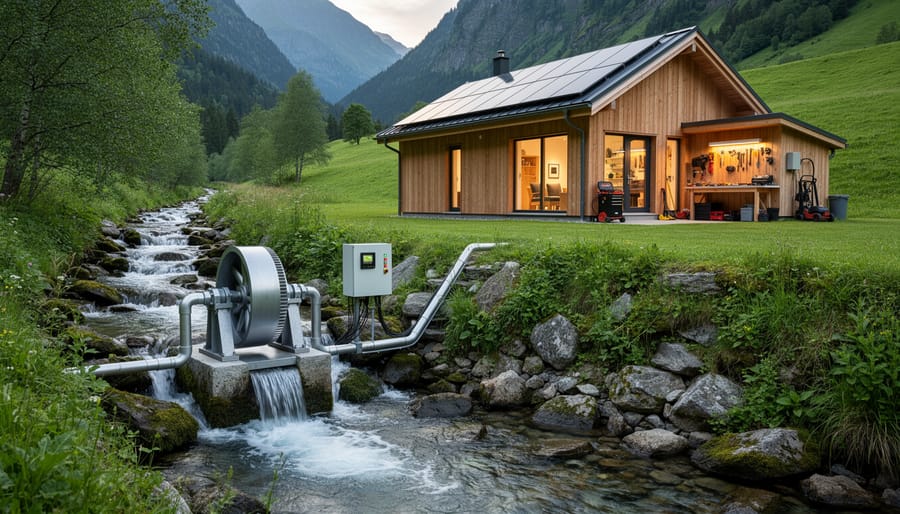
Micro-hydroelectric systems provide consistent 24/7 power generation for properties with flowing water access.
Geothermal Energy: The Underground Climate Controller
How Geothermal Reduces Your Solar System’s Workload
Here’s something I learned the hard way during my first winter with solar panels: my heating system was quietly devouring the energy I worked so hard to generate. Once I added geothermal heating and cooling, everything changed.
Think of it this way. When your home maintains a comfortable temperature using geothermal’s efficient ground-source heat exchange, your solar panels aren’t constantly playing catch-up with an energy-hungry HVAC system. Instead of sizing your solar array to handle massive heating and cooling loads, you can install a smaller, more affordable system that focuses on your remaining electrical needs like lighting, appliances, and electronics.
The math is compelling. Geothermal systems use about 25-50% less electricity than conventional heating and cooling, which directly translates to fewer solar panels on your roof. Plus, your battery bank doesn’t drain as quickly during peak heating or cooling hours, meaning better performance and longer lifespan for your energy storage.
I’ve seen DIY solar enthusiasts calculate they needed a 10kW system, only to discover that adding geothermal first meant they could manage perfectly well with 6-7kW. That’s thousands in savings and a faster return on your renewable energy investment.
The DIY Reality of Geothermal Installation
Let me be straight with you about geothermal: this isn’t your typical weekend project. I learned this the hard way when I got excited about adding geothermal heating to my solar setup. The reality? Drilling hundreds of feet underground requires heavy equipment, specialized knowledge, and permits you probably can’t pull yourself.
What you can DIY: system research, site assessment basics, and post-installation monitoring. Some handy folks tackle the indoor heat pump installation and ductwork modifications if they have HVAC experience. You’ll also handle the integration with your existing solar system to maximize efficiency.
What needs professionals: ground loop installation, drilling, refrigerant handling, and electrical hookups. These require licensing and equipment that costs more than most homes.
The cost-benefit truth: expect $15,000-$30,000 for residential systems, but you’ll slash heating and cooling costs by 40-60%. Combined with solar panels covering your reduced electrical needs, you’re looking at near-zero energy bills. Professional installation pays for itself in 5-10 years through savings, making this one renewable where investing in experts actually makes financial sense.
Biomass Energy: Turning Waste Into Backup Power
Wood Pellet Systems and Solar: A Winter Partnership
Here’s something I learned during my first winter with solar panels: December through February can feel like the dark ages for solar production. Short days, low sun angles, and frequent cloud cover meant my panels were generating maybe 30% of their summer output right when my heating bills skyrocketed.
That’s when I discovered how beautifully wood pellet systems complement solar energy. A pellet stove or boiler handles your heating load using biomass fuel, dramatically reducing electrical demand during those lean solar months. While your panels struggle to keep up in winter, the pellet system takes over the heavy lifting for warmth.
The partnership works both ways. During spring and summer when solar overproduces, you can stockpile pellets inexpensively and use excess electricity to run pellet system fans and augers. Some DIYers even build solar-powered pellet storage areas with dehumidifiers to keep fuel dry.
The key is matching capacities. Calculate your winter heating needs, then size your pellet system to handle 70-80% of that load. Your solar setup covers lighting, appliances, and the pellet system’s modest electrical requirements. Together, they create year-round energy resilience that neither could achieve alone.
Biogas Digesters for the Adventurous DIYer
Here’s something I never thought I’d have in my backyard—a biogas digester! While solar panels capture energy from above, these fascinating systems harness energy from organic waste below. Perfect for rural properties with livestock or large gardens, small-scale biogas digesters convert kitchen scraps and animal manure into cooking fuel and electricity.
Let me be honest: this isn’t your weekend starter project. Biogas systems require careful planning, proper ventilation, and understanding of methane safety. You’ll need consistent feedstock (think daily food waste or manure from a few animals), temperature management, and realistic expectations. A small household digester might only produce enough gas for an hour or two of cooking daily—not powering your whole home.
The real win? Pairing biogas with solar creates energy redundancy. Your panels work during sunny days while your digester produces fuel round-the-clock. Plus, the leftover slurry makes incredible fertilizer for gardens. Start small, prioritize safety training, and check local regulations before diving in.
Hydrogen Fuel Cells: The Emerging Storage Solution
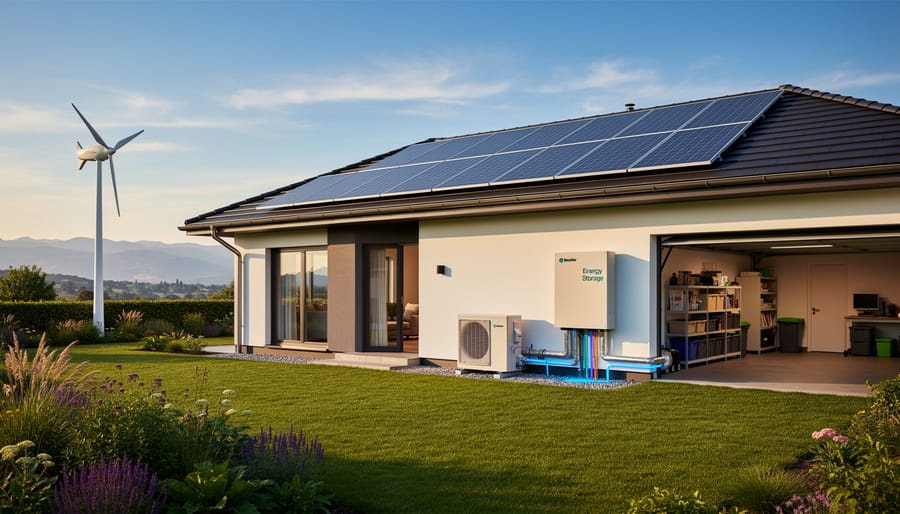
A diversified home renewable energy strategy combines multiple complementary power sources for maximum reliability and energy independence.
How Hydrogen Could Solve Solar’s Storage Problem
Here’s an exciting development I’ve been following closely: using your excess solar power to create hydrogen fuel for energy storage. The concept is beautifully simple. When your panels produce more electricity than you need during sunny days, that surplus power splits water molecules into hydrogen and oxygen through a process called electrolysis. You store the hydrogen, then later convert it back to electricity using a fuel cell when the sun isn’t shining.
The technology has been around for decades in industrial settings, but residential systems are just starting to emerge. Companies like LAVO have introduced home hydrogen batteries, though they’re still pricey compared to lithium options. The appeal? Hydrogen can store energy for months without degradation, making it ideal for seasonal storage challenges. I’ve met homeowners successfully combining this with their solar arrays when building a zero energy home, particularly in off-grid situations. While the technology isn’t mainstream yet, watching this space could pay off as costs drop and efficiency improves.
Is Hydrogen Ready for DIY Solar Enthusiasts?
Let’s be honest: hydrogen storage isn’t quite ready for most DIYers yet. While the technology is genuinely exciting, current home electrolyzers and fuel cells cost $10,000-$30,000, making them impractical compared to proven battery systems. The equipment requires specialized knowledge beyond typical solar installation skills, and maintenance is more complex than solar panel maintenance.
However, I’m watching this space closely. Experts predict residential hydrogen systems could become cost-competitive within 5-10 years as manufacturing scales up. For now, focus on optimizing your solar array and battery storage. Keep hydrogen on your radar for future upgrades when prices drop and plug-and-play systems emerge.
Building Your Multi-Source Renewable Energy Strategy
Matching Resources to Your Property and Climate
Choosing the right renewable energy mix for your home starts with understanding what you’re working with. I learned this the hard way when I initially planned a wind turbine setup, only to realize my suburban neighborhood’s tree cover made it impractical!
Start by assessing your property’s sun exposure throughout the day and across seasons. South-facing roofs or open land are ideal for solar, while hilltops with consistent breezes favor wind energy. Next, consider your local climate patterns. Do you get year-round sunshine, seasonal cloud cover, or consistent wind? These factors dramatically impact which resources will perform best.
Your property size matters too. A small urban lot might limit you to solar panels and maybe a small vertical wind turbine, while rural properties open up possibilities for ground-mounted systems, micro-hydro if you have flowing water, or even biomass options if you have acreage.
Take stock of your energy consumption patterns. Are you a heavy electricity user who’d benefit from multiple renewable sources? Or would a well-designed solar system with battery storage meet your needs?
I recommend using online solar calculators and wind speed maps for your area as starting points. Then, walk your property during different times of day, observing sunlight patterns, wind direction, and potential installation spots. This hands-on evaluation, combined with your local utility rates and available incentives, will guide you toward the perfect renewable energy combination for your unique situation.
Start Small and Expand: A Phased Approach
Here’s my honest advice from years of tinkering with renewable energy: start with solar panels and get comfortable before expanding. I began with a simple 100-watt panel powering a few outdoor lights, and it taught me everything about charge controllers, battery maintenance, and system monitoring without overwhelming my budget or patience.
Once your solar setup is humming along smoothly, consider adding a small wind turbine if you live in a breezy area, or explore micro-hydro if you’re near flowing water. These complement solar beautifully since they often generate power when the sun isn’t shining. I added a 400-watt wind turbine two years after my initial solar installation, and the combination significantly reduced my grid dependence during winter months.
Don’t rush into multiple systems simultaneously. Each renewable resource has its own learning curve, maintenance requirements, and integration challenges. Starting small lets you build confidence, troubleshoot problems methodically, and make informed decisions about which resources truly make sense for your specific location and energy needs. Your renewable energy journey is a marathon, not a sprint.
Here’s the truth I’ve learned after years of tinkering with renewable energy at my own place: solar is an incredible foundation, but it really shines when it’s part of a bigger picture. I started with just a small solar array on my garage, convinced it would solve everything. But after adding a small wind turbine for those cloudy winter months and installing a micro-hydro system near the creek behind my property, I finally understood what energy resilience actually means.
The beauty of diversifying your renewable energy sources is that nature rarely fails you on all fronts simultaneously. When the sun isn’t shining, the wind might be blowing. When both are calm, water keeps flowing. Each resource you’ve explored in this guide—solar, wind, hydro, geothermal, biomass, and hydrogen—has unique strengths that complement the others.
Your journey should start with honest assessment. Use the solar calculators and wind assessment tools we’ve discussed to understand what your property offers. Don’t try to implement everything at once. I recommend beginning with solar as your primary system since it’s the most accessible and proven technology for residential use. Then, based on your location’s specific characteristics and your energy needs, consider adding one complementary resource.
The DIY solar community is incredibly supportive, and I encourage you to share your plans and learn from others who’ve walked this path. Start small, experiment safely, and scale up as you gain confidence. Your unique situation—whether it’s that windy hilltop, nearby stream, or sunny roof—holds the key to your perfect renewable energy mix. Take that first step today, and remember, every kilowatt-hour you generate yourself is a victory worth celebrating.
How useful was this post?
Click on a star to rate it!
Average rating 0 / 5. Vote count: 0
No votes so far! Be the first to rate this post.
We are sorry that this post was not useful for you!
Let us improve this post!
Tell us how we can improve this post?
charlesnoble
Here at Spheral Solar, I’m a hands-on solar power enthusiast, constantly exploring and experimenting with DIY solutions. I’m dedicated to sharing my discoveries, insights, and even the bumps I hit along the way, all in the pursuit of a more sustainable future.
Why Solar Alone Isn’t Enough: Five Energy Sources… by Charlesnoble February 11, 2026 Combine multiple power sources to create a resilient energy system that keeps your home running when solar panels can’t produce electricity. Start by identifying which backup sources match your property’s natural resources—flowing water, consistent wind, or reliable grid access—then layer them strategically so you’re never dependent on a single energy…
Why Commercial Rooftop Solar Isn’t Just for Experts… by Charlesnoble January 2, 2026 Calculate your building’s solar potential by measuring the usable roof area—subtract space for HVAC units, vents, and required maintenance walkways, then multiply by 15 watts per square foot for a quick capacity estimate. Most commercial roofs between 5,000 and 50,000 square feet can support systems ranging from 30kW to 400kW,…
Why Florida Homeowners Are Going Solar (And How You Can Too) by Charlesnoble March 6, 2026 Calculate your home’s solar potential by checking your annual electricity bills and measuring your available south-facing roof space—Florida homes typically need 20-30 panels to offset 100% of energy usage. Contact your utility provider to understand net metering policies, as companies like Duke Energy, FPL, and Tampa Electric have different buyback…
How I Built a Zero Energy Home Without Breaking the Bank by Charlesnoble November 14, 2025 **Imagine slashing your electricity bill to zero—permanently.** A zero energy home produces as much renewable energy as it consumes over the course of a year, transforming your house from an energy drain into a self-sustaining powerhouse. It’s not science fiction or reserved for millionaires; thousands of homeowners are already living…
Why Your Rooftop Solar Installation Needs… by Charlesnoble January 28, 2026 Seal every penetration point where your solar mounting hardware breaks through the deck surface with marine-grade polyurethane caulk rated for continuous UV exposure and thermal cycling. I learned this the hard way after my first DIY installation when I assumed standard silicone would suffice—three months later, I discovered water pooling…
How Sunlight Becomes Electricity in Your Home (The… by Charlesnoble November 3, 2025 Understand the photovoltaic effect—when sunlight hits solar panels, photons knock electrons loose from silicon atoms, creating an electrical current through a principle Einstein won a Nobel Prize for discovering. Your solar panels generate direct current (DC) electricity, which then flows to an inverter that converts it into alternating current (AC)…
Subscribe for handpicked DIY projects, exclusive tips, and giveaways.
Match your LFP battery capacity to your actual lighting needs by calculating your nightly watt-hour consumption and multiplying by three—this gives you enough storage for cloudy stretches without overspending on unused capacity. A 20-watt LED running five hours nightly needs a 300Wh minimum battery, which translates to a 100Ah 12V LFP pack. Choose LFP chemistry… Read more: Why LFP Batteries Changed Everything About Solar Lighting (And How to Use Them Right)
Stop obsessing over wattage alone—it’s the biggest mistake I see RV solar shoppers make. Yes, the highest wattage panels available for RVs currently max out around 400-550 watts, but cramming the most powerful panel onto your roof doesn’t guarantee you’ll have enough power to run your air conditioner or keep your fridge cold through the… Read more: The Highest Watt Solar Panel Won’t Save Your RV Setup (Here’s What Actually Matters)
Picture a garden fountain that runs entirely on sunlight, requiring no electrical outlets, trenching, or monthly power bills. Solar-powered fountains harness photovoltaic technology to circulate water through decorative displays, creating peaceful ambiance while operating completely off-grid. These self-contained systems typically feature a small solar panel connected to a submersible pump, making them perfect for patios,… Read more: Why Solar-Powered Fountains Are Better Than You Think (And How to Build Your Own)


")
")

")
")

")
")

")
")


