Stop Frying Your Batteries: How to Size Your Solar Charge Controller in 3 Simple Steps
Updated:
Multiply your solar panel wattage by 1.25, then divide by your battery voltage—that’s your minimum charge controller amperage. A 400-watt solar array feeding a 12-volt battery bank needs at least a 42-amp controller (400 × 1.25 ÷ 12 = 41.67). This calculation accounts for real-world conditions where panels sometimes exceed their rated output on crisp, cold mornings or when sunlight reflects off snow.
Check your solar panel specifications for the short-circuit current rating, not just the wattage. If you’re wiring panels in parallel, add up all their short-circuit currents and multiply by 1.25 for your safety margin. Series-wired panels increase voltage instead of amperage, which changes your calculation entirely—the total wattage still matters, but you’ll divide by your system voltage after applying the 1.25 multiplier.
Choose between PWM and MPPT technology based on your voltage differential. PWM controllers work fine when your panel voltage closely matches your battery voltage, like a 12-volt panel charging a 12-volt battery. MPPT controllers cost more but deliver 20-30 percent more power when your panel voltage significantly exceeds battery voltage, such as using 24-volt or higher panels on a 12-volt system. I learned this the expensive way on my first RV installation—spending an extra $80 on MPPT would have saved me from replacing an undersized PWM controller six months later.
Round up to the next commercially available size rather than choosing the exact calculated amperage. Controllers operating at their maximum rated capacity run hotter, age faster, and leave no headroom if you expand your solar array later. A 50-amp controller instead of a 40-amp unit provides breathing room and future flexibility.
Why Charge Controller Size Actually Matters (And What Happens When You Get It Wrong)
Getting your charge controller size wrong isn’t just an inconvenience—it can create real problems that range from annoying to downright dangerous. Let me share what actually happens when you don’t get this right.
When you go too small with your charge controller, you’re essentially asking it to handle more current than it was designed for. Think of it like trying to funnel a fire hose through a garden hose nozzle. The controller starts working overtime, generating excessive heat as it struggles to manage all that power. In the best-case scenario, you’ll experience frequent shutdowns as the built-in safety features kick in to prevent damage. Your panels will essentially sit idle while the controller cools down, wasting precious sunlight and leaving your batteries partially charged. In worse cases, the sustained overload can damage internal components, leading to premature failure. And yes, in the worst situations, an undersized controller dealing with persistent overcurrent can overheat to the point of creating a fire hazard.
I learned this lesson the hard way during my first off-grid cabin project. I miscalculated my panel current and went with a 20A controller to save fifty bucks. Within two months, it failed completely during a camping trip, leaving me with dead batteries and no way to run my essential equipment. That “savings” cost me twice as much in replacement costs plus the hassle of reinstalling everything.
On the flip side, oversizing your controller won’t hurt anything electrically, but you’re throwing money away for capacity you’ll never use. A quality charge controller rated for 60A costs significantly more than a 30A unit. If your system only produces 25A, you’re paying for 35A of unused capacity. For budget-conscious DIYers, that extra money could go toward better batteries or additional panels that actually improve your system’s performance.
An undersized charge controller that overheated and failed, demonstrating the real-world consequences of improper sizing.
The Two Types of Charge Controllers (And Which One Changes Your Math)
PWM Controllers: The Simple Math
PWM controllers work on a beautifully simple principle: what goes in, comes out. Unlike their MPPT cousins, PWM controllers don’t transform voltage, so the current from your solar panels flows directly through to your battery. This makes the math refreshingly straightforward.
Here’s what you need to know: size your PWM controller based on the total current (amps) your panels can produce. Check your panel’s specifications for the short circuit current rating, often labeled as Isc. Add up the Isc values from all your panels if you’re connecting multiple units in parallel.
I learned this the hard way during my first camping setup when I assumed a 10A controller would handle my two 5A panels. Technically yes, but I quickly discovered the importance of headroom. Always add a 25% safety buffer to account for optimal conditions when your panels might temporarily exceed their rated output.
For example, if your panels produce 8 amps combined, multiply by 1.25 to get 10 amps. Round up to the next available controller size, which would be a 10A or 15A unit. This safety margin protects your equipment and gives you room to expand your system later without replacing the controller.
MPPT Controllers: Why You Need Different Numbers
Here’s where things get really interesting, and honestly, where I made my first big mistake when I started out. MPPT (Maximum Power Point Tracking) controllers work completely differently than PWM controllers, and that changes everything about sizing.
The magic of MPPT controllers is their ability to convert excess voltage into usable current. Think of it like a transformer – when your solar panels produce more voltage than your battery needs, the MPPT controller doesn’t waste that extra voltage. Instead, it converts it into additional amperage, boosting the charging current to your batteries. This is why MPPT controllers are more efficient, typically 20-30% more so than PWM controllers.
Because of this voltage-to-current conversion, you can’t just add up your panel amps like you do with PWM. Instead, you need to work with total wattage and then divide by your battery voltage to find the current your controller will actually output.
Here’s a practical example: Let’s say you have 400 watts of solar panels and a 12-volt battery system. Divide 400 by 12, and you get 33.3 amps. Add your 25% safety buffer, and you’d need a 42-amp MPPT controller (so you’d round up to a 50-amp model).
This is also why MPPT controllers can handle much higher wattages – they’re converting that voltage down to match your battery system. A 40-amp MPPT controller on a 12-volt system can handle around 520 watts of panels, whereas a 40-amp PWM controller maxes out at about 480 watts. That’s a real difference when you’re planning your system expansion.
Step 1: Calculate Your Total Solar Panel Power
Reading Your Panel Specs (Where to Find the Numbers That Matter)
Grab your solar panel and flip it over—there’s usually a label on the back that’s like a cheat sheet for sizing your charge controller. I remember the first time I tried to decipher one of these labels; it looked like alphabet soup! But once you know what you’re looking for, it’s actually pretty straightforward.
You’re hunting for four key numbers. First, find Voc (open circuit voltage)—this is the maximum voltage your panel produces in perfect conditions with no load connected. Right below that, you’ll see Vmp (maximum power voltage), which is the voltage when your panel is actually working under load. These are typically listed in the “Electrical Data” section.
Next up are the current ratings. Look for Isc (short circuit current)—the maximum current your panel can pump out—and Imp (maximum power current), which is what it delivers during normal operation.
Here’s the crucial part: for sizing your charge controller, you’ll primarily use Voc and Isc. These represent the extreme values your controller needs to handle safely. Vmp and Imp are helpful for understanding your system’s typical performance, but when it comes to protecting your equipment, always design around those maximum numbers. Most quality panels have these specs clearly printed, but if yours doesn’t, check the manufacturer’s datasheet online.
Solar panel specification labels contain the critical voltage and current values needed for accurate charge controller sizing.
Multiple Panels? Here’s Your Quick Formula
When you’re connecting multiple panels, the math shifts depending on how you wire them together. Here’s the friendly breakdown:
Series wiring adds voltage but keeps amperage the same. If you have two 100W panels at 18V and 5.5A each, connected in series, you’ll get 36V at 5.5A. Your controller needs to handle that higher voltage.
Parallel wiring does the opposite, adding amperage while voltage stays constant. Those same two panels in parallel give you 18V at 11A. Now your controller sizing focuses on that doubled current.
Series-parallel is where things get interesting. I learned this the hard way during my first RV setup when I had four panels to wire. You create series pairs first, then connect those pairs in parallel. Four 100W panels (18V, 5.5A each) wired series-parallel would give you 36V at 11A.
Here’s a camping trip scenario: You’ve got three 150W panels wired in parallel for your trailer. Each produces 6A. That’s 18A total, so you’d need a controller rated for at least 22.5A after applying your 25% safety margin. A 30A controller would be your sweet spot, giving you room to expand later.
Step 2: Do the Actual Sizing Math (It’s Easier Than You Think)
Calculating the correct charge controller size requires careful attention to your solar panel specifications and system voltage.
PWM Controller Sizing Formula
For PWM controllers, sizing is straightforward because these controllers connect your panels directly to your battery. The key number you need is your solar panel’s short-circuit current, or Isc, which you’ll find on the panel’s specification label or datasheet.
Here’s the simple formula: Take your total Isc and multiply by 1.25 (that’s your 25% safety factor). This accounts for those unexpectedly sunny days when your panels might produce more current than expected.
Total Controller Size = Combined Panel Isc × 1.25
Let me walk you through a couple of real-world examples I’ve helped friends calculate.
Example 1: Single 100W Panel
A typical 100-watt panel has an Isc of about 6 amps. Using our formula:
6 amps × 1.25 = 7.5 amps
You’d need at least a 10-amp PWM controller (round up to the next available size).
Example 2: 200W Two-Panel Setup
Say you’re installing two 100W panels in parallel. Now you’re combining their currents:
(6 amps + 6 amps) × 1.25 = 15 amps
A 20-amp PWM controller would handle this setup comfortably.
Example 3: RV Setup with 300W
Three 100W panels would give you:
(6 + 6 + 6) × 1.25 = 22.5 amps
You’d want a 30-amp controller.
Remember, with PWM controllers, your panel voltage should closely match your battery voltage (a 12V panel for a 12V battery system). This matching requirement is why PWM works best for smaller, simpler setups where budget matters more than maximum efficiency.
MPPT Controller Sizing Formula
Calculating the right size MPPT controller is easier than you might think. The basic formula is: take your total solar panel wattage, divide it by your battery voltage, then add a 25% safety margin. Here’s what that looks like in action.
Let me walk you through some real-world examples that I’ve helped friends and community members work through.
For an RV setup, imagine you have 400 watts of solar panels and a 12-volt battery bank. First, divide 400 by 12, which gives you 33.3 amps. Now multiply that by 1.25 for your safety margin: 33.3 × 1.25 = 41.6 amps. You’d want to go with a 50-amp MPPT controller, as controllers come in standard sizes.
Here’s an off-grid cabin scenario: You’ve installed 800 watts of panels with a 24-volt battery system. Calculate it as 800 ÷ 24 = 33.3 amps. Add your safety margin: 33.3 × 1.25 = 41.6 amps. Again, a 50-amp controller fits perfectly.
For a smaller camping setup with 200 watts and 12 volts: 200 ÷ 12 = 16.7 amps, then 16.7 × 1.25 = 20.8 amps. A 30-amp controller would work great here.
The 25% safety margin protects against efficiency losses and gives you room for future expansion. For more comprehensive calculations and advanced scenarios, check out our detailed MPPT sizing guide.
Use Our Free Calculator to Double-Check Your Math
Look, I get it—math isn’t everyone’s favorite pastime, especially when you’re excited to get your solar setup running. That’s exactly why we built the Spheral Solar charge controller calculator. Just plug in your panel specs and battery voltage, and it does the heavy lifting for you in seconds. I’ve used it countless times for my own projects, and it’s saved me from more than a few “oops” moments. Think of it as your safety net—use it to verify your calculations or skip the math entirely. Either way, you’ll have confidence you’re choosing the right controller.
Step 3: Add Your Safety Margin (The 25% Rule That Saves Systems)
Here’s something I learned the hard way during my first solar setup: I calculated everything perfectly, ordered exactly the charge controller size I needed, and watched it overheat on the first sunny afternoon. What went wrong? I forgot that real life isn’t as neat as calculations on paper.
This is where the 25% safety margin becomes your best friend. Think of it as insurance for your solar system. When you’ve calculated your required amperage, always multiply by 1.25 to add that crucial buffer. So if your calculations show you need 20 amps, you should actually get a 25-amp controller.
Why is this margin so important? Temperature plays a bigger role than most people realize. On hot days, solar panels can actually produce more current than their rated capacity. I’ve seen panels exceed their specifications by 15-20% under intense conditions. Then there’s the voltage spike issue. When clouds suddenly part and sunshine floods your panels, you get momentary power surges that can fry an undersized controller.
Here’s a real example: My friend Sarah calculated she needed 30 amps for her RV setup. She went with exactly 30 amps to save money. Three months later, during a summer trip through Arizona, her controller failed. The replacement cost, plus installation time at an RV shop, ended up costing three times what the larger controller would have cost initially.
The 25% rule also accounts for future expansion. Maybe you’ll add another panel next year? That margin gives you room to grow without replacing equipment. It’s not about overbuying; it’s about building a system that handles reality, not just theory.
Common Sizing Mistakes (And How to Avoid Them)
Using Wattage Instead of Current for PWM Controllers
I learned this lesson the hard way during my first solar setup. I mistakenly calculated my PWM controller size using wattage instead of current, and the controller overheated within days. Here’s what went wrong: PWM controllers operate at the panel’s voltage, not the battery voltage, which is the key difference.
When you divide panel wattage by battery voltage (like 12V), you’re essentially calculating for an MPPT controller’s output. PWM controllers don’t convert that higher panel voltage down, so the actual current flowing through matches the panel’s rated current, not the calculated result. For example, a 100W panel might produce 5.5A at 18V, not the 8.3A you’d get from dividing 100W by 12V.
This mistake leads to undersized controllers that can’t handle the actual current, causing overheating, shortened lifespan, or complete failure. Always use the panel’s short-circuit current rating from the spec sheet and add your safety margin from there. Your system’s reliability depends on getting this fundamental calculation right.
Forgetting About Temperature Derating
Here’s something I learned the hard way during a summer project in Arizona: charge controllers hate heat just as much as we do. Most controllers are rated for optimal performance at 77°F, but once temperatures climb past that, their capacity actually drops. It’s called temperature derating, and it’s a real buzzkill if you don’t plan for it.
In hot climates or during summer months, your controller might only handle 80-90% of its rated capacity. So that 30-amp controller you calculated? It might effectively become a 24-27 amp controller on a scorching afternoon. Desert installations, rooftop mounts with limited airflow, or any setup where your controller sits in direct sun are especially vulnerable.
The fix is simple: add a temperature safety margin. For installations in consistently hot environments, I recommend bumping up your controller size by 15-20% beyond your normal calculations. If you’re borderline between two controller sizes, always go with the larger one. Your future self will thank you when everything keeps running smoothly through that first heat wave.
Ignoring Future Expansion Plans
I learned this lesson the hard way during my first cabin setup. I sized my charge controller perfectly for my initial two-panel system, feeling pretty proud of my precise calculations. Six months later, when I wanted to add two more panels for winter reliability, I had to buy an entirely new, larger controller. That “bargain” turned into paying twice.
Here’s the reality: solar systems grow. You start with basics, then realize you want to run that mini-fridge, add some lights, or keep those devices charged. Planning for expansion from day one saves money and hassle.
Consider sizing your charge controller for at least 25-50% more capacity than your current setup. If you’re installing 400 watts now, choose a controller that handles 600 watts comfortably. Yes, you’ll pay slightly more upfront, but you’ll avoid the frustration of replacing perfectly good equipment later. Think of it as future-proofing your investment.
This forward-thinking approach also helps with optimizing solar panel performance as your energy needs evolve, giving you flexibility to expand without starting from scratch.
Matching Controller Voltage to the Wrong System Voltage
One mistake I made early on was matching my controller to my panel voltage instead of my battery bank voltage. Here’s the thing: your charge controller needs to match your battery system voltage first. If you have a 12V battery bank, you need a controller rated for 12V systems, even if your panels are 24V or higher. With MPPT controllers, this works perfectly since they convert higher panel voltages down to your battery voltage. However, PWM controllers require your panel voltage to closely match your battery voltage. So those 36V panels won’t work efficiently with a PWM controller on a 12V battery system. Always start by identifying your battery bank voltage, then choose your controller accordingly.
Real-World Sizing Examples for Popular DIY Solar Setups
Example 1: Basic RV or Van Setup (200W Panel, 12V System)
Let me walk you through a real-world example that mirrors what I’ve helped dozens of RV owners figure out. Imagine you’ve picked up a 200W solar panel for your weekend warrior van, and you’re ready to keep that 12V battery topped up.
First, find your panel’s specs. Most 200W panels put out around 18V at maximum power point voltage and roughly 11 amps of current (200W divided by 18V equals 11.1A). Always round up for safety.
For a PWM controller, you’d need one rated for at least 12 amps. Since these controllers work best when panel voltage matches battery voltage, grab a 15-amp PWM controller to give yourself breathing room. Cost-effective and simple.
Want better efficiency? Go MPPT instead. Same 11 amps input, but here’s where it gets interesting. The controller converts that higher voltage down to 12V, potentially boosting your amperage by 20-25 percent. Plan for about 14 amps output. A 20-amp MPPT controller handles this perfectly and leaves room for adding another panel down the road. My buddy Jake started exactly here and now runs three panels on the same controller.
A properly sized charge controller installation on an RV ensures safe and efficient solar power for off-grid adventures.
Example 2: Weekend Camping Setup (100W Portable Panel)
For those weekend adventures off-grid, a compact PWM controller is usually your best friend. Let me walk you through a typical camping scenario I’ve used myself dozens of times.
Picture this: You’ve got a 100W portable solar panel charging a 12V deep cycle battery to run your LED lights, phone charger, and maybe a small portable fridge. Since your panel is relatively small and you’re working with a 12V system, PWM is the practical choice here.
Using our simple calculation: 100W divided by 12V equals 8.3 amps. Following the 25% safety margin rule, multiply 8.3 by 1.25, giving you about 10.4 amps. A standard 10A or 15A PWM controller fits perfectly and keeps your setup lightweight and affordable.
I remember my first camping trip with solar – I over-thought everything and nearly bought a fancy 30A MPPT controller for my little 100W panel. My neighbor Bob laughed and showed me his simple 10A PWM setup that had been running flawlessly for three years. Sometimes simpler really is better, especially when portability matters and you’re not daisy-chaining multiple panels together.
Example 3: Off-Grid Cabin (600W Array, 24V System)
Let’s tackle something more substantial. Say you’re setting up an off-grid cabin with a 600W solar array using four 150W panels wired in series-parallel configuration, and you’re running a 24V battery bank.
First, calculate your total current. With 600W at 24V, you’d expect about 25 amps (600W ÷ 24V = 25A). However, these panels typically have an open-circuit voltage around 22V each. When wired in a series-parallel setup (two strings of two panels each), your voltage reaches about 44V.
For MPPT controller sizing, use the higher voltage rating. Calculate: 600W ÷ 24V = 25A, then multiply by 1.25 for safety: 25A × 1.25 = 31.25A. You’d need at least a 40A MPPT controller, and importantly, one rated for input voltages above 44V. Most quality controllers handle 100V or more, so you’re covered.
I remember helping my neighbor Charles set up a similar system last year. We initially underestimated the voltage requirements and had to upgrade the controller. Check the voltage ratings carefully on the best solar charge controllers before purchasing.
This setup gives you room for future expansion while maintaining system efficiency through MPPT technology’s superior energy harvesting.
Quick Safety Checks Before You Wire Everything Up
Alright, you’ve calculated the perfect charge controller size for your setup—excellent work! But before you start connecting wires, let’s pump the brakes for a moment. Trust me on this one. I learned this lesson the hard way during my first solar installation when I got so excited that I nearly connected a 24V panel to a 12V system. Thankfully, I caught it just in time!
First up, double-check your voltage matching. Your solar panels, battery bank, and charge controller all need to speak the same electrical language. If you’ve got 12V batteries, make sure your controller is rated for 12V systems. Mixing voltages is like trying to plug a European appliance into an American outlet—things won’t end well.
Next, let’s talk wire sizing. This is where many DIYers stumble. Your wires need to handle the current flowing through them without overheating. As a general rule, thicker wires (lower AWG numbers) carry more current safely. For example, if your controller handles 30 amps, you’ll typically need at least 10 AWG wire for short runs. Check a wire sizing chart based on your specific amperage and cable length. Undersized wires create resistance, generate heat, and waste precious solar energy.
Now for the safety essential everyone should use but some skip: fuses or circuit breakers. Install an appropriately rated fuse between your solar panels and charge controller, and another between the controller and battery. These act as your system’s safety net. If something goes wrong, the fuse blows instead of your expensive equipment going up in smoke. Size your fuses at 125% of your maximum current rating—so for a 30-amp controller, use a 40-amp fuse.
Finally, verify your charge controller settings match your battery type before powering everything up. Different batteries need different charging profiles, and getting this wrong can damage your batteries or reduce their lifespan significantly. Take these few extra minutes now—your future self will thank you.
There you have it – your complete roadmap to sizing a charge controller! Let’s recap those three essential steps: calculate your total solar panel wattage, determine your system voltage, and apply the right formula (either PWM or MPPT) while adding that crucial 25% safety buffer. I still remember my first solar setup when I skipped that safety margin and ended up replacing my controller after just two months – not a mistake I’d recommend repeating!
Ready to put this into action? Head over to our charge controller calculator tool to get your personalized sizing recommendation in seconds. Just plug in your numbers and let it do the math for you. And here’s the thing – every solar setup is a bit different, and sometimes you need a second opinion. That’s exactly what our community is for! Drop your specific sizing questions in our forums where fellow solar enthusiasts and experienced DIYers can offer feedback on your calculations.
Once you’ve nailed down the right controller size, don’t stop there. Check out our related guides on proper wiring techniques and safe installation practices to ensure your system runs smoothly from day one.
Your solar journey is uniquely yours, and now you’ve got the knowledge to make confident decisions about one of your system’s most critical components. Take control, trust your calculations, and join thousands of others who’ve successfully powered their adventures with the sun. You’ve got this!
How useful was this post?
Click on a star to rate it!
Average rating 5 / 5. Vote count: 1
No votes so far! Be the first to rate this post.
We are sorry that this post was not useful for you!
Let us improve this post!
Tell us how we can improve this post?
charlesnoble
Here at Spheral Solar, I’m a hands-on solar power enthusiast, constantly exploring and experimenting with DIY solutions. I’m dedicated to sharing my discoveries, insights, and even the bumps I hit along the way, all in the pursuit of a more sustainable future.
Why Your Solar Charge Controller’s Load Output… by Charlesnoble February 9, 2026 Connect your DC loads directly to your charge controller’s load terminals instead of tapping straight into the battery—this simple setup protects your battery from over-discharge and can extend its lifespan by years. Most charge controllers include built-in load management features that automatically disconnect your lights, fans, or other devices when…
Why a 9kW Solar System with Batteries Could Be… by Charlesnoble November 23, 2025 Calculate your actual energy consumption before committing to a 9kW solar system with batteries. Pull your last 12 months of electricity bills, add up the total kilowatt-hours used, and divide by 365 to get your daily average. Most households consuming 25-35 kWh daily find a 9kW system hits the sweet…
Every Component Your Solar Panel System Actually… by Charlesnoble November 26, 2025 Picture this: you’re standing in front of a solar panel, ready to harness free energy from the sun, but you’re not quite sure what else you need to make it actually work. I’ve been there. When I first started tinkering with solar in my garage, I quickly learned that panels…
Why Your 8kW Off-Grid Solar System Might Be Wasting… by Charlesnoble December 17, 2025 Calculate your actual daily energy consumption in watt-hours before investing a single dollar—not your estimated usage, but real measurements taken over at least two weeks using a kill-a-watt meter on every circuit. An 8kW off-grid system produces roughly 32-40 kWh daily under ideal conditions, but real-world performance drops 20-30% due…
Why Your Battery Needs the Load Output (And How to… by Charlesnoble January 6, 2026 Connect your solar panel to the charge controller’s solar input terminals, then wire the controller to your battery’s positive and negative posts—this creates the essential protection layer that prevents overcharging during sunny days and deep discharge on cloudy ones. Think of your charge controller as a smart traffic cop directing…
The 9 Best Solar Charge Controllers in 2023 by Adeyomola August 15, 2021 To compile our list of solar charge controllers, we measured maximum output voltage, maximum input voltage, maximum charge current, and maximum input wattage. But peak conversion efficiency and manageability ultimately separate the best from the rest. A good solar charge controller is typified by high peak conversion efficiency. This is…
Subscribe for handpicked DIY projects, exclusive tips, and giveaways.
Dig a trench deeper than four feet for your ground-mounted solar array, and you’re entering territory where the walls can collapse without warning—burying you in seconds under thousands of pounds of soil. I learned this the hard way when planning my first major DIY solar project: what seemed like simple ditch-digging for conduit runs turned… Read more: Why Your DIY Solar Trench Could Cave In (And How to Prevent It)
Calculate your daily energy consumption by examining your electricity bills for the past year—most households use between 20-30 kilowatt-hours per day, which translates to a 5-7 kilowatt solar array for complete energy independence. This single number determines everything: how many panels you’ll mount, the inverter capacity you’ll need, and whether your budget aligns with reality.… Read more: Build Your Own Home Solar Power System and Actually Save Money
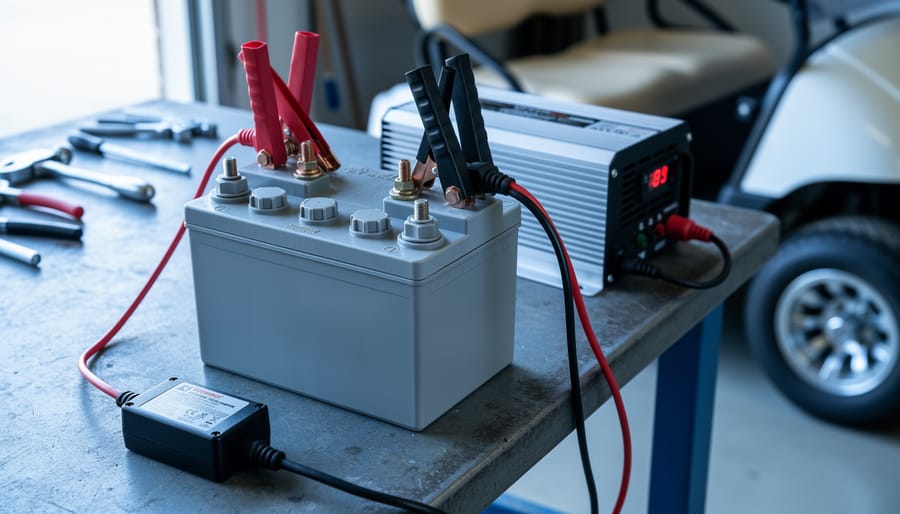
Match your charger voltage to your battery’s 8-volt requirement, or risk permanent damage to your battery bank. Most standard chargers output 6V or 12V, making them incompatible with the less common 8V configuration found in certain golf carts, floor scrubbers, and older solar setups. Use a dedicated 8-volt charger with an output between 9.0V and… Read more: Why Your 8 Volt Battery Won’t Charge (And How to Fix It with an Inverter)


 for Your Home")
")

")


 for Your Home")
")

")