Why 4×12 Solar Pool Heating Panels Are Perfect for DIY Pool Warming
Updated:
Calculate your panel needs by measuring your pool’s surface area and multiplying by 0.5 to 0.75—that’s the solar collector coverage you’ll need to heat effectively. For a typical 400 square foot pool, you’re looking at 200-300 square feet of panels, which translates to roughly 4-6 of these 4×12 foot panels (48 square feet each).
Position these panels where they’ll capture maximum sunlight between 9am and 3pm, ideally facing south at an angle matching your latitude. Your roof might seem perfect, but ground mounts work brilliantly too and make maintenance far simpler. I’ve helped dozens of homeowners set up both configurations, and the ground-mount folks consistently report easier winterization and repairs.
Connect panels in series for longer runs or parallel circuits for better flow rates, depending on your pump’s capacity. Most residential pool pumps handle 2-4 panels in series without issue, but adding more requires checking your system’s pressure ratings. This isn’t complicated—your pump manual lists the maximum head pressure, and each panel typically adds 2-3 PSI.
Expect to invest between 120 to 180 dollars per panel for quality collectors, plus mounting hardware and plumbing connections. DIY installation cuts costs dramatically compared to professional setups that often exceed 3,000 dollars. The learning curve is manageable for anyone comfortable with basic plumbing—think connecting garden hoses, but with PVC primer and cement.
Your pool water becomes your free heating source once these panels transform your pump into a solar circulation system. The beauty of 4×12 panels lies in their modular nature, letting you start small and expand as budget allows.
What Makes 4×12 Solar Pool Heating Panels Special
4×12 solar pool heating panels are designed at a manageable size for homeowner installation while providing substantial heating capacity.
The Sweet Spot: Size and Output Balance
Here’s what makes the 4×12 configuration such a practical choice for most pool owners. When I helped my neighbor install his first solar pool heating system last summer, we quickly discovered why these dimensions have become something of an industry standard.
At 4 feet wide and 12 feet long, these panels hit a sweet spot that’s all about real-world usability. Two people can comfortably carry and maneuver a single panel without needing a crane or calling in favors from the entire neighborhood. Compare that to larger 4×20 panels, which are incredibly heavy and awkward, often requiring professional installation. On the flip side, smaller 2×10 or 3×8 panels mean you’ll need more connections, more potential leak points, and significantly more time piecing everything together like a complicated puzzle.
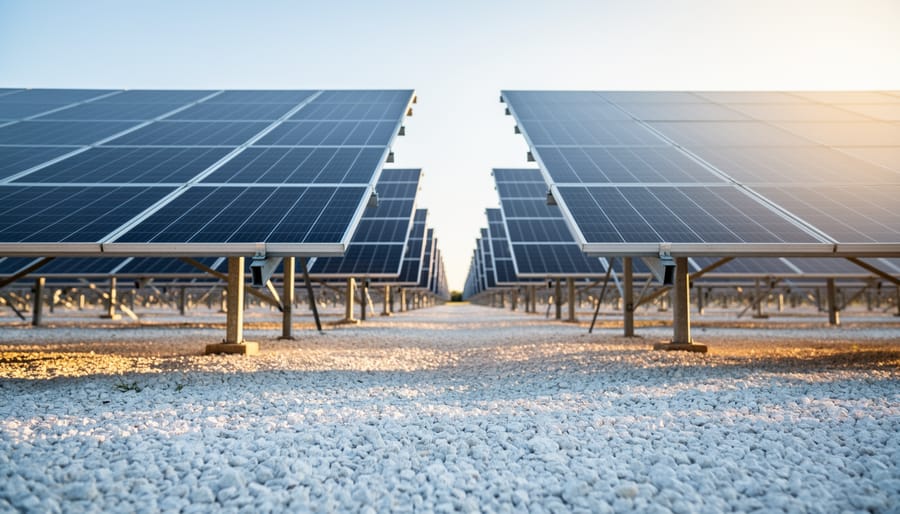
The heating capacity is equally balanced. A single 4×12 panel provides 48 square feet of solar collection area, which means you can easily calculate what you need without getting into fractions and complicated math. For most residential pools, you’re looking at somewhere between 4 to 8 panels total, which keeps your project manageable without turning your entire roof into a solar farm.
From a practical standpoint, these panels also fit nicely on standard roof sections without excessive cutting or custom work. They’re long enough to provide substantial heating output but not so massive that you’re limited in placement options. This flexibility matters when you’re working around vents, skylights, or other roof features.
How They Actually Heat Your Pool Water
Here’s the thing about these panels – they’re beautifully simple once you understand what’s happening inside. I remember the first time I touched a solar pool heating panel on a sunny afternoon. I expected some complex machinery, but it was just warm tubes doing exactly what nature intended.
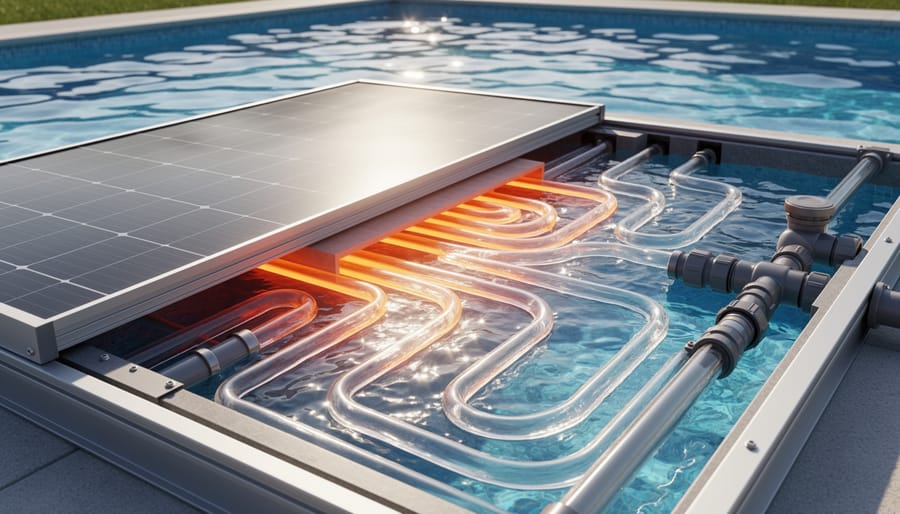
When you look at how solar pool heating works, the basic principle is straightforward: cold water from your pool gets pumped through the panel’s tubes, absorbs heat from the sun, and returns warmer to your pool. Think of it like leaving a garden hose in the sun – the water inside heats up naturally. These panels just optimize that process with specialized materials and design.
Inside a 4×12 panel, you’ll find dozens of narrow tubes arranged in parallel rows across that 48 square foot surface. The tubes are typically made from black polypropylene or similar material that eagerly soaks up solar radiation. As water flows through these tubes at a controlled rate, heat transfers from the warm tube walls directly into the cooler water molecules. The slower the flow, the more time for heat transfer, but you need to balance that with keeping water moving through your entire system.
On a typical sunny day, expect your water to gain between 5 to 15 degrees as it passes through a properly-sized panel array. A single pass might only add 1-3 degrees, but remember, your pool water circulates through these panels multiple times throughout the day. By afternoon, that cumulative heating really adds up.
The beauty is there are no moving parts inside the panel itself, no electronics to fail, and no fuel to burn. Just sunlight, water, and smart engineering working together to extend your swimming season.
Water circulates through the panel’s internal channels where solar heat is absorbed and transferred to raise pool temperature.
Calculating How Many Panels Your Pool Needs
The Pool-to-Panel Surface Area Rule
Here’s the thing about sizing solar pool heating panels that I wish someone had explained to me when I first started: there’s a surprisingly simple guideline that works for most backyard pools. It’s called the pool-to-panel surface area rule, and it’s basically your starting point for figuring out how many 4×12 panels you’ll need.
The rule states that your total solar panel area should equal 50-100% of your pool’s surface area. So if you have a 400 square foot pool, you’d need between 200-400 square feet of solar panels. Since each 4×12 panel covers 48 square feet, that translates to roughly 4-8 panels for that pool size.
Now, what pushes you toward the higher or lower end of that range? Several factors come into play. If you live in Florida or Arizona with abundant sunshine, you can probably get away with 50-60% coverage. But if you’re in a cloudier climate like the Pacific Northwest, aim for 80-100%. Want to extend your swimming season into cooler months? Go higher. Only planning to take the chill off during peak summer? The lower end works fine.
Here’s a real-world example from my own experience: My neighbor in Pennsylvania has a 600 square foot pool and initially installed six 4×12 panels, giving him 48% coverage. It helped, but the water never got truly comfortable in May or September. He added three more panels the following year, bringing him to 72% coverage, and that made all the difference. The water stays swimmable from mid-May through late September now.
Wind exposure matters too. Pools in windy areas lose heat faster, so bump up your percentage by 10-20% to compensate.
Regional Considerations That Actually Matter
Your location dramatically affects how many panels you’ll need. I learned this the hard way when helping my cousin in Phoenix—his setup required three panels fewer than mine in coastal Oregon, even with identically sized pools!
In sunny Southern states like Florida, Texas, and Arizona, you’ll typically need 50-70% of your pool’s surface area in panels. The abundant sunshine (8-10 hours daily) does most of the heavy lifting. Meanwhile, Northern regions like Michigan or Maine might need 80-100% coverage due to fewer sun hours and cooler ambient temperatures.
Wind patterns matter more than most realize. Coastal areas experience constant breezes that cool panels and reduce efficiency by 10-15%. If you’re near the ocean, add an extra panel to your calculation. Mountain regions face similar challenges with elevation and wind exposure.
Seasonal pool users have flexibility others don’t. If you only swim May through September, size your system for shoulder-season performance (spring and fall). Year-round swimmers in mild climates need systems capable of handling December’s weaker sunlight—typically requiring 20-30% more panels than summer-only calculations suggest. Track your local sun exposure hours using simple weather apps to fine-tune these estimates for your specific backyard.
DIY Installation: What You’re Actually Getting Into
Roof Mounting vs. Ground Mounting: Picking Your Battle
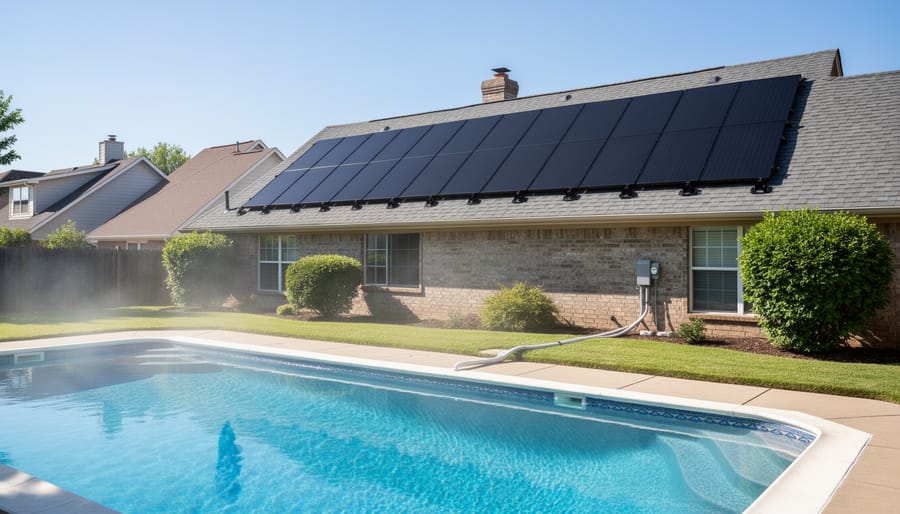
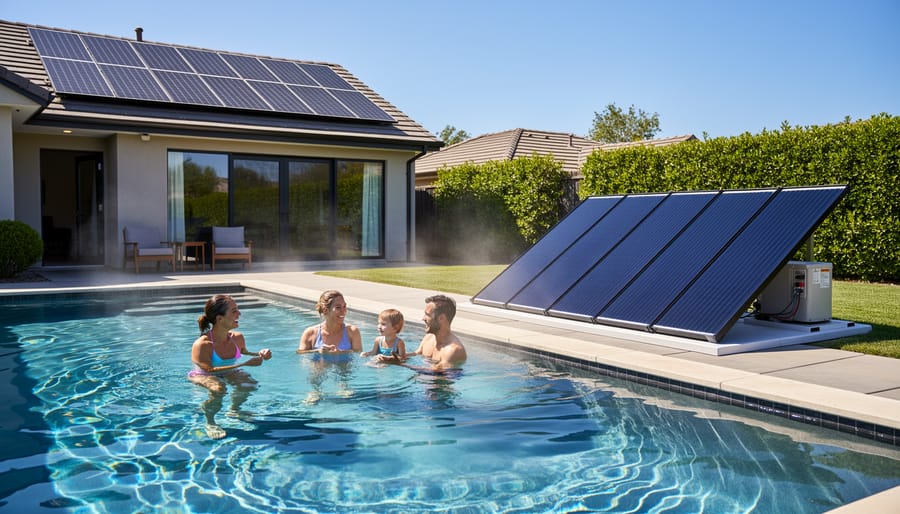
When you’re ready to install your 4×12 panels, you’ll face an important decision: should they go on your roof or sit on the ground near your pool? I’ve done it both ways, and honestly, there’s no universal right answer. It really depends on your specific situation.
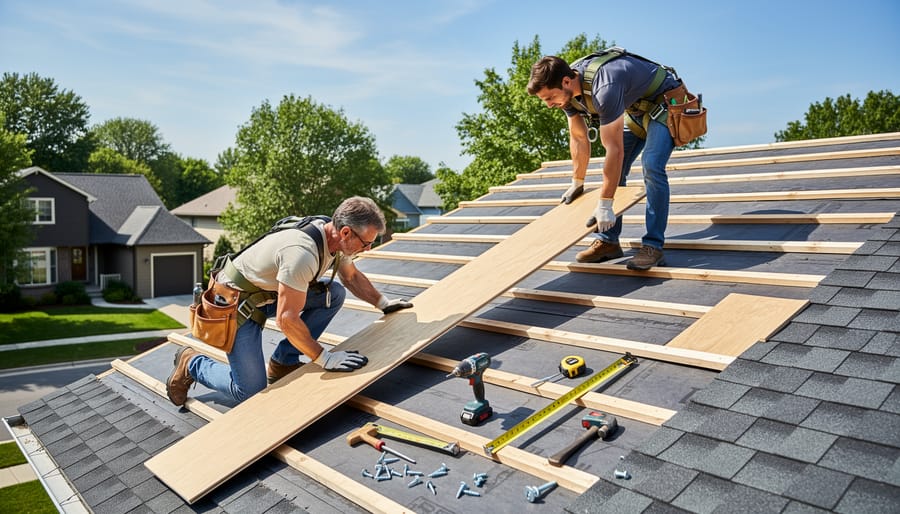
Roof mounting is the classic approach, and for good reason. Your panels get maximum sun exposure up there, they’re completely out of the way, and you’re not sacrificing any valuable yard space. Plus, they’re less accessible to curious kids or pets. The catch? You need a south-facing roof (or close to it) with a decent slope, and you’ll be working at heights, which isn’t everyone’s cup of tea. I remember my first roof installation took twice as long as I expected because I had to keep taking breaks to conquer my nerves about being on a ladder. If you’re comfortable with heights and basic roofing work, this option gives you the cleanest look.
Ground mounting, on the other hand, is wonderfully accessible. You can angle your panels perfectly toward the sun regardless of your roof’s orientation, and any maintenance or adjustments happen at a comfortable standing height. When my neighbor Charles installed his panels on a simple ground rack, he had them up and running in an afternoon. The downside is they take up yard space, and you’ll need to consider aesthetics since they’re visible. They’re also more vulnerable to accidental damage from lawn equipment or energetic backyard activities.
For beginners, I generally recommend ground mounting. The learning curve is gentler, mistakes are easier to fix, and you won’t be juggling tools while worrying about falling. If you’ve got roofing experience or limited yard space, roof mounting becomes more attractive.
DIY installation of 4×12 panels on a residential roof typically requires two people and basic carpentry skills.
The Essential Components Beyond the Panels
Here’s something I learned the hard way during my first solar pool heating project: the panels are just the beginning! You’ll need several additional components to create a complete, functioning system.
First up, you’ll need a pump to circulate water through your panels. Many existing pool filter pumps work perfectly for this job, but you’ll want to review the pump considerations to ensure yours has adequate flow rate (typically 30-50 gallons per minute for a residential setup). If you need a dedicated solar pump, budget around $150-$400.
Valves are essential for controlling water flow and isolating your solar system when needed. You’ll typically need three-way diverter valves (about $30-$80 each) and check valves ($15-$40) to prevent backflow. Most systems require at least two to three valves total.
A solar controller automatically manages when your system operates based on temperature sensors. Basic controllers run $100-$200, while programmable models with digital displays cost $200-$400. Trust me, this investment saves you from constantly monitoring your system manually.
Don’t forget plumbing connections and fittings like PVC pipes, elbows, and unions. Budget approximately $50-$150 depending on your setup’s complexity and distance from panels to pool.
Finally, mounting hardware including brackets, straps, and weatherproof fasteners typically costs $50-$150. Choose corrosion-resistant materials since they’ll face constant sun and moisture exposure. Altogether, these supporting components usually add $400-$1,200 to your total project cost.
Tools and Skills You’ll Need (Be Honest With Yourself)
Let me be straight with you—this isn’t rocket science, but it’s not exactly a Sunday afternoon project either. Here’s what you’ll actually need to make this happen.
For tools, you’ll want a drill with bits suitable for your roof type, a screwdriver set, adjustable wrenches, pipe cutters or a hacksaw, measuring tape, and a level. PVC primer and cement are essential for connecting pipes. A ladder tall enough to safely reach your roof is non-negotiable, and I can’t stress enough how important safety gear is—think gloves, safety glasses, and non-slip shoes.
Skill-wise, if you’ve installed a ceiling fan or done basic plumbing repairs, you’re probably in decent shape. You’ll need basic carpentry skills for mounting brackets, comfort working on a roof (this is huge—if heights make you dizzy, reconsider), and understanding how to work with PVC plumbing. Reading instructions carefully and following them sequentially is honestly half the battle.
When should you call for help? If your roof is steep, has multiple levels, or you’ve never worked with pool plumbing before, getting a professional consultation is money well spent. There’s no shame in hiring out the roof mounting while handling the ground-level connections yourself.
Choosing Quality Panels Without Overpaying
New vs. Used: When Each Makes Sense
I’ve scored some incredible deals on used solar panels over the years, and I’ve also learned some expensive lessons. When hunting for used 4×12 panels, inspect them carefully for cracks, warping, and leaks around the header connections. Run water through them if possible to check for blockages or leaks. Ask the seller how long they’ve been used and why they’re selling.
Here’s my rule of thumb: if used panels cost less than 50% of new and appear in good condition, they’re worth considering for non-critical applications or backup systems. I once bought a set for $40 each that worked beautifully for five seasons.
However, buy new when you’re building a primary heating system you’ll depend on. New panels typically come with 5-10 year warranties and guaranteed performance ratings. Used panels are gambles without that protection. Also consider that older panels might use outdated fittings that complicate integration with modern systems.
For beginners, I actually recommend starting with new panels. You’ll avoid compatibility headaches and have manufacturer support if issues arise. Once you’ve gained experience, you’ll better recognize quality used panels when you see them.
Real-World Performance and Maintenance
The Maintenance Schedule That Actually Works
Here’s what I’ve learned keeps these panels performing beautifully without eating up your weekends. I’ll be honest—I initially thought maintenance would be this huge time sink, but it’s surprisingly manageable.
Monthly (15 minutes): Give your panels a quick visual check. Look for debris like leaves or bird droppings that can block sunlight. A simple garden hose rinse usually does the trick. I do mine when I’m already checking pool chemistry, so it becomes part of the routine. This matters because even small obstructions can reduce efficiency by 10-15%.
Seasonal (30-45 minutes): At the start of swim season, inspect connections for any winter damage or loose fittings. Check your pump pressure gauge—significant changes signal potential clogs. Before closing for winter, drain panels completely in freezing climates to prevent cracking. Trust me, learned that one the hard way my first year.
Annual (1-2 hours): Deep clean with a soft brush and mild soap if simple rinsing isn’t cutting it. Test all valves and replace any worn O-rings. Verify your controller still switches between pool and panels correctly. This annual tune-up catches small issues before they become expensive problems, keeping your system running efficiently for 15-20 years.
Common Issues and Quick Fixes
Even the best solar pool heating systems can throw you a curveball now and then. Let me share some common hiccups I’ve encountered and how to get back on track quickly.
Air locks are probably the most frustrating issue for first-timers. You’ll notice your panels aren’t warming up properly, and the flow seems sluggish. This happens when air gets trapped in the system during initial setup. The fix is surprisingly simple: open the air relief valve at the highest point of your panels and let the system run until water flows smoothly without sputtering. I learned this the hard way during my first installation when I spent two hours wondering why nothing was heating!
Leaks typically show up at connection points. If you spot dripping, first check that all clamps are properly tightened. Most leaks happen because connections weren’t quite snug enough initially. If tightening doesn’t solve it, you may need to replace rubber gaskets, which can degrade from sun exposure over time.
Poor circulation often points to a dirty filter or debris blocking the panels. Clean your pool filter first, then check the panel inlet for any leaves or buildup. A quick rinse with a garden hose usually does the trick.
Reduced output after months of good performance? Your panels might just need cleaning. Pollen, dust, and algae can accumulate on the surface, blocking sunlight. A gentle wash with mild soap and water typically restores 90% of lost efficiency. Think of it as giving your panels a spa day—they’ll reward you with warmer water almost immediately.
Cost Breakdown and Payback Reality Check
Let me give you the real numbers on what a 4×12 solar pool heating system will actually cost you. Charles installed his system for a 15,000-gallon pool using eight 4×12 panels, and his total investment came to approximately $2,400. That included the panels themselves at about $180 each, plus plumbing connections, mounting hardware, and a diverter valve. He tackled the installation himself over two weekends, saving roughly $800-1,200 in professional installation fees.
For comparison, heating that same pool with a gas heater would have cost Charles around $150-250 monthly during swimming season. Electric heat pumps run $80-150 per month. With solar, his only ongoing cost is the tiny amount of electricity to run his existing pool pump, which he was already paying anyway. This means Charles started seeing real savings immediately and reached full payback in just under two years.
Your specific numbers will vary based on pool size and climate. A smaller 12,000-gallon pool might only need six panels (around $1,800 total), while larger 20,000-gallon pools could require ten to twelve panels ($3,000-3,500). The solar pool heating costs calculator on our site can help you estimate your exact scenario.
The honest truth? If you’re currently using conventional heating and swimming more than three months yearly, solar typically pays for itself in 2-4 years. After that, you’re essentially heating your pool for free for the next 15-20 years, which is the typical lifespan of quality panels. Charles jokes that his system has already saved him enough to take his family on a nice vacation, and he’s only in year three.
A properly sized solar panel system can extend your swimming season by several months while eliminating gas or electric heating costs.
You’ve made it this far, and hopefully you’re feeling ready to transform your pool into a solar-powered oasis. The beauty of 4×12 solar pool heating panels is that they’re genuinely accessible for DIY enthusiasts at almost any skill level. You don’t need to be a licensed contractor or have years of plumbing experience to make this happen. With some basic tools, a free weekend, and the determination to learn as you go, you can absolutely pull this off.
I’ve talked to countless DIYers who started with zero solar experience and now happily swim in their solar-heated pools well into fall. The key is taking that first step, even if it feels intimidating. Remember, every expert was once a beginner who decided to try.
Before you order your panels, take advantage of Spheral Solar’s calculators to dial in exactly how many panels you’ll need for your specific pool size and climate. These tools take the guesswork out of the planning phase and help you avoid the frustration of under-buying or overspending.
Once you’ve completed your installation, we’d love to hear about your experience. Share your project photos, lessons learned, and any creative solutions you discovered along the way. Our community thrives on these real-world stories, and your journey might be exactly what inspires someone else to take the plunge.
How useful was this post?
Click on a star to rate it!
Average rating 0 / 5. Vote count: 0
No votes so far! Be the first to rate this post.
We are sorry that this post was not useful for you!
Let us improve this post!
Tell us how we can improve this post?
charlesnoble
Here at Spheral Solar, I’m a hands-on solar power enthusiast, constantly exploring and experimenting with DIY solutions. I’m dedicated to sharing my discoveries, insights, and even the bumps I hit along the way, all in the pursuit of a more sustainable future.
9 Best Solar Pool Heaters in 2023 by Adeyomola June 20, 2021 When buying solar pool heaters, people often give precedence to features like square footage, mounting type, water pressure limit, and the type of pool the solar pool heater is suitable for. But, in the end, the best solar pool heaters tip above the rest by offering superior temperature rise in…
How Does Solar Pool Heating Work? by Charlesnoble August 27, 2023 Solar pool heating systems work by is a sustainable and cost-effective way to extend the swimming season and enjoy warmer water in your pool. Solar pool heating systems work by harnessing heat from sunlight and transferring it to the pool water pumped through the collectors. This solar-heated water is returned…
Why Glazed Solar Pool Heaters Outperform Everything… by Charlesnoble November 25, 2025 Understand that glazed solar pool heaters are built with a glass or polycarbonate cover over dark absorber plates, creating an insulated greenhouse effect that captures and retains heat far more efficiently than unglazed alternatives. This design makes them capable of extending your swimming season by months, even in cooler climates…
Hook Up Your Solar Pool Heater the Right Way (Before… by Charlesnoble January 17, 2026 Position your solar collectors above pool water level whenever possible to enable gravity drainage when the system shuts off, preventing freeze damage and extending panel life. This single design choice eliminates the most common failure point in DIY solar pool heating installations. Study the three-zone valve configuration before purchasing components.…
DIY Solar Pool Heater – Beginner’s Guide With Diagrams by Paul June 27, 2021 Although you may think it’s a tall order, you can build a DIY solar pool heater using irrigation tubing and fittings, framing lumber, and basic tools and expertise, all in a weekend or less. And that’s not an exaggeration. You can build a functional and efficient solar pool heater using…
Why Your Pool Solar Heater Valve Position Changes… by Charlesnoble March 9, 2026 Set your three-way valve to point toward the roof when you want solar heating, typically between 10 AM and 4 PM on sunny days when your panels can effectively warm the water. Point it toward the bypass position during cloudy weather, at night, or when your pool has reached the…
Subscribe for handpicked DIY projects, exclusive tips, and giveaways.
When your solar array needs more power than a simple series connection provides, but your charge controller can’t handle high voltages, series-parallel wiring becomes your solution. This hybrid approach combines the voltage-boosting benefits of series connections with the current-increasing advantages of parallel wiring, giving you the flexibility to match your system’s exact requirements. Most DIYers… Read more: Why Series-Parallel Wiring Could Save Your Solar Setup (And Your Wallet)
An 8kW solar system typically generates between 24 and 40 kWh per day, depending on your location, season, and installation quality. That’s enough to power most average homes completely, but the reality is more nuanced than a single number can capture. I remember installing my first 8kW array in Arizona and being thrilled when it… Read more: How Much Power Does an 8kW Solar System Actually Produce Each Day?
Flip your bifacial solar panels over and you’ll find a second active surface that can boost your system’s energy production by 10-30% – but only if you design your array to take advantage of it. Unlike traditional panels that capture sunlight from one side, bifacial modules harvest energy from both their front and rear surfaces,… Read more: Why Your Bifacial Solar Panels Need a Completely Different Array Design


")
")

")


")
")

")