Why a 9kW Solar System with Batteries Could Be Overkill (Or Perfect) for Your Home
Updated:
Calculate your actual energy consumption before committing to a 9kW solar system with batteries. Pull your last 12 months of electricity bills, add up the total kilowatt-hours used, and divide by 365 to get your daily average. Most households consuming 25-35 kWh daily find a 9kW system hits the sweet spot between coverage and cost, but your number might be completely different.
Match your battery capacity to your overnight usage, not your installer’s recommendation. A 9kW solar array typically generates 36-45 kWh daily in decent sunlight, but batteries are expensive. If you only use 8-10 kWh between sunset and sunrise, a single 10 kWh battery makes more financial sense than the 20+ kWh systems many salespeople push. I learned this the hard way when my first setup had double the battery storage I actually needed.
Understand that system size isn’t just about panels. A 9kW system refers to peak panel output under ideal conditions, but your actual production depends on roof orientation, shading, and local climate. Meanwhile, batteries address the timing problem since you generate power during the day but often need it most in evenings. This combination transforms solar from a bill-reduction tool into genuine energy independence.
Run the numbers on payback period using real quotes, not online estimates. Factor in federal tax credits currently at 30 percent, state incentives, and your actual electricity rates. Most 9kW systems with battery storage cost between $25,000-$35,000 before incentives, with payback periods ranging from 7-12 years depending on your location and usage patterns.
Understanding What a 9kW Solar System Actually Means
Peak Power vs. Actual Daily Production
Here’s something I learned the hard way during my first solar installation: a 9kW system doesn’t actually produce 9kW of power all day long. Think of it like your car’s horsepower rating – it’s the maximum capability under ideal conditions, not what you get during your daily commute.
The 9kW rating represents peak power, which occurs when the sun hits your panels at the perfect angle on a cloudless day with optimal temperature. In reality, your system produces varying amounts throughout the day. During my morning coffee, I watch my system wake up, gradually climbing from a few hundred watts to its peak around noon, then tapering off as evening approaches.
On average, a 9kW system in most regions produces between 30-45 kilowatt-hours (kWh) per day. That’s roughly 3-5 hours of peak production. I call these your “sun hours” – the equivalent time your panels would need to run at full 9kW capacity to match the day’s actual output.
Several factors affect this daily production. Weather plays the obvious role – cloudy days might give you only 20-30% of peak output. Seasonal changes matter too. My system generates about 40% more energy in summer compared to winter, when days are shorter and the sun sits lower in the sky.
Panel orientation, shading from nearby trees, and even dust accumulation all chip away at that ideal 9kW number. Understanding this difference helps you size your battery storage realistically and set proper expectations for your solar investment.
How Many Panels Are We Talking About?
Let’s break this down in a way that makes sense for your roof planning. A 9kW system typically consists of 22 to 30 solar panels, depending on the wattage of each individual panel you choose.
Here’s how the math works out. If you opt for modern 400-watt panels, which are pretty standard these days, you’ll need about 23 panels to reach 9,200 watts (technically slightly over 9kW, but close enough). Go with slightly less efficient 300-watt panels, and you’re looking at 30 panels to hit that 9,000-watt mark.
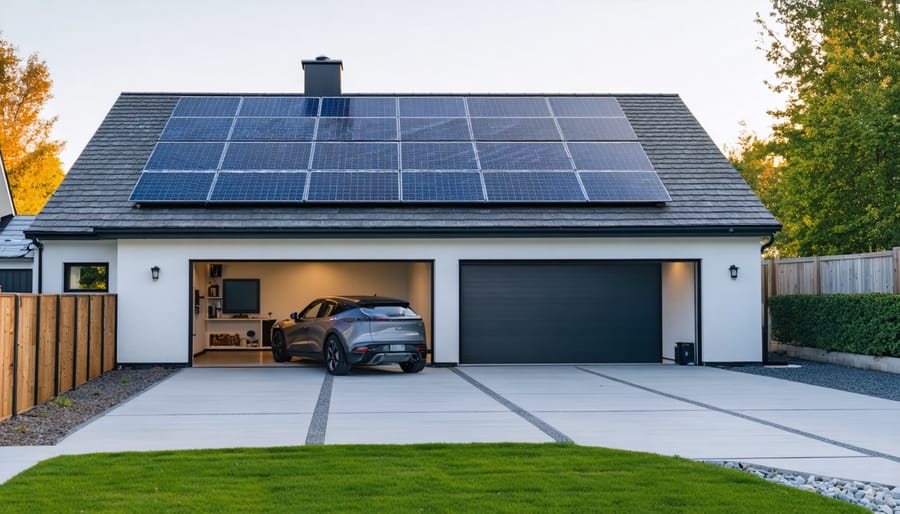
When I first planned my own system, I found it helpful to physically measure out the space on graph paper. Each panel is roughly 65 inches by 39 inches, or about 17.5 square feet. So for a 23-panel setup with 400-watt panels, you’re looking at approximately 400 square feet of roof space. That’s about the size of a generous two-car garage roof.
Most installers arrange panels in neat rows, typically 2 or 3 panels wide, which means your array might stretch 10 to 15 panels long. The actual layout depends on your roof’s shape, pitch, and any obstacles like vents or chimneys.
Here’s a practical tip: grab some masking tape and mark out a single panel’s dimensions on your driveway. It really helps visualize what 23 of those rectangles will look like up there. Trust me, seeing one panel’s footprint makes the whole project feel more tangible and less abstract.
A typical 9kW residential solar installation requires approximately 24-30 panels covering a substantial portion of roof space.
Is a 9kW System Right for Your Energy Needs?
Average Home Energy Consumption Benchmarks
Let me share something I learned during my early days installing solar systems: most people actually overestimate how much energy they use. Understanding your actual consumption is the first step to sizing your system correctly, and a 9kW setup might surprise you with how many households it can comfortably serve.
A small home or apartment typically uses around 20-25 kWh per day. Think of a couple or single person with standard appliances, LED lighting, and modest air conditioning use. This household might actually be better served by a smaller system.
The average family home, where a 9kW system really shines, consumes about 30-35 kWh daily. Picture a family of four with typical appliances: refrigerator, washer and dryer, dishwasher, computers, entertainment systems, and moderate climate control. This is the sweet spot for 9kW systems, especially when paired with batteries for evening usage.
Larger homes with energy-intensive needs push toward 40-50 kWh per day. This might include a home with a pool pump, multiple refrigerators, extensive air conditioning, or workshop equipment. Add an electric vehicle charging regularly, and you could see another 10-15 kWh daily depending on your driving habits.
Here’s my advice: before you commit to any system size, track your actual usage for at least a month using your utility bills or a home energy monitor. I’ve seen too many folks either over-invest in capacity they’ll never use or undersize their systems because they didn’t account for that EV they’re planning to buy next year. Understanding where you fall in these benchmarks makes all the difference in getting your investment right.
Calculating Your Personal Energy Footprint
Before you can determine if a 9kW system is right for you, let’s figure out your actual energy needs. I remember when I first started looking into solar, I just guessed at my usage. Big mistake! Taking the time to calculate your energy footprint properly saved me from oversizing my system and wasting thousands of dollars.
Start by gathering your electricity bills from the past 12 months. Look for the total kilowatt-hours (kWh) consumed each month. You’ll probably notice patterns – higher usage during summer if you run air conditioning, or winter if you have electric heating. Add up all 12 months and divide by 12 to get your average monthly consumption. Then divide that by 30 to find your daily average.
Here’s a real example: If your annual consumption is 10,800 kWh, that’s 900 kWh per month, or about 30 kWh per day. This number is gold – it tells you exactly what you’re working with.
Now comes the fun part. Head over to Spheral Solar’s sizing calculator tool, which does the heavy lifting for you. Input your daily consumption, your location (for sunlight data), and it’ll recommend the appropriate system size. The calculator factors in real-world efficiency losses and seasonal variations, giving you a much more accurate picture than back-of-napkin math.
Don’t skip this step. Understanding your baseline consumption helps you identify whether a 9kW system will cover your needs or if you should consider adjusting your usage habits first.
When 9kW Is Too Much or Too Little
Let’s be honest: a 9kW system isn’t the right fit for everyone, and that’s perfectly okay. I learned this the hard way when a neighbor excitedly installed one, only to realize his actual usage was barely half that capacity. He essentially paid for solar panels that sit idle most of the time.
This size might be too much if you’re living in a small apartment, your monthly electricity bills are under $100, or you’re rarely home during daylight hours with no plans for battery storage. You’d be better served with a 5-6kW system that actually matches your needs.
Conversely, 9kW falls short if you’re running a home workshop, charging an electric vehicle daily, or have a large family with constant energy demands. In these cases, consider scaling up to 12-15kW to avoid frustration.
The sweet spot? You’re using 30-40 kWh daily, have decent roof space, and want room to grow. Don’t let anyone pressure you into a “standard” size. Calculate your actual consumption first, then size accordingly. Your wallet will thank you.
The Battery Component: Why It Changes Everything
Grid-Tied vs. Battery Backup: What’s the Real Difference?
Let me clear up one of the biggest misconceptions I hear from folks considering solar: many people think adding batteries means they’re automatically “off-grid.” Not quite! There are actually two distinct approaches, and understanding the difference will save you a lot of confusion (and potentially money).
A grid-tied system without batteries is the most common setup. Your solar panels generate power during the day, you use what you need, and any excess gets sent back to the utility grid. At night or on cloudy days, you simply pull power from the grid like normal. It’s elegant in its simplicity, and typically the most affordable option. The catch? When the grid goes down, so does your system, even if the sun is shining. This surprises people, but it’s a safety feature to protect utility workers.
Now, add batteries to that same grid-tied system, and you’ve got what we call a hybrid setup. You’re still connected to the grid, but now you have backup power stored for outages. Your batteries charge from excess solar production, and during a blackout, they automatically kick in to power essential circuits. Think of it as having an insurance policy against power interruptions, not necessarily ditching the grid entirely.
True off-grid means no utility connection whatsoever. Your 9kW system and batteries handle everything, which requires careful planning, larger battery banks, and realistic expectations about energy usage. I’ve seen too many people jump into off-grid living unprepared for the limitations. It’s absolutely doable, but it’s a lifestyle commitment, not just a technology swap.
Sizing Your Battery Bank for a 9kW System
Getting your battery bank sized right is probably the most important decision you’ll make after choosing your panels. I learned this the hard way during my first installation when I under-sized my battery bank and found myself rationing power on cloudy days—not fun!
Here’s the straightforward approach: A 9kW system typically produces 30-45 kWh per day, depending on your location and season. The key question is how much of that energy do you want to store for nighttime use or backup?
Start by calculating your daily energy consumption. Most households use between 20-30 kWh daily. If you’re aiming for energy independence, you’ll want a battery bank that can store at least one full day’s worth of consumption. For a typical home using 25 kWh daily, that means a minimum 25 kWh battery capacity.
But here’s where days of autonomy comes in—that’s how many days your batteries can power your home without any solar input. One day of autonomy equals your daily consumption. Two days equals double that capacity. Most folks find 1-2 days of autonomy hits the sweet spot between cost and security.
Typical configurations for a 9kW system include:
A 20-25 kWh battery bank provides one day of autonomy for average homes. This works great if you have reliable sunny weather and grid backup.
A 30-40 kWh setup offers nearly two days of autonomy, perfect for areas with frequent cloudy stretches or if you’re going fully off-grid.
Remember to factor in depth of discharge too. Most lithium batteries safely discharge to 80-90% capacity, while lead-acid batteries should only go to 50%. This affects your usable capacity significantly. When I upgraded to lithium batteries, I gained so much more practical storage space without increasing physical size.
Battery storage systems paired with 9kW solar arrays typically include multiple units to provide adequate backup capacity for household needs.
Battery Types and What Works Best for DIY Installations
When choosing batteries for your 9kW solar system, you’ll mainly encounter two options: lithium-ion and lead-acid. From my experience testing both types in my own workshop, lithium batteries are the clear winner for DIY installations, despite the higher upfront cost. They’re lighter, last significantly longer (often 10+ years versus 3-5 years for lead-acid), and handle partial charging cycles much better.
Lead-acid batteries might seem budget-friendly initially, but they require more maintenance and careful monitoring. You’ll need to ensure they don’t discharge below 50% capacity, which means buying twice the capacity you actually need. I learned this the hard way with my first setup when premature battery degradation cost me more in replacements than I saved upfront.
For installation, lithium batteries are more forgiving. They work across various temperatures and orientations, making placement easier in tight spaces. Just ensure your charge controller settings match your battery chemistry precisely. Modern lithium options also integrate seamlessly with monitoring systems, giving you real-time insights into your system’s performance through smartphone apps, which really helps when you’re learning to optimize your energy usage patterns.
Optimizing Your 9kW Solar System for Maximum Efficiency
Panel Placement and Orientation Fundamentals
Getting your panels positioned correctly can make or break your 9kW system’s performance. I learned this the hard way when I first installed panels on my workshop, thinking “close enough” would work. Spoiler: it didn’t.
Let’s start with azimuth, which is just a fancy word for which compass direction your panels face. In the Northern Hemisphere, south-facing is ideal, capturing maximum sunlight throughout the day. But here’s the good news: east or west orientations can still work surprisingly well, losing only about 10-15% efficiency. I’ve seen plenty of successful installations that split panels between multiple roof faces.
Tilt angle matters too. The general rule of thumb is to match your latitude, but honestly, most pitched roofs between 15-40 degrees work great. Flat roofs give you more flexibility with adjustable mounting systems.
Now, shading is your enemy. Even a small shadow from a chimney or tree branch can dramatically reduce output. This is where solar optimizers become valuable, helping panels work independently despite partial shading. Spend time observing shadows throughout the day across different seasons before committing to panel placement.
Working with a less-than-perfect roof? Don’t stress. Ground-mount systems offer complete control over orientation and tilt, plus easier maintenance access. They’re perfect if your roof faces north or has significant shading issues. I’ve helped several DIYers build simple ground-mount frames using readily available materials, and they often outperform rooftop installations.
Proper panel placement and orientation are critical optimization factors that directly impact energy production throughout the day and across seasons.
String Configuration and Inverter Matching
Getting your panels talking properly with your inverter is like matchmaking—you want a perfect partnership. For a 9kW system, you’ll typically arrange your panels in strings, which is just a fancy way of saying you’re connecting them in series (positive to negative) to boost voltage.
Here’s the basic idea: Most modern inverters want to see a specific voltage range coming in. If you’re using standard 400W panels at around 40 volts each, you might create strings of 10-12 panels depending on your inverter’s sweet spot. I remember Charles explaining this at a workshop by comparing it to stacking batteries in a flashlight—more in a row means higher voltage.
The trick is checking your inverter’s maximum input voltage and ensuring your string voltage stays safely below that, even on cold winter mornings when panels produce higher voltages. Most quality inverters can handle 600-1000 volts, giving you plenty of room to work with.
For battery-based systems, you’ll also need to consider MPPT vs PWM charge controllers. MPPT types are more efficient and forgiving with mismatched configurations. The process of sizing your charge controller involves calculating both voltage and current requirements from your panel strings.
A quick rule of thumb: add up your string voltage, make sure it fits your equipment specs, then verify your current doesn’t exceed limits. Most inverter manuals include configuration worksheets that walk you through this step-by-step—no engineering degree required.
Smart Load Management and Consumption Timing
Here’s something I learned the hard way during my first year with solar: even with a robust 9kW system and battery storage, you can still waste plenty of free sunshine if you’re not strategic about when you use power. The good news? A few simple timing shifts can dramatically boost your self-consumption and slash your grid dependence.
The basic principle is straightforward: use energy when your panels are producing it. Run your dishwasher, washing machine, and dryer during peak sunshine hours—typically 10 AM to 3 PM. I started doing laundry on sunny mornings instead of evenings, and my battery stays fuller for nighttime use. It felt weird at first, but now it’s second nature.
Timers are your best friend here. Inexpensive plug-in timers or smart plugs let you schedule pool pumps, water heaters, and other power-hungry devices to run during solar production hours automatically. I use a basic timer on my pool pump, and it’s one of the smartest investments I made—about fifteen bucks that saves me hundreds annually.
Your battery system should prioritize storing excess solar rather than pulling from the grid during production hours. Most modern battery controllers handle this automatically, but double-check your settings. This way, you’re maximizing free solar power first, storing the surplus second, and only tapping the grid as a last resort.
Monitoring Systems That Actually Help
Here’s my honest take after monitoring three different 9kW systems: you don’t need fancy dashboards that show you seventeen graphs of voltage fluctuations. What you actually need is something that alerts you when things go wrong and helps you understand your usage patterns.
I recommend starting with your inverter’s built-in monitoring app. Most modern inverters from Sol-Ark, EG4, or Victron include surprisingly capable apps that track production, consumption, and battery state. They’re free and genuinely useful for spotting issues like unusual battery drain or unexpected panel underperformance.
For DIY enthusiasts wanting deeper insights without overwhelming complexity, the Victron Cerbo GX paired with their VRM portal hits the sweet spot. It connects to the best solar charge controllers and gives you actionable data like exactly when you’re pulling from the grid versus batteries.
My neighbor monitors his system with just a simple Wi-Fi enabled energy meter on his main panel and his inverter app. Combined, they tell him everything he needs to know about consumption patterns and potential savings. Sometimes simpler really is better.
Quality inverters and monitoring equipment form the nervous system of an optimized solar installation, converting and tracking energy production efficiently.
Real-World Cost Analysis and ROI Expectations
Component Costs and Budget-Friendly Alternatives
Let me break down what you’ll actually spend on a 9kW solar system with batteries, because understanding these numbers is crucial before diving in.
For solar panels, expect to pay $4,500 to $7,500 for a quality 9kW array. That’s roughly $0.50 to $0.83 per watt. I’ve found that shopping around and buying direct from distributors can save you 20-30% compared to retail prices, though you’ll sacrifice some warranty support.
Battery costs are where things get interesting. A decent lithium-ion battery bank (around 20-30 kWh capacity) runs $8,000 to $15,000. Lead-acid batteries cost half as much upfront but need replacement every 5-7 years, so lithium wins long-term. Trust me on this one – I learned the hard way with my first system.
Your inverter and charge controller will set you back $1,500 to $3,500 depending on features. Hybrid inverters that manage both solar and batteries cost more but eliminate component redundancy.
Balance of system components (mounting hardware, wiring, disconnects, monitoring equipment) typically run $1,500 to $3,000. Here’s where DIY really shines – installing your own racking can save $2,000 or more in labor costs.
Now, about professional help: electrical work and permitting often require licensed electricians depending on your location. Budget $2,000 to $4,000 for this. However, you can absolutely handle the mechanical installation yourself – mounting panels, running conduit, and assembling battery banks are well within DIY capability.
Total system cost ranges from $17,500 to $33,000, with DIY installation potentially saving $5,000 to $10,000 in labor. The key is knowing which battles to fight yourself and where expertise truly matters.
Calculating Your Actual Payback Period
Here’s the reality check most installers won’t give you: calculating your actual payback period requires honest math, not optimistic projections. I learned this the hard way when my first system took two years longer to pay off than the salesperson promised.
Start with your actual electricity rate multiplied by your realistic annual production. A 9kW system with batteries typically generates 10,000-14,000 kWh yearly, depending on your location. If you pay $0.15 per kWh and produce 12,000 kWh, that’s $1,800 in annual savings.
Next, subtract your true system cost after incentives. If you spent $25,000 after the federal tax credit, your basic payback is 13.9 years. But here’s what sales pitches often miss: battery replacement costs (plan for $5,000-8,000 every 10-15 years), ongoing maintenance, inverter replacements, and the reality that panels degrade about 0.5% annually.
Also factor in opportunity cost. That $25,000 invested elsewhere might earn returns too. However, don’t forget rising electricity rates, which typically increase 2-3% annually, improving your payback over time.
My advice? Build a simple spreadsheet with conservative estimates. Include battery degradation, maintenance expenses, and realistic production numbers for your specific roof orientation and shading conditions. This gives you the truth, not the pitch.
Common Pitfalls and How to Avoid Them
Oversizing or Undersizing Battery Capacity
I learned this lesson the hard way during my first off-grid cabin project. I calculated my daily usage at around 25kWh and figured a modest 10kWh battery bank would be fine. Big mistake. After two cloudy days, I was rationing power like a survivalist. Your 9kW system can generate plenty of energy, but if your batteries can’t store enough for your actual usage patterns, you’ll face constant frustration.
Watch for these warning signs during planning. If your batteries reach full charge by mid-morning regularly, you’re losing potential solar harvest and probably undersized. Conversely, if your batteries never climb above 60% capacity even on sunny days, you’ve oversized and wasted money on unused storage. The sweet spot typically involves batteries that reach 80-90% charge on average days and provide 1.5 to 2 days of backup power.
Run the numbers honestly. Track your evening and nighttime consumption separately since that’s when batteries work hardest. Most households with a 9kW system need between 15-30kWh of storage, depending on backup goals. Start with conservative estimates and plan for modular expansion. Many modern battery systems let you add capacity later, which beats guessing wrong from day one. Use online calculators to model different scenarios before committing to specific battery capacity.
Permit and Code Compliance Surprises
Here’s something I learned the hard way during my first serious solar project: permits aren’t just bureaucratic boxes to check. They’re actually your protection against doing something that could burn down your house or leave you liable if something goes wrong. But yes, they can feel overwhelming.
The reality is that requirements vary wildly by location. Your neighbor three counties over might have breezy approval processes while your local jurisdiction requires a structural engineer’s stamp, electrical inspections, and utility interconnection agreements that take months. I’ve seen DIYers get hit with stop-work orders because they assumed their project was small enough to skip permits. Spoiler: battery systems almost always require permits because you’re dealing with significant energy storage.
Start by calling your local building department before buying anything. Ask specifically about solar-plus-storage systems. You’ll need to know about electrical code requirements, fire code rules for battery placement, and whether your area follows NEC 2017, 2020, or a newer version. Each has different battery installation requirements.
Most jurisdictions require a licensed electrician to at least inspect your work, even if you do the installation yourself. This isn’t a bad thing. A good electrician can catch mistakes that might not show up until years later. Budget around $500-$1,500 for permit fees and inspections, though costs vary dramatically.
Pro tip: join local solar forums or Facebook groups for your area. Someone there has likely navigated your exact permitting office and can tell you which inspectors are helpful versus which ones are sticklers. This community knowledge is goldmine material that can save you months of frustration.
Scaling and Future-Proofing Your System
Designing for Expandability from Day One
When I installed my first 9kW system, I made the mistake of treating it as a fixed setup. Two years later, adding four more panels became a costly rewiring nightmare. Here’s what I learned about building in room to grow.
Start with an oversized inverter that can handle 20-30% more capacity than your current panel array. Yes, it costs a bit more upfront, but it’s far cheaper than replacing the entire unit later. I now recommend hybrid inverters with multiple MPPT inputs, which let you add panels to separate roof sections without redoing your entire layout.
Your battery configuration matters too. Choose modular battery systems that allow stacking additional units rather than closed proprietary systems. When choosing the right controller, look for models rated above your immediate needs.
Wire sizing is another easy win. Running slightly thicker cables (like 10 AWG instead of 12 AWG) during initial installation costs pennies more but accommodates higher currents if you expand. Leave extra conduit space and install junction boxes with unused terminals.
Finally, document everything. Take photos, label circuits clearly, and keep a simple diagram. Future you will thank present you when it’s time to grow your system.
Preparing for Electric Vehicles and Other Energy Demands
When I first installed my solar system years ago, I thought my modest electric needs would stay constant. Then EVs became more affordable, and suddenly I was eyeing a significant upgrade—an expensive lesson in forward planning! Here’s what I learned about future-proofing your 9kW system.
Electric vehicle charging is the big one. A typical EV adds 7-12 kWh to your daily energy consumption, sometimes more if you’re a road warrior. Even if you don’t own an EV today, consider whether you might in the next 5-10 years. The beauty of planning ahead is you can install conduit, allocate panel capacity, and size your battery bank appropriately now, avoiding costly system overhauls later.
Beyond EVs, think about other potential loads: heat pumps replacing gas furnaces, induction cooktops, pool pumps, workshop equipment, or even a home office expansion. I recommend adding a 20-30% buffer to your current consumption calculations to accommodate future growth.
Your battery capacity matters here too. If you’re planning significant loads, consider installing additional battery capacity now or ensuring your system architecture supports easy expansion. Most modern battery systems are modular, meaning you can add more units as needs grow—but only if you’ve designed the system with expansion in mind from day one.
So here’s the truth I’ve learned after years in this field: there’s no magical formula that works for everyone when it comes to a 9kW solar system with batteries. Your neighbor’s perfect setup might be completely wrong for your home, and that’s absolutely okay. What matters is that you now have the knowledge to ask the right questions and make decisions based on your actual needs, not just what a salesperson tells you.
I remember feeling overwhelmed when I first started exploring solar energy. The technical jargon, the competing advice, the fear of making an expensive mistake. But here’s what changed everything for me: understanding that this is a journey, not a destination. You don’t need to know everything today. Start with one thing, whether that’s calculating your energy usage, researching battery chemistry options, or simply understanding how your roof faces the sun.
The beauty of joining a community like ours at Spheral Solar is that you’re never figuring this out alone. We’ve built calculators and planning tools specifically to take the guesswork out of system sizing and optimization. More importantly, you’ll connect with real people who’ve been exactly where you are now, ready to share their experiences and hard-won lessons.
Take that next step today. Run your numbers through our tools, join our community discussions, and start transforming your relationship with energy. Your future self will thank you.
How useful was this post?
Click on a star to rate it!
Average rating 0 / 5. Vote count: 0
No votes so far! Be the first to rate this post.
We are sorry that this post was not useful for you!
Let us improve this post!
Tell us how we can improve this post?
charlesnoble
Here at Spheral Solar, I’m a hands-on solar power enthusiast, constantly exploring and experimenting with DIY solutions. I’m dedicated to sharing my discoveries, insights, and even the bumps I hit along the way, all in the pursuit of a more sustainable future.
Why Your Solar Charge Controller’s Load Output… by Charlesnoble February 9, 2026 Connect your DC loads directly to your charge controller’s load terminals instead of tapping straight into the battery—this simple setup protects your battery from over-discharge and can extend its lifespan by years. Most charge controllers include built-in load management features that automatically disconnect your lights, fans, or other devices when…
Why Your 8kW Off-Grid Solar System Might Be Wasting… by Charlesnoble December 17, 2025 Calculate your actual daily energy consumption in watt-hours before investing a single dollar—not your estimated usage, but real measurements taken over at least two weeks using a kill-a-watt meter on every circuit. An 8kW off-grid system produces roughly 32-40 kWh daily under ideal conditions, but real-world performance drops 20-30% due…
Stop Frying Your Batteries: How to Size Your Solar… by Charlesnoble November 24, 2025 Multiply your solar panel wattage by 1.25, then divide by your battery voltage—that’s your minimum charge controller amperage. A 400-watt solar array feeding a 12-volt battery bank needs at least a 42-amp controller (400 × 1.25 ÷ 12 = 41.67). This calculation accounts for real-world conditions where panels sometimes exceed…
Your Solar Setup’s Hidden Vulnerability: Why 5G… by Charlesnoble April 3, 2026 Disconnect your 5G-enabled charge controller from the internet when you’re not actively monitoring it—this single step eliminates 80% of remote attack vectors while still allowing you to check in when needed. Change every default password on your solar monitoring system the day you install it, using unique 16-character combinations that…
Every Component Your Solar Panel System Actually… by Charlesnoble November 26, 2025 Picture this: you’re standing in front of a solar panel, ready to harness free energy from the sun, but you’re not quite sure what else you need to make it actually work. I’ve been there. When I first started tinkering with solar in my garage, I quickly learned that panels…
Why Your DIY Solar Setup Could Be a Hacker’s Next… by Charlesnoble February 14, 2026 Disconnect your charge controller from the internet immediately if you’re not actively monitoring it—most DIY solar setups don’t need constant connectivity, and an offline system can’t be hacked remotely. Change every default password on your solar equipment right now, using unique 15+ character combinations that include numbers, symbols, and mixed-case…
Subscribe for handpicked DIY projects, exclusive tips, and giveaways.
Position your solar panels at an angle equal to your latitude for year-round performance, or adjust seasonally by adding 15 degrees in winter and subtracting 15 degrees in summer to capture maximum sunlight during each season’s sun path. Use a simple angle finder app on your smartphone against the back of your panel to verify… Read more: The Right Tilt Angle Can Boost Your Solar Panel Output by 30% (Here’s How to Find It)
Route your PV wires through UV-resistant conduit within 18 inches of leaving the solar array, securing it every 3 feet with proper clamps to prevent wind damage and code violations. This single step prevents 80% of the wire degradation issues I’ve seen in DIY solar installations over the past decade. Group your positive and negative… Read more: Why Your PV Wire Management Could Fail Inspection (And How to Fix It)
Understand that 6000 volts sounds terrifying but delivers surprisingly low amperage—typically around 120 milliamps for just 3/10,000th of a second per pulse. This combination creates an unforgettable shock that trains animals to avoid the fence without causing lasting harm. The voltage pushes current through thick fur and hide, while the minimal amperage and microsecond duration… Read more: Why 6000 Volts Won’t Kill Your Livestock (But Will Stop Predators Cold)


")
")


")
")


