Why Solar Alone Isn’t Enough: Five Energy Sources That Complete Your Off-Grid System
Updated:
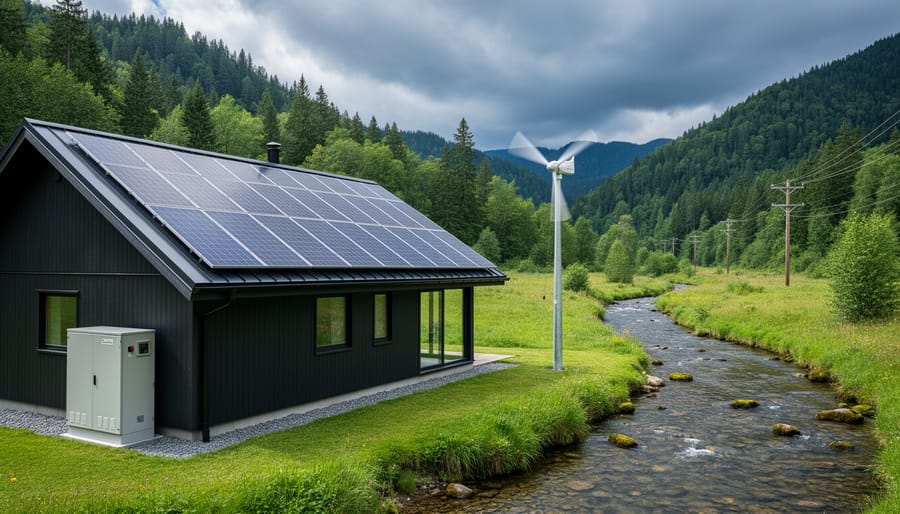
Combine multiple power sources to create a resilient energy system that keeps your home running when solar panels can’t produce electricity. Start by identifying which backup sources match your property’s natural resources—flowing water, consistent wind, or reliable grid access—then layer them strategically so you’re never dependent on a single energy supply. This approach transforms solar from an isolated system into the cornerstone of a hybrid setup that works around the clock and through every season.
When I began building an energy-independent home, I quickly learned that solar alone couldn’t cover my needs during our Pacific Northwest’s gray winters. The solution wasn’t abandoning solar but complementing it with four additional energy sources that filled the gaps. Grid connection handled extended cloudy periods, battery storage captured excess production for nighttime use, and a small wind turbine generated power during winter storms when solar output dropped to nearly nothing.
Understanding these five electrical energy sources gives you the knowledge to design a power system tailored to your specific situation. You’ll learn which sources work best for your climate, property size, and energy goals, plus how to integrate them so they support rather than compete with each other. Whether you’re planning a complete off-grid setup or just want reliable backup power during outages, knowing your options helps you build smarter and avoid costly mistakes.
This practical guide breaks down each energy source with honest assessments of costs, complexity, and real-world performance, so you can make informed decisions about your energy future.
Understanding Electrical Integration with Solar Systems
When I first started exploring solar energy, I thought installing panels would solve all my power needs. Reality check: solar alone isn’t always enough. That’s where electrical integration comes in, and it’s simpler than it sounds.
Think of electrical integration like building a well-stocked pantry. You wouldn’t rely on just one type of food, right? The same principle applies to your power system. Integration means connecting different energy sources so they work together seamlessly, creating what we call a hybrid system. When the sun isn’t shining, other sources kick in automatically.
Here’s why this matters for your DIY projects: solar panels are fantastic during sunny days, but what about cloudy weeks or nighttime? Understanding how solar power works helps you appreciate why backup sources aren’t just nice to have—they’re essential for true energy independence.
A hybrid system doesn’t mean you need five generators running simultaneously. Instead, it’s about creating smart connections between your solar array and complementary sources like battery storage, grid power, or even a small wind turbine. These components communicate through your system’s control center, automatically drawing from the most efficient source at any given moment.
The beauty of integration is resilience. I learned this during a three-day storm that knocked out both sunshine and grid power. Neighbors without backup systems were in the dark, but my integrated setup switched to stored battery power without missing a beat. That’s the peace of mind you’re building toward.
For DIYers, modern integration doesn’t require an engineering degree. Today’s charge controllers and inverters handle the technical switching automatically. Your job is understanding which sources complement your solar setup best and ensuring they’re properly connected. The system does the heavy lifting while you enjoy reliable, renewable power regardless of weather conditions.
Modern solar systems integrate multiple energy sources including battery storage to create reliable off-grid power solutions.
Grid Power: Your Most Reliable Backup Partner
How Grid Integration Actually Works
Connecting your solar system to the grid isn’t as intimidating as it sounds, but it does require understanding the right equipment and following proper safety protocols. Let me walk you through how this actually works.
The heart of grid integration is your inverter. This device converts the DC power from your solar panels into AC power that matches your home’s electrical system and the grid. For grid-tied systems, you’ll need a grid-tie inverter specifically, which synchronizes with the utility’s frequency and voltage. Think of it as a translator that ensures your solar power speaks the same language as the grid.
Next comes the bi-directional meter, which your utility company typically installs. This clever device tracks both the electricity you pull from the grid and what you push back when your panels produce excess power. During sunny afternoons when my panels were cranking out more power than I needed, watching that meter spin backwards was genuinely satisfying.
The connection process requires several safety components. An automatic disconnect switch is mandatory, shutting down your system if the grid goes down to protect utility workers. You’ll also need proper grounding, circuit breakers, and potentially a production meter to track your solar output separately.
Here’s the reality check: while understanding the process is valuable, actual professional solar integration requires licensed electricians and utility approval. Grid interconnection involves permits, inspections, and compliance with local electrical codes. DIYers can absolutely handle the solar panel installation and wiring, but the final grid connection must meet strict safety standards and regulatory requirements for good reason.
When Grid Backup Makes Sense for Your Solar Setup
Let me be honest from my own experience: staying grid-connected alongside your solar setup is often the smartest move, especially when you’re starting out. I learned this after my first winter when cloudy weeks had me nervously checking my battery levels daily.
Grid backup shines in several practical scenarios. If you live in an area with net metering, you’re essentially using the grid as a free battery, sending excess power during sunny days and drawing it back when needed. This eliminates the upfront cost of expensive battery banks, which can run $10,000-$15,000 for a whole-home system.
It also makes sense if your energy needs fluctuate significantly. Running power tools in your workshop, hosting family gatherings, or dealing with seasonal heating and cooling demands means your usage isn’t consistent. The grid handles these spikes effortlessly without requiring you to oversize your solar array and storage.
Reliability is another key factor. While batteries degrade over time and require maintenance, the grid typically delivers 99.9% uptime. For anyone working from home or running medical equipment, that peace of mind is invaluable.
The sweet spot? Use solar to offset 80-90% of your usage while keeping grid connection for those edge cases. You’ll maximize savings without the stress of going completely off-grid before you’re ready.
Battery Storage: Solar’s Perfect Companion
Choosing the Right Battery Bank Size
Getting the right battery bank size isn’t about guessing—it’s about understanding your actual power needs. I learned this the hard way on my first off-grid cabin project when I drastically underestimated my storage requirements and ended up in the dark by day three!
Here’s the straightforward approach I now use with every project. Start by listing everything you want to run during a power outage or off-grid situation. Write down each device and how many hours per day you’ll use it. A refrigerator might run 8 hours total, LED lights maybe 4 hours, your laptop 3 hours. Multiply the wattage of each device by its hours of use to get watt-hours, then add everything up.
Now here’s the crucial part: multiply your total by at least 2, preferably 3. Why? Because you never want to discharge lead-acid batteries below 50 percent, and you need backup capacity for cloudy days. If your daily consumption is 2,000 watt-hours, you really need 4,000 to 6,000 watt-hours of storage.
Our interactive calculator on the site does all this math for you automatically. Just plug in your appliances and usage times, and it accounts for battery type, depth of discharge limits, and even seasonal variations. I use it for every client consultation because it prevents the expensive mistake of undersizing your system.
Remember, it’s usually better to start smaller and add capacity later than to overbuild from the start.
Common Battery Integration Mistakes to Avoid
I’ve learned a lot from fellow DIYers in our community, and honestly, some of the best lessons come from mistakes we’ve made along the way. Let me share what I’ve seen trip people up most often with battery integration.
The biggest mistake? Undersizing your battery bank. I remember Charles telling me about his first setup where he calculated his daily usage but forgot to account for cloudy days or increased winter consumption. He ended up running his batteries down to dangerously low levels regularly, which shortened their lifespan dramatically. A good rule of thumb is to size your battery bank for at least three days of autonomy, not just one.
Charging configuration errors are another common pitfall. Your charge controller settings need to match your specific battery chemistry. Using lithium battery settings on flooded lead-acid batteries, or vice versa, can lead to overcharging, undercharging, or even safety hazards. Always double-check those settings before your first charge cycle.
Then there’s the maintenance oversight issue. Even sealed batteries need monitoring. Temperature extremes affect performance, connections can corrode, and voltage imbalances between batteries in a bank can develop over time. Set calendar reminders to check your system quarterly at minimum.
Finally, many folks forget about proper ventilation for battery enclosures, especially with flooded lead-acid batteries that can release hydrogen gas. This isn’t just about performance, it’s about safety. Always follow manufacturer guidelines for spacing and airflow, even if it means redesigning your battery cabinet.
Wind Power: When the Sun Isn’t Shining
Battery storage systems work alongside solar panels to provide power during nighttime and cloudy conditions.
Integrating Wind Turbines with Your Solar Array
So you’re thinking about adding wind to your solar setup? I’ll be honest—I spent months researching this before realizing wind wasn’t right for my location, but that experience taught me exactly what to look for.
The key piece of equipment is a hybrid charge controller that can manage both solar panels and a wind turbine simultaneously. These controllers are smarter than standard solar controllers because they handle the different voltage characteristics of wind turbines, which can spike during high winds. Look for controllers rated for both power sources, typically in the 400-600 watt range for small residential setups.
Wiring requires some extra attention. Wind turbines generate three-phase AC power that needs converting to DC before reaching your battery bank. Most small turbines include a rectifier for this, but you’ll need heavier gauge wire than you’d expect—I recommend 10 AWG minimum for runs under 50 feet. Always include a dump load resistor to absorb excess energy during high winds when your batteries are full.
Here’s the practical reality check: wind only makes sense if you have consistent wind speeds above 10 mph. I used a simple anemometer app on my phone for a month and discovered my property averaged just 6 mph—not worth the investment. Coastal areas, hilltops, and open plains are ideal. Urban and suburban locations typically don’t have enough unobstructed wind to justify the cost.
Also consider noise and neighbors. Even small turbines create a whooshing sound that carries surprisingly far at night.
Generator Backup: Insurance for Extended Low-Production Periods
Wind turbines complement solar arrays by generating power during nighttime and winter months when solar production is lower.
Setting Up Automatic Generator Integration
Creating a seamless hybrid system where your generator automatically kicks in when battery levels dip is easier than you might think. Most modern charge controllers include relay outputs or programmable settings that trigger external devices based on battery voltage. Here’s how I set mine up, and you can too.
First, determine your low-battery threshold. I typically set mine to activate the generator when batteries reach 50% capacity, which prevents deep discharge damage while giving me plenty of reserve. Next, connect your charge controller’s relay output to your generator’s automatic start system. Many generators designed for off-grid use include this feature, or you can install an aftermarket auto-start module for around $150-300.
Program your charge controller through its display or smartphone app to close the relay when voltage drops below your threshold. The generator fires up, charges your batteries back to 80-90%, then automatically shuts off. This way, you’re only running the generator when absolutely necessary, saving fuel and wear.
For those without auto-start generators, you can install a simple alarm system that alerts you when battery voltage drops. It’s not fully automatic, but it works reliably and costs significantly less. The key is monitoring and responding before your batteries reach critical levels.
Fuel Efficiency and Maintenance for Solar-Generator Hybrids
The key to getting the most from a solar-generator hybrid is smart management. I learned this the hard way during a week-long camping trip where I ran my generator way more than necessary because I hadn’t properly sized my solar array. Now I follow a simple rule: let solar handle your daytime and trickle loads, reserve the generator only for heavy lifting or emergencies.
Start by calculating your average daily consumption and aim for solar panels that cover at least 70-80% of that need during peak sun hours. This means your generator only kicks in during cloudy stretches or when you’re running power-hungry tools. I’ve found that pairing a 400-watt solar setup with a modest 2000-watt inverter generator works beautifully for most RV applications.
Here’s my maintenance routine that’s kept costs down: run your generator under load for at least 30 minutes monthly, even if you don’t need it. This prevents carburetor gumming and keeps seals fresh. Use fuel stabilizer religiously, and drain the carburetor if storing longer than two months.
Position your solar panels to capture morning sun first since that’s when batteries are typically most depleted. During one installation for a friend’s off-grid cabin, we angled panels eastward and reduced his generator runtime by 40% compared to his south-facing setup. Small adjustments make big differences in real-world efficiency.
Micro-Hydro: The Hidden Gem for Property Owners with Water Features
Backup generators integrate with solar systems to automatically charge batteries during extended periods of low solar production.
Assessing Your Property for Micro-Hydro Potential
Before investing in micro-hydro equipment, you need to determine if your property can actually support it. The good news? The initial assessment is surprisingly straightforward.
Start with the flow test. Place a bucket of known volume (say, 5 gallons) under your stream during different seasons. Time how long it takes to fill. You’ll need consistent flow year-round, ideally at least 10-20 gallons per minute for even small systems. I learned this the hard way when a friend’s promising summer stream became a trickle by October.
Next, measure your head, which is the vertical drop between where you’ll divert water and where the turbine sits. Even 10 feet of drop can generate usable power with sufficient flow. Use a simple leveling app on your smartphone or a transparent hose filled with water to measure elevation changes.
Here’s where things get serious: permits and environmental considerations. Most jurisdictions require water rights documentation, and you’ll need to maintain adequate flow for downstream ecosystems. Contact your local environmental agency early in the planning process. They’re usually helpful and can prevent costly mistakes.
Consider fish passage requirements and seasonal wildlife needs. A responsible micro-hydro setup actually enhances your property’s ecological value while generating clean power.
Connecting Micro-Hydro to Your Solar System
Integrating micro-hydro with your existing solar setup is simpler than you might think. The key piece of equipment you’ll need is a hybrid charge controller that can handle multiple input sources simultaneously. These smart controllers manage power from both your solar panels and micro-hydro turbine, directing energy to your battery bank without conflict.
I learned this the hard way when I first tried connecting my creek turbine directly alongside my solar array. The two systems fought each other until I upgraded to a proper hybrid controller. Now they work in perfect harmony, with the micro-hydro providing steady nighttime charging while solar takes over during the day.
Look for controllers that support 24-hour energy harvesting and automatic source prioritization. Most quality units will also include load management features that optimize battery charging based on which source is producing more power at any given moment. This means your batteries stay topped off regardless of weather conditions or time of day, creating a truly resilient power system that keeps running when single-source setups would fail.
Building Your Multi-Source Solar System: Practical Next Steps
Now that you understand the five complementary energy sources that can work alongside your solar setup, let’s talk about how to choose the right combination for your unique situation. I’ve learned through countless conversations with DIYers that there’s no one-size-fits-all solution here, but there is a logical way to think through your options.
Start by honestly assessing your location and what it offers. If you’re connected to reliable grid power, that’s your simplest backup right there. Living somewhere with consistent wind? A small turbine might make sense. Got a stream running through your property? You’re one of the lucky few who should explore micro-hydro. The key is working with what nature gives you rather than fighting against it.
Next, calculate your actual energy needs. Our solar calculator can help you determine your daily consumption in kilowatt-hours. Once you know this number, you can size your battery bank accordingly. A good rule of thumb I share with beginners is to start with enough battery capacity for two days of autonomy. This gives you breathing room without breaking the bank.
Budget matters, so be realistic. Grid connection is cheapest if available. Battery storage has become more affordable but still represents a significant investment. Wind and micro-hydro require upfront costs but can pay dividends if conditions are right. Generator fuel adds up over time, so factor in ongoing expenses, not just initial purchase price.
Here’s my decision-making framework: Begin with solar as your primary source, add battery storage for energy independence, maintain grid connection if possible for backup, then consider adding wind or hydro if your site has consistent resources. A generator serves as your emergency fallback regardless of your setup.
Use the energy audit worksheet on our resources page to map out your consumption patterns throughout the day. This reveals when you need power most and helps you design a system that matches your lifestyle rather than forcing you to adapt to your system’s limitations. Remember, building a multi-source system is a journey, not a destination. Start simple and expand as you gain experience and confidence.
Here’s what I’ve learned from years of tinkering with solar systems: relying on a single energy source is like having only one leg on a stool. It works until it doesn’t. The real magic happens when you combine multiple sources into an integrated system that covers your needs rain or shine, day or night.
I remember the first time I added battery storage to my basic solar setup. That feeling of having power after sunset, knowing I wasn’t completely dependent on perfect weather, gave me genuine peace of mind. Your integrated energy system doesn’t need to be complex from day one. Start small. Maybe add a battery bank first, then consider grid connection as backup, or explore a small wind turbine if you’ve got the breeze for it.
The beauty of building an integrated system is that you can expand gradually as your budget and confidence grow. Each addition makes your entire setup more resilient and reliable.
I’d love to hear about your own integration journey. What combination of energy sources are you using or planning? What challenges have you encountered? Join our community and share your experiences. Your story might be exactly what another DIYer needs to hear to take that next step toward energy independence.
How useful was this post?
Click on a star to rate it!
Average rating 0 / 5. Vote count: 0
No votes so far! Be the first to rate this post.
We are sorry that this post was not useful for you!
Let us improve this post!
Tell us how we can improve this post?
charlesnoble
Here at Spheral Solar, I’m a hands-on solar power enthusiast, constantly exploring and experimenting with DIY solutions. I’m dedicated to sharing my discoveries, insights, and even the bumps I hit along the way, all in the pursuit of a more sustainable future.
Six Energy Sources That Work With Your Solar Panels… by Charlesnoble December 16, 2025 Harness the sun’s energy streaming onto your roof right now—solar panels convert sunlight into electricity that powers your home while slashing monthly utility bills. Capture moving air with residential wind turbines mounted on your property, generating supplemental power during breezy days and nights when solar production drops. Tap into the…
Why Your Rooftop Solar Installation Needs… by Charlesnoble January 28, 2026 Seal every penetration point where your solar mounting hardware breaks through the deck surface with marine-grade polyurethane caulk rated for continuous UV exposure and thermal cycling. I learned this the hard way after my first DIY installation when I assumed standard silicone would suffice—three months later, I discovered water pooling…
How Sunlight Becomes Electricity in Your Home (The… by Charlesnoble November 3, 2025 Understand the photovoltaic effect—when sunlight hits solar panels, photons knock electrons loose from silicon atoms, creating an electrical current through a principle Einstein won a Nobel Prize for discovering. Your solar panels generate direct current (DC) electricity, which then flows to an inverter that converts it into alternating current (AC)…
Why Florida Homeowners Are Going Solar (And How You Can Too) by Charlesnoble March 6, 2026 Calculate your home’s solar potential by checking your annual electricity bills and measuring your available south-facing roof space—Florida homes typically need 20-30 panels to offset 100% of energy usage. Contact your utility provider to understand net metering policies, as companies like Duke Energy, FPL, and Tampa Electric have different buyback…
Why Commercial Rooftop Solar Isn’t Just for Experts… by Charlesnoble January 2, 2026 Calculate your building’s solar potential by measuring the usable roof area—subtract space for HVAC units, vents, and required maintenance walkways, then multiply by 15 watts per square foot for a quick capacity estimate. Most commercial roofs between 5,000 and 50,000 square feet can support systems ranging from 30kW to 400kW,…
How I Built a Zero Energy Home Without Breaking the Bank by Charlesnoble November 14, 2025 **Imagine slashing your electricity bill to zero—permanently.** A zero energy home produces as much renewable energy as it consumes over the course of a year, transforming your house from an energy drain into a self-sustaining powerhouse. It’s not science fiction or reserved for millionaires; thousands of homeowners are already living…
Subscribe for handpicked DIY projects, exclusive tips, and giveaways.
Route your PV wires through UV-resistant conduit within 18 inches of leaving the solar array, securing it every 3 feet with proper clamps to prevent wind damage and code violations. This single step prevents 80% of the wire degradation issues I’ve seen in DIY solar installations over the past decade. Group your positive and negative… Read more: Why Your PV Wire Management Could Fail Inspection (And How to Fix It)
Understand that 6000 volts sounds terrifying but delivers surprisingly low amperage—typically around 120 milliamps for just 3/10,000th of a second per pulse. This combination creates an unforgettable shock that trains animals to avoid the fence without causing lasting harm. The voltage pushes current through thick fur and hide, while the minimal amperage and microsecond duration… Read more: Why 6000 Volts Won’t Kill Your Livestock (But Will Stop Predators Cold)
Check the maximum voltage and current ratings first—these determine whether your controller can actually handle your solar panel array without frying itself on the first sunny day. I learned this the hard way when my first DIY system shut down every afternoon because I’d paired 600 watts of panels with a controller rated for only… Read more: Why Your Solar Setup Needs Both a Charge Controller and Inverter (And How to Pick the Right Ones)


")
")
")
")
")

")
")
")
")
")


