Running Your RV Air Conditioner on Solar: Why Most Inverters Fail (And Which Ones Actually Work)
Updated:
**Calculate your air conditioner’s starting watts before buying any inverter**—most RV AC units need 2,800-3,500 watts to start but only 1,200-2,000 watts to run. This surge requirement catches most first-time solar RV owners off guard, leading to undersized systems that can’t handle the initial power draw.
**Match your inverter capacity to exceed your AC’s surge watts by at least 20%**. A 13,500 BTU rooftop unit typically requires a 3,000-3,500 watt pure sine wave inverter, while a 15,000 BTU unit demands 3,500-4,000 watts. Modified sine wave inverters will damage your AC’s compressor over time, so this isn’t where you cut costs.
**Plan your battery bank for realistic runtime expectations**. Running a typical RV air conditioner draws 100-150 amp-hours per hour from your battery bank at 12V. That means a 400Ah lithium battery bank gives you roughly 2-3 hours of cooling before reaching safe discharge levels—barely enough for a hot afternoon, let alone overnight comfort.
**Consider soft-start devices to reduce inverter size requirements**. Installing a soft-start kit on your AC compressor can cut starting watts by 50-70%, potentially allowing you to use a smaller, less expensive inverter. I learned this after hauling an oversized 4,000-watt inverter across three states—sometimes the smartest solution isn’t the biggest one.
The inverter is just one piece of your off-grid cooling puzzle. Let’s break down exactly what you need.
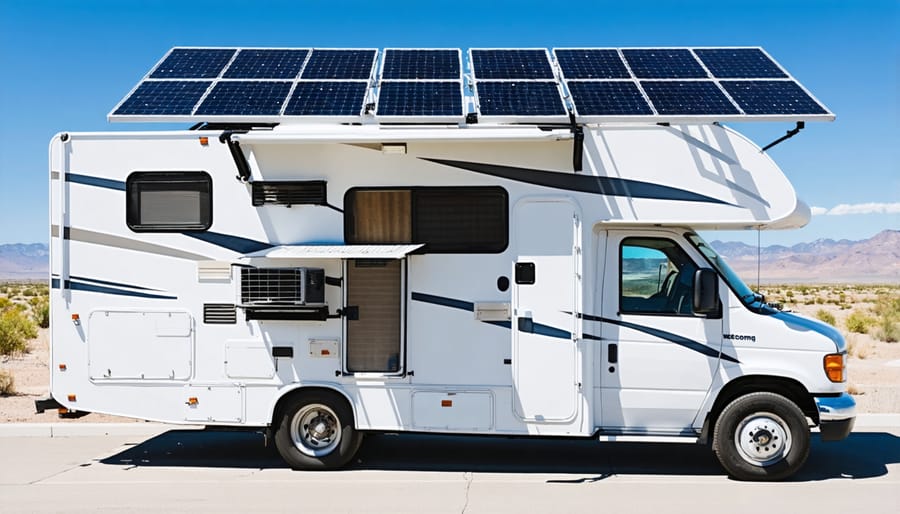
Why Your RV Air Conditioner Is Such a Power Hog
RV air conditioner units require significant power, making proper inverter selection critical for solar-powered systems.
The Startup Surge That Kills Most Inverters
Here’s what catches most RVers off guard: your 1,500-watt air conditioner doesn’t actually need 1,500 watts to start—it needs much more. I learned this the hard way during my first summer of full-time RVing when my supposedly “adequate” inverter kept shutting down every time the AC kicked on.
The culprit? Inrush current, also called startup surge. When your AC compressor fires up, it demands a massive burst of power for just a few seconds—typically 2 to 3 times its running wattage. That same 1,500-watt AC unit might pull 3,000 to 4,500 watts during those critical first moments. Think of it like pushing a car: getting it moving requires far more effort than keeping it rolling.
This is the single most overlooked factor when RVers shop for inverters, and it’s why so many end up with expensive paperweights. Your inverter needs to handle both the continuous running watts AND the peak surge watts. Most standard inverters simply can’t deliver that surge capacity, which is why they shut down or fail entirely during startup.
The principle is similar to generator sizing for AC units—you always need headroom beyond the running watts. But with inverters, the stakes are higher because you’re drawing from your battery bank, and an undersized inverter won’t just struggle—it’ll protect itself by shutting down completely, leaving you hot and frustrated.
What Those Watts Mean for Your Battery Bank
Understanding watts is one thing, but translating that into actual battery and solar capacity? That’s where many RVers hit a wall. Let me break this down the way I wish someone had explained it to me when I started.
Here’s the fundamental equation: if your AC unit pulls 1,500 watts and you want to run it for one hour, you need 1,500 watt-hours (Wh) of battery capacity. Sounds simple, right? But there’s a catch—most battery systems shouldn’t be drained below 50% (for lead-acid) or 80% (for lithium). So that 1,500Wh actually requires a 3,000Wh lead-acid bank or about 1,875Wh lithium bank.
I learned this the hard way during a hot Arizona afternoon when my undersized battery bank gave out after just 45 minutes of cooling. Not fun!
For solar panels, you’ll need to replenish what you’ve used. Those same 1,500 watts running for one hour need replacing, plus inverter losses (about 10-15%). With 5 peak sun hours daily, you’d need roughly 350 watts of solar panels minimum—but I’d recommend 500-600 watts for real-world conditions like clouds and panel angle.
Want to make this easier? Use our battery and solar calculator tool to input your specific AC unit’s specs and get personalized recommendations. It accounts for your location’s sun exposure and your typical usage patterns, taking the guesswork out of system sizing.
What Makes an Inverter Capable of Running Your AC
Pure Sine Wave vs Modified Sine Wave: Why It Matters
Not all inverters are created equal, and this distinction can make or break your RV air conditioning setup. Power inverters come in two main types: pure sine wave and modified sine wave. Pure sine wave inverters produce smooth, consistent electrical current that mirrors what you get from the grid—essential for sensitive electronics and motor-driven appliances. Modified sine wave inverters, on the other hand, create a choppier, step-like waveform that’s cheaper but problematic for many devices.
Here’s where it gets critical: AC compressors absolutely need pure sine wave power. The compressor motor in your air conditioner is precision-engineered equipment that doesn’t play nice with modified sine waves. Charles learned this the hard way during his first summer on the road. “I tried saving a few hundred bucks with a modified sine wave inverter,” he recalls. “The AC ran for about three days before the compressor started making a grinding noise. Turns out the inconsistent power was causing excessive heat and wear. I ended up replacing both the inverter AND the compressor—way more expensive than just buying the right inverter initially!”
Modified sine waves can cause overheating, reduced efficiency, annoying humming sounds, and premature equipment failure. When it comes to powering your RV air conditioner, pure sine wave isn’t just recommended—it’s mandatory.
Sizing Your Inverter: The Math Made Simple
Let me walk you through sizing your inverter with a simple formula that’s worked perfectly for countless RV adventures. I remember my first attempt at this calculation—scribbling numbers on the back of a napkin at a campground in Colorado. Trust me, it’s easier than it looks!
Here’s a practical example: Let’s say you have a typical 13,500 BTU RV air conditioner. These units usually draw about 1,500 watts when running and need roughly 3,000 watts for that initial startup surge.
Your calculation would look like this:
– Running watts with safety buffer: 1,500 × 1.1 = 1,650 watts
– Startup surge requirement: 3,000 watts
**You’ll need a minimum 3,000-watt inverter.**
For a smaller 10,000 BTU unit (around 1,200 running watts, 2,400 surge):
– 1,200 × 1.1 = 1,320 watts running
– **Minimum inverter: 2,400 watts**
**My practical recommendation?** Always round up to the next inverter size. That 10% safety margin accounts for voltage drops, aging equipment, and those scorching afternoons when your AC works overtime. I typically suggest adding another 20% if you plan to run other appliances simultaneously—nobody wants to choose between cold air and cold beer!
Pro tip: Check your AC unit’s label for exact wattage specs, or use a clamp meter for precise measurements before purchasing.
Inverter Options That Actually Work for RV Air Conditioning
A pure sine wave inverter with adequate surge capacity is essential for reliably starting and running RV air conditioning compressors.
The 3000W Sweet Spot for Most RVers
For most RVers running a standard 13,500 BTU air conditioner, a 3000W continuous (6000W surge) pure sine wave inverter hits the sweet spot. I learned this the hard way after my first underpowered inverter kept shutting down every time my AC kicked on—not fun during a Texas summer!
Here’s why this size works: your 13,500 BTU AC typically draws around 1,800-2,200 watts when running, but demands a significant surge when the compressor starts up. The 6000W surge capacity handles that initial jolt, while the 3000W continuous rating keeps things humming along comfortably.
**Important considerations:** This setup works beautifully for *one* AC unit running solo. If you’re planning to run other major appliances simultaneously—like your microwave or electric water heater—you’ll need to manage your loads carefully. Also, remember that your inverter is only as good as your battery bank behind it. A 3000W inverter pulling from undersized batteries will drain them faster than you can say “dead battery.”
Most quality 3000W inverters also include helpful features like overload protection and low-voltage shutoff, giving you peace of mind while boondocking off-grid.
When You Need to Go Bigger
Sometimes your RV setup demands serious power, and that’s when you need to look at 4000W inverters or larger. I learned this the hard way during a scorching Arizona summer when my buddy tried running his two 15,000 BTU ACs simultaneously—his 3000W inverter simply threw in the towel!
You’ll need these heavy-duty inverters if you’re running a larger 15,000 BTU AC unit, which can surge up to 3500W on startup. They’re also essential for dual AC setups common in Class A motorhomes, where you might need both roof units running during extreme heat. And here’s something many folks don’t consider: if you want to run your AC *plus* other appliances like a microwave, coffee maker, or hair dryer without constantly monitoring what’s on, a 4000W+ inverter gives you that breathing room.
The tradeoff? These larger inverters require substantial battery banks—think 800+ amp-hours of lithium—and significantly more solar panels to recharge. Your investment jumps considerably, but for full-timing RVers or those who boondock in extreme climates, it’s often worth every penny for the comfort and convenience.
Building the Complete System: Beyond Just the Inverter
Battery Bank Reality Check
Let me be straight with you—running an RV air conditioner on batteries is an expensive proposition, and the math might surprise you. I learned this the hard way during my first attempt at boondocking in Arizona!
A typical 15,000 BTU RV air conditioner draws about 1,500-2,000 watts continuously. That means you’re consuming roughly 125-165 amp-hours per hour at 12 volts. Yes, you read that correctly—*per hour*.
**Lithium Battery Banks:**
With a 400Ah lithium battery bank (around $2,000-3,000), you can realistically run your AC for about 2-3 hours before depleting 50% of capacity. Double that to 800Ah, and you’re looking at 4-6 hours of runtime. These calculations assume no solar input and ideal conditions—real-world performance varies.
**Lead-Acid Battery Banks:**
Lead-acid batteries complicate things further. Since you shouldn’t discharge them below 50%, you effectively have half the usable capacity. A 400Ah lead-acid bank only gives you about 1-1.5 hours of AC runtime. Plus, they’re significantly heavier and require more frequent replacement.
**The Bottom Line:**
Most RVers find that battery-powered AC works best for short cooling bursts—maybe an hour before bed or during the hottest afternoon hours while your solar panels recharge the bank. For extended cooling, you’ll still need shore power or a generator. Understanding these limitations helps you build a realistic system that matches your actual needs rather than draining your wallet on oversized battery banks.
Solar Panels: How Many You Actually Need
Running your RV air conditioner during the day opens up an exciting possibility: using solar panels to power it directly while keeping your batteries topped off. But how many panels do you actually need?
Here’s the straightforward math: a 13,500 BTU AC unit draws roughly 1,800 watts when running. To cover this demand plus battery charging, you’ll want between 2,400-3,000 watts of solar capacity. That typically means 8-10 standard 300-watt panels—more than most RVs can physically accommodate on their roofs.
I learned this the hard way during my first summer boondocking attempt. My four panels simply couldn’t keep up with afternoon cooling demands, even in full Arizona sun. The panels helped extend my battery runtime, but they couldn’t fully sustain the load.
This is where sizing RV solar power becomes highly personal. If you’re plugged into shore power most of the time and only need occasional off-grid AC, fewer panels might work. For serious boondocking, you’ll need maximum roof coverage plus ground-deployable panels.
Use our solar calculator tool below to input your specific AC model, desired runtime, and available roof space—it’ll show you realistic panel requirements for your situation.
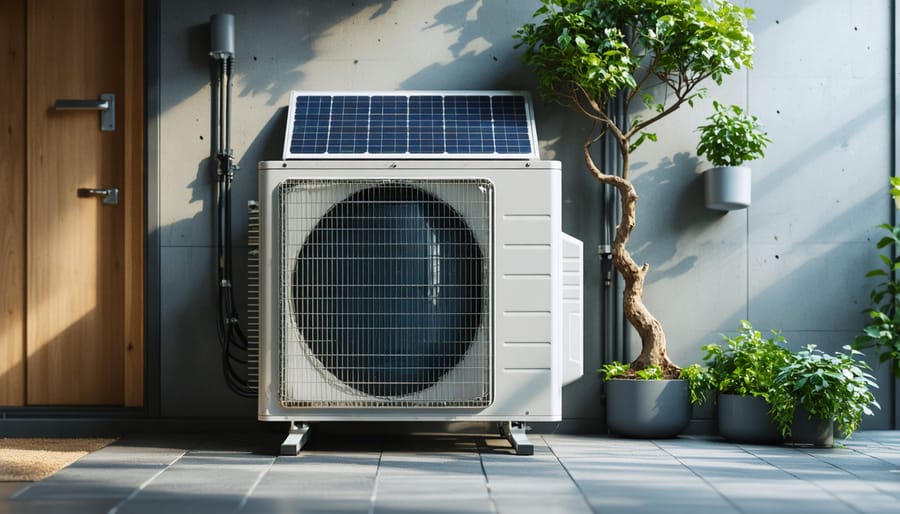
Installation Tips That Save You From Costly Mistakes
A properly sized battery bank provides the energy storage needed to run your air conditioner when solar panels alone cannot meet demand.
Wire Size Matters More Than You Think
Here’s something I learned the hard way during my first RV solar install: even the best inverter won’t help if your wires can’t deliver the power. Voltage drop is the silent killer of inverter performance, and it’s surprisingly easy to overlook.
Think of it like trying to drink a milkshake through a tiny straw—the liquid is there, but you can’t get enough flow. When electricity travels through undersized wires, resistance causes voltage to drop, meaning your inverter receives less power than it needs. For a 3,000-watt inverter running on 12V, you’re pushing around 250 amps. That’s serious current!
Here’s a practical guideline: for runs under 5 feet, use 4/0 AWG cable; between 5-10 feet, upgrade to dual 4/0 runs or heavier. I always use welding cable—it’s flexible, durable, and handles the amperage beautifully.
Don’t skimp on wire gauge. I’ve seen too many friends troubleshoot inverter problems for hours, only to discover their 6 AWG wires were the bottleneck. Quality copper cables cost more upfront, but they’ll save you from frustrating power losses and potential safety issues down the road.
Safety First: Fuses, Breakers, and Disconnects
Before you flip that switch, let’s talk safety—because nobody wants their dream RV setup turning into a nightmare. Your inverter system needs three critical protections: fuses, breakers, and disconnects.
I learned this the hard way when a friend skipped proper fusing on his first install. One loose connection later, and he had melted cables that could’ve started a fire. Don’t be that person!
Start with appropriately sized fuses on both the battery and inverter sides—typically 200-300 amps for a 3000W inverter. These are your first line of defense against shorts and overloads. Next, install a disconnect switch between your batteries and inverter for safe maintenance. When wiring to breaker box, ensure your AC breaker matches your inverter’s output rating.
Think of these components as insurance for your investment. Yes, they add cost upfront, but they’re non-negotiable for protecting your RV, your equipment, and most importantly, your family. Always use marine-grade or DC-rated components—standard automotive fuses won’t cut it for sustained high-amp loads.
Making It Work in the Real World: Practical Strategies
Soft Start Technology: The Game Changer
Here’s the game-changer I wish someone had told me about when I first started my RV solar journey: soft start technology. These clever devices reduce the initial surge current your AC needs by up to 70%, which can dramatically change your inverter requirements.
Think of it like this—instead of your air conditioner demanding a massive jolt of power all at once (like a sprinter exploding off the blocks), a soft start device makes it gradually ramp up (like a jogger building speed). This means that 3,000-watt inverter we discussed earlier might actually handle your 13,500 BTU AC with a soft start installed, instead of requiring a 4,000-watt unit.
The math gets pretty attractive: a quality soft start kit runs about $250-350, while upgrading from a 3,000-watt to 4,000-watt inverter costs $400-800 more. You’re potentially saving money *and* reducing the battery bank size needed to support that smaller inverter.
I installed one on my RV’s Dometic unit last summer, and the difference was remarkable. My batteries barely flinched during startup, whereas before, I’d see that initial voltage dip every single time. Not every AC model is compatible, so check your manufacturer’s specifications first.
When to Run Your AC (And When Not To)
Timing is everything when you’re running AC on solar power. I learned this the hard way during my first summer RVing in Arizona—trying to blast the AC at sunset drained my batteries faster than I could say “rookie mistake!”
Your best cooling window is between 10 AM and 3 PM when solar production peaks. This lets your panels directly power the AC while minimizing battery draw. Think of it as “free cooling” courtesy of the sun. During these hours, you can run your AC guilt-free while your batteries stay topped up.
Avoid running AC after dark unless absolutely necessary. Most RV batteries shouldn’t discharge below 50% (lead-acid) or 20% (lithium) for longevity. That nighttime cooling comes at a steep cost to your battery bank’s lifespan.
Smart inverter management means knowing when to switch strategies. On marginal days, try pre-cooling your RV during peak sun hours, then use fans, window covers, and ventilation at night. Park in shade when possible—it’s free and uses zero watts! Some RVers even wet their awnings for evaporative cooling.
Remember: every hour of AC runtime you avoid is battery capacity saved for essential needs.
Running your RV air conditioner on solar power isn’t just a dream—it’s absolutely achievable with the right planning and equipment. Yes, it requires a solid investment in a quality pure sine wave inverter (3,000-4,000 watts for most systems), adequate battery capacity, and sufficient solar panels to recharge everything. But the payoff is real freedom to camp wherever you want without hunting for hookups or listening to a generator rumble all night.
The key is setting realistic expectations. You won’t power your AC indefinitely on a cloudy day with a minimal setup. But with proper system sizing based on your actual AC unit’s specifications and your typical usage patterns, you can absolutely enjoy cool comfort off-grid.
Before you start purchasing components, take advantage of our system sizing calculators to determine exactly what you’ll need for your specific situation. Every RV and usage pattern is different, and getting the math right upfront saves frustration and money later.
Charles here—I’ve helped hundreds of RVers make this transition, and the stories I hear about newfound camping freedom never get old. One couple told me they finally visited remote desert locations they’d dreamed about for years, all because they weren’t tethered to campground hookups anymore. Join our community forum to connect with others who’ve tackled similar projects, share your progress, and get answers when you hit roadblocks. You’ve got this!
With the right power system in place, you can enjoy cool comfort while boondocking off-grid in your RV.
How useful was this post?
Click on a star to rate it!
Average rating 0 / 5. Vote count: 0
No votes so far! Be the first to rate this post.
We are sorry that this post was not useful for you!
Let us improve this post!
Tell us how we can improve this post?
charlesnoble
Here at Spheral Solar, I’m a hands-on solar power enthusiast, constantly exploring and experimenting with DIY solutions. I’m dedicated to sharing my discoveries, insights, and even the bumps I hit along the way, all in the pursuit of a more sustainable future.
How Much Power Does Your RV Mini Fridge Really Use? by Charlesnoble January 12, 2026 Measure your mini fridge’s actual power draw by plugging a Kill-A-Watt meter between the outlet and your fridge for 24 hours—this $25 tool gives you the exact kWh reading rather than relying on manufacturer estimates that often miss real-world conditions. Most compact mini fridges consume between 0.5-1.5 kWh per day,…
Why Your Motorhome Electrical System Keeps Failing… by Charlesnoble November 18, 2025 Picture this: You’re three days into a dream cross-country trip when your lights flicker, the refrigerator stops cooling, and you’re left wondering whether to call for expensive roadside assistance or figure it out yourself. I’ve been there, and here’s what I wish someone had told me before my first electrical…
Why Your RV Appliances Keep Tripping the Breaker… by Charlesnoble November 17, 2025 Turn off shore power and disconnect your battery bank before touching any wire in your RV—this single step prevents the most common DIY electrical accidents. Check your circuit breaker panel ratings against your actual appliance loads, because that microwave drawing 1500 watts on a 15-amp circuit is exactly why you’re…
Why 48V is the Sweet Spot for Your RV Solar System by Charlesnoble May 20, 2026 Calculate your actual power consumption before jumping to 48V—most RVers overestimate their needs and waste money on unnecessary voltage conversions. Pull out your last month of camping data and add up the watt-hours your appliances actually use daily, not what you think you might need someday. If you’re consistently pulling…
What Size Generator to Run Air Conditioner by Charlesnoble July 27, 2023 Choosing the right generator size to run an air conditioner depends primarily on two factors: the power requirements of the air conditioner, particularly at startup, and the generator’s power output. This article will guide you through understanding these requirements, including a special focus on solar generators for RV use, and…
Solar Power for RV Air Conditioner – How to Size RV… by Nick May 24, 2021 Solitude? Check. Idyllic landscape? Check. But does your RV have enough solar power to run an air conditioner? Maybe not! The lack of a comfortable temperature inside your rig can ruin an otherwise perfect road trip. While powering an air conditioner with solar energy is possible, the setup calls for…
Subscribe for handpicked DIY projects, exclusive tips, and giveaways.
Connect your panels to a charge controller or battery system by running positive terminals to positive and negative to negative. This parallel configuration doubles your available current (amperage) while keeping voltage the same, which is exactly what you need when your system demands more power than a single panel can deliver. I learned this the… Read more: Why Two Solar Panels Beat One Every Time (Parallel Connection Explained)
Monitor your greenhouse temperature daily during peak sun hours—if it consistently exceeds 85°F or condensation builds up on interior surfaces, you’re losing crops to heat stress and creating the perfect environment for fungal diseases. A greenhouse solar ventilation fan addresses both problems without adding a penny to your electricity bill, making it one of the… Read more: Why Your Greenhouse Needs a Solar Ventilation Fan (Before Summer Hits)
Press and hold the adjust button (usually bottom-left) on your G-Shock for three seconds until the time display starts flashing—this unlocks manual time adjustment on most models. Navigate between hours, minutes, and date using the mode button, then use the forward/reverse buttons to change values. If you own a radio-controlled G-Shock with Multi-Band 6 technology,… Read more: How to Adjust Time on Your G-Shock Solar Watch (Without Breaking It)


")
")


")
")


