Stop Killing Your E-Bike Battery: Charging Mistakes That Cost You Hundreds
Updated:
Charge your e-bike battery to only 80% for daily rides—this single habit can double its usable lifespan compared to always topping off to 100%. Store the battery at room temperature between 32°F and 77°F, removing it from the bike during extreme weather since heat above 90°F accelerates degradation faster than any other factor. Avoid letting the charge drop below 20% before plugging in, as deep discharges stress lithium-ion cells and reduce their total cycle count.
Most e-bike owners replace their batteries every 2-3 years, spending $400-$800 each time, yet proper charging habits can stretch that timeline to 5+ years. The difference isn’t complicated battery management systems or expensive equipment—it’s understanding a few key principles about how lithium-ion cells age and adjusting your daily routine accordingly.
I learned this the hard way with my first e-bike. After two years of charging to 100% overnight and leaving it plugged in for days, my range dropped by 40%. My second battery lasted twice as long simply because I changed when and how I charged it. Whether you’re commuting daily or weekend trail riding, these charging strategies work regardless of your battery’s brand or capacity.
Beyond extending lifespan, smart charging habits also create opportunities to power your e-bike with solar energy, reducing both your electricity costs and environmental impact while maintaining peak battery performance.
Why E-Bike Batteries Are Different (And Why That Matters)
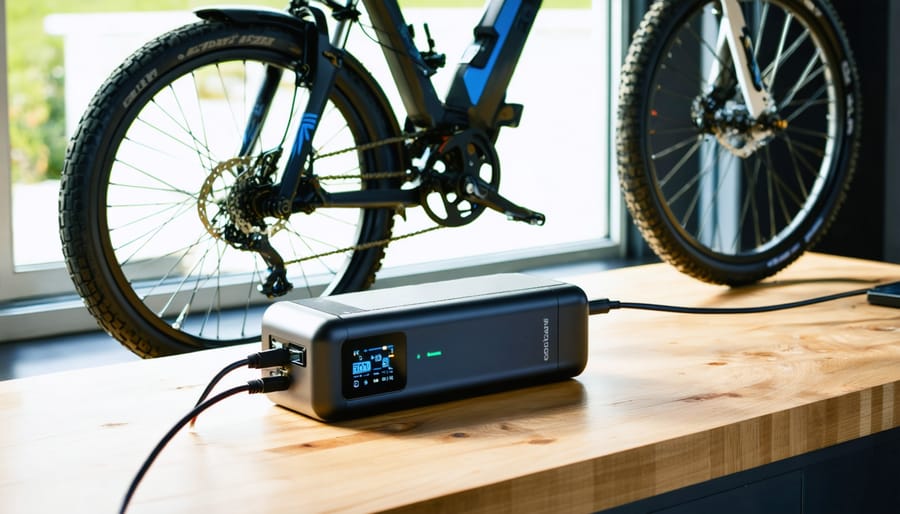
Understanding the internal structure of lithium-ion e-bike batteries helps riders make better charging decisions.
The Sweet Spot: Understanding Your Battery’s Ideal Charge Range
You’ve probably heard someone say you should never let your phone battery hit 0%, right? The same principle applies to your e-bike battery—but it’s even more important. Here’s the game-changer: keep your battery between 20% and 80% charge whenever possible.
I learned this the hard way with my first e-bike. I’d constantly drain it to empty, then charge it to 100% overnight, thinking I was being efficient. After just 18 months, my battery capacity had dropped noticeably. When I replaced it and started following the 20-80% rule, that second battery was still going strong after three years.
Here’s why it matters: lithium-ion batteries (what powers your e-bike) experience stress at both extremes. Charging to 100% keeps the battery cells at high voltage, which accelerates chemical degradation. Draining below 20% forces the cells into a stressful “deep discharge” state. Think of it like constantly redlining your car’s engine versus cruising at moderate speeds.
Real-world impact? Studies show batteries kept in this sweet spot can maintain 80% capacity after 2,000 charge cycles, versus just 500-800 cycles with full 0-100% charging. That’s the difference between 4+ years of reliable use versus needing a replacement in under two years.
For daily riders, this means charging when you get home (even if you’re at 50%) and unplugging around 80%. Most modern e-bikes show charge percentage right on the display, making this easier than ever to track.
What Your Battery’s BMS Is Doing Behind the Scenes
Think of your e-bike’s Battery Management System (BMS) as a protective guardian that works 24/7 to keep your battery healthy. This small circuit board monitors individual cell voltages, temperature, and current flow, making thousands of micro-adjustments during each charge cycle.
Here’s what’s happening behind the scenes: When you plug in, the BMS carefully balances power across all cells—imagine filling several water glasses simultaneously and ensuring each reaches exactly the same level. It prevents overcharging by cutting power at the right moment and stops over-discharging by shutting down before cells drain completely. The BMS also manages temperature, slowing or pausing charging if things get too warm.
I learned this the hard way when I tried using a non-compatible charger on my first e-bike. The BMS repeatedly shut down charging to protect the battery, but I kept trying different outlets thinking it was a power issue. What felt like a malfunction was actually my BMS doing its job perfectly.
When you bypass BMS recommendations—using incompatible chargers, extreme temperatures, or third-party batteries—you’re essentially asking your guardian to work overtime. Eventually, it can’t compensate for those stresses, leading to reduced capacity, safety risks, or complete battery failure.
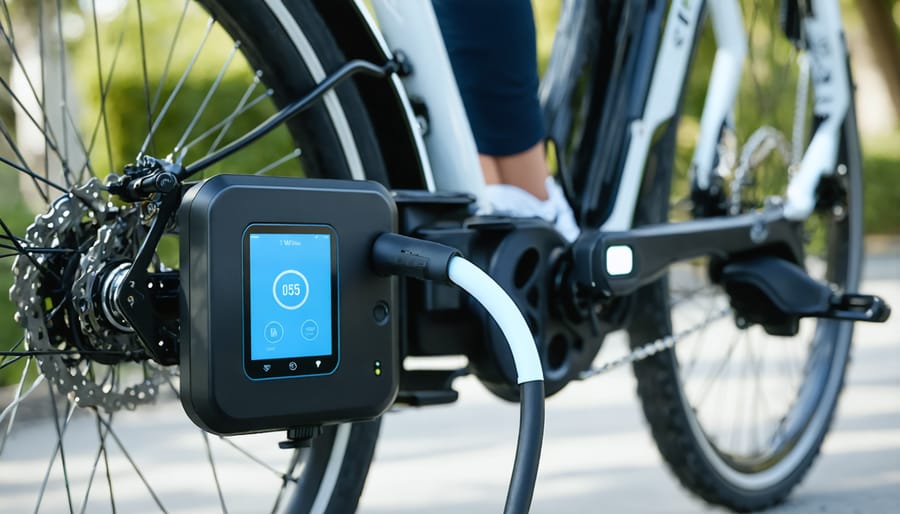
The Daily Charging Routine That Extends Battery Life
Developing a consistent daily charging routine is key to maximizing your e-bike battery’s lifespan.
When to Plug In (And When to Wait)
One of the most common questions I hear from fellow e-bike enthusiasts is: “Should I plug in right after my ride?” Here’s what I’ve learned through personal experience and research.
**After Your Ride**
Let your battery breathe! After a long ride, especially on hot days, your battery pack will be warm. I made the rookie mistake early on of immediately plugging in after my summer commute—the battery management system actually prevented charging because of excess heat. Wait 15-30 minutes for the battery to cool to room temperature before connecting the charger. This protects the cells from thermal stress and extends overall lifespan.
**Overnight Charging Myths**
Modern e-bike batteries include smart charging systems that stop drawing power once full, so overnight charging won’t “overcharge” your battery. That said, I prefer charging during daylight hours when I can keep an eye on things—plus, if you’re running solar panels, you’re using clean, free energy! Set a phone reminder if you’re worried about forgetting to unplug.
**How Often Should You Charge?**
Your usage pattern matters here. Daily commuters should charge after each ride to maintain the 20-80% sweet spot. Weekend warriors can wait until the battery drops to around 30-40% before topping up. Avoid letting it fully drain regularly—lithium-ion batteries don’t need “training cycles” like older technology did. Think of it like keeping your gas tank between quarter and three-quarters full for optimal performance.
The Temperature Factor Nobody Talks About
Here’s something I learned the hard way during my first winter with an e-bike: I left my battery in the garage overnight and tried charging it the next morning. The charger light blinked red, refusing to cooperate. Turns out, temperature isn’t just a minor detail—it’s absolutely critical to your battery’s health and charging efficiency.
Lithium-ion batteries have a “Goldilocks zone” for charging, and it’s narrower than you might think. The ideal range is between 50°F and 77°F (10°C to 25°C). Charging outside this range doesn’t just slow things down—it can actually damage your battery cells, reducing their overall lifespan by up to 40%.
When temperatures drop below 32°F (0°C), the chemical reactions inside your battery slow dramatically. Charging a cold battery forces lithium ions to plate unevenly on the electrodes, creating permanent damage. On the flip side, charging above 86°F (30°C) accelerates degradation and increases the risk of thermal runaway in extreme cases.
Here’s what to do in different seasons: During winter, bring your battery indoors and let it warm to room temperature for at least an hour before plugging in. In summer, charge in the coolest part of your home—basements work great. Never leave a charging battery in direct sunlight or inside a hot car.
If you’re pairing your e-bike with a solar charging setup, consider adding a temperature sensor to your charging area. This simple addition helps you monitor conditions and protect your investment year-round.
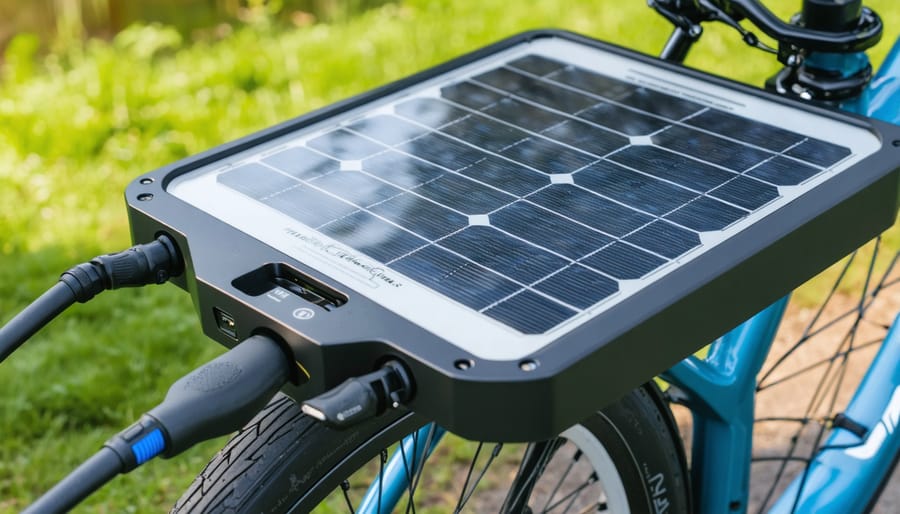
Charging With Solar: Making Your E-Bike Truly Green
Solar-powered e-bike charging offers a truly sustainable transportation solution for eco-conscious riders.
Sizing Your Solar System for E-Bike Charging
Figuring out how much solar capacity is needed to charge your e-bike doesn’t require an engineering degree—just some simple math and realistic expectations.
Start with your battery’s capacity, usually listed in watt-hours (Wh) on the battery itself. Most e-bikes range from 400Wh to 700Wh. To calculate your solar panel needs, account for charging efficiency losses (typically 20-25%). So a 500Wh battery actually needs about 625Wh of solar energy to fully charge.
Here’s a practical scenario: Let’s say you have a 500Wh e-bike battery and want to charge it with solar. A 100-watt solar panel produces roughly 400-500Wh per day in decent sunlight (assuming 4-5 peak sun hours). That means you could fully recharge your battery in about one to two sunny days with a single 100W panel.
Want faster charging? A 200-watt panel setup could recharge that same battery in a single day, even with less-than-perfect conditions.
I’ve found that most riders don’t need to fully recharge from zero every time—you’re often just topping off after shorter rides. This flexibility makes solar charging incredibly practical for regular commuters.
Our solar calculators on the site can help you customize these calculations based on your specific battery size and local sunlight conditions. Input your e-bike’s specs and your location to get personalized recommendations. Remember, oversizing slightly gives you buffer room for cloudy days and winter months when sunlight is scarcer.
Direct Solar vs. Battery Bank Charging
When Charles first started charging his e-bike with solar power, he experimented with both methods to see what worked best for his setup. Direct solar charging—plugging your e-bike straight into the panels—sounds simple, but it comes with challenges. Clouds roll by, voltage fluctuates, and your charging stops and starts unpredictably. This inconsistency can actually stress your battery over time.
That’s why Charles now swears by battery bank charging. With this approach, your solar panels charge a battery bank throughout the day, storing steady power. Then you charge your e-bike from that bank whenever you need it, getting consistent voltage and current—exactly what your battery wants. Yes, you’ll lose about 10-15% efficiency in the conversion process, but the tradeoff is worth it for battery health.
The battery bank method also lets you charge your e-bike at night or on cloudy days using stored solar energy. Charles calls it “solar charging with a safety net.” For most DIY solar enthusiasts, this intermediate step provides reliability without sacrificing your renewable energy goals.
Advanced Charging Techniques for Maximum Longevity
Storage Charging: The 50% Rule
If you’re putting your e-bike away for winter or won’t be riding for a few weeks, here’s something I learned the hard way: never store your battery fully charged or completely empty. The sweet spot? Around 50-60% charge.
I made this mistake with my first e-bike battery, leaving it fully charged in my garage all winter. When spring arrived, the battery had degraded significantly—an expensive lesson! Lithium batteries experience the most stress at the extreme ends of their charge range, so storing them at mid-level keeps the chemistry stable and happy.
For off-season storage, charge your battery to about half, then disconnect it from the bike. Store it somewhere cool and dry—not in a freezing garage or hot attic. Room temperature is ideal. Every month or two, check the charge level. If it’s dropped below 40%, give it a quick top-up back to that 50-60% range. This maintenance charging prevents the battery from falling into a deep discharge state, which can cause permanent damage.
Think of it like hibernation mode for your battery—you’re keeping it in a comfortable middle ground where it can rest without stress. This simple practice can add years to your battery’s life.
Balancing Cells Without a Special Charger
Most e-bike batteries don’t require special balancing chargers if you follow a few simple practices. I learned this firsthand when I noticed one cell in my DIY solar-charged e-bike battery was dropping faster than the others—a classic sign of imbalance.
The easiest balancing technique is performing a full charge cycle monthly. Charge your battery to 100%, let it sit for 2-3 hours (this gives the BMS time to balance), then use it normally. This passive balancing helps weaker cells catch up without any special equipment.
Watch for warning signs that indicate professional balancing is needed: significant range reduction (more than 20%), the battery feeling unusually hot during charging, or your BMS indicator showing persistent errors. If you’re comfortable with a multimeter, checking individual cell voltages can reveal imbalances—cells shouldn’t differ by more than 0.1 volts.
For those integrating solar charging into their e-bike routine, consistent charging patterns actually help maintain balance better than sporadic, irregular charging. Think of it like watering plants evenly rather than drowning some while neglecting others. When cells drift beyond DIY fixes, seeking professional rebalancing services saves you from premature battery replacement.
Common Charging Mistakes That Destroy Batteries
The Fast Charging Trap
Fast charging is tempting—I’ll admit, I’ve plugged in my own e-bike before a spontaneous ride and cranked it to 100% in under an hour. But here’s the honest truth: doing this regularly will shorten your battery’s lifespan significantly.
Fast charging generates more heat, which degrades the lithium cells faster. Think of it like sprinting versus walking—your battery can sprint occasionally, but doing it every day wears it out.
**When fast charging is acceptable:**
– Emergency situations when you genuinely need the range
– Occasional use (once or twice monthly)
– When you’re charging from 20% to 80% rather than a full cycle
**When to avoid it:**
– Daily commuting routines
– Overnight charging (there’s no rush!)
– Hot weather conditions (heat plus fast charging is a double threat)
The convenience-longevity trade-off is real. Fast charging might save you an hour today, but could cost you a $500-800 battery replacement a year or two earlier. For my daily charging setup powered by my home solar array, I use standard charging overnight—it’s gentler on the battery and perfectly syncs with off-peak solar storage.
Leaving It Plugged In: Is It Really That Bad?
You’ve probably heard conflicting advice about leaving your e-bike battery plugged in overnight. Here’s the truth: modern e-bike chargers are generally smarter than we give them credit for.
Most quality chargers automatically switch to “trickle charging” or maintenance mode once your battery hits 100%. Think of it like a thermostat—when the battery dips slightly, the charger delivers a tiny top-up, then stops again. This prevents overcharging damage that older charging systems caused.
However, “generally safe” doesn’t mean “always ideal.” The real issue isn’t the one night you forget to unplug—it’s the habit of *constantly* leaving your battery plugged in for days or weeks at a time. Extended trickle charging keeps your battery at 100% charge, which actually accelerates chemical degradation inside the cells.
I learned this the hard way with my first e-bike. I’d leave it plugged in my garage “just in case” I wanted to ride. After a year, my battery capacity had noticeably dropped.
**The sweet spot?** Unplug within an hour or two of reaching full charge when possible. If you occasionally forget overnight, don’t stress—your battery will survive. But making it a daily habit of staying plugged in 24/7 will shorten its lifespan considerably. Set a phone reminder if you’re forgetful like me!
Charger Selection and Safety Essentials
Choosing between OEM and third-party chargers requires understanding the safety and performance trade-offs.
OEM vs. Third-Party Chargers: What You Need to Know
I learned this lesson the hard way when a cheap replacement charger fried my first e-bike battery—an expensive mistake I don’t want you to repeat! Here’s the honest truth: OEM chargers are always the safest bet, but quality third-party options can work if you know what to look for.
**When third-party chargers are acceptable:** If your original charger breaks and you need an affordable replacement, look for certifications like UL, CE, or ETL. These aren’t just stickers—they mean the charger has passed safety testing. Also verify the voltage and amperage exactly match your battery’s specifications (check your battery label or manual).
**Red flags to avoid:** Skip chargers without brand names, those significantly cheaper than competitors, or anything lacking certification marks. If the connector feels loose or doesn’t fit snugly, don’t use it—poor connections create heat and potential fire hazards.
**Must-have features:** Temperature monitoring, automatic shutoff when fully charged, and short-circuit protection are non-negotiable. Quality chargers also include LED indicators showing charging status clearly.
My advice? Invest in the OEM charger when possible, especially if you’re planning to power it with your DIY solar setup—you want reliable equipment protecting your battery investment.
Fire Safety and Charging Location
Charging location matters more than you might think, but it’s about being smart rather than scared. I always charge my e-bike battery in my garage on a concrete surface, away from anything flammable like stored paper or hanging curtains. Avoid charging on carpets, wooden decks, or near exit routes where a malfunction could block your way out.
Keep your charging area well-ventilated and never charge batteries inside enclosed spaces like closets or storage bins. Room temperature is ideal—extreme heat or cold can stress the battery and increase risk. I’ve made it a habit to charge during times when I’m home and awake, at least until I’m confident the battery and charger are functioning reliably.
Consider a simple smoke detector near your charging station for extra peace of mind. If you’re charging multiple batteries or using solar power to charge them, space them apart and avoid overloading circuits. These straightforward precautions dramatically reduce any potential issues while keeping your charging routine convenient and stress-free.
Monitoring Battery Health Over Time
Simple Tests You Can Do Without Special Equipment
You don’t need fancy diagnostic equipment to keep tabs on your e-bike battery’s health. I learned this the hard way after ignoring warning signs on my first e-bike—let’s just say that replacement wasn’t cheap!
Start with the **range test**: fully charge your battery and ride your usual route. Compare the distance you travel before needing a recharge against what you got when the battery was new. A gradual decline of 10-20% over a couple years is normal, but a sudden drop signals trouble.
Check your **bike’s display** during rides. Most show remaining percentage or voltage. If you notice the battery dropping from 100% to 80% unusually fast, or if it dies at 20% instead of running to near-zero, these inconsistencies indicate aging cells.
Pay attention to **charging behavior** too. Does your charger’s light turn green in half the usual time? Does the battery feel excessively warm during charging? These observations cost nothing but can reveal declining capacity.
Finally, simply **track your charging frequency**. If you’re suddenly plugging in twice as often for the same riding patterns, your battery’s definitely telling you something. Keep a simple log—even just dates in your phone’s notes app works perfectly.
Here’s the thing about good battery charging habits—they feel like extra work at first, but within a couple of weeks, they become completely automatic. You’ll find yourself plugging in at 30% without even thinking about it, and avoiding that full charge before short trips will feel as natural as checking your tire pressure. The payoff is absolutely worth it: batteries that last years longer, fewer range anxiety moments, and significant money saved on replacements.
I’ve been running my daily commuter e-bike entirely on solar power for the past three years now, and it’s one of those setups that just makes me smile every time I use it. My 400-watt panel array charges a small battery bank that powers my e-bike charger—completely off-grid and practically maintenance-free once I dialed in the system. The satisfaction of riding on sunshine never gets old, and honestly, the whole setup cost less than two replacement batteries would have.
If you’re curious about going solar with your e-bike charging, I’d encourage you to check out our solar calculators to see what size system you’d need. They’re designed to take the guesswork out of designing an e-bike charging system that fits your specific riding patterns.
I’d love to hear what charging strategies have worked best for you, or if you’ve experimented with solar charging yourself. Drop your experiences in the comments—our community loves sharing real-world results and troubleshooting together!
How useful was this post?
Click on a star to rate it!
Average rating 0 / 5. Vote count: 0
No votes so far! Be the first to rate this post.
We are sorry that this post was not useful for you!
Let us improve this post!
Tell us how we can improve this post?
charlesnoble
Here at Spheral Solar, I’m a hands-on solar power enthusiast, constantly exploring and experimenting with DIY solutions. I’m dedicated to sharing my discoveries, insights, and even the bumps I hit along the way, all in the pursuit of a more sustainable future.
Why Your LiFePO4 Battery Fails in Winter (And How to Fix It) by Charlesnoble February 9, 2026 Your lithium iron phosphate battery won’t charge below 32°F and risks permanent damage from freezing—a problem that catches many first-time solar DIYers off guard during their system’s first winter. LiFePO4 batteries operate within a specific temperature window: charging requires 32°F to 113°F (0°C to 45°C), while discharging tolerates a wider…
Which Solar Battery Actually Lives Up to the Hype? by Charlesnoble November 8, 2025 Compare capacity ratings in amp-hours (Ah) and watt-hours (Wh) first—these numbers tell you exactly how much energy each battery stores and how long it’ll power your devices. Check the depth of discharge (DoD) percentage next, because a battery with 90% DoD gives you far more usable energy than one limited…
Why 6 Volt Batteries Might Be Your Solar System’s… by Charlesnoble February 20, 2026 Connect 6-volt batteries in series pairs to create 12-volt banks that deliver superior amp-hour capacity and longer lifespan than single 12-volt alternatives. This wiring configuration doubles your voltage while maintaining the individual battery capacity, giving you more usable power for off-grid applications. Most RV and camping solar setups benefit from…
Why Your RV Solar System Isn’t Charging (And How to Fix It) by Charlesnoble May 6, 2026 Picture this: You’re parked at a stunning boondocking spot, miles from the nearest electrical hookup, and your RV batteries are draining fast. Your fridge starts warming, lights dim, and you’re left wondering if you’ll need to pack up and find a campground. I’ve been there, and it’s frustrating. RV solar…
Why a 7 kWh Battery Might Be Your Solar System’s Sweet Spot by Charlesnoble May 20, 2026 Match a 7 kWh battery to your actual energy usage by checking your utility bills for daily consumption patterns. If your household uses 20-30 kWh per day, this size covers roughly 4-6 hours of evening power or essential loads during an outage—perfect for keeping your refrigerator, internet, and a few…
10 Best Rechargeable Batteries for Solar Lights by Nick April 23, 2021 While lithium-ion batteries have long been touted as the future of the solar battery world, some close rivals are giving them a run for their money. This blog post gives you a closer look at the best rechargeable batteries for solar lights currently available for solar light applications. We’ve covered…
Subscribe for handpicked DIY projects, exclusive tips, and giveaways.
Connect your panels to a charge controller or battery system by running positive terminals to positive and negative to negative. This parallel configuration doubles your available current (amperage) while keeping voltage the same, which is exactly what you need when your system demands more power than a single panel can deliver. I learned this the… Read more: Why Two Solar Panels Beat One Every Time (Parallel Connection Explained)
Monitor your greenhouse temperature daily during peak sun hours—if it consistently exceeds 85°F or condensation builds up on interior surfaces, you’re losing crops to heat stress and creating the perfect environment for fungal diseases. A greenhouse solar ventilation fan addresses both problems without adding a penny to your electricity bill, making it one of the… Read more: Why Your Greenhouse Needs a Solar Ventilation Fan (Before Summer Hits)
Press and hold the adjust button (usually bottom-left) on your G-Shock for three seconds until the time display starts flashing—this unlocks manual time adjustment on most models. Navigate between hours, minutes, and date using the mode button, then use the forward/reverse buttons to change values. If you own a radio-controlled G-Shock with Multi-Band 6 technology,… Read more: How to Adjust Time on Your G-Shock Solar Watch (Without Breaking It)

")


")


")


")


