Why Glazed Solar Pool Heaters Outperform Everything Else (And Cost Less Than You Think)
Updated:
Understand that glazed solar pool heaters are built with a glass or polycarbonate cover over dark absorber plates, creating an insulated greenhouse effect that captures and retains heat far more efficiently than unglazed alternatives. This design makes them capable of extending your swimming season by months, even in cooler climates where temperatures regularly dip below 70°F.
Compare your local climate conditions against the heater type before investing. Glazed collectors cost 2-3 times more than unglazed rubber mats but deliver 30-50% better heat retention in temperatures below 60°F, making them worthwhile for year-round heating in northern regions or winter use. If you’re only swimming during summer months when ambient temperatures stay above 75°F, the extra cost rarely justifies the modest performance gain.
Calculate your required collector area using this straightforward formula: take your pool’s surface area in square feet and multiply by 0.5 to 0.8 depending on your sun exposure and desired temperature increase. A 400-square-foot pool typically needs 200-320 square feet of glazed collector area, which translates to roughly 4-6 standard 4×8-foot panels positioned on a south-facing roof or ground mount.
Assess your DIY capabilities honestly before committing to self-installation. Mounting the panels requires structural knowledge to ensure your roof can handle the additional 3-4 pounds per square foot of weight, plus competent plumbing skills to integrate the system into your pool’s circulation loop without creating leaks or pressure issues. The actual assembly process is straightforward, but mistakes in placement angle or connection points can reduce efficiency by 40% or create costly water damage that negates any savings from avoiding professional installation.
What Makes Glazed Solar Pool Heaters Different
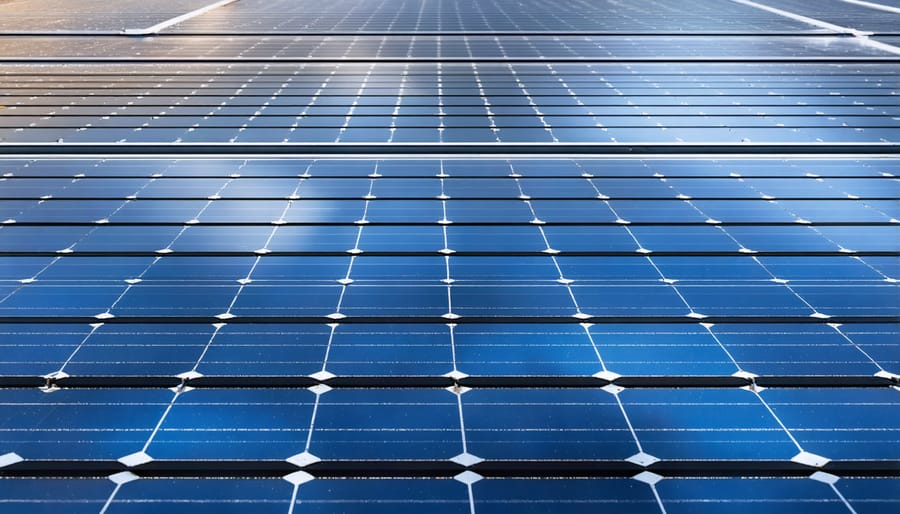
Glazed solar collectors feature transparent glass or polycarbonate covers that trap heat like a greenhouse, making them highly efficient in cooler climates.
The Anatomy of a Glazed Collector
Think of a glazed solar pool heater as a sandwich designed to capture and hold heat. Let me walk you through what’s happening inside that sleek panel sitting on your roof.
The top layer is the glazing, typically made from tempered glass or tough polycarbonate plastic. This transparent shield is your first line of defense against the elements. It lets sunlight stream through while blocking wind from stealing away the heat you’re trying to capture. I remember helping my neighbor install his first glazed collector, and he kept asking why we couldn’t skip this expensive glass layer. Two winters later, he understood perfectly when his unglazed neighbor’s system became essentially useless in cold weather.
Beneath the glazing sits the absorber plate, the real workhorse of your system. This dark-colored metal sheet, usually copper or aluminum, soaks up sunlight like a sponge and converts it into heat. Water flows through tubes attached to this plate, picking up warmth as it travels through.
Under the absorber plate, you’ll find insulation, typically foam or fiberglass. This layer prevents heat from escaping downward through your roof. Without it, you’d be heating your attic instead of your pool.
Finally, everything sits inside a weatherproof housing or frame, which holds all these components together and mounts securely to your roof or ground structure. It’s engineered to withstand years of sun exposure, rain, and whatever else nature throws at it.
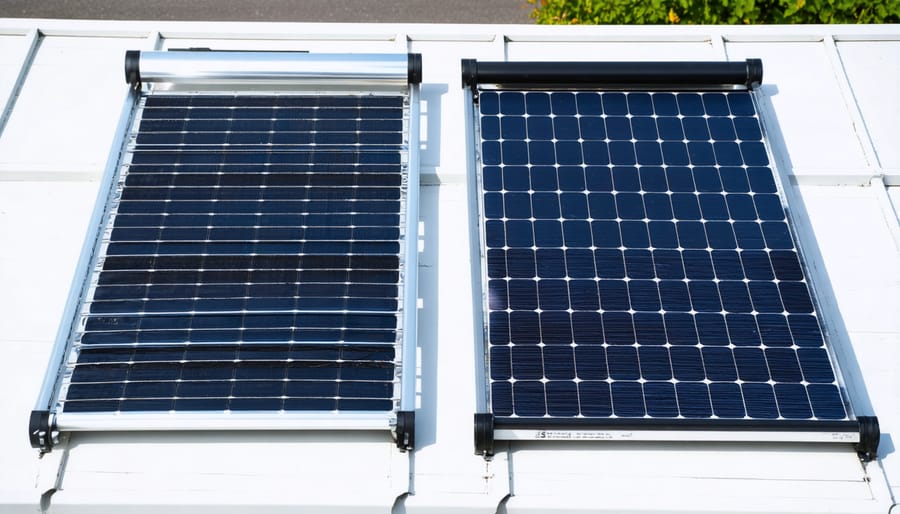
Side-by-side view of glazed collectors and unglazed mats shows the fundamental design differences between these two solar heating approaches.
Glazed vs. Unglazed: The Real Performance Gap
Let me share what I’ve learned testing both glazed and unglazed collectors side-by-side at my place, because the difference isn’t always what you’d expect.
Unglazed collectors are the budget champions. They’re essentially black rubber or plastic mats that water flows through directly. In my summer testing (air temps 75-85°F), they heated my pool water about 8-12°F above ambient temperature. They’re incredibly efficient when it’s warm because there’s minimal heat loss. I paid roughly $30-40 per square foot for mine, and installation was straightforward enough for a weekend project.
Glazed collectors, on the other hand, are the workhorses for cooler weather. They feature a transparent cover (usually tempered glass or polycarbonate) over copper or aluminum absorber plates. This glazing creates an insulating layer that traps heat. During my spring testing (air temps 55-65°F), glazed panels delivered 15-20°F water temperature increases, while my unglazed system barely managed 4-6°F. The trade-off? Cost runs $80-120 per square foot, and they’re heavier and trickier to mount.
Here’s the honest breakdown: If you only swim May through September and live somewhere warm, unglazed collectors will save you money without sacrificing performance. But if you’re extending your season into shoulder months or live in a climate with cool mornings, glazed collectors justify their premium. I’ve seen folks combine both systems, using unglazed for peak summer and glazed for spring and fall.
When comparing your options, consider exploring heat pump vs solar heating alternatives too. Each system shines in different scenarios, and understanding the full landscape helps you make the smartest choice for your specific swimming season and climate.
When Glazed Collectors Are Your Best Choice
Climate and Geography Factors
Glazed solar pool heaters really shine in certain climates, and understanding where they work best can save you money and frustration. I learned this the hard way during my first solar project in Vermont, where I initially tried an unglazed system that just couldn’t keep up with our chilly spring mornings.
If you live in cooler climates where temperatures regularly dip below 70°F, glazed collectors are your friend. The glass or plastic covering acts like a greenhouse, trapping heat that would otherwise escape into cold air. This makes them ideal for northern states, mountain regions, or anywhere you want to extend your swimming season into spring and fall. I’ve seen homeowners in Colorado and Minnesota successfully use glazed systems to maintain comfortable pool temperatures from April through October.
Year-round pool heating is another sweet spot for glazed systems. In moderate climates like the Pacific Northwest or parts of the Northeast, where you might want a heated pool even in winter months, the superior insulation of glazed collectors makes them worth the extra investment. They can capture and retain heat even on overcast days, which is something unglazed systems struggle with.
Areas with variable weather conditions also benefit significantly. If your region experiences unpredictable temperature swings, windy conditions, or frequent cloud cover, glazed collectors maintain consistent performance. The protective glazing shields the absorber from wind that would steal heat from unglazed panels.
That said, if you’re in consistently sunny, warm climates like southern Florida or Arizona, you might not need the extra insulation glazed systems provide, making simpler options more cost-effective.
Your Pool Usage Patterns Matter
Your pool usage habits play a huge role in determining whether a glazed solar pool heater makes sense for you. Let me share what I’ve learned from talking with dozens of pool owners in our community.
If you’re a year-round swimmer in a cooler climate, glazed collectors become almost essential. I remember chatting with Sarah from Michigan who tried unglazed panels first. She was disappointed when her pool barely reached 70°F in April and September. After switching to glazed collectors, she extended her swimming season by three full months.
For those of you who only swim during peak summer months, unglazed collectors often do the job just fine. Your pool naturally warms up during hot weather, and you’re simply maintaining comfortable temperatures rather than fighting against cool spring or fall conditions.
Pool size matters too. Larger pools require more heating capacity, which might push you toward the higher efficiency of glazed systems. A good rule of thumb: if your pool is over 20,000 gallons and you want 80°F water before Memorial Day, start seriously considering glazed options.
Target water temperature is the final piece. Aiming for 75°F? Unglazed works great in most regions. Want that luxurious 82°F feel? Glazed collectors deliver those extra degrees much more reliably, especially when ambient temperatures drop below 70°F.
The True Cost Breakdown (Installation to Operation)
DIY vs. Professional Installation
Let me be honest with you—building a glazed solar pool heater isn’t quite as straightforward as assembling an unglazed system, but it’s definitely manageable if you’re comfortable with basic construction projects.
When I tackled my first glazed collector, I had some experience with home improvement projects but nothing fancy. The most challenging part was working with the glazing material and ensuring proper sealing. You’ll need basic tools like a drill, saw, wrenches, and a ladder, plus some specialized items like a tube bender if you’re working with copper pipes. Budget around $200-300 for tools if you’re starting from scratch.
The realistic time investment runs about 15-25 hours for a complete installation, spread over several weekends. You’ll need two people for mounting panels safely on your roof—trust me on this one. I learned that lesson the hard way when a gust of wind nearly sent my first panel sailing.
Skill-wise, you should be comfortable with basic plumbing connections, working at heights, and following detailed instructions. If you’ve successfully completed projects like installing a ceiling fan or building a deck, you’re probably ready. The trickiest aspects involve properly connecting to your pool’s circulation system and ensuring leak-free fittings.
Here’s the cost reality check: professional installation typically runs $3,000-5,000 for a complete glazed system, while DIY costs range from $800-1,500 in materials. That’s significant savings, but don’t cut corners on safety equipment or proper mounting hardware.
When should you call a professional? If your roof pitch exceeds 6:12, you have limited attic access for electrical work, or local codes require licensed contractors for pool equipment modifications, it’s worth getting professional help. Some insurance policies also specify professional installation requirements.
Operating Costs and Energy Savings
Here’s where the numbers get really exciting. When I first switched to glazed solar collectors for my pool, I was skeptical about the actual savings. But after tracking my energy bills for two seasons, I became a true believer.
The operating costs for a glazed solar pool heater are remarkably low. Your main expense is running the circulation pump, which you’re already using to filter your pool anyway. Most pool pumps consume between 0.75 to 2.5 kilowatt-hours, costing roughly $30-80 per month depending on your electricity rates and runtime. The beauty is that this cost doesn’t increase when you add solar heating since you’re using your existing pump.
Compare that to gas heaters, which can cost $300-600 monthly during peak season, or electric resistance heaters that might run $200-400 monthly. The difference is staggering. Most homeowners report 60-80% reductions in pool heating costs after switching to glazed solar collectors.
Maintenance expenses are minimal too. Expect to spend about $50-100 annually on basic upkeep like checking connections, cleaning panels, and winterizing in cold climates. There are no fuel deliveries, no pilot lights to monitor, and no complex electronic controls that break down.
We’ve created an interactive calculator on our site that helps you estimate your specific savings based on your pool size, location, and current heating method. Just plug in your numbers to see realistic payback periods, which typically range from 2-5 years for glazed systems. After that, you’re essentially heating your pool for free while the sun shines.
Building Your Own Glazed Solar Pool Heater
Sizing Your System Correctly
Getting the size right is crucial for your glazed solar pool heater to work efficiently. Too small, and you won’t see the temperature rise you’re hoping for. Too large, and you’ve wasted money on unnecessary collectors. Let me walk you through the basics.
The general rule of thumb is that your collector area should be between 50% to 100% of your pool’s surface area. So if you have a 400 square foot pool, you’ll need roughly 200 to 400 square feet of collectors. Where you fall in that range depends on several factors.
First, consider your local climate and sun exposure. If you’re in sunny Arizona with long pool seasons, you might get away with the lower end. Northern climates with shorter summers typically need more collector area to compensate for less intense sunlight and cooler temperatures.
Next, think about your desired temperature rise. Want to extend your swimming season into fall? You’ll need more heating power. Just looking to take the chill off during summer? Less collector area might suffice.
I remember when I first sized my system, I made the mistake of being too optimistic about our Michigan sunshine. I ended up adding another panel the following year because I’d underestimated what we needed for comfortable late-season swimming.
Rather than doing complex calculations by hand, we’ve created an interactive calculator tool right here on the site. It factors in your pool dimensions, location, and temperature goals to give you a personalized recommendation. This tool takes the guesswork out of sizing your solar system and helps ensure you invest in exactly what you need.
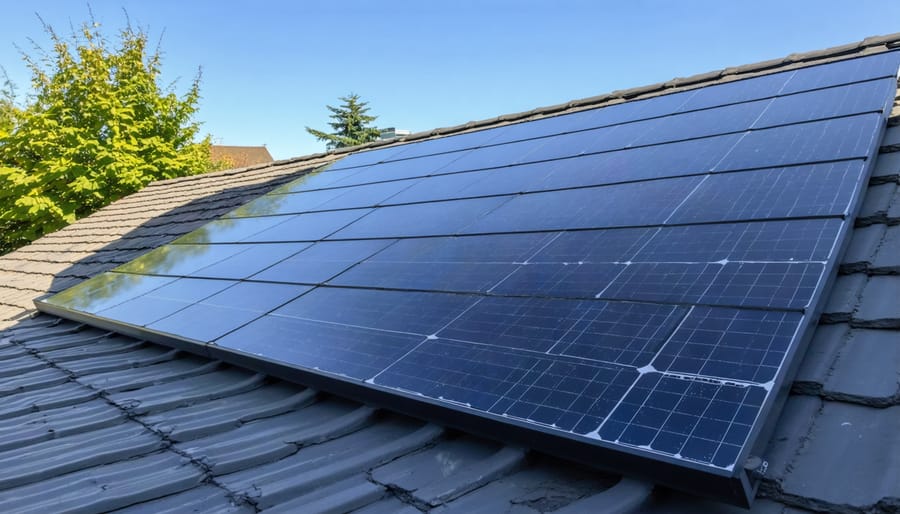
DIY installation of glazed solar collectors is achievable for homeowners with moderate construction skills and basic tools.
Materials and Tools You’ll Actually Need
Here’s what you’ll need to build your glazed solar pool heater. I learned early on that having everything ready before you start makes the project so much smoother, and you’ll actually save money by avoiding multiple trips to the hardware store.
For the collector itself, you’ll need black polyethylene tubing or EPDM rubber matting as your absorber material. I recommend starting with 100-200 feet of half-inch poly tubing from your local hardware store or online retailers like Home Depot or Amazon. You’ll spend around 50-75 dollars here. The glazing is crucial, so grab a sheet of polycarbonate or tempered glass sized to your collector frame. Polycarbonate runs about 30-50 dollars for a 4×8 foot sheet at building supply stores and is much easier to work with than glass.
You’ll need lumber for the frame, typically 2x4s or 2x6s depending on your size requirements. Pick up exterior-grade screws, silicone sealant for weatherproofing, and pipe fittings to connect your collector to the pool’s circulation system. Budget about 40-60 dollars for these items at any home improvement center.
For tools, you probably have most of what you need already: a drill with bits, saw for cutting lumber, measuring tape, level, and utility knife. The only specialty item is a tubing cutter if you’re working with poly pipe, which costs around 10-15 dollars and makes clean cuts much easier.
Total materials cost runs between 150-250 dollars for a basic system. Not bad when you consider commercial options start at 2,000 dollars. Local hardware stores work great for most components, though I’ve found online retailers sometimes offer better prices on bulk tubing.
The Build Process Simplified
Building your glazed solar pool heater is less daunting than it might seem. I remember feeling overwhelmed by my first project, but breaking it down into manageable phases made all the difference. Let me walk you through the construction journey step by step.
Phase one starts with the frame. You’ll create a sturdy box, typically using treated lumber or aluminum, sized to fit your absorber panel. Think of it as building a shallow picture frame that can withstand outdoor conditions. The frame needs to be weather-resistant and angled correctly for maximum sun exposure in your location.
Next comes installing the absorber, the heart of your system. This is usually black tubing or specialized absorber material that captures solar energy. You’ll secure it firmly within the frame, ensuring proper spacing for water flow. The absorber needs to make good contact across its surface to maximize heat transfer.
The glazing phase transforms your basic collector into a high-efficiency unit. You’ll carefully mount polycarbonate or tempered glass over the absorber, creating an insulated chamber. This greenhouse effect traps heat while protecting your system from the elements. Proper sealing here is crucial to prevent moisture buildup and heat loss.
Insulation comes next, typically on the back and sides of your collector. I use foam board insulation, which works wonderfully and is budget-friendly. This step dramatically improves efficiency by preventing heat from escaping anywhere except into your pool water.
Finally, you’ll tackle plumbing connections. This involves attaching inlet and outlet ports to your frame and connecting them to your pool’s circulation system. Basic PVC skills and some Teflon tape are usually all you need.
For complete step-by-step instructions with photos and material lists, check out our comprehensive DIY solar pool heater guide. It covers everything from cutting your first board to testing your finished system.
Maintenance and Troubleshooting Tips
Common Problems and Easy Solutions
Even the best-designed glazed solar pool heater can run into hiccups. Here’s what I’ve learned from both my own projects and countless community conversations about fixing common issues without losing your cool.
Condensation under the glazing is probably the most frequent complaint I hear. Before you panic, a little moisture is actually normal during temperature swings. However, if you’re seeing persistent fogging, check your edge seals. I once spent a whole weekend troubleshooting reduced output, only to find a tiny gap where my glazing met the frame. A bead of high-temperature silicone fixed it in ten minutes. Make sure you’ve got proper ventilation holes too, usually small weep holes at the bottom corners work wonders.
Leaks in the collector tubes are surprisingly easy to spot but can be tricky to fix. Turn on your pump and walk along the entire panel, looking for drips or wet spots. Most leaks happen at connection points rather than in the tubes themselves. I recommend keeping spare fittings and a bit of PEX or copper pipe on hand, depending on your system. A quick splice repair gets you back in business fast.
Reduced heating output often comes down to flow rate issues. If your water’s moving too fast, it doesn’t have time to absorb heat. Too slow, and you’re wasting potential. Most DIYers find that aiming for a temperature rise of about 5-10 degrees through the collector gives optimal performance.
For freeze protection in cooler climates, drainback systems are your friend. Install your collector at a slight angle so water naturally drains when the pump stops. This simple gravity-fed solution has saved countless panels from winter damage.
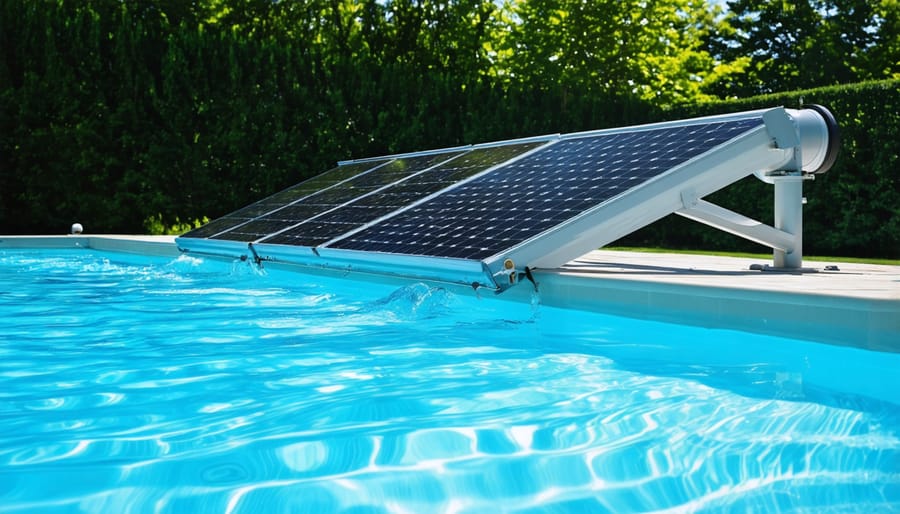
A properly sized glazed solar heating system can extend your swimming season and maintain comfortable water temperatures even in cooler weather.
So, are glazed solar pool heaters right for you? If you’re in a cooler climate, want year-round swimming, or you’re looking to extend your pool season well into spring and fall, they’re absolutely worth considering. Yes, they cost more upfront than unglazed collectors, but that investment pays off through superior heat retention and efficiency when you need it most.
I’ve talked with countless DIYers in our community who initially hesitated because of the price tag, only to realize later that choosing the right system from the start saved them from upgrading down the road. The key is honestly assessing your situation. What’s your climate like? How long do you want to swim each year? What’s your budget not just today, but over the system’s 15-20 year lifespan?
Here’s what I love about our community at Spheral Solar: we’re all about making informed decisions together. Whether you end up building a glazed system, going with unglazed collectors, or even exploring hybrid approaches, you’ll find support and real-world advice from people who’ve been exactly where you are now.
Ready to take the next step? Use our sizing calculator to figure out exactly what your pool needs. And if you’re leaning toward a DIY build, dive into our detailed build guides where community members share their actual experiences, mistakes, and victories. Trust me, there’s nothing quite like heating your pool with something you built yourself.
How useful was this post?
Click on a star to rate it!
Average rating 0 / 5. Vote count: 0
No votes so far! Be the first to rate this post.
We are sorry that this post was not useful for you!
Let us improve this post!
Tell us how we can improve this post?
charlesnoble
Here at Spheral Solar, I’m a hands-on solar power enthusiast, constantly exploring and experimenting with DIY solutions. I’m dedicated to sharing my discoveries, insights, and even the bumps I hit along the way, all in the pursuit of a more sustainable future.
Pool Heating Mats: The Solar Solution That Pays for… by Charlesnoble May 1, 2026 Harness the sun’s energy to warm your pool water passively by laying dark-colored mats on your pool deck or floating them directly on the water surface—this simple solar collection method can raise water temperature by 5-15°F depending on your climate and setup. Position these mats where they’ll receive maximum sunlight…
9 Best Solar Pool Heaters in 2023 by Adeyomola June 20, 2021 When buying solar pool heaters, people often give precedence to features like square footage, mounting type, water pressure limit, and the type of pool the solar pool heater is suitable for. But, in the end, the best solar pool heaters tip above the rest by offering superior temperature rise in…
How Does Solar Pool Heating Work? by Charlesnoble August 27, 2023 Solar pool heating systems work by is a sustainable and cost-effective way to extend the swimming season and enjoy warmer water in your pool. Solar pool heating systems work by harnessing heat from sunlight and transferring it to the pool water pumped through the collectors. This solar-heated water is returned…
Solar Pool Heating Cost and Lifespans by Adeyomola May 7, 2021 The cost of getting solar pool heating might be steep, but the running cost is way below any other available option for heating pools. How much does it cost to get solar pool heating? On average, the cost of solar pool heating systems falls between $3000 and $6000. The cost…
Heat Your 7000 Gallon Pool for Pennies Using Solar Power by Charlesnoble May 24, 2026 Calculate your heating needs by multiplying 7000 gallons by 8.34 pounds per gallon, then factor in your desired temperature rise and the time frame you want to achieve it. For a 7000-gallon pool, you’ll typically need between 75,000 and 150,000 BTUs per hour depending on your climate, but before you…
Heat Your Pool for Pennies Using Solar Panels You… by Charlesnoble April 12, 2026 Imagine cutting your pool heating costs by 70% while extending your swimming season by months—that’s the reality when you harness your existing solar panel system to warm your pool water. If you’ve already invested in rooftop solar or are planning an installation, you’re sitting on an untapped heating solution that…
Subscribe for handpicked DIY projects, exclusive tips, and giveaways.
Electricity powers our homes from five main sources: solar panels, wind turbines, hydroelectric generators, fossil fuel generators, and battery storage systems. If you’re building a reliable off-grid setup or backing up your solar array, understanding how these sources work together transforms a single-point-of-failure system into resilient, year-round power. I learned this the hard way during… Read more: 5 Sources of Electrical Energy Every Solar DIYer Should Know for Complete Off-Grid Power
Connect your panels to a charge controller or battery system by running positive terminals to positive and negative to negative. This parallel configuration doubles your available current (amperage) while keeping voltage the same, which is exactly what you need when your system demands more power than a single panel can deliver. I learned this the… Read more: Why Two Solar Panels Beat One Every Time (Parallel Connection Explained)
Monitor your greenhouse temperature daily during peak sun hours—if it consistently exceeds 85°F or condensation builds up on interior surfaces, you’re losing crops to heat stress and creating the perfect environment for fungal diseases. A greenhouse solar ventilation fan addresses both problems without adding a penny to your electricity bill, making it one of the… Read more: Why Your Greenhouse Needs a Solar Ventilation Fan (Before Summer Hits)