Why Your Attic Solar System is Dripping Wet (And How to Fix It for Good)
Updated:
Look up at your attic ceiling on a cold morning and spot water droplets collecting near your solar equipment. That moisture isn’t coming from a roof leak—it’s condensation, and if you’ve recently installed solar components in your attic space, you’re not alone in dealing with this frustrating issue.
Condensation forms when warm, moist air from your living space meets the cold surfaces in your attic, creating the perfect conditions for water droplets to appear on rafters, insulation, and unfortunately, your solar inverters or battery storage systems. I learned this the hard way during my first winter with a DIY solar setup when I discovered a small puddle beneath my charge controller.
The problem intensifies with solar installations because we’re adding heat-generating equipment to spaces that weren’t designed for it. Your inverter runs warm, creating temperature differentials that accelerate moisture formation. Left unchecked, this condensation leads to corroded connections, damaged electronics, compromised insulation, and even structural wood rot.
The good news? This is entirely preventable and fixable with straightforward solutions that don’t require professional intervention. Whether you’re troubleshooting existing moisture problems or planning ahead for a new solar installation, understanding the science behind attic condensation gives you the power to protect your investment and keep your system running efficiently year-round. Let’s walk through exactly how to identify, prevent, and eliminate condensation issues in your solar-equipped attic space.
What’s Really Happening When Condensation Forms in Your Attic
I’ll never forget my first solar attic installation. I was so focused on getting the panels positioned perfectly that I completely missed the moisture gathering on the rafters. It wasn’t until I went back to check my work a week later that I discovered droplets of water clinging to every cold surface. That’s when I learned the hard way what condensation is really all about.
Here’s what happens in simple terms. When warm, moist air from your living space rises into the attic, it’s carrying invisible water vapor. During colder months, your attic surfaces like rafters, roof sheathing, and even solar equipment get cold because they’re exposed to outside temperatures. When that warm, moisture-laden air touches these cold surfaces, it suddenly cools down. Cold air can’t hold as much moisture as warm air, so the water vapor turns into liquid droplets. That’s condensation.
The magic temperature where this happens is called the dew point. Think of it like a glass of ice water on a hot summer day. The glass gets covered in water droplets because the cold surface causes the moisture in the surrounding air to condense. Your attic works exactly the same way.
Attics are especially vulnerable to this problem for a few reasons. First, they’re naturally the collection point for warm air from below since heat rises. Second, they sit right at the boundary between your heated home and the cold outdoors. Third, many attics have poor ventilation, which means that moist air gets trapped with nowhere to go. When you add solar equipment into the mix, you’re introducing even more surfaces that can get cold and collect moisture, plus you might be creating new pathways for warm air to escape into the attic space.
Understanding this basic process is your first step toward preventing condensation problems in your solar attic setup.
Condensation forming on attic rafters is a clear warning sign of moisture problems that need immediate attention.
Why Solar Panels Make Your Attic Condensation Problem Worse
Temperature Shifts from Panel Shading
Here’s something I learned the hard way during my first solar installation: those panels don’t just generate electricity, they completely change your roof’s thermal behavior. Think of your solar panels as big umbrellas for your shingles. While the sun beats down on the panels themselves, the roof surface directly underneath stays significantly cooler, sometimes 20-30 degrees Fahrenheit cooler than exposed areas.
This temperature difference creates what I call “thermal islands” on your roof. When warm, moisture-laden air from your attic rises and meets these cooler zones beneath the panels, you’ve got the perfect recipe for condensation. It’s basic physics: warm air holds more moisture, and when it contacts a cool surface, that moisture has to go somewhere. The result? Water droplets forming on the underside of your roof decking, right where your panels provide shade.
The contrast is especially noticeable during temperature swings, like early morning or evening hours. I’ve crawled into enough attics to see this pattern repeatedly: wet spots forming in perfect rectangles that match the panel layout above. Understanding this temperature dynamic is your first step toward preventing moisture problems before they damage your roof structure.
Solar panels create cooler shaded zones on the roof surface beneath them, increasing the potential for condensation in those areas.
New Entry Points for Moisture
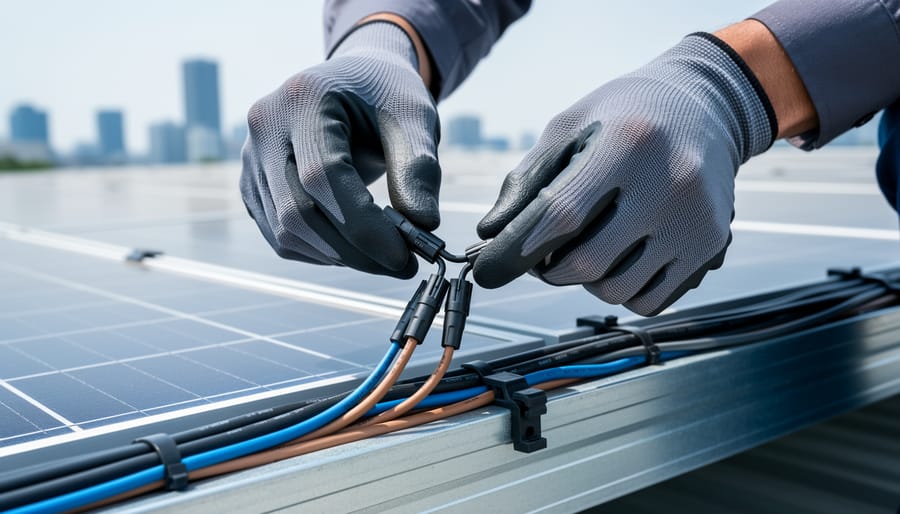
When I helped my neighbor install his first solar panel array last spring, I learned a hard lesson about moisture pathways. Every hole we drilled, every bolt we mounted, and every wire we ran through his attic created a potential doorway for moisture to sneak in. Here’s what you need to know to avoid the condensation headaches we faced.
Each wire penetration through your roof deck is like leaving a window cracked open for moisture. Even if you’ve sealed these entry points with caulk or weatherproofing materials, temperature changes cause materials to expand and contract. Over time, these seals can develop tiny gaps that become moisture highways. The DC wiring running from your panels into the attic is a common culprit, especially where conduit passes through the roof membrane.
Mounting hardware creates similar problems. Those L-feet and flashings bolted to your roof need perfect sealing, but they’re constantly exposed to temperature swings and weather. During installation, it’s easy to compromise existing insulation around these penetration points. I’ve seen cases where installers compressed or moved insulation to accommodate wiring runs, creating cold spots that become condensation magnets.
The installation process itself can disturb your attic’s carefully balanced vapor barrier. Walking around on insulation compresses it, reducing its effectiveness. Cutting into existing vapor barriers to run wiring without proper resealing creates moisture pathways you might not notice until condensation problems appear months later.
Before installation, document your attic’s existing condition. After your solar system goes in, inspect all penetration points carefully and reinforce sealing where needed.
The Warning Signs You Already Have a Condensation Problem
Last winter, I climbed into my attic to check on some stored holiday decorations and immediately knew something was wrong. The air felt damp, and there was this unmistakable musty smell that hadn’t been there before. That moment taught me the importance of regular attic inspections, especially after installing solar panels.
Here’s your practical checklist to determine if condensation is already affecting your attic. Grab a flashlight and let’s walk through what to look for.
Start with the obvious visual clues. Water stains on the underside of your roof decking or rafters are red flags. These typically appear as dark patches or rings and indicate moisture has been present, even if the surface feels dry now. Don’t confuse these with older stains from previous roof leaks, look for fresh discoloration or areas that seem to grow over time.
Next, inspect your insulation closely. Wet or compressed insulation loses its effectiveness and often looks flattened or matted down. If your attic has fiberglass batts, they should appear fluffy and uniform. Any sections that look darker, feel damp to the touch, or have a heavy, soggy appearance need attention immediately.
Mold and mildew are telltale signs of ongoing moisture problems. Look for black, green, or white spots on wood surfaces, especially in corners and along the roofline. Sometimes mold appears as a fuzzy growth, other times it’s just discoloration. Your nose is a powerful tool here. That musty, earthy smell I mentioned earlier is often your first clue that mold is present, even before you spot it visually.
During winter months, check for frost accumulation on nails protruding through the roof deck or along the underside of the sheathing. This frost forms when warm, moist air hits those cold surfaces and is a clear indicator of condensation issues.
Finally, examine any metal components like ductwork, vents, or solar equipment mounting brackets. Rust or corrosion suggests repeated exposure to moisture. Document everything you find with photos and dates to track whether conditions are improving or worsening over time.
Three Critical Steps to Prevent Condensation Before It Starts
Step 1: Get Your Attic Ventilation Right
Here’s something I learned the hard way after dealing with condensation nightmares in my own workshop attic: you can’t just slap in a couple of vents and call it a day. Proper attic ventilation follows a specific formula, and getting it right is your first line of defense against moisture problems.
The golden rule is simple: you need 1 square foot of ventilation for every 150 square feet of attic floor space. Even better, aim for 1 square foot per 300 square feet if you have a vapor barrier installed on your attic floor. But here’s the catch – that ventilation needs to be balanced between intake vents at the soffits and exhaust vents at the ridge. Think of it like breathing: your attic needs both to inhale and exhale.
For a typical 1,200 square foot attic, you’re looking at 8 square feet of total ventilation using the 150-to-1 ratio. Split that evenly: 4 square feet for soffit vents and 4 square feet for ridge vents. This creates a natural airflow where cool air enters low and warm, moist air exits high.
Don’t guess on these calculations. Head over to Spheral Solar’s interactive ventilation calculator – it does the math for you and accounts for your specific roof pitch and climate zone. I used it when upgrading my space, and it saved me from over-ventilating one side while under-ventilating the other, which can actually make condensation worse by disrupting the natural airflow pattern.
Proper attic ventilation with ridge and soffit vents is essential for preventing condensation in solar-equipped attics.
Step 2: Seal Every Air Leak From Below
Before you add another inch of insulation, you need to stop warm, moist air from escaping into your attic. Trust me on this – I learned the hard way when I discovered ice dams forming on my roof despite having plenty of insulation. The problem wasn’t the insulation itself; it was all the air leaks underneath it.
Think of your attic like a chimney. Warm air naturally rises, and it’s constantly searching for escape routes. Every gap, crack, and hole becomes a highway for moisture-laden air to travel upward. When that warm air hits your cold attic space, condensation forms instantly.
Start your air-sealing mission by checking the usual suspects. Look around recessed lights, plumbing stacks, electrical wiring holes, and anywhere ductwork passes through the ceiling. Use a smoke pencil or incense stick on a cool day – hold it near suspected gaps and watch where the smoke travels. You’ll be amazed at what you find.
Now, here’s where solar installations create unique challenges. When your solar system was installed, new holes were drilled through your roof and attic floor for wiring. These penetrations are often overlooked during the installation rush. Make sealing wiring penetrations a top priority. Use fire-rated caulk or expanding foam specifically designed for electrical penetrations – never compromise on fire safety.
For smaller gaps and cracks, use caulk. For larger openings around pipes or wires, fire-rated expanding foam works wonders. Weather-stripping belongs around attic access doors and pull-down stairs. And those old recessed light fixtures? Consider replacing them with airtight, IC-rated models or building sealed boxes around them.
Remember, sealing comes before insulating. Always. This single step often solves 80 percent of attic condensation problems, especially in solar-equipped homes.
Step 3: Install a Proper Vapor Barrier
Think of a vapor barrier like a raincoat for your attic—it keeps moisture where it belongs and prevents it from sneaking into places that cause trouble. When I first installed one in my workshop, I was amazed at how such a simple layer could make such a dramatic difference in controlling condensation.
A vapor barrier is essentially a sheet of plastic or foil-backed material that blocks water vapor from passing through. Here’s the key science in simple terms: warm air holds more moisture than cold air. When that warm, moist air from your living space tries to rise into your cold attic, the vapor barrier stops it in its tracks before it can condense into water droplets on cold surfaces.
The placement matters enormously. Your vapor barrier should go on the warm side of your insulation—that’s typically the ceiling of your living space, not up in the attic itself. This positioning intercepts moisture before it begins its journey upward. Many DIYers make the mistake of installing it on the wrong side, which actually traps moisture and makes condensation worse.
For homes with solar installations, proper vapor barriers become even more important. Your solar equipment and wiring create additional pathways for warm air to escape, and any condensation near electrical components is a recipe for problems. The barrier works alongside your ventilation system—while ventilation removes moisture that does get through, the vapor barrier minimizes how much moisture enters in the first place.
Common vapor barrier materials include six-mil polyethylene sheeting or specialized foil-faced products. The installation is straightforward: overlap seams by several inches and seal them with specialized tape to create a continuous barrier without gaps.
How to Fix Condensation Issues in Your Existing Solar Setup
Quick Wins You Can Do This Weekend
Let me share something I learned the hard way: you don’t need to wait weeks for a contractor to tackle basic attic condensation issues. There are several things you can do this weekend that’ll make a real difference.
Start by inspecting your existing vents. Grab a flashlight and check all your soffit vents, gable vents, and ridge vents for blockages. I once found a bird’s nest completely blocking my soffit vent, which explained a lot! Clean out any debris, dust, or insulation that’s crept into these openings. This simple task takes maybe an hour but can dramatically improve airflow.
Next, examine any attic penetrations where pipes, wires, or ducts enter your space. These gaps are condensation magnets because warm, moist air sneaks through them. Seal them with spray foam insulation or caulk. The difference this makes is remarkable, and you’ll probably spend less than fifty bucks at the hardware store.
If you’ve got a solar panel installation, check that the mounting didn’t accidentally block or redirect your existing ventilation pathways. Sometimes panels can interfere with natural airflow patterns without anyone realizing it.
Consider upgrading to solar attic fans if you need better active ventilation. They’re weekend-installable and work beautifully with existing solar attic ventilation systems.
Finally, on a sunny day, measure your attic temperature versus outside temperature. If it’s more than twenty degrees hotter inside, you’ve got ventilation issues that need addressing beyond these quick fixes.
When to Call in Professional Help
I’ll be straight with you—I’ve tackled plenty of attic condensation issues over the years, but there have been times when I’ve stepped back and made the call for professional help. It’s not admitting defeat; it’s being smart about protecting your home and solar investment.
If you discover mold covering more than ten square feet, especially if it’s black mold, that’s professional territory. Small patches you can handle with proper safety gear, but extensive growth indicates a deeper moisture problem that needs expert assessment. I learned this lesson when a neighbor tried tackling widespread mold himself and ended up spreading spores throughout his home—not a mistake worth repeating.
Structural damage is another clear signal. If you notice sagging roof decking, deteriorating rafters, or compromised wood around your solar panel mounting points, bring in a structural engineer or experienced contractor. Your solar panels rely on solid mounting surfaces, and weakened structures can create dangerous situations.
Complex ventilation redesigns, particularly those involving attic fan considerations integrated with solar systems, often benefit from professional input. While you might handle basic vent installation, calculating proper airflow for spaces with solar equipment requires expertise. A qualified HVAC specialist or solar contractor can ensure your ventilation works harmoniously with your panels.
You should also call professionals if condensation persists despite your DIY efforts, if you’re uncomfortable working at heights, or if your local building codes require permitted work. Many solar installers offer maintenance packages that include attic inspections—worth considering since they understand how panels affect roof dynamics.
Remember, the DIY spirit is about working smarter, not harder. Sometimes the smartest move is recognizing when expertise saves you time, money, and potential headaches down the road.
Tools and Materials That Make the Job Easier
Let me tell you, after years of crawling through attics, I’ve learned that having the right tools makes all the difference between a frustrating afternoon and a successful fix. When I first started tackling condensation issues, I was guessing half the time. Now I rely on specific instruments that take the mystery out of moisture problems.
First up, a quality moisture meter is absolutely essential. I personally use a pin-type meter from General Tools, which runs about $30-50 at most home improvement stores. It lets you test wood and insulation directly to confirm whether you’re dealing with active moisture or just old stains. For monitoring ongoing conditions, grab a basic digital hygrometer for around $15-25. I keep three of these scattered around my attic to track humidity levels in different zones. You’ll find both at Home Depot, Lowe’s, or Amazon.
For sealing air leaks, which is often your first line of defense, I swear by Great Stuff Pro foam sealant and high-temperature silicone caulk. Budget about $30-40 for enough material to seal a typical attic. The foam expands to fill gaps around pipes and wires, while silicone handles areas near heat sources.
When addressing insulation, fiberglass batts with vapor barriers are budget-friendly at roughly $0.50-0.75 per square foot, but I’ve had better results with spray foam kits for problem areas, despite the higher cost of around $300-500 for a DIY kit.
For ventilation improvements, soffit vents run about $2-5 each, ridge vents cost $3-6 per linear foot, and powered attic fans range from $100-300. Don’t forget a good headlamp, work gloves, and a respirator mask for safety. Most of these items are available at local hardware stores, though I often comparison shop online for better deals.
Using a moisture meter helps identify hidden condensation problems in attic insulation before they cause serious damage.
Real-World Success Story: How I Eliminated Condensation in My Off-Grid Cabin
Let me share a frustrating problem I dealt with in my own off-grid cabin about three years ago. I’d installed a modest solar array on the roof, and everything seemed perfect until I noticed water droplets forming on the underside of my attic sheathing right where the wiring penetrated through.
At first, I thought I had a roof leak. I spent an entire Saturday afternoon inspecting shingles and flashing, convinced I’d find the culprit. Nothing. The roof was solid. That’s when I realized I was dealing with condensation, and honestly, I felt pretty foolish for not spotting it sooner.
Here’s what was happening: I’d run my solar panel wiring through the attic space without properly sealing the penetration points. Every time warm, humid air from my living space rose into the cooler attic, it found these tiny gaps around the conduit. The moisture-laden air would hit the cold attic surfaces and bam, condensation city.
The troubleshooting process taught me a lot. I grabbed a flashlight and traced every wire path, checking for moisture patterns. Sure enough, the condensation was concentrated around three specific spots where cables entered the attic. On colder mornings, I could actually see the temperature differential creating problems.
My solution was surprisingly straightforward. I used expanding foam sealant designed for electrical penetrations to completely seal those entry points. Then I added a layer of foam board insulation around the immediate area to create a thermal barrier. I also improved my cabin’s overall ventilation by installing two additional soffit vents.
The results were immediate. Within a week, the condensation disappeared completely. The whole fix cost me about forty dollars and maybe three hours of work. The lesson? Even experienced DIYers overlook the basics sometimes. Proper air sealing matters just as much as the solar installation itself, and addressing condensation early saves you from much bigger headaches down the road.
Here’s the good news I want you to take away from all this: controlling condensation in your attic solar setup is absolutely manageable. I’ve seen countless homeowners tackle this issue successfully, and honestly, once you understand the basics of moisture control and ventilation, it becomes second nature. The key is catching it early and taking action now rather than waiting for that small water stain to become a major repair bill.
I learned this lesson the hard way years ago when I ignored a minor condensation issue in my own workshop. What could have been a simple ventilation fix turned into replacing insulation and treating mold. Don’t let that be your story.
Your solar investment deserves protection, and so does your home. Whether you’re dealing with condensation right now or just want to prevent it, you’ve got the knowledge to move forward confidently. Start with a thorough attic inspection this weekend, check your ventilation rates, and make sure your vapor barriers are doing their job.
I’d love to hear about your experiences. Have you dealt with condensation in your solar attic? What solutions worked for you? Drop your questions and stories in the comments below. We’re all learning together, and your insights might help someone else protect their system and home.
How useful was this post?
Click on a star to rate it!
Average rating 0 / 5. Vote count: 0
No votes so far! Be the first to rate this post.
We are sorry that this post was not useful for you!
Let us improve this post!
Tell us how we can improve this post?
charlesnoble
Here at Spheral Solar, I’m a hands-on solar power enthusiast, constantly exploring and experimenting with DIY solutions. I’m dedicated to sharing my discoveries, insights, and even the bumps I hit along the way, all in the pursuit of a more sustainable future.
Solar-Powered Ventilation That Slashes Your Energy… by Charlesnoble March 11, 2026 Calculate your home’s air exchange rate by dividing your square footage by 60—most homes need complete air replacement every 1-3 hours to prevent moisture buildup, stale air, and indoor pollutants that trigger allergies and respiratory issues. A 1,500 square foot home requires roughly 25-50 cubic feet per minute of continuous…
Why Your Attic Needs a Solar Roof Vent (Before Summer Hits) by Charlesnoble February 21, 2026 Your attic is probably hotter than you think. On a summer day, temperatures up there can soar past 150°F, turning your top floor into an oven and forcing your air conditioner to work overtime. A solar ventilation fan for your roof tackles this problem head-on by pulling hot air out…
Solar Ventilation Just Saved My Attic (And Cut My… by Charlesnoble November 3, 2025 **Assess your home’s air quality by standing in your living space right now—if you notice stale odors, condensation on windows, or that stuffy feeling when you walk in the door, your home is telling you it needs better ventilation.** Most homes built in the last 30 years are sealed tight…
Attic Solar Wiring That Won’t Fail Your Inspection by Charlesnoble February 10, 2026 Verify your attic wiring meets National Electrical Code (NEC) Article 334 requirements before connecting any solar equipment. This means checking that all NM cable (Romex) running through your attic maintains proper support every 4.5 feet, stays at least 1.25 inches from roof decking edges where penetration could occur, and uses…
How Do Attic Fans Work? by Adeyomola June 21, 2021 Attic fans work primarily by augmenting the movement of hot air rising out of the attic. They do this by transmitting the mechanical energy (kinetic energy) from their rotation to the molecules of the air around them, thus increasing the rate of convection. As attic fans promote the escape of…
Keep Your Attic Cool Without Touching Your Electric Bill by Charlesnoble December 27, 2025 Look up at your gable vent on a summer afternoon, and you’ll understand why a solar-powered attic fan mounted there makes perfect sense. That triangle-shaped opening at the peak of your home sits exactly where hot air naturally accumulates, and it’s already positioned to catch direct sunlight for most of…
Subscribe for handpicked DIY projects, exclusive tips, and giveaways.
Monitor your greenhouse temperature daily during peak sun hours—if it consistently exceeds 85°F or condensation builds up on interior surfaces, you’re losing crops to heat stress and creating the perfect environment for fungal diseases. A greenhouse solar ventilation fan addresses both problems without adding a penny to your electricity bill, making it one of the… Read more: Why Your Greenhouse Needs a Solar Ventilation Fan (Before Summer Hits)
Press and hold the adjust button (usually bottom-left) on your G-Shock for three seconds until the time display starts flashing—this unlocks manual time adjustment on most models. Navigate between hours, minutes, and date using the mode button, then use the forward/reverse buttons to change values. If you own a radio-controlled G-Shock with Multi-Band 6 technology,… Read more: How to Adjust Time on Your G-Shock Solar Watch (Without Breaking It)
Picture this: you’ve just installed your third solar panel on the roof, wires dangling everywhere, and suddenly you realize your two-panel string needs to connect with your new addition. You need a solar branch connector, but you’re staring at product listings wondering if you’re about to make an expensive mistake. Solar branch connectors are the… Read more: Why Your Solar Array Needs Branch Connectors (And How to Install Them Right)


")
")


")
")