How to Install a Whole House Ventilation System Using Solar Power
Updated:
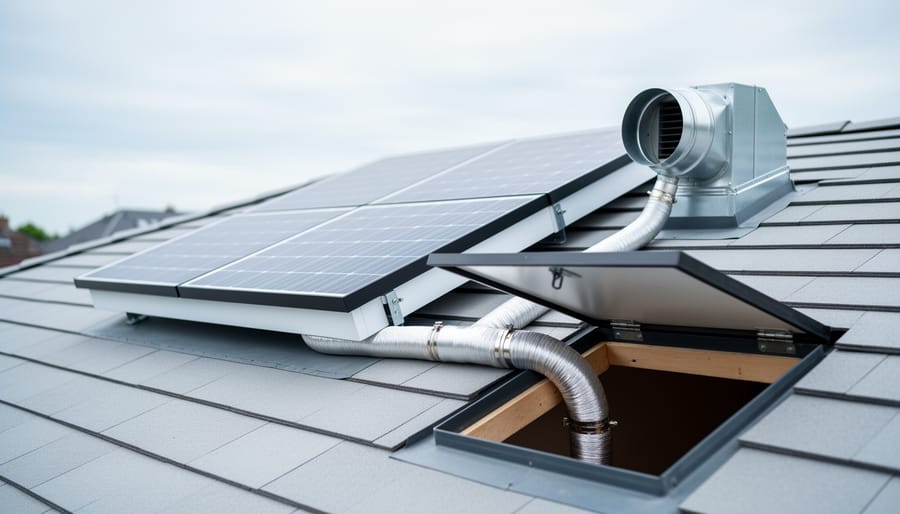
Installing a whole house ventilation system powered by solar takes about 6 to 8 hours for a moderately skilled DIYer and delivers continuous fresh air circulation without touching your electric bill. The core method involves mounting a solar panel on your roof to power an intake or exhaust fan, routing ductwork through your attic or crawlspace, and cutting strategic openings in your home’s envelope to create balanced airflow that pushes out stale air while drawing in fresh outdoor air.
I’ll be straight with you: this isn’t a beginner’s first solar project. But if you’ve successfully tackled basic electrical work and you’re comfortable working in tight spaces, you can absolutely do this yourself over a weekend. When I installed my first solar ventilation system back in 2019, I made every rookie mistake in the book, from undersizing my panel to creating negative pressure that sucked conditioned air right out of my living space. That trial-by-fire taught me what actually works, and I’m going to walk you through the proper way so you skip the headaches I caused myself.
The beauty of solar-powered whole house ventilation is the independence it gives you. No hardwiring into your home’s electrical system means simpler permitting in most jurisdictions, and the system keeps running during grid outages when air quality matters most. You’re creating a mechanical ventilation strategy that works with your home’s natural airflow patterns rather than fighting them.
What makes this project achievable is breaking it into clear phases: planning your airflow strategy, gathering the right components, safely cutting and sealing penetrations, running low-voltage wiring from panel to fan, and verifying balanced performance with simple pressure tests. Each step builds on the last, and by the end of this guide, you’ll have a system that exchanges your home’s air volume several times per day using nothing but free sunshine.
Key Takeaway: Solar ventilation systems eliminate ongoing electricity costs while operating independently from the grid, and they deliver continuous fresh air exchange that reduces indoor pollutants, moisture buildup, and trapped heat without adding to your utility bills.
Understanding Solar-Powered Whole House Ventilation
Solar-powered whole house ventilation harnesses energy from the sun to drive air circulation throughout your home, creating a continuous exchange that pushes out stale air while drawing in fresh outdoor air. At its core, the system uses photovoltaic panels to generate electricity that powers ventilation fans, eliminating the need for grid power and slashing your energy bills.
You’ll encounter two main approaches when comparing solar vs electric ventilation systems. Active solar ventilation uses PV panels connected directly to electric fans that actively pull or push air through your home. These systems include a solar panel, one or more DC fans, wiring, and mounting hardware. The fans spin faster on sunny days when you typically need more cooling, creating a naturally responsive system that adapts to conditions without any programming.
Passive solar thermal ventilation takes a different route, using heat from the sun to warm air in a collector, which then rises naturally and draws cooler air through your living spaces via convection. While passive systems have no moving parts to maintain, they generate less powerful airflow and work best in consistently sunny climates.
The basic components of an active system integrate seamlessly with most homes. The solar panel mounts on your roof or exterior wall where it captures maximum sunlight. Wiring runs from the panel to the fan unit, which you’ll install in your attic, gable wall, or directly through the roof. The fan connects to ducting or vents that channel airflow according to your home’s layout. Some DIYers add a charge controller and battery to maintain airflow after sunset, though the simplest setups operate only during daylight hours when ventilation needs peak anyway. The beauty of this approach is that it works alongside your existing HVAC system without requiring professional integration or modifications to your electrical panel.
What You’ll Need: Tools, Materials, and Equipment
A solar-powered ventilation fan and panel are shown mounted on a home exterior, illustrating the practical placement of the system components.
Before you climb onto the roof, let’s make sure you have everything on hand. I learned this the hard way during my first installation, nothing’s worse than discovering you’re missing a critical component when you’re halfway through cutting a hole in your wall. Here’s what you’ll actually need to complete this project without multiple trips to the hardware store.
Essential Tools: Variable-speed drill with masonry and wood bits, jigsaw with metal-cutting blade, Phillips and flathead screwdrivers, wire strippers and crimpers, caulk gun, sturdy extension ladder rated for your weight plus 25 pounds, tape measure, level, pencil, safety glasses, and work gloves
Core Materials: Solar panel ventilation kit (typically 10-40 watt panel with integrated or separate DC fan), stainless steel mounting brackets and hardware, flexible or rigid ducting (4-6 inch diameter depending on your fan), high-quality exterior caulk and roofing sealant, 14-gauge or 12-gauge UV-resistant wire, roof flashing appropriate for your roof type, and intake/exhaust vent covers with pest screens
Optional but Recommended: Inline DC fuse or circuit breaker, charge controller for battery systems, deep-cycle 12V battery for nighttime operation, MC4 connectors for solar wiring, smoke pencil or incense sticks for airflow testing, and multimeter for electrical verification
When selecting your solar panel kit, look for systems specifically designed for ventilation rather than repurposing standard panels. The sweet spot for most homes is a 20-30 watt panel paired with a brushless DC fan rated for 800-1200 CFM. Brushless motors last significantly longer and handle the constant operation better than brushed alternatives.
For ducting, I prefer semi-rigid aluminum over flexible plastic, it doesn’t sag, maintains better airflow, and won’t degrade in attic heat. Go with 6-inch diameter if your home is over 1800 square feet. The extra airflow capacity makes a noticeable difference.
If you’re adding battery backup for continuous operation, get a proper solar charge controller. The cheap PWM controllers work fine for this application and prevent overcharging your battery. A single 35Ah deep-cycle battery will run a typical ventilation fan through the night and well into the next morning before the sun takes over again.
Safety Warnings and Pre-Installation Considerations
The image highlights roof-safety essentials and careful weatherproofing when installing a duct penetration.
Before you climb that ladder with your solar panel and drill in hand, let’s talk about the serious stuff that could land you in the emergency room, or worse, in legal trouble with your local building department.
Roof Work Is Inherently Dangerous
I learned this the hard way during my first installation when I nearly slid off a wet roof while carrying a solar panel. Falls from roofs account for thousands of injuries annually, and a whole house ventilation install puts you up there multiple times. You’ll need proper fall protection, at minimum, a roof safety harness with anchor points rated for your weight plus equipment. Work only in dry conditions, wear shoes with good grip, and never rush. If your roof pitch exceeds 6:12 or you’re uncomfortable with heights, hire a roofer to handle the mounting and penetration work.
Warning: Always use fall protection equipment when working on roofs, and check with your local building department about permit requirements before cutting any openings, unpermitted work can void your insurance and complicate future home sales.
Electrical Safety with DC Circuits
DC current from solar panels behaves differently than household AC power. It doesn’t “let go” the way AC does, making shocks potentially more dangerous. Always disconnect panels before working on wiring, use insulated tools, and never work in wet conditions. DC arcs can be persistent and dangerous when making or breaking connections under load, so install an inline disconnect switch you can throw before touching any wiring.
Structural Considerations You Can’t Ignore
Every hole you cut in your roof or exterior wall is a potential water entry point. You’re creating penetrations that must be properly flashed and sealed, or you’ll face rot, mold, and expensive repairs. Before cutting anything, locate roof rafters and wall studs, you’ll need solid wood for mounting brackets. Avoid cutting through structural members. If you’re unsure about your roof’s integrity or whether it can support additional equipment, get a structural assessment first.
When to Call a Professional
Some situations demand expert help. If your project requires integrating with your main electrical panel, tying into existing HVAC ductwork in tight spaces, working on a slate or tile roof, or dealing with complex flashing around chimneys or valleys, bring in licensed contractors. The money you save doing it wrong won’t cover the cost of fixing water damage or failed inspections. Complex roofing configurations, homes with cathedral ceilings, or situations requiring asbestos abatement are all professional territory.
Step-by-Step Installation Process
Step 1: Planning Your Ventilation Layout
Start by walking your home with a notepad and sketching a simple floor plan. Mark existing HVAC vents, windows, and any obvious air leaks you’ve noticed. Your goal is to create a cross-flow pattern where fresh air enters on one side of the house and stale air exhausts on the other, typically using prevailing winds to your advantage.
For a basic CFM calculation multiply your home’s square footage by 0.35. A 2,000 square foot home needs roughly 700 CFM of ventilation capacity. If you’re dealing with high ceilings or open layouts, factor in total volume instead. The ventilation by square feet standard provides a good baseline, but I always round up slightly to account for inefficiencies in ductwork.
Now decide on your mounting location. Attic-mounted systems work brilliantly for ranch-style homes where heat accumulates at the peak, and they’re easier to install without ladders on steep roofs. Gable-mounted fans are my go-to for two-story homes because you can access them from inside the attic. Roof-mounted configurations give you the most flexibility for solar panel positioning but require more careful weatherproofing.
Consider where you spend the most time. I placed my intake near the living room and exhaust above the kitchen because that’s where we generate the most heat and moisture. Don’t overthink this step, just avoid putting exhaust vents directly above intake points or you’ll short-circuit your airflow.
Step 2: Installing the Solar Panel
The solar panel needs rock-solid mounting and clear access to sunlight throughout the day. Start by identifying your installation location, ideally a south-facing roof section (in the Northern hemisphere) with zero shade between 9 AM and 3 PM. Even a small shadow from a chimney or tree branch can cut output by 30% or more.
Mount the provided brackets to roof rafters, not just sheathing. I learned this the hard way when a windstorm nearly tore my first panel loose. Use a stud finder or tap along the roof to locate solid framing, then drill pilot holes and secure with lag screws rated for outdoor use. Apply a generous bead of roofing sealant under each bracket before tightening.
Angle the panel at roughly your latitude in degrees for year-round efficiency, about 35 degrees works well for most of the continental US. Some kits include adjustable mounts that let you fine-tune this later.
Before final tightening, double-check that no nearby objects will cast shadows as the sun moves across the sky. A few minutes with a compass now saves headaches later. Weatherproof all penetration points with flashing tape or additional sealant, ensuring water flows away from mounting holes.
Step 3: Cutting Ventilation Openings
Start by locating studs or rafters near your planned vent locations, you’ll want to position openings between them, not through them. From inside the attic or room, drill a pilot hole through the center point of your marked area. This gives you a reference on the exterior and prevents you from cutting blind.
Push a wire or long nail through the pilot hole so it’s visible from outside. Head out and mark your vent outline around this reference point, using the manufacturer’s template if provided. For exhaust vents, I typically cut a 12-14 inch diameter circle, though your specific fan will dictate the exact size.
The cutting technique depends on your wall material. Wood siding cuts cleanly with a jigsaw fitted with a fine-tooth blade, work slowly to avoid splintering. Vinyl requires similar treatment but benefits from masking tape along your cut line to prevent cracking. Stucco needs scoring first with a grinder, then careful jigsaw work to avoid crumbling the edges. Brick or block walls demand a masonry bit and reciprocating saw, which honestly pushes into professional territory for most DIYers.
Always wear safety glasses and a dust mask. The goal is clean edges that your vent flange will completely cover, hiding any minor imperfections.
Step 4: Installing Ventilation Fans and Ducting
Start by securing the fan unit to the ductwork opening you cut earlier. Most solar ventilation fans come with a mounting flange, position it flush against the wall or ceiling surface, ensuring the airflow arrow points in the correct direction (typically outward for exhaust). Drive screws through the pre-drilled holes into solid framing, not just drywall. I learned this the hard way when my first fan vibrated loose after two weeks.
Connect the ducting to the fan’s outlet port, sliding the duct over the collar and securing it with metal duct tape (not cloth tape, it deteriorates). For runs longer than six feet, use rigid metal ducting instead of flexible; it maintains better airflow and won’t sag. The DIY installation steps are similar whether you’re installing in an attic or gable.
If you’re adding intake vents, position them low on opposite walls from exhaust points to create cross-ventilation. Cut openings following manufacturer templates, insert the vent housing, and seal edges with exterior-grade caulk. For homes with existing passive vents, you can connect ducting directly to those points using transition fittings.
Seal every joint with mastic sealant or aluminum foil tape rated for HVAC use, even small gaps reduce efficiency by 20-30%.
Step 5: Wiring the Solar Panel to the Fan
With the solar panel and fan physically mounted, you’re ready for the electrical connection. Start by running appropriate gauge wire from the panel to the fan location, 14 AWG works for most residential installations under 20 feet, but use 12 AWG for longer runs to minimize voltage drop. Strip about half an inch from each wire end using wire strippers.
Connect the positive wire from the solar panel to the fan’s positive terminal, matching red to red. Connect the negative wire (typically black) to the fan’s negative terminal. Most solar ventilation fans have clearly marked terminals, but if you’re unsure, consult the fan’s wiring diagram. Double-check polarity before making final connections, reversed polarity won’t damage DC motors but will prevent operation.
Install an inline fuse holder on the positive wire, positioned close to the solar panel. Use a fuse rated 25% higher than your fan’s maximum draw, if your fan pulls 2 amps, use a 2.5 or 3 amp fuse. This protects against wiring shorts.
For continuous nighttime operation, add a charge controller between the panel and a small 12V battery, then wire from the battery to the fan. Follow proper solar attic wiring practices for all connections.
Seal every outdoor connection with heat-shrink tubing and electrical tape, then apply a layer of waterproof electrical sealant. Secure wiring to prevent wind damage using cable clips every 18 inches.
Step 6: Sealing and Weatherproofing
Weatherproofing is where many DIYers cut corners, don’t be one of them. Start at the roof penetration: slide metal flashing under the shingles above your vent, over the vent flange, and seal with roofing cement. Apply a continuous bead of outdoor-rated silicone caulk around the vent housing where it meets the roof surface.
Move to duct connections inside. Seal every joint with aluminum foil tape (not duct tape, which degrades). Caulk where ducting passes through walls or ceilings.
Test your seals by running the system during light rain and checking for moisture. Install galvanized mesh screens over intake and exhaust openings to block insects, birds, and rodents while maintaining airflow.
Testing and Verifying Your Installation
Now that your solar ventilation system is installed, you need to verify it’s working correctly before calling the job done. I learned this the hard way when I assumed everything was fine, only to discover a week later that I’d reversed the polarity and my fan was pulling air the wrong direction.
Start your testing on a sunny day when your panel is generating maximum power. Here’s your systematic verification checklist:
Visual confirmation: Watch the fan blades spin. They should rotate smoothly without wobbling or grinding noises.
Airflow direction test: Hold a tissue or piece of toilet paper near the exhaust vent. It should pull firmly toward the opening. Do the same at intake vents, paper should flutter away from the opening.
Multimeter voltage check: Measure DC voltage at the panel output in full sun. You should see voltage matching your panel’s rated output (typically 12-24V). Anything below 80% suggests wiring issues or panel damage.
Current measurement: Use your multimeter’s amp setting to verify the fan is drawing appropriate current. Compare this to the fan motor’s specifications, it should be within 10% of the rated amperage.
Home-wide airflow: Walk through your house with a smoke pencil or incense stick. You should detect air movement from intake zones toward exhaust points. Stagnant areas indicate inadequate circulation.
Performance under clouds: Wait for an overcast period and recheck fan speed. It will slow down but shouldn’t stop completely unless you’re experiencing heavy cloud cover.
Proper operation means steady airflow you can feel with your hand, quiet fan operation (no rattling or scraping), and measurable air movement throughout your home. Warning signs include complete fan stoppage in sunlight, voltage readings below 10V in full sun, backward airflow, or moisture accumulating inside ducts. If you’re seeing these issues, revisit your wiring connections and polarity first, that fixes 80% of installation problems.
Testing electrical output with a multimeter helps confirm safe connections before powering airflow components.
Troubleshooting Common Issues
Even well-planned installations hit snags. Here’s how to diagnose and fix the most common issues I’ve seen with solar ventilation systems.
Fan Not Spinning
First, check polarity. I once spent an hour troubleshooting before realizing I’d reversed the positive and negative wires, DC motors won’t run backward, they just won’t run. Swap the connections and test again. If polarity’s correct, inspect the fan motor contacts for corrosion or dust buildup. A quick wipe with rubbing alcohol often gets things moving. Finally, use your multimeter to verify the panel is actually producing power. On cloudy days, you might only see 2-3 volts instead of the rated 12V, which isn’t enough to start the motor.
Insufficient Airflow
Walk through your ductwork and check for kinks, compression, or debris blocking the path. Even a slight bend can cut airflow by half. Pull off the intake cover and peer inside, I’ve found everything from insulation scraps to bird nests. Also verify your fan’s CFM rating matches your home’s square footage. A 150 CFM fan can’t effectively ventilate a 2,500 square foot house; you’ll need closer to 250 CFM or a multi-fan setup.
Quick Reference: Common Problems
Moisture in ducts: Add drainage holes at low points and improve exterior seal around penetrations
Intermittent operation: Check for tree shadows moving across the panel during the day
Rattling noise: Tighten all mounting screws and verify fan blades aren’t hitting the housing
Poor winter performance: Clean snow/ice from panel and consider adding battery backup for consistent operation
Most issues come down to connections, electrical or physical. Wiggle every wire, tighten every screw, and inspect every seal. Ninety percent of the time, that’ll solve it.
Optimizing Performance and Next Steps
Your system’s running, but there’s plenty you can do to squeeze every last bit of performance from it. I’ve found these tweaks make a noticeable difference in how well my ventilation keeps up with changing seasons.
Seasonal Adjustments
Twice a year, spring and fall, adjust your solar panel angle to match the sun’s height. In summer, tilt it flatter (around 15-25 degrees) to catch the higher sun. In winter, increase the angle (45-55 degrees) to capture those low-arc rays. This simple change can boost daily runtime by 20-30%.
Adding Smart Controls
A basic thermostat switch turns your fan on only when attic temps exceed your set point, preventing unnecessary operation on cool days. I installed a dual-stage controller that ramps fan speed based on temperature, low speed at 90°F, high speed at 110°F. This extends component life while maintaining comfort.
HVAC Integration
Your solar ventilation can complement your existing system. Coordinate intake locations so fresh air feeds near return vents, reducing AC workload. In shoulder seasons, your solar fan might handle cooling entirely, keeping the AC off.
Expanding Coverage
Once comfortable with one zone, add fans to other areas. A gable-mounted unit plus an attic fan creates cross-ventilation that really moves air. Check our installation cost guide to budget additional zones.
Maintenance Schedule
Every three months, brush dust off the solar panel and check fan blades for debris. Annually, inspect roof seals and flashing for cracks, tighten any loose mounting hardware, and verify all electrical connections remain corrosion-free. These quick checks prevent small issues from becoming major headaches.
Frequently Asked Questions
Once installed, the ventilation system works quietly in the background to support healthier, more comfortable indoor air.
Here are answers to the questions I hear most often from DIYers planning their first solar ventilation installation:
How much does a DIY solar whole house ventilation system typically cost?
A basic solar ventilation kit with a 20-30W panel and fan typically runs $200-400, while a more comprehensive system with battery backup and multiple zones can reach $800-1200. You’ll save 40-60% compared to professional installation costs.
Will solar ventilation work during winter or on cloudy days?
Yes, though at reduced capacity. Solar panels still generate power from diffused sunlight on cloudy days, typically 10-25% of peak output. Adding a small battery backup ($100-200) lets the system run continuously, drawing stored power during nighttime and overcast periods.
Can I integrate solar ventilation with my existing HVAC system?
Absolutely. Solar ventilation works alongside traditional HVAC by providing continuous background air exchange, which actually reduces the load on your heating and cooling systems. Just ensure intake and exhaust points don’t interfere with existing returns or supply vents.
How noisy are solar-powered ventilation fans?
Quality solar fans operate at 25-40 decibels, roughly equivalent to a quiet library or refrigerator hum. You’ll barely notice them indoors, especially if mounted in attic spaces rather than living areas.
What’s the payback period for a solar ventilation system?
Most homeowners see ROI within 3-5 years through reduced cooling costs and extended HVAC lifespan. In hot climates where attic temperatures regularly exceed 140°F, payback can happen in under 2 years.
Do I need a permit to install a solar ventilation system?
Requirements vary by municipality. Many areas don’t require permits for small roof-mounted solar fans, but some jurisdictions treat any roof penetration or electrical work as permit-worthy. Check with your local building department before starting, the call takes five minutes and prevents potential headaches.
Can I install this if I have an older home with limited attic access?
Yes, though it may take creative problem-solving. Gable-mounted systems work well for homes with difficult attic access, and wall-mounted intake vents eliminate the need to navigate tight spaces. You might spend an extra hour on installation, but it’s definitely doable.
The biggest concern I hear from first-timers is whether they can handle the roof work safely. If you’re comfortable on a ladder and follow basic safety protocols, this project is well within reach. The electrical component is straightforward DC wiring, simpler than most household electrical work, and the ventilation calculations aren’t rocket science. Start with a single-zone system to build your confidence, and you’ll be planning expansions before you know it.
You’ve got this. Installing a solar-powered whole house ventilation system isn’t some mystical contractor-only task. It’s a weekend project that’ll make your home healthier while slashing energy costs for years to come. I still get a little thrill every time I walk past my attic fan knowing the sun is doing all the work.
Start small if you’re hesitant. A single-zone system in your attic or one problem room proves the concept without overwhelming you. Once you see how well it performs and how straightforward the install actually was, adding more zones becomes exciting rather than intimidating. That’s exactly how I approached it, and within six months I had coverage throughout my whole house.
The satisfaction of creating a ventilation system that runs itself, costs nothing to operate, and keeps working even during power outages? That’s the kind of energy independence that got me hooked on solar in the first place. Every breath of fresh air reminds me why I love DIY renewable projects.
I’d love to hear how your installation goes. Share your experience, photos, or questions in the Spheral Solar community forums. We learn best from each other’s real-world successes and challenges. And before you start your next solar project, check out our calculators to size components accurately and avoid the guesswork. Fresh air and clean energy are waiting for you to take that first step.
How useful was this post?
Click on a star to rate it!
Average rating 0 / 5. Vote count: 0
No votes so far! Be the first to rate this post.
We are sorry that this post was not useful for you!
Let us improve this post!
Tell us how we can improve this post?
charlesnoble
Here at Spheral Solar, I’m a hands-on solar power enthusiast, constantly exploring and experimenting with DIY solutions. I’m dedicated to sharing my discoveries, insights, and even the bumps I hit along the way, all in the pursuit of a more sustainable future.
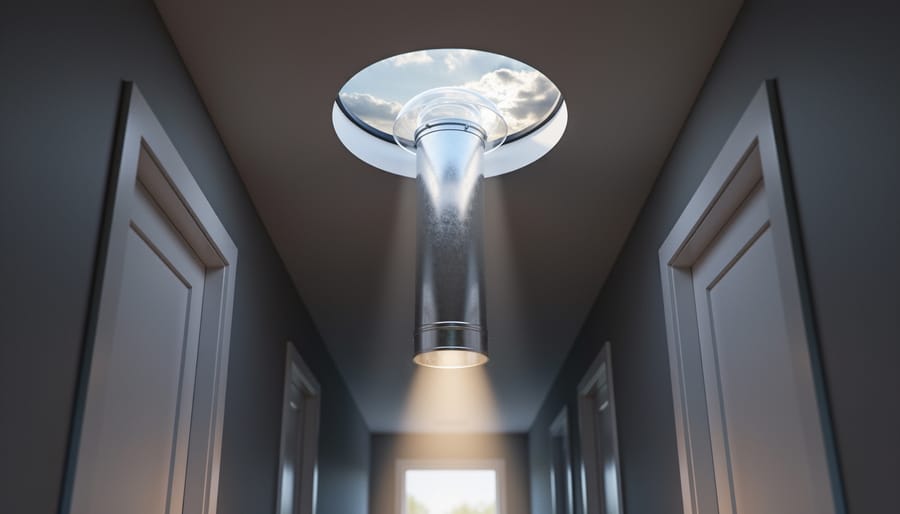
How to Make DIY Solar Tubes for Free Natural… by Charlesnoble July 7, 2026 You can build a DIY solar tube for $50 to $150 and start harvesting natural daylight in a weekend. This simple project combines a reflective tube, clear dome, and diffuser to channel sunlight from your roof into dark interior spaces, delivering illumination equivalent to multiple bulbs without electrical costs or…
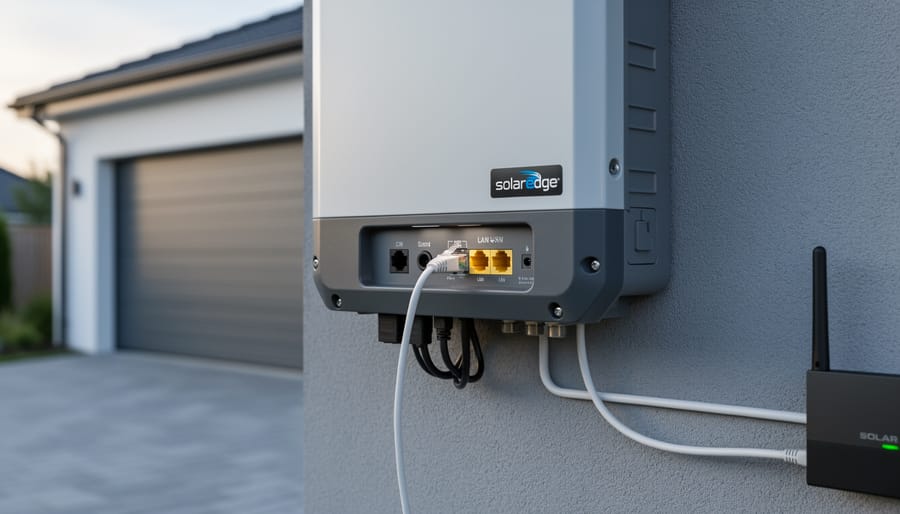
How to Connect SolarEdge to Ethernet for Seamless… by Charlesnoble July 9, 2026 Connecting your SolarEdge inverter to your home network via Ethernet cable takes about 15 minutes and gives you real-time access to your system’s performance data from any device with internet access. You’ll plug a standard Ethernet cable into the RJ45 port on your inverter (usually labeled “LAN” or “Ethernet”), run…
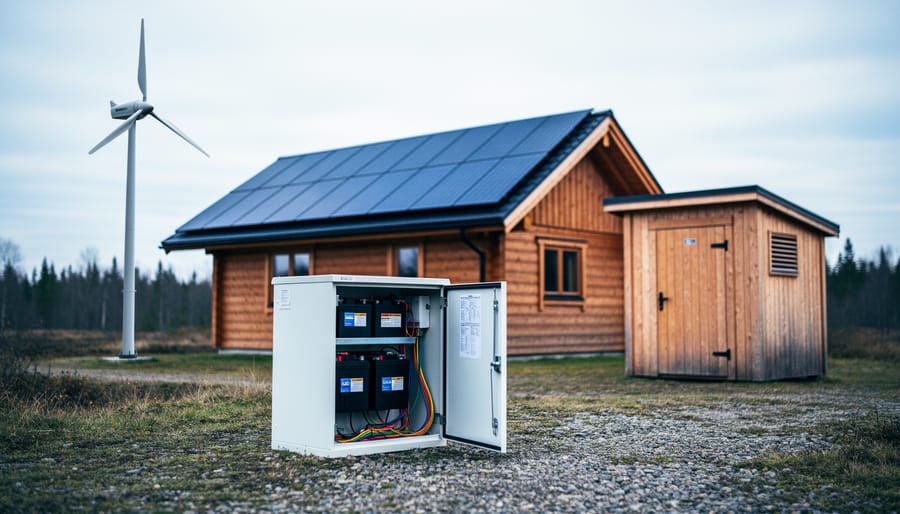
5 Sources of Electrical Energy Every Solar DIYer… by Charlesnoble July 1, 2026 Electricity powers our homes from five main sources: solar panels, wind turbines, hydroelectric generators, fossil fuel generators, and battery storage systems. If you’re building a reliable off-grid setup or backing up your solar array, understanding how these sources work together transforms a single-point-of-failure system into resilient, year-round power. I learned…
What Should a Pool Be Heated To? The Complete… by Charlesnoble July 4, 2026 Most residential swimming pools should be heated to 78-82°F for comfortable recreational use, though your ideal temperature depends on how you plan to use the pool, who’s swimming, and whether you want to keep energy costs in check. If you’re heating with solar, you’ll find this sweet spot is easy…
Why Two Solar Panels Beat One Every Time (Parallel… by Charlesnoble June 22, 2026 Connect your panels to a charge controller or battery system by running positive terminals to positive and negative to negative. This parallel configuration doubles your available current (amperage) while keeping voltage the same, which is exactly what you need when your system demands more power than a single panel can…
Subscribe for handpicked DIY projects, exclusive tips, and giveaways.
Installing a whole house ventilation system powered by solar takes about 6 to 8 hours for a moderately skilled DIYer and delivers continuous fresh air circulation without touching your electric bill. The core method involves mounting a solar panel on your roof to power an intake or exhaust fan, routing ductwork through your attic or… Read more: How to Install a Whole House Ventilation System Using Solar Power
Connecting your SolarEdge inverter to your home network via Ethernet cable takes about 15 minutes and gives you real-time access to your system’s performance data from any device with internet access. You’ll plug a standard Ethernet cable into the RJ45 port on your inverter (usually labeled “LAN” or “Ethernet”), run it to your router, and… Read more: How to Connect SolarEdge to Ethernet for Seamless System Monitoring
You can build a DIY solar tube for $50 to $150 and start harvesting natural daylight in a weekend. This simple project combines a reflective tube, clear dome, and diffuser to channel sunlight from your roof into dark interior spaces, delivering illumination equivalent to multiple bulbs without electrical costs or ongoing energy consumption. I remember… Read more: How to Make DIY Solar Tubes for Free Natural Lighting in Your Home