DIY Solar Shower Ideas – Guide With Diagrams
Updated:

In the afternoon, you can easily build a DIY solar shower with affordable hardware store supplies such as PVC pipes, hoses, buckets, and garden-grade spigots or spray heads.
In addition, most solar shower projects, particularly simple, mobile types, require no specialized technical skills or equipment. On the other hand, formal, permanent DIY solar shower setups may take longer to construct but utilize equally basic and affordable hardware.
Most solar shower ideas can be combined entirely from one building supply or hardware store, and most won’t break a $100.00 budget. If you’re already a DIY enthusiast, you are also very unlikely to need more equipment than you currently have in your toolbox.
To demonstrate how simple and cheap a solar outdoor shower is to set up, we will walk you through the construction of one common example.
DIY Solar Shower Ideas
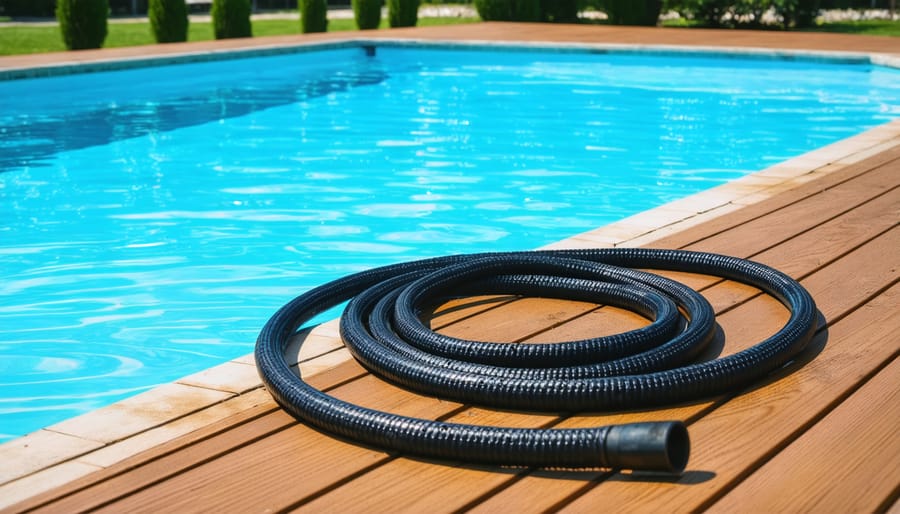
Anyone who has opened their garden hose in the middle of a hot sunny day will be able to answer that question immediately. The first couple of seconds of water flowing from the hose is very hot. It’s often as hot, if not hotter, than the feed from any electric water heater.
And such are the wonders of solar water heating and the core principle of solar showers. Water is held in a closed container and sun heated on a hot day for a few hours to heat naturally through solar radiation.
When you need to shower, the water is forced by gravity, air, and water pressure out of the container, and boom, piping hot shower water anywhere at zero cost.
Let’s look at one of the simplest solar shower ideas — the bucket shower. This mobile outdoor solar shower type is effective, convenient, and very mobile. Most importantly, though, it will save money.
Quick Notes!
We will use buckets, PVC pipes, and irrigation hoses throughout this article, which will always be black. The choice of color is strictly scientific — black items absorb almost all radiated sunlight and ensure the water heats quicker than light colors. If you can’t find the materials in black, a can of matt black spray paint will give you the thermal fashion edge you need!
The Solar Shower Bucket Brigade
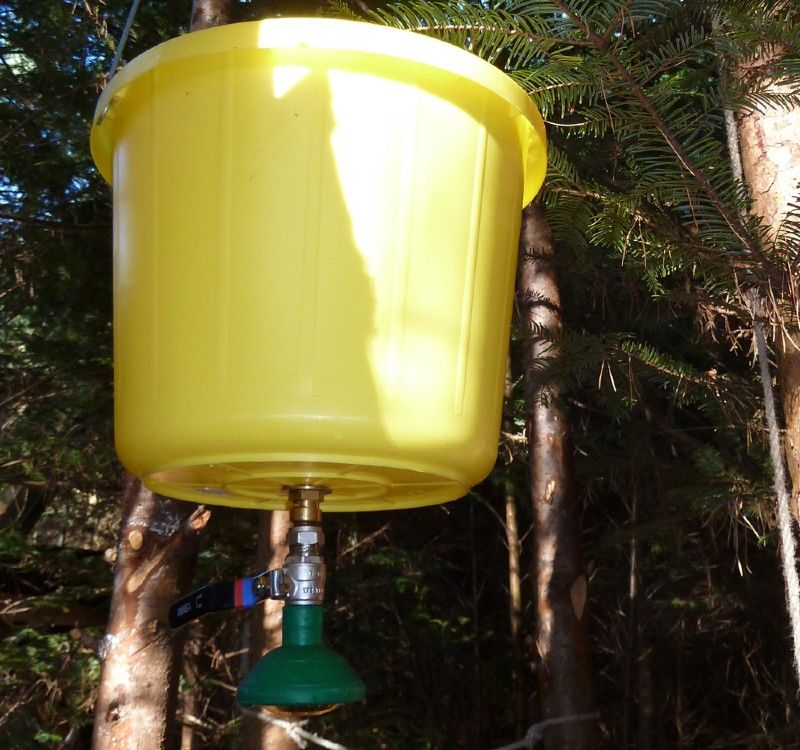
This solar shower is built using a standard 5 gallon (19 liters) black PVC bucket with a lid. This efficient outdoor solar shower works like a charm, packs up easily for transport, and generally won’t cost more than $50.00. The physics behind this solar shower option employs two abundantly available and completely free natural resources outside a water supply – sunlight and gravity.
Hardware for Your Solar Bucket Shower
- 1 x 5 gallon (19 liters) black PVC bucket with lid
- 6 feet (2 meters) of non-reinforced, flexible garden hose
- 1 x trigger type garden spray head
- 2 x female push-fit, click-lock garden hose fittings
- 1 x male click-lock garden hose adaptor
- 1 x double male click-lock adaptor (optional if the spray head doesn’t feature an adaptor)
- 30 feet (10 meters) of 1/4 inch (6 mm) nylon rope
- 1 x 3/8 inch (10 mm) carabiner (optional)
Tools You Need
- Power or battery drill
- 1/2 (13 mm) inch drill bit
- A tapered reamer
- A universal adjustable wrench
- A box cutter
Consumables You Need
- Silicone sealant
- Medium grit sandpaper
How It Works
The basic concept involves solar-heated water flowing out of a bucket through a side-mounted hot water line hose fitted with a spray head. The bucket is suspended with a rope high enough to give adequate water flow and for you to stand under to comfortably shower.
Note: We have used click-lock or snap-on garden hose fittings for this project because they are readily available in a large range of sizes, options, and accessory sets.
They are extremely convenient and allow the shower to be set up and broken down in minutes or less. They also allow all the components to be conveniently stored inside the bucket for transport.
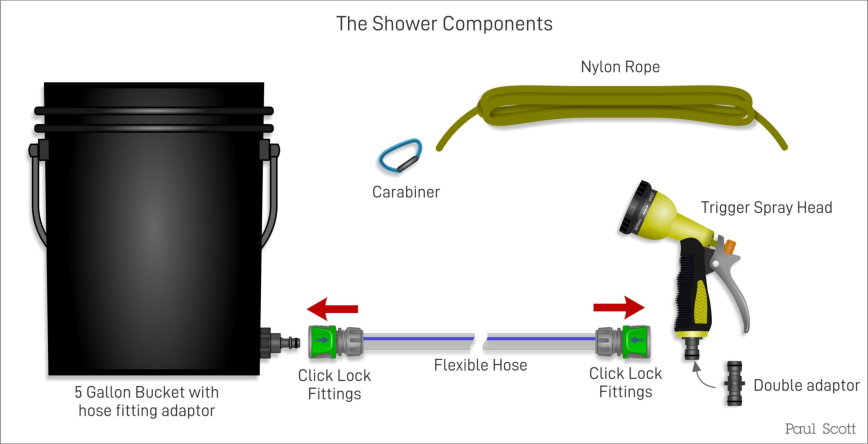
Here are all the components you’ll need to get the shower set up.
Installing the Male Click-Lock Adaptor on the Bucket
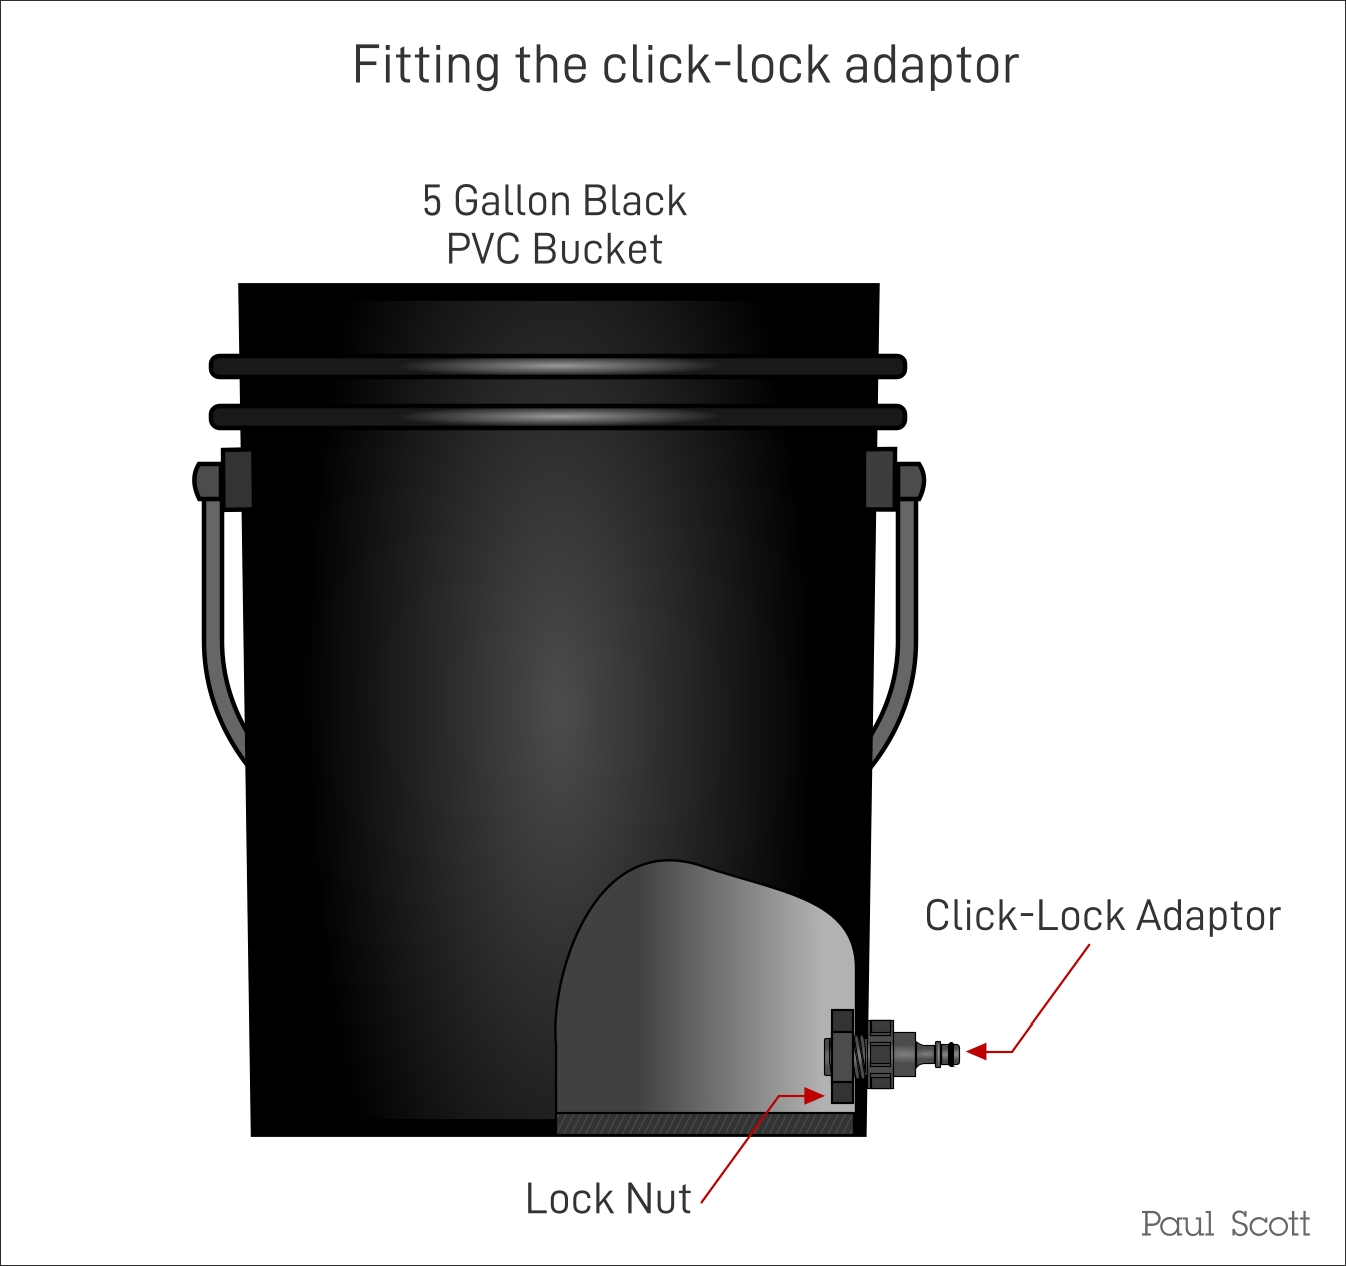
The first step is fitting a male click-lock adaptor to the bucket so you can snap the hose on or off when required. Mark a spot about 3 to 4 inches above the bottom of the bucket in a place where you’ll be able to screw the adaptors lock nut up tight without obstructions.
Then drill a 1/2 inch hole through the bucket wall on your mark. Use the taper reamer to open the hole up if necessary to allow the adaptors threaded shoulder to pass through snuggly.
Before installing the adaptor, remove any rough edges with sandpaper and run a bead of silicone sealant around the inside and outside the hole. Once done, insert the adaptor and tighten it up securely and allow the sealer to cure fully.
NOTE! You’ll be attaching the hose adaptor to the curved surface of the bucket wall. You may have to fill up small gaps with an additional sealer to ensure a leak-free fit.
At this point, your bucket should look like this.
Setting up the Hose
Now fit your two push-fit hose fittings on either end of your flexible hose. One will snap onto the bucket adaptor and the other onto the spray head. Note: If your spray head does not come with a snap-on adaptor, you may have to buy a double adaptor, as illustrated above.
Setting the Bucket DIY Solar Shower Up
Once the solar shower system is good to go, you need to locate a good spot to set it up. Next, you’ll have to find a suitable suspension point for your outdoor solar shower, preferably over a section of gravel.
A sandy area is no good as it will quickly become muddy and defeat the whole purpose of the shower. You’ll also have to make sure there is a suitable place for you to tie the rope up once the bucket is suspended.
Now you can use a cold water line to fill the bucket to approximately two-thirds. This allows you to run cold water or additional hot water into the bucket if you need to. Finally, put the lid on the bucket and put it in full sunlight for nature to work its magic.
While the water is heating, you can tie one end of the rope onto the handle of the shower bucket and the other onto the carabiner if you have one.
Getting Clean
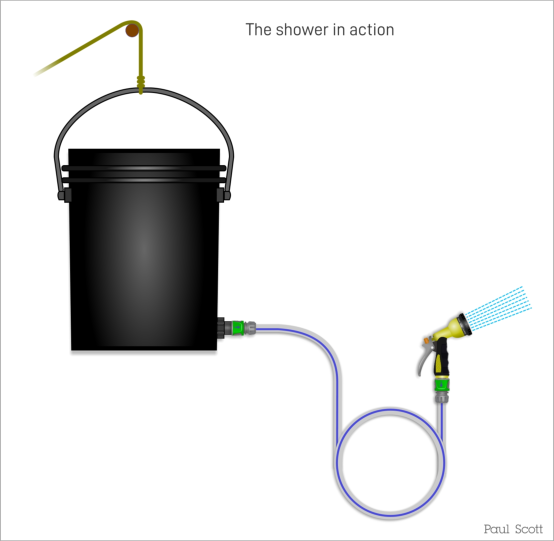
When the water is hot enough to your liking, you can throw the free end of the rope over the suspension point and lift the bucket. A bucket height of around 6 feet (2 meters) will give you enough room to shower comfortably and enough pressure to give a good water flow.
To secure the bucket, you can either tie a half-hitch into the rope around the tie-off point or use the carabiner if you choose that option.
NOTE! The bucket will weigh approximately 44 pounds (20 kilograms), so the suspension point needs to carry the weight safely.
Now snap your hose onto the bucket adaptor, reach for the soap and enjoy!
The Pros and Cons of This Solar Outdoor Shower Type
Pros
Probably the biggest pro of this shower design is how cheap and easy it is to build. All the components can be sourced from a single hardware outlet, and the shower can be assembled using simple hand tools in an hour or so.
In addition, modular garden hose components make it very simple to assemble, disassemble,, and transport.
A side-mount hose point choice means the bucket bottom is clear and can be placed anywhere on the ground to heat. A bottom hose exit would require a custom stand and different fittings for the same convenience. This pro does come at a cost, though, which we’ll check out in the cons section.
Using a trigger spray head makes the shower more efficient and allows longer shower times. The spray head lets you use only enough water at any one time to get wet and rinse off. This saves water and will extend the shower time,, allowing more than one person to use the shower.
If you use the shower sparingly, a 5-gallon bucket shower of this type will give you around 15 minutes of shower time on a single charge.
Cons
The side mount hose exit is a great choice, but it does mean you’ll never be able to use all the water in the bucket because of the height of the exit. Unless, of course, you tip the bucket towards the exit when the water runs low. This con is offset by the side mount exit’s convenience to the shower.
Bucket solar showers also heat a little slower than other designs. Such as pipe-based roof mount systems with greater surface area to water volume. Again, the portability and simplicity of a bucket shower make up for this, and the water doesn’t take that long to heat anyway.
Roof Rack Solar Shower vs. Bucket Solar Shower
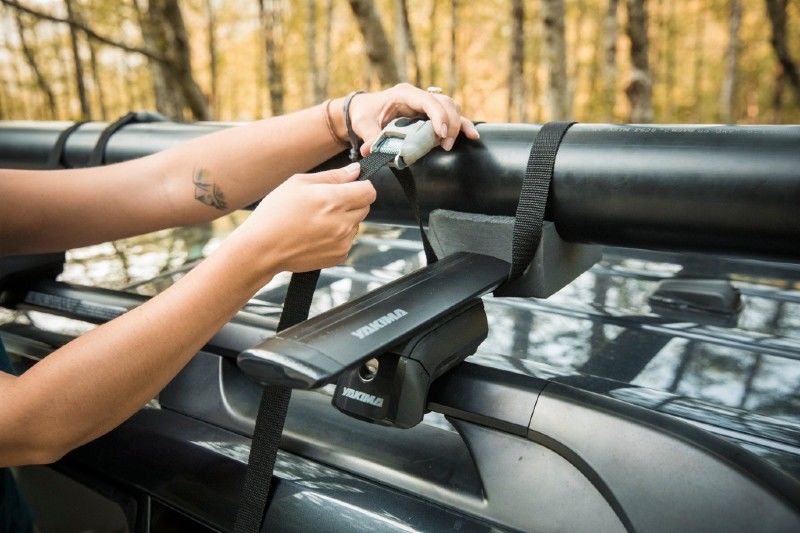
A roof rack solar shower is a different animal and deserves an article. Having your solar shower permanently, or at least semi-permanently, mounted on your SUV or RV is an attractive option, and roof rack systems have many benefits.
However, the bucket brigade is hard to beat for convenience, simplicity, and low cost.
Wrapping Up
Mobile solar shower systems offer an element of home comforts when you are a long way from them. We hope this short tutorial will help you set up a basic DIY solar shower.
In the future, we will explore other solar-heated shower designs, such as permanent solar indoor shower installations and many other camps, RV, and SUV rooftop designs.
If you have experience with solar shower construction and want to share or ask related questions, please drop us a query in the comments section below.


