How to Size a 5kW Solar System for Your Home or RV
Updated:
A 5kW solar system occupies between 250 and 350 square feet of roof or ground space and produces roughly 20 to 25 kilowatt-hours of electricity per day in most U.S. locations. That’s enough to power a typical three-bedroom home with moderate energy use, though your exact needs depend on your daily consumption patterns, climate zone, and whether you run energy-intensive appliances like central air conditioning or an electric vehicle charger.
Key Takeaway: A 5kW system needs approximately 300 square feet of installation space, generates 20-25 kWh daily, and costs between $10,000 and $15,000 after federal tax credits in 2026.
When I first helped my neighbor Charles size his solar array three years ago, the biggest confusion came from mixing up the system’s rated capacity with its actual physical footprint. He assumed “5 kilowatts” told him everything he needed to know, but the truth is that number represents the system’s peak electrical output under ideal conditions, not how much space you’ll need or whether it matches your household’s appetite for power.
The “size” question actually has three distinct answers you need to nail down before moving forward. First, there’s the electrical capacity (that 5kW rating), which determines how much power the system can generate at solar noon on a cloudless day. Second, there’s the physical footprint, which varies based on panel efficiency and whether you’re installing on a sloped roof, flat roof, or ground mount. Third, and most important for your planning, there’s the practical sizing question: will 5,000 watts of solar capacity actually cover your monthly electric bill, or are you undersizing?
Getting this right the first time saves you from expensive mistakes. Install too small a system and you’ll still face hefty utility bills. Oversize it without net metering and you’re paying for electricity you can’t use or store. This guide walks you through the actual measurements and calculations you need to verify whether a 5kW system fits both your roof and your energy profile.
Understanding What 5kW Really Means
Peak Power vs. Daily Energy Production
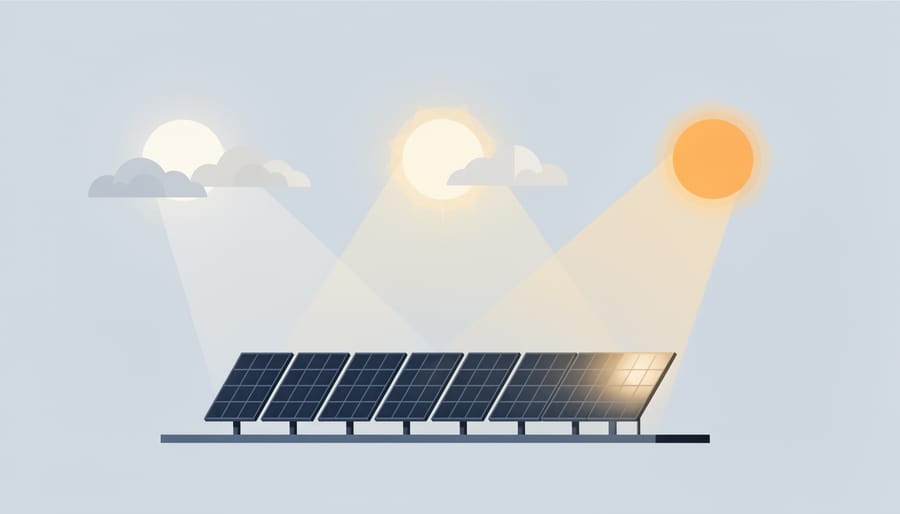
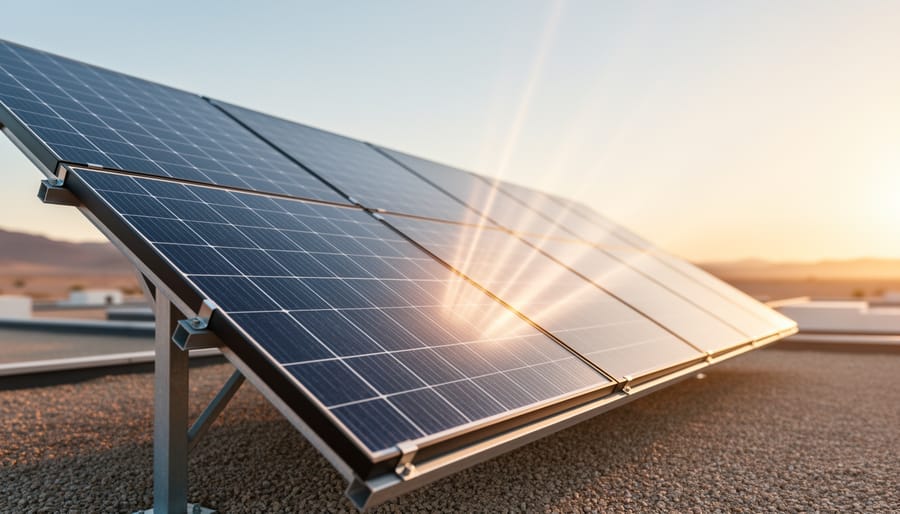
Sunlight conditions are what ultimately determine how much energy a 5kW system can produce day to day.
A 5kW solar system doesn’t churn out 5kW of power 24 hours a day. That nameplate rating represents what your panels produce under perfect lab conditions, full sun, optimal angle, cool temperatures. Real-world production varies dramatically based on how many hours of strong sunlight you actually get.
On a bright summer day, your 5kW system might hum along at full capacity for 4-6 peak hours, generating 20-30 kWh of electricity. But here’s the catch: those “peak sun hours” compress all the day’s sunlight into equivalent hours of maximum intensity. Your panels still produce power in morning and evening when the sun’s weaker, but we measure it as if it were all concentrated into fewer, stronger hours.
Weather changes everything. That same system on a cloudy winter day might only hit 1-2 peak sun hours, dropping daily production to 5-10 kWh. I’ve watched my own system go from 28 kWh on a clear June afternoon to barely 8 kWh during a gray December stretch.
Seasons matter too. Winter brings shorter days and a lower sun angle, cutting production by 40-60% compared to summer peaks in many locations. If you live in Arizona, seasonal swings stay modest. In Wisconsin? You’ll see massive differences between July and January output.
This variability is why we size systems based on your location’s average peak sun hours across the whole year, not just the sunniest days.
What Can a 5kW System Actually Power?
A 5kW system can comfortably power a typical energy-efficient home or a full-featured RV, but understanding what that means in practical terms helps you visualize whether it matches your lifestyle. In my experience, most people overestimate how much power they need once they see what 5kW can actually handle.
For a residential setup, a properly sized 5kW system producing around 20-25 kWh per day can run:
A full-size refrigerator and freezer running continuously
LED lighting throughout a 1,500-2,000 square foot home
A central air conditioner for 4-6 hours during peak heat
A well pump cycling several times daily
Standard kitchen appliances like microwave, coffee maker, and dishwasher
Electronics including computers, TV, and phone chargers
A washing machine (though you might schedule dryer use strategically)
This assumes you’re not running everything simultaneously at maximum capacity. The key is managing your peak loads rather than worrying about total daily consumption. I’ve seen families of four live quite comfortably on a 5kW system by simply being mindful about not running the electric dryer, water heater, and air conditioner all at once.
For RV applications, 5kW is actually generous. You’ll easily power roof air conditioning, a residential refrigerator, microwave, water pump, and all your electronics with capacity to spare. The same system works beautifully for small off-grid cabins where typical loads include lighting, a small fridge, water pumping, and occasional power tool use.
Tools and Materials You’ll Need for Sizing
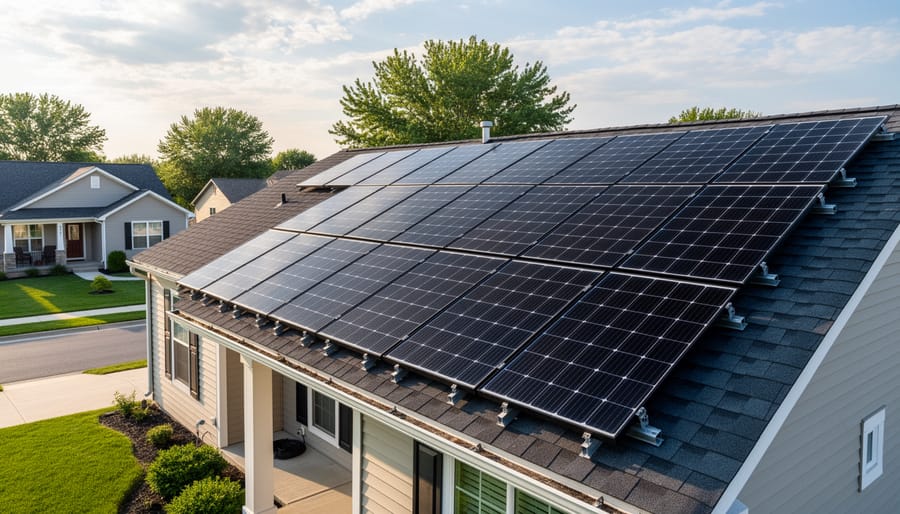
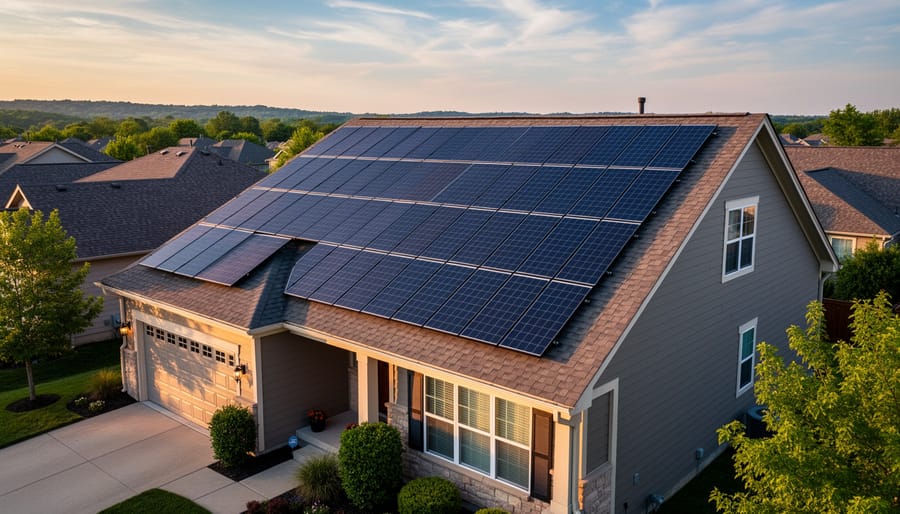
A clean residential rooftop solar installation helps readers visualize what a real 5kW setup looks like in everyday life.
Before you start planning your 5kW solar system, you’ll need to gather some basic tools and information. None of this requires specialized equipment, just items you likely already have or can easily access. Getting these pieces together upfront will make the sizing process much smoother and help you avoid costly mistakes down the road.
Here’s what you’ll need:
12 months of utility bills showing your kWh consumption
Tape measure (25-foot minimum for measuring roof or installation area)
Compass or sun path app to identify true south and potential shading
Access to the Spheral Solar calculator for verification
List of major appliances with their wattage ratings
Your utility bills are the foundation of accurate sizing. They show your actual consumption patterns throughout the year, including seasonal highs and lows. Don’t just grab one month, you need the full year to capture winter heating loads or summer air conditioning spikes.
The tape measure helps you determine if you have enough physical space for the panels. A 5kW system typically needs 300-400 square feet, and you’ll want to measure both the total available area and any obstacles that might create shading.
An energy monitor device (like a Kill-A-Watt meter) isn’t strictly required, but it’s incredibly helpful for measuring individual appliances. This lets you verify the wattage ratings on your appliance list and identify energy hogs you might not have noticed.
Finally, you’ll need basic electrical knowledge to properly size components like wire gauge and fuse size for your system. While these aren’t sizing tools themselves, understanding these requirements early helps you plan a safe, code-compliant installation from the start.
Safety Warnings and System Considerations
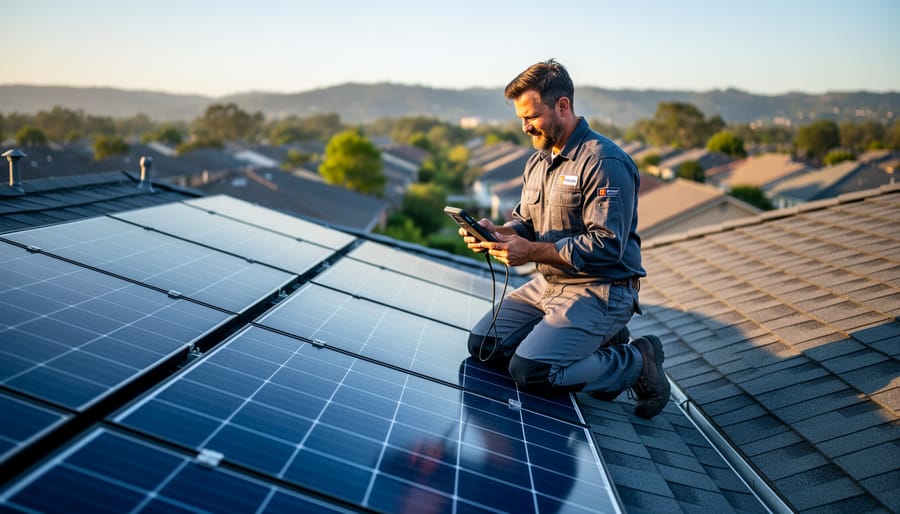
Reviewing electricity usage alongside an energy monitor makes it easier to understand how much daily power you really need.
Before you start planning your 5kW system, let’s talk about the safety considerations that’ll keep you out of trouble. I’ve seen too many enthusiastic DIYers skip these steps and end up with costly mistakes or dangerous situations.
First, check your electrical panel. Most homes have 100-amp or 200-amp service, and adding solar affects your total capacity. If you’re already running close to your panel’s limit, you might need an upgrade before installing solar. This is something an electrician can assess during a walkthrough.
For rooftop installations, your roof needs to handle the extra weight. A typical 5kW system adds about 3-4 pounds per square foot, which most roofs can support, but older structures or those with existing damage may need reinforcement. If you’re unsure about your roof’s condition, have a structural engineer take a look before you commit to buying panels.
Warning: Never attempt electrical work beyond your skill level, making connections to your main panel or utility meter requires a licensed electrician and proper permits.
Speaking of permits, nearly every jurisdiction requires them for solar installations. Your local building department will want to see plans, and your utility company needs to approve interconnection. Skipping permits can void your insurance, create liability issues, and make your home harder to sell. The permitting process also ensures your system meets code, which protects you long-term.
Before moving forward with calculations about how many kWh you need or figuring out peak sun hours for your location, make sure these safety foundations are solid. And when you’re designing your array and thinking about series vs parallel configurations, remember that those electrical connections are where professional help often makes the most sense.
Step-by-Step: Sizing Your 5kW Solar System
Step 1: Calculate Your Daily Energy Consumption
Pull out your last twelve months of electricity bills, yes, all of them. You need the complete picture because your usage likely swings more than you realize between summer AC season and winter heating. Look for the line that shows total kilowatt-hours (kWh) consumed each month. Write these numbers down.
Now add up all twelve months and divide by 365 days. That’s your average daily consumption. For example, if your annual total is 10,950 kWh, you’re using about 30 kWh per day (10,950 ÷ 365 = 30). Don’t skip this step or guess, I’ve seen people size entire systems around summertime estimates only to discover their winter baseline is completely different.
Next, identify your peak and low months. If July hits 40 kWh per day but March sits at 22 kWh, you need to decide which number to design around. Most folks target somewhere between their average and peak, especially if they’re adding loads like an electric vehicle. Remember that solar production also varies seasonally, what you produce in December won’t match June even with the same system, so your panel angle matters here too.
Write down three numbers: your daily average, your highest month’s daily average, and your lowest. These figures become the foundation for everything that follows. If your bills show usage in kilowatts instead of kilowatt-hours, you’re looking at the wrong line, keep searching for the total energy consumed, not the peak demand.
Step 2: Determine Your Available Sun Hours
Your solar panels don’t produce at full capacity all day long. Peak sun hours represent the equivalent number of hours per day when sunlight intensity averages 1000 watts per square meter, the standard condition used to rate solar panels. This is different from actual daylight hours.
For example, if your location gets 5 peak sun hours, that means the total solar energy received throughout the day equals what you’d get from 5 hours of perfect, midday sun intensity. Your panels might receive light for 12 hours, but the weaker morning and evening sun count as fractions of a peak sun hour.
Finding your peak sun hours is straightforward. The National Renewable Energy Laboratory (NREL) maintains a free PV Watts Calculator that provides accurate data for any U.S. location. Just enter your zip code or city name, and you’ll get monthly average peak sun hours for your area. The Spheral Solar calculator also pulls this data automatically when you input your location.
Peak sun hours vary dramatically by region. Phoenix averages around 6.5 peak sun hours daily, while Seattle gets closer to 3.5. Coastal areas often receive less intense sunlight due to marine layer fog. Mountains get clearer skies but must account for shorter winter days.
This number directly determines your system’s actual output. A 5kW system in Arizona produces roughly 30 kWh daily (5kW × 6 hours), while the same system in Seattle generates about 17.5 kWh. That’s a huge difference that affects whether 5kW meets your needs.
Step 3: Calculate Required System Size
Now we get to the heart of sizing: the actual math that tells you whether 5kW is enough. This calculation is simpler than it looks, and I’ll walk you through it with real numbers so you can follow along with your own data.
The basic formula connects three pieces of information you’ve already gathered: your daily energy use from Step 1, your peak sun hours from Step 2, and a reality check for system losses. Here’s how it works:
Take your daily energy consumption in kWh. Let’s say you use 25 kWh per day.
Divide that number by your location’s peak sun hours. If you get 5 peak sun hours daily, that’s 25 ÷ 5 = 5 kW needed.
Add 20-25% to account for system losses from heat, wiring, inverter efficiency, and dirt on panels. Multiply by 1.25: 5 kW × 1.25 = 6.25 kW actual system size required.
In this example, a 5kW system falls short. You’d need closer to 6-7kW to reliably cover that 25 kWh daily consumption, or you’d need to reduce your energy use.
Let’s try another scenario. Say you use 18 kWh daily and get 4.5 peak sun hours. That’s 18 ÷ 4.5 = 4 kW baseline. Adding the 25% buffer gives you 4 × 1.25 = 5 kW. Perfect match.
The 20-25% loss factor isn’t pessimism; it’s realism. Panels get dusty, inverters aren’t 100% efficient, and hot summer days reduce panel output. I’ve seen DIYers skip this step and wonder why their system underperforms. Don’t make that mistake.
If your calculation shows you need significantly more than 5kW, that’s valuable information. You haven’t failed; you’ve just discovered your actual requirements before spending money on an undersized system.
Step 4: Choose Panel Wattage and Count
Once you know you need 5kW of capacity, the next decision is how to get there. Solar panels come in various wattages, and you’ll need to pick a combination that adds up to roughly 5000W total.
The math is straightforward: divide 5000W by your chosen panel wattage. If you’re using 300W panels, you’ll need about 17 panels (5000 ÷ 300 = 16.67, round up). With 360W panels, that drops to 14 panels. Go with 400W panels and you only need 13. Higher-wattage panels mean fewer total units to install.
Here’s where space becomes the deciding factor. A 300W panel might measure 65″ × 39″, while a 400W panel could be 75″ × 40″, bigger, but not drastically so. The real space savings come from needing fewer panels overall. Fourteen 360W panels occupy less total roof area than seventeen 300W panels, even though each individual panel is slightly larger.
For tight spaces like RV roofs or small residential arrays, higher-wattage panels are often your only realistic option. You physically can’t fit seventeen panels where fourteen might squeeze in.
Cost matters too. Higher-wattage panels typically cost more per unit but less per watt. Run the numbers for your specific situation, sometimes the premium for 400W panels pays off in reduced installation complexity and fewer mounting rails.
I usually recommend going with the highest wattage that fits your budget and space. Fewer panels mean simpler wiring, fewer connections to waterproof, and a cleaner installation overall.
Step 5: Measure Your Installation Space
Now that you know how many panels you need, it’s time to confirm you have somewhere to put them. A 5kW system typically requires 300 to 400 square feet of usable space, but the actual area depends on your panel dimensions and layout.
For a roof installation, grab a tape measure and head up to check your available area. Measure the length and width of unobstructed sections, avoiding chimneys, vents, and skylights. Don’t forget to account for code-required setbacks from roof edges, typically 18 inches on sides facing streets and 6 inches elsewhere, though your local requirements may differ.
When measuring, think about shading. Even partial shade from trees, nearby buildings, or roof features can significantly reduce production. I always recommend measuring during midday to see where shadows fall, then revisit at different times to catch morning and afternoon patterns.
Ground-mounted systems offer more flexibility since you can choose the exact location and tilt angle, but you’ll need slightly more space to accommodate proper row spacing. If you’re tilting panels at 30 degrees, plan for about 1.5 times the panel length between rows to prevent self-shading.
For RV installations, measure your roof’s flat, accessible areas. Most RV roofs can’t handle the full 5kW capacity due to space constraints and weight limits, so you might need a hybrid approach with some panels on a ground-deployable frame for campsite use.
Sketch your layout on paper before buying anything. This simple step has saved countless DIYers from discovering space issues after panels arrive.
Step 6: Select the Right Inverter
With your panel layout finalized, you need an inverter that converts DC power from your panels into AC electricity your home can use. For a 5kW (5000W) solar array, you’ll typically want an inverter rated between 5000W and 6000W.
Here’s the basic logic: inverters work most efficiently at 80-95% of their rated capacity. A 5000W inverter perfectly matches your array size, but I usually recommend going slightly larger, around 5500W to 6000W, to handle those peak production moments when conditions are ideal and your panels briefly exceed their nameplate rating. This “oversizing” by 10-20% protects your inverter and maximizes energy capture.
You’ve got three main inverter types to consider. String inverters are the budget-friendly choice, one central unit for your whole array. They’re reliable and straightforward but shade on even one panel affects the entire string. Microinverters mount on each panel individually, so shading only impacts that specific panel. They cost more upfront but offer panel-level monitoring and optimization. Hybrid inverters add battery integration if you’re planning storage now or later.
For a straightforward rooftop install with minimal shading, a quality 5500W string inverter works great. If your roof has chimneys, vents, or partial shade, microinverters justify the extra cost. RV installations almost always benefit from a hybrid inverter with charging capabilities.
Check that your chosen inverter includes built-in monitoring, you’ll want to track system performance and catch issues early.
Step 7: Decide on Battery Storage (Optional)
Battery storage is one of those decisions that splits DIYers right down the middle, some swear by it, others skip it entirely. Here’s how I think about it: batteries aren’t about collecting every scrap of solar energy; they’re insurance against being without power when you need it most.
Start by asking what you want batteries to do. Grid-tied systems without batteries still work perfectly fine, they just send excess power to the grid and pull from it at night. But if you live somewhere with frequent outages, want true energy independence, or use your system on an RV where there’s no grid connection, batteries become essential rather than optional.
To size a battery bank, figure out how many hours of backup you need and which loads matter most. Let’s say you want four hours of evening power for essentials, refrigerator, lights, internet, maybe a TV. Add up their wattage (let’s say 1,500W total), multiply by four hours, and you get 6,000Wh or 6kWh of storage needed. Account for depth of discharge limits (lithium batteries typically allow 80-90% usable capacity) and you’re looking at roughly 7-8kWh of battery capacity to comfortably meet that need.
Cost-wise, batteries can easily double your system budget. A decent lithium battery bank adds $5,000-$8,000 to a 5kW setup, plus you’ll need a hybrid inverter capable of managing both solar input and battery charging.
I’ve installed systems both ways. Batteries make absolute sense for off-grid or backup-critical situations. For grid-tied homes in stable service areas? They’re a luxury that might not pay for itself, at least not yet.
Physical Sizing: Roof vs. Ground vs. RV Installations
The physical footprint of your 5kW system changes dramatically depending on where you’re mounting those panels. Let’s break down what you’re actually dealing with in each scenario.
Rooftop installations typically need 300-400 square feet of unshaded roof space. That’s roughly a 15×25 foot rectangle, though the exact shape depends on your panel configuration. Here’s the catch: you can’t just measure your roof and call it done. You need to account for setbacks from roof edges (usually 18-36 inches for fire code), obstructions like vents and chimneys, and pathways for maintenance access. On a typical suburban home, you’re looking at one slope of a moderately-sized roof. If your roof has multiple orientations, you might split the array across two slopes, though this complicates your wiring and may require additional hardware.
Ground-mounted systems give you more flexibility but demand more real estate. Plan for 500-600 square feet when you factor in spacing between rows to prevent self-shading. You’re also dealing with posts or racking that need to be anchored properly, either driven deep or set in concrete depending on your soil and local wind loads. I’ve seen folks underestimate how much of their yard a ground mount actually claims, especially when you account for the shadow it casts throughout the day.
RV installations are the tightest puzzle. You’re working with maybe 200-250 square feet of usable roof space on a large Class A motorhome, less on smaller rigs. This often means choosing higher-efficiency panels (400W+) to hit 5kW, or accepting that you might top out at 3-4kW realistically. Weight becomes critical too, 13-17 panels plus mounting hardware adds 400-600 pounds up high, affecting your RV’s center of gravity and potentially exceeding roof load ratings on some models.
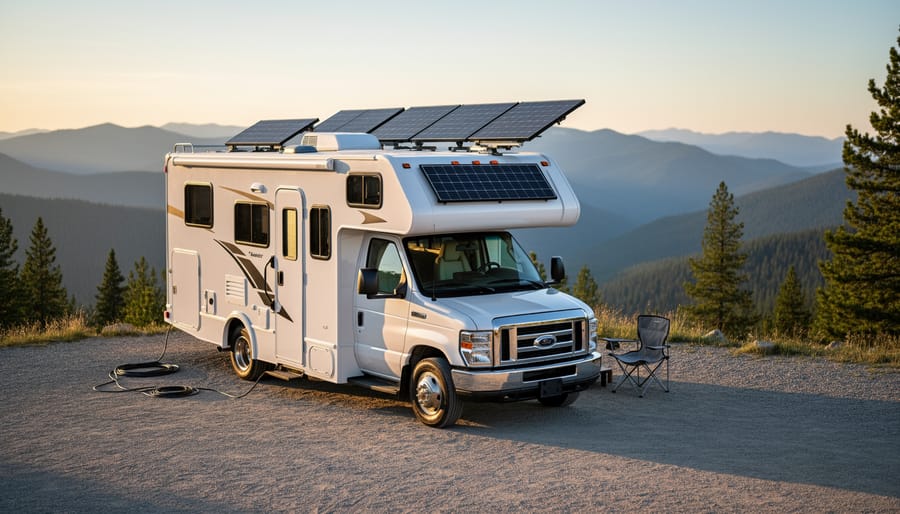
An RV with roof-mounted solar panels shows how 5kW sizing applies beyond homes, especially for travel and off-grid lifestyles.
Verification: Does 5kW Actually Fit Your Needs?
Before you commit to a 5kW system, take a few minutes to verify your calculations. You’ve done the math, but small errors compound quickly in solar sizing.
Start with a sanity check: divide your daily energy consumption by your system’s expected production. If you use 25 kWh per day and your 5kW system produces 20 kWh in your location, you’ll cover 80% of your needs. That’s workable if you’re willing to supplement with grid power or shift some usage to peak sun hours. However, if the gap is 50% or more, you’re undersized and will constantly rely on backup power.
Look for warning signs in your numbers. If you routinely exceed 30 kWh daily and you don’t plan to reduce consumption, 5kW probably won’t cut it. Conversely, if your usage is consistently under 15 kWh daily, you might be oversizing and wasting money on capacity you won’t use. Seasonal variations matter too. Check both your summer and winter bills to see if one season dramatically increases your consumption.
Tip: Use our interactive solar calculator to verify your sizing, and add 10-15% to your current consumption to account for future energy growth like EV charging or new appliances.
When the numbers don’t align perfectly, you have options. You can adjust your panel count (adding or removing one or two panels), modify your energy habits to match production, or reconsider your system size entirely. Don’t force a 5kW system to work if it clearly doesn’t fit your situation. Charles always says it’s better to acknowledge a mismatch now than to discover it after installation when your electric bills are still high.
Run multiple scenarios with different assumptions for sun hours and system losses. If the system works under conservative estimates, you’re in good shape.
Common Sizing Mistakes and How to Avoid Them
Over the years, I’ve watched countless DIYers make the same sizing mistakes when planning their 5kW systems. The good news? These errors are easy to avoid once you know what to watch for.
The most common mistake is ignoring partial shading. You might think a few hours of shade on one corner of your array won’t matter much, but shading even 10% of your panels can reduce total system output by 30% or more. Always map shade patterns throughout the day and across all seasons before finalizing panel placement. If you can’t avoid shading completely, plan for micro-inverters or power optimizers rather than a standard string inverter.
Forgetting to factor in system losses catches many first-timers. Your 5kW system won’t produce a full 5kW in real-world conditions. Inverter efficiency, wire resistance, temperature effects, and dust accumulation typically eat up 20-25% of your theoretical capacity. When calculating if 5kW meets your needs, multiply your required output by 1.25 to account for these losses.
Here are the key mistakes that trip up DIY solar installers:
Underestimating shading impact, Map shade patterns for all seasons, not just when you’re planning
Forgetting system losses, Always add 20-25% overhead to your capacity calculations
Ignoring future energy needs, Account for electric vehicles, heat pumps, or other planned additions
Oversizing without checking utility limits, Some areas cap residential solar at specific percentages of your load
Using summer consumption only, Size for your highest-use season, typically winter in most climates
Another trap is not planning for future loads. If you’re considering an electric vehicle or planning to replace your gas furnace with a heat pump in the next few years, size your system now to handle those additions. Expanding later means duplicate installation costs and potential mismatches between old and new equipment.
Conversely, some folks oversize dramatically thinking bigger is always better. A system that produces three times your actual consumption might sound great, but many utilities limit net metering credits or pay minimal rates for excess generation. You’ll spend thousands more upfront without meaningful returns.
Next Steps After Sizing Your System
Once you’ve confirmed that a 5kW system matches your energy needs and space constraints, it’s time to translate those calculations into action.
Start by creating a detailed parts list. Based on your Step 4 calculations, list your specific panels (quantity and wattage), inverter model, mounting hardware, wiring, disconnects, and breakers. If you’re adding batteries, include the battery bank and charge controller. Don’t forget the small stuff like conduit, junction boxes, and weatherproofing materials, these add up quickly.
Next, develop a realistic budget. As of 2026, expect to spend roughly $5,000-$8,000 for a quality DIY 5kW system without batteries, or $10,000-$15,000 with storage. Get quotes from multiple suppliers and watch for seasonal sales. I’ve saved hundreds by timing purchases around major promotions.
Before buying anything, check your local permitting requirements. Most jurisdictions require electrical and building permits for solar installations. Contact your local building department early, the permit process can take weeks or even months in some areas. Also reach out to your utility company about interconnection agreements and net metering requirements. This paperwork isn’t exciting, but it’s essential for a legal, grid-connected system.
Finally, map out your installation timeline. Most DIYers complete a 5kW install over 2-4 weekends, but factor in permit waiting periods and potential weather delays. Join the Spheral Solar community forum to connect with others who’ve tackled similar projects, their real-world experiences can help you avoid rookie mistakes and stay motivated when challenges arise.
Getting your 5kW solar system sizing right isn’t just about running calculations, it’s about building confidence in your DIY solar journey. When you take the time to accurately measure your energy needs, evaluate your available space, and verify your numbers, you’re setting yourself up for a system that performs exactly as expected.
I’ve seen plenty of DIY solar installations over the years, and the ones that succeed share a common trait: careful upfront planning. A properly sized 5kW system can comfortably power most average homes, handle weekend RV adventures, or support off-grid cabins. The difference between frustration and satisfaction often comes down to those sizing steps we covered, understanding your consumption, knowing your sun hours, and matching components to your actual needs.
Don’t rush this process. Double-check your math, use the tools available to you, and ask questions when something doesn’t add up. The Spheral Solar community is full of people who’ve been exactly where you are now, and we’re always happy to help troubleshoot sizing challenges or celebrate successful installations.
Your solar project starts here, with solid numbers and realistic expectations. Take what you’ve learned, trust your calculations, and move forward with confidence.
Frequently Asked Questions
How many solar panels do I need for a 5kW system?
Most 5kW systems use between 13 and 17 panels depending on individual panel wattage. If you’re using 300W panels, you’ll need about 17 panels, while 400W panels require only 13 to reach the same 5000W total capacity.
How much roof space does a 5kW solar system require?
You’ll typically need 300 to 400 square feet of unshaded roof area for a 5kW system. The exact footprint depends on your panel dimensions and whether you’re mounting them in portrait or landscape orientation, plus you need to account for spacing between rows and setbacks from roof edges.
Can a 5kW solar system power my whole house?
It depends entirely on your energy consumption. A 5kW system producing around 20-25 kWh per day can power an energy-efficient home with modest usage, but won’t be enough for larger homes with high consumption or if you’re running multiple high-draw appliances simultaneously.
Will a 5kW system run my air conditioner?
Yes, but with important caveats. A central AC unit typically draws 3-5kW when running, which means it could consume most of your system’s output during peak hours. You’ll want to size your system based on total daily loads, not just the AC, and consider that cloudy days will reduce available power significantly.
Does a 5kW system work in cloudy climates?
Absolutely, though you’ll produce less energy than someone in a sunnier location. Your system will still generate power on overcast days, just at 10-25% of rated capacity. The key is accounting for your actual peak sun hours when sizing, which might be 3-4 hours in cloudier regions versus 5-6 hours in sunny areas.
What’s the difference between sizing for grid-tied versus off-grid?
Grid-tied systems only need to offset your usage since the grid handles gaps in production, while off-grid systems must meet 100% of your needs every day plus charge batteries for nighttime use. This typically means an off-grid setup requires 30-50% more panel capacity than a grid-tied system supporting the same loads, along with substantial battery storage.
These are the questions I hear most often from folks planning their first solar project. The panel count question usually comes up first because people want to visualize what they’re committing to on their roof. I’ve walked dozens of DIYers through the math, and the biggest surprise is usually realizing how much space those panels actually take up when you account for proper spacing and fire setbacks.
The whole-house power question deserves special attention because it’s where expectations often clash with reality. I’ve seen people assume 5kW will handle everything, then get disappointed when they realize their 40 kWh daily usage needs a bigger system. That’s why I always push people to calculate their actual consumption first, before falling in love with a particular system size. Your energy needs should drive the decision, not the other way around.
The cloudy climate concern comes up constantly, and it’s valid. I worked with a family in the Pacific Northwest who worried their 5kW system would be a waste of money given their gray skies. After running the numbers with their actual sun hours (about 3.5 on average), we confirmed the system would still offset a meaningful portion of their bill. They’re now three years in and consistently generating 12-15 kWh daily, even through winter. Solar works everywhere, you just need realistic expectations for your specific location.
How useful was this post?
Click on a star to rate it!
Average rating 0 / 5. Vote count: 0
No votes so far! Be the first to rate this post.
We are sorry that this post was not useful for you!
Let us improve this post!
Tell us how we can improve this post?
charlesnoble
Here at Spheral Solar, I’m a hands-on solar power enthusiast, constantly exploring and experimenting with DIY solutions. I’m dedicated to sharing my discoveries, insights, and even the bumps I hit along the way, all in the pursuit of a more sustainable future.
How Many kWh Does Your Solar System Actually Need?… by Charlesnoble November 29, 2025 Calculate your daily energy consumption by checking your utility bill for the monthly kilowatt-hour (kWh) usage, then divide by 30 to get your average daily number. This single figure becomes your North Star for sizing any solar system, whether you’re powering a full household, weekend cabin, or portable camping setup.…
How Much Power Does an 8kW Solar System Actually… by Charlesnoble March 24, 2026 An 8kW solar system typically generates between 24 and 40 kWh per day, depending on your location, season, and installation quality. That’s enough to power most average homes completely, but the reality is more nuanced than a single number can capture. I remember installing my first 8kW array in Arizona…
Calculate Your Solar Panel kWh Output Before You Buy… by Charlesnoble January 29, 2026 Grab your solar panel specs and electricity bill—you’re about to discover exactly how many kilowatt-hours your solar setup can generate and whether it’ll actually cover your energy needs. Most people dive into solar projects with enthusiasm but fuzzy math, leading to oversized systems that waste money or undersized ones that…
Save Money Now: Calculate Your Home’s Energy Usage… by Charlesnoble October 17, 2025 Calculate your home’s energy consumption by multiplying each appliance’s wattage by its daily hours of use, then convert to kilowatt-hours (kWh) by dividing by 1,000. A typical American home uses 30 kWh per day, but understanding your specific usage unlocks significant savings potential and solar planning opportunities. Start with your…
How to Use a Mass Energy Conversion Calculator… by Charlesnoble October 8, 2026 A mass energy conversion calculator lets you determine how much energy is locked inside any amount of matter using Einstein’s famous equation E=mc². Whether you’re working on a physics assignment or simply curious about the enormous energy potential in everyday objects, the calculation itself takes just seconds once you understand…
Watts to Kilowatt Hours (W to kWh) Conversion Calculator by Charlesnoble March 25, 2023 What is Watts? Watts is the unit for power. In electrical systems, a watt is defined as power measured as the rate at which an electric circuit uses energy. More specifically, one watt equals one joule of energy consumed or produced per second. This means when your device draws 100…
Subscribe for handpicked DIY projects, exclusive tips, and giveaways.
A 5kW solar system occupies between 250 and 350 square feet of roof or ground space and produces roughly 20 to 25 kilowatt-hours of electricity per day in most U.S. locations. That’s enough to power a typical three-bedroom home with moderate energy use, though your exact needs depend on your daily consumption patterns, climate zone,… Read more: How to Size a 5kW Solar System for Your Home or RV
Installing a home solar system yourself takes 2-4 weekends for an average 5kW setup, requires solid electrical knowledge and comfort working at heights, and can save you $5,000-$8,000 in labor costs if you tackle everything except the final utility interconnection. The process breaks down into five main phases: permitting and design, mounting the racking system,… Read more: Solar Power Installation Step by Step: Complete DIY Guide From Start to Finish
After testing dozens of solar chargers across camping trips, power outages, and backyard experiments, we found the X-Dragon 20W delivers the most reliable charging performance for phones and tablets, while the Goal Zero Nomad 50W steps up when you need to power larger devices or handle extended emergencies. If you’re planning weekend hikes, assembling an… Read more: 7 Best Solar Powered USB Chargers of 2026, Tested and Reviewed