How to Size MPPT Solar Charge Controller Units
Updated:

So, you think sizing an MPPT charge controller is hard? A job reserved for guys in horn-rimmed glasses and lab coats. Well, think again. Sizing a charge controller actually nowhere near as difficult as you imagine. And we are going to show you how to size MPPT solar charge controller units the easy way!
Granted, correctly sizing MPPT solar charge controllers is critical. If you get it right, you’ll end up with a reliable, efficient system. If not, you’ll lose efficiency and potential at best. At worst, you may end up damaging or even destroying equipment and creating serious safety issues. And a charge controller is generally not cheap.
Even so, learning to size MPPT solar charge controller units is actually pretty straightforward once you get your head around a few basic concepts, so let’s dive right in.
What Role Do Charge Controllers Play in Solar Power Systems?

To appreciate why it’s important to size MPPT solar charge controller units correctly, you need to know what they are and what they do. It’s also a good idea to understand the differences between pulse width modulation and maximum power point tracking solar charge controllers.
In most cases, solar power systems consist of three main components.
- A solar panel or an array of panels.
- A battery or a battery bank.
- A solar charge controller.
The Solar Panels or Panel Array
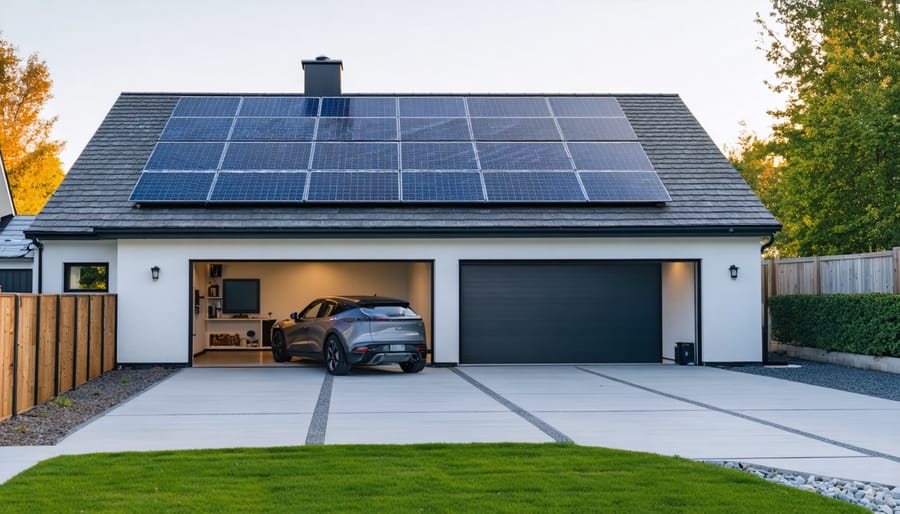
Solar panels are the heart of a solar power system. The solar panel or solar array collects the potential energy in sunlight and converts it into an electrical charge.
The Battery Bank

A solar power system stores the solar panels’ electrical energy in a rechargeable battery or battery bank.
The Solar Charge Controller
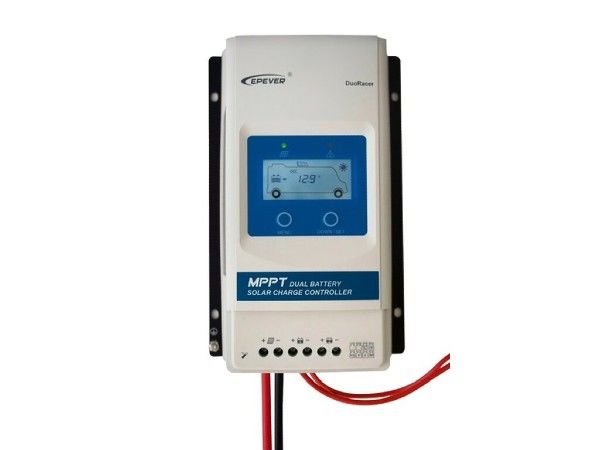
A solar charge controller is primarily a device that ensures the system batteries remain charged correctly and is usually placed between the solar panels and the battery bank. It stops the batteries from over or undercharging and prevents the power saved in the batteries from “trickling” back to the solar array when there is no sunlight. The solar charge controller is the mediator that makes sure the solar panel inputs are used properly to keep the battery bank full and healthy.
Depending on the type of charge controller used, they can also serve as direct power access points for low-load appliances such as lighting circuits. Some charge controller types even allow lighting circuits to be switched on or off automatically depending on the day. More sophisticated units also feature remote programming access via ethernet connections.
What Types of Solar Charge Controllers Are There?
Charge controllers usually fall into PWM and MPPT charge controller types. Without diving too deep into the tech, here are the main differences between the two.
Pulse Width Modulation Charge Controllers

Pulse Width Modulation (PWM) solar charge controllers are the simplest of the two types. They are less complex and are generally used on smaller solar installations. Their simplicity makes them the cheaper and more reliable of the two charge controller categories, although these pros do come at a cost.
For instance, a PWM charge controller cannot deal with wide voltage ranges and generally needs to match the solar panel outputs. In addition, a Pulse Width Modulation charge controller generally doesn’t allow solar panels to be wired in a series-only configuration. As a result, PWM charge controllers are ideal for small, low-load systems such as RV grids and simple domestic solar systems.
Maximum Power Point Tracking Charge Controllers
The Maximum Power Point Tracking (MPPT) charge controller is more sophisticated and feature-rich than PWM examples. Their main pro point is utilizing solar panel voltage outputs far higher than the battery requirements. This feature allows users to install larger panel arrays for increased efficiency and flexibility, leaving the charge controller to maintain the battery voltage correctly.
A Maximum PowerPoint Tracking solar charge controller is ideal for larger systems with high loads in challenging weather conditions. However, it is important to remember that it is vital to charge the controller of choice correctly.
How to Size MPPT Solar Charge Controller Units Correctly

Even though MPPT charge controllers are flexible and forgiving, correctly rating them is essential for safety and efficiency. Fortunately, solar charge controller sizing is not difficult if you know the specifications of the rest of your system components.
The key to getting this right the first time is to define your solar grid to define a solar array accurately, and batteries and choosing those two components’ specifications on hand are really important in the future.
At this point, we’ll assume that you already have suitable solar panels and a battery set, and you’re set to choose your solar charge controller.
Knowing Your Solar System Specifics
As we’ve mentioned, accurately working out which MPPT solar charge controller size to buy is relatively simple. You’ll only need three bits of information to nail the solar charge controller sizing exercise.
- You must know the solar panel array’s maximum open-circuit voltage (Voc).
- You’ll also need to know the total power rating of the solar panel array in watts.
- Lastly, you have to know what your battery voltage is.
You can find solar panel specifications on the panel labels, and a sales representative should supply the manufacturer’s website. The same applies to your batteries.
Putting It All Together

The following is an example of how you’d use these figures to calculate the MPPT solar charge controller size you’ll need. Please note the figures we’re using are just examples.
Let’s say you have a solar array of six 250-watt panels, each producing 20 volts (12.5 amps). If the solar panel array is wired in series, which it probably will be, the total open circuit voltage would be 120 volts (6 x 20).
The total power output of the solar panels is worked out similarly, giving you a total power output of 1,500 watts (6 x 250). As for your battery voltage, we’ll assume you have opted for a 24-volt battery bank.
Let’s Do the Math
At this point, you can calculate the last critical parameter, which is the charge controller amperage rating. To do this, divide the total panel power figure by the battery voltage, in this case, 1,500/24. That gives you a charging amperage of 62.5 amps.
You now have all the information you need. Let’s size an ideal charge controller for your grid.
We know that, under normal conditions, your solar panel’s maximum voltage is 120 volts, and they produce 1,500 watts. In addition, we also know you’re using a 24-volt battery system that will require around 62.5 amps to charge.
So, your ideal MPPT solar charge controller would have an input voltage rating of 150 volts and a maximum amperage of around 80 amps. These two figures slightly exceed the requirements to build a safety margin. Additionally, MPPT charge controllers are available in various voltage and amperage ratings, so making a match is seldom hard.
Additional Considerations
So that’s the choice done and dusted, right? Well, yes and no. A couple of factors fall outside of the basic calculations you would do well to consider if you want a safe and efficient system. Let’s have a closer look at them now.
Solar Panel Outputs and the Weather

Solar panels are rated according to what is known as the STC or Standard Test Conditions. This standard assumes the surrounding temperature is 77° F or 25° C. The interesting thing about solar panels is that their outputs go down when the ambient temperature rises above 77° and go up when it gets colder.
If your power and voltage outputs go up in freezing weather, your charging current will too. The same applies to scorching conditions where a solar panel loses efficiency.
If you live in an area that experiences extreme seasonal temperature swings, you’ll have to remember this when sizing your charge controller. That said, the great thing about MPPT charge controllers is their ability to operate efficiently under various input conditions.
Even so, it would be wise to use one of the many online resources or calculators to figure out any intense temperature changes in your calculations.
Cable Runs

This can be a tough one depending on the location. Long cable runs are prone to causing power drops or losses. These losses can play havoc with your controller’s efficiency. It’s good practice to plan your solar layout, particularly the solar panel array placement, in such a way that your cables are kept as short as possible.
Also, try to use the heaviest gauge of cable you can. Heavy cables have less resistance and, although they are initially more expensive, the long-term savings on voltage losses are well worth the investment.
Using Multiple Charge Controllers in a Grid
If you decided to add more panels to your array, for example, or if you wanted to split your array to compensate for shading or changes in layout, you can use more than one controller. The common perception that this will create a sort of electronic turf-war between the units is a myth. Charge controllers are peace-loving creatures, and they’ll get along just fine.
It is a good idea to consider this point if you decide to add controllers. It is good practice to use the same type of solar charge controller throughout the system. If you are using PWM controllers, stick to that type. If MPPT charge controllers are used, the same applies:
Additional Tips When Choosing MPPT Solar Charge Controllers

Now that you have a good idea of what size MPPT charge controller you’ll need to charge the battery or batteries in your grid let’s take a look at some other handy points to consider.
Build Quality
Solar charge controllers are generally permanently mounted in protected spots and don’t see much physical abuse. Even so, it’s a good idea to check out the overall build quality of the controller you choose for your system.
Casing and Mounting Points
Most MPPT charge controller casings are made of plastic or nylon composites. As with most things, though, all are not created equal. Try and make sure your controller of choice is at least moderately robust and seals well. Most charge controllers live outdoors, and a shoddy case will allow dust and moisture to enter the sensitive bits with obvious negative results.
Connectors
Many controllers have small, fragile external connectors. This may sound petty but come installation time. You’ll understand the significance. Large, robust connectors allow you to use heavier cable, and when it comes to reducing cable loss over long distances, heavier is better. Flimsy connectors are also more inclined to break or strip when you make connections.
Heat Sinks
Charge controllers run hot, sometimes very hot. They generally feature ribbed heat sinks to shed this heat, and in this case, bigger is definitely better.
General Hardware

Buttons and switches and latches, and connector covers will probably be some of the most used parts on the solar charge controller. If they feel cheap, they probably are. There’s nothing worse than having to replace a $150 MPPT charge controller in the dead of winter because of a busted five-cent push button.
Additional Functionality
Although price isn’t always an indicator of feature sets, budget charge controllers often don’t have much useful functionality.
Temperature Compensation
A temperature compensation function on a solar charge controller is a convenient feature if your solar array installation is subject to large temperature swings. This is particularly true if you’re using conventional lead-acid batteries.
Suppose you cannot compensate your charge voltage for very high or low temperatures. The battery can overcharge and gas when it’s scorching. On the opposite end of the scale, it can undercharge and sulfate in cold weather. Both conditions can have a serious negative effect on the lifespan of your batteries.
Battery Type Settings and Programing

A lot of folks will end up using standard lead-acid batteries. In these cases, this functionality may not be super relevant. If, however, you want to use lithium batteries or even build your own, this feature is a must.
Again, not all charge controllers are created equal, and some offer very easy-to-use and feature-rich programming interfaces. Unfortunately, programing others is a bit like having a root canal without Novocain.
If you’re going to use lithium-Ion batteries and want to be able to program upper charge limits and charge cycle life parameters, then check this one out carefully.
Diagnostic Displays
Many MPPT charge controller models feature onboard displays or ports to connect remote displays. These are great for keeping track of the controller’s main functions, particularly in the initial run-in phase after installation. Those folks who like to monitor their systems regularly will be using these displays all the time.
The remote display function, either wired or Bluetooth, is handy as most charge controllers will be located outdoors. A remote display allows you to check your system without venturing out into foul weather.
Direct Connection Functions
It is often possible to connect DC loads directly to your MPPT charge controller without hooking up to the battery or grid. Generally, you can connect only low-load appliances like LED lights or phone chargers directly, but it’s still a handy feature. Some charge controller models even feature programming functions that allow lights connected directly to be switched on during the night and off when it gets light.
How to Get the Best Out of Your MPPT Solar Charge Controller

If you have made good choices when selecting your charge controller and the installation was well done, maintaining it is a cinch. In fact, most of the routine maintenance that ensures long, efficient charge controller life doesn’t involve the charge controller at all.
Controller Care
Keep the charge controller clean and free of leaf litter, snow, dust, and any other gunk that can obstruct airflow around the heat sink. Once every three months, check all connections and mounting screws or bolts. Regularly check the system vitals, if you have a display, to ensure all is well and within specification.
System Component Care
A lot of the well-being of your charge controller depends on well the rest of the family is doing. Regular solar panel and battery maintenance will go a long way to making sure the controller continues to work properly.
This is particularly true of your batteries. All batteries, but especially flooded lead-acid types, should be checked regularly for water levels, corrosion on the terminals, tight connections, casing leaks, and unobstructed airflow around the batteries.
Although largely self-explanatory, solar panels must be kept clear of obstructions, debris, and snow. The surface of the solar panel array should also be kept free of dust, grime, or salt deposits to keep them working to their full potential. In addition, you should check solar array connections and cable runs regularly.
In Conclusion
Choosing an MPPT solar charge controller may seem a bit daunting at first. Hopefully, we’ve been able to shed enough light on how to size MPPT solar charge controller units to show you that it’s really not that complex after all.


