Set Your Garden Watering on Autopilot (Even When the Power’s Out)
Updated:
Picture this: You’re enjoying a relaxing weekend morning when you suddenly remember—you forgot to water the garden yesterday. Again. That sinking feeling is all too familiar for busy homeowners and gardening enthusiasts alike. But what if your irrigation system could run itself, powered entirely by the sun, without trenching for electrical lines or worrying about monthly utility costs?
Solar powered irrigation timers solve this exact problem by combining water scheduling automation with off-grid solar energy. These compact devices attach directly to your outdoor faucet or hose, use a small solar panel to charge an internal battery, and automatically open and close a valve based on your programmed schedule. No electrician needed, no outdoor outlets required, and no guilt about energy consumption.
I’ve been experimenting with solar irrigation systems at my own property for three years now, and the freedom they provide is remarkable. Whether you’re watering vegetable beds, maintaining a lawn, or keeping potted plants hydrated during vacation, these timers deliver consistent results while teaching valuable lessons about renewable energy in everyday applications.
The technology has matured significantly in recent years. Modern solar irrigation timers offer programmable schedules ranging from twice-daily cycles for seedlings to weekly deep watering for established plants. They work reliably even in partially shaded locations, storing enough charge to operate through several cloudy days. Most importantly, they’re surprisingly affordable and genuinely simple to install—even for complete beginners.
This guide walks you through everything you need to know: how these systems actually work, what features matter most, installation steps anyone can follow, and troubleshooting tips from real-world experience.
Why Your Garden Needs a Solar Irrigation Timer
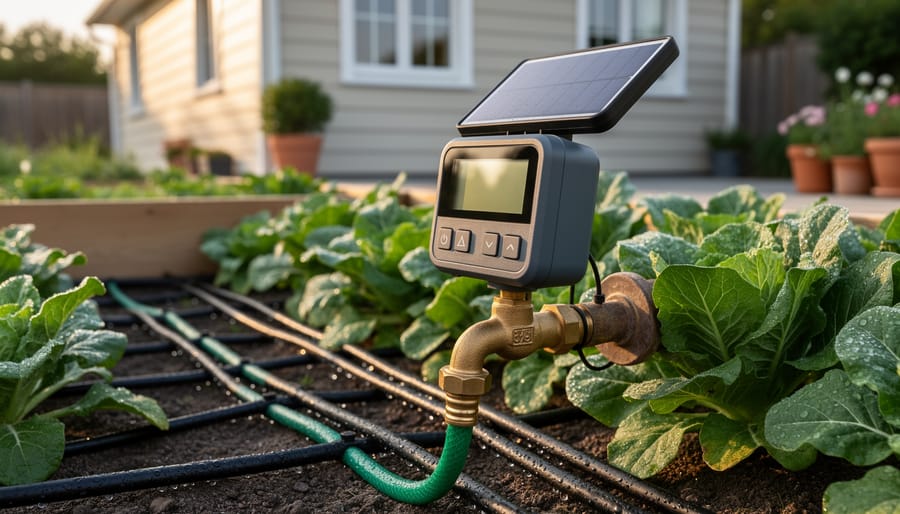
A solar-powered irrigation timer connects directly to a standard outdoor faucet, eliminating the need for electrical outlets.
The Freedom of Off-Grid Watering
One of the most liberating aspects of solar-powered irrigation timers is their ability to bring automated watering to places traditional systems simply can’t reach. I remember visiting a community garden last summer where volunteers were struggling with a watering schedule because their plots were a quarter-mile from the nearest outlet. Installing electrical lines would have cost thousands of dollars, making it completely impractical. A solar timer changed everything for them.
These devices shine in remote properties, vacation cabins, and rural homesteads where running electrical infrastructure isn’t feasible or would require expensive trenching and permits. They’re perfect for solar-powered drip irrigation systems in areas beyond your home’s electrical reach—that vegetable patch at the edge of your property, orchards on hillsides, or greenhouse setups in backyard corners.
Camping sites and temporary growing spaces benefit tremendously too. Because solar timers are self-contained and portable, you can set up automated watering wherever sunlight reaches. This flexibility means you’re not limited by outlet locations or extension cord lengths. The freedom to irrigate anywhere the sun shines opens up possibilities that grid-dependent systems simply cannot match, all while keeping your setup costs minimal and your environmental impact low.
When the Grid Fails, Your Garden Doesn’t Have To
I learned this lesson the hard way during a summer storm that knocked out power for three days. My electric irrigation timer went silent, and I spent those sweltering mornings hand-watering everything. Meanwhile, my neighbor’s garden kept thriving on its automated schedule, thanks to his solar-powered timer.
Here’s the beautiful part: solar irrigation timers operate completely independently from the electrical grid. They store energy in built-in batteries that recharge daily, giving them enough juice to keep running for several days even during cloudy stretches or power failures. When hurricanes, wildfires, or grid maintenance cut electricity, your plants don’t skip a beat.
This reliability becomes especially critical during extreme weather when your garden faces the most stress. Heat waves increase water needs right when power demands peak and outages become likely. A solar timer ensures consistent watering exactly when your plants need it most, without you scrambling with hoses or worrying about whether your electric timer will reboot correctly after power restoration. It’s genuinely set-it-and-forget-it peace of mind.
The Real Cost Savings Over Time
Here’s where things get exciting for your wallet. A typical solar irrigation timer costs between $30-$80, while conventional electric timers run $20-$50. But here’s the kicker: electric versions require either battery replacements every 6-12 months (around $10-$15 annually) or a constant power draw from your home’s electricity.
I switched to solar three years ago, and I’ve spent exactly zero dollars on batteries or electricity since. My neighbor? He’s purchased batteries eight times. That’s roughly $120 wasted on something the sun provides free.
The payback period typically ranges from 1-2 years, depending on your setup. After that, you’re saving money every single season. When you consider the lifespan of quality solar panels (15-20 years), you’re looking at genuine long-term savings. Plus, if you’re already invested in renewable solutions like solar-powered greenhouses, adding a solar timer creates a completely off-grid watering system. No electric bills, no battery runs to the hardware store, just free sunshine keeping your garden thriving.
How Solar-Powered Irrigation Timers Actually Work
The Three Essential Components
Think of a solar-powered irrigation timer as a simple three-part system working in harmony, much like how your body uses food for energy. Let me break down each component so you can understand exactly what’s happening in your garden.
The solar panel is your energy collector, converting sunlight into electrical power. Even on cloudy days, these panels capture enough light to keep things running. When I first installed mine, I was amazed that even morning dew didn’t stop it from charging. Most quality timers use small panels between 2 to 6 watts, which is plenty for this job. The panel typically sits on top of the unit or connects via a short cable, so you can position it where it catches the most sun.
Next is the rechargeable battery, usually a lithium-ion or NiMH type, which stores that captured energy for nighttime watering or cloudy stretches. This is your backup power source, ensuring your watering schedule doesn’t skip a beat when the sun goes down. Most batteries hold enough charge to run the system for several days without sunlight.
Finally, there’s the programmable controller, the brain of the operation. This microprocessor lets you set watering schedules, duration, and frequency through buttons or a digital display. It tells the valve when to open, when to close, and manages power consumption efficiently. Together, these three components create a self-sufficient watering system that operates independently of your home’s electrical grid.
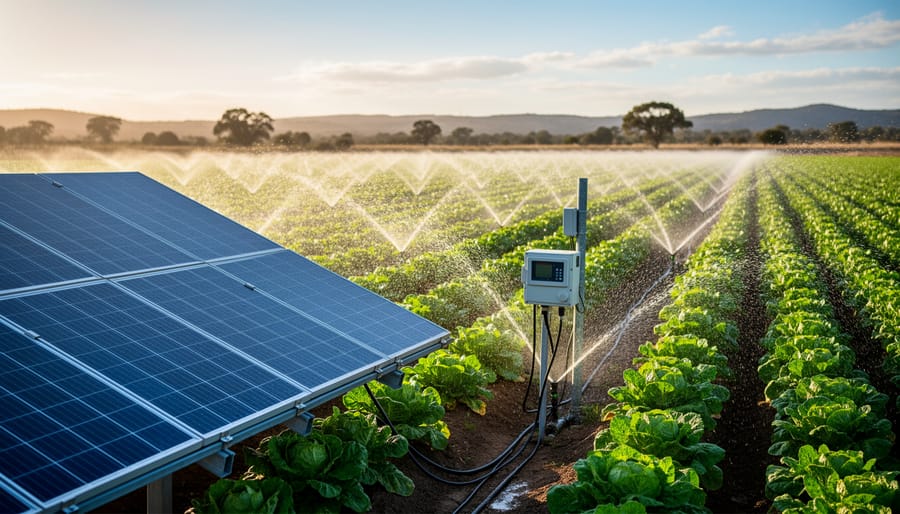
Automated solar irrigation systems maintain consistent watering schedules, resulting in healthier plants and better harvests.
Power Requirements: Less Than You’d Think
Here’s something that surprised me when I first started experimenting with solar irrigation timers: these systems run on remarkably little power. I remember thinking I’d need a massive solar panel and battery setup, but the reality is far more manageable.
Most irrigation valves are latching solenoids, meaning they only use power for a brief moment to open or close. We’re talking about 1-3 watts for just a few seconds. The timer’s control board, which does the actual scheduling, typically draws between 0.01 to 0.05 watts in standby mode. That’s about as much power as your TV remote uses.
Let’s put this in perspective with actual numbers. A typical solar irrigation timer uses a small rechargeable battery, usually around 2000-3000 mAh at 3.7 volts. That modest battery can keep your system running for 7 to 30 days without any sunlight whatsoever, depending on how frequently you’re watering. If you’re running two watering cycles per day, you’re still looking at around two weeks of autonomy.
I tested this myself during a particularly gloomy Pacific Northwest winter. My system, with just a 5-watt solar panel and standard battery, sailed through 12 consecutive cloudy days without missing a single watering cycle. The small panel charges the battery so efficiently that even indirect sunlight on overcast days provides enough juice.
This reliability means you don’t need to worry about your garden during extended cloudy periods or when you’re away on vacation. The system’s design builds in plenty of buffer capacity for real-world conditions.
Choosing the Right Solar Irrigation Timer for Your Setup
Single-Zone vs. Multi-Zone Systems
When you’re shopping for solar irrigation controllers, one of the first decisions you’ll face is whether you need a single-zone or multi-zone system. The difference is simpler than it sounds: single-zone timers control one watering area at a time, while multi-zone systems can manage multiple areas independently.
For smaller gardens or container setups, a single-zone timer is usually perfect. If you’re just watering a vegetable bed or a handful of patio planters, there’s no need to overcomplicate things. I started with a basic single-zone setup for my raised beds, and it handled everything beautifully.
Multi-zone systems shine when you have different plant types with varying water needs. Picture this: your lawn needs watering three times weekly, your vegetable garden twice, and your drought-tolerant natives once. A multi-zone controller lets you program each area separately, preventing overwatering and saving water overall.
Consider your current layout and future plans too. If you might expand your garden next season, investing in a multi-zone system now could save you from upgrading later. Most multi-zone units control two to six zones, giving you room to grow your watering setup as your garden evolves.
Understanding Programming Features That Matter
When shopping for a solar-powered irrigation timer, you’ll find feature lists can feel overwhelming. From my experience setting up systems for both my vegetable garden and my neighbor’s flower beds, here’s what actually matters in daily use.
Start with the basics: watering duration and frequency. Look for timers that let you set run times from just a minute or two up to several hours, and frequency ranging from multiple times daily to once weekly. This flexibility ensures your timer grows with your garden’s needs, whether you’re nurturing seedlings that need frequent light watering or established shrubs requiring deep, infrequent soaking.
Seasonal adjustment features are genuinely helpful. Rather than reprogramming your entire schedule when temperatures shift, these let you dial watering up or down by a percentage. I’ve found this saves considerable time during spring and fall transitions.
Rain delay functions qualify as must-haves rather than nice-to-haves. These let you pause scheduled watering for 24 to 72 hours after rainfall, preventing water waste and potential overwatering damage. Some advanced models even include moisture sensors for automatic adjustments.
Finally, ensure your timer includes manual override. Despite perfect programming, you’ll occasionally need to water immediately or skip a cycle. A simple manual button makes this possible without disrupting your carefully crafted schedule. Trust me, you’ll use this feature more often than you’d think, especially during unusual weather patterns or when establishing new plantings.
Battery Capacity and Climate Considerations
Your local weather plays a bigger role in solar timer performance than you might think. I learned this the hard way when I first installed a timer in my Pacific Northwest garden during what turned out to be our rainiest November on record. The system struggled, and I quickly realized battery capacity isn’t one-size-fits-all.
For sunny climates with consistent sunlight, a basic battery capacity around 1000-2000mAh typically works well. These regions can recharge batteries daily without issue. However, if you live somewhere with frequent cloud cover or long winters like I do, you’ll want to look for timers with larger battery reserves, ideally 3000mAh or higher. This extra capacity acts as a buffer during those stretches when your solar panel isn’t getting optimal sunlight.
Consider your region’s cloudiest season when selecting your timer. A good rule of thumb is choosing a battery that can run your system for at least three to five consecutive cloudy days. Some advanced models include low-battery alerts, which gives you peace of mind during those unpredictable weather patterns. Remember, slightly oversizing your battery capacity costs a bit more upfront but saves frustration and protects your plants during unexpected gloomy spells.
Installing Your Solar Irrigation Timer: A Step-by-Step Walkthrough
Finding the Sweet Spot for Your Solar Panel
Getting your solar panel positioned correctly makes all the difference between a system that works flawlessly and one that struggles. I learned this the hard way when I first installed a timer with the panel facing east—it worked great in the morning but couldn’t hold enough charge for evening watering cycles!
The golden rule is simple: aim for south-facing placement (in the Northern Hemisphere) where the panel gets direct sunlight for at least 6-8 hours daily. Most irrigation timers come with adjustable mounting brackets that let you attach the panel to fence posts, stakes, or even the side of a shed. Some models feature extension cables, giving you flexibility to position the panel in a sunny spot while keeping the timer near your faucet.
Here’s a practical tip: spend one full day observing your potential mounting location. Check it at 9 AM, noon, and 3 PM to identify shade patterns from trees, buildings, or structures. Even partial shade can reduce charging efficiency by 50% or more.
If you’re dealing with unavoidable shade, consider these workarounds: mount the panel higher to clear obstructions, use the extension cable to relocate it to a sunnier area, or choose a model with a larger panel that can compensate for reduced sun exposure. Remember, a little extra effort positioning your panel upfront saves countless headaches later.
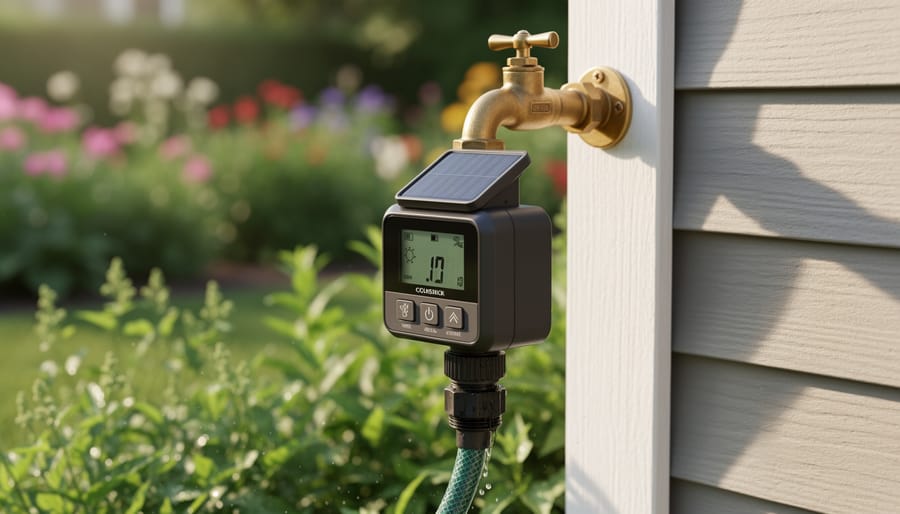
Installing the solar panel in an optimal sun-exposed location ensures consistent battery charging for reliable operation.
Connecting to Your Water Source
Connecting your solar irrigation timer is surprisingly straightforward, and you’ll likely need just basic tools you already have around the house. Let me walk you through the two most common setup methods.
For a simple hose-end connection (the easiest option), start by shutting off your outdoor faucet. Most solar timers come with a standard 3/4-inch threaded connector that screws directly onto your hose bib, just like attaching a regular garden hose. Hand-tighten the connection firmly, then add about a quarter turn with an adjustable wrench. Don’t overtighten, as this can crack the plastic housing. Next, attach your garden hose or drip line to the timer’s outlet side. That’s it! You’re ready to program.
For in-line installations with permanent irrigation systems, you’ll need a few more components. First, identify where you want to place the timer along your main supply line. Cut the pipe at this location (use a PVC cutter for clean edges), then install threaded adapters on both cut ends. Your solar timer threads between these adapters, creating a control point in your system. This method works beautifully when building a complete solar drip system from scratch.
Pro tip from my own experience: Keep a roll of thread seal tape handy. Wrapping it clockwise around male threads prevents leaks and makes future disconnections easier. Also, position your timer where the solar panel gets maximum sunlight, using extension tubing if needed to reach shadier faucets.
Programming Your First Watering Schedule
Once your timer is installed, it’s time to create your first watering schedule. Charles always recommends starting conservatively. “I learned the hard way that overwatering causes more problems than underwatering,” he shares. “Start with shorter sessions and gradually increase if needed.”
For vegetable gardens, begin with 15-20 minutes twice daily during early morning and evening hours. Flower beds typically need 20-30 minutes every other day, while established lawns often thrive with 30-40 minutes three times weekly. Container plants may require daily 5-10 minute sessions due to faster drainage.
Program your timer using the control panel or smartphone app if available. Most solar irrigation timers let you set multiple zones with different schedules. Input your start times first, then duration, and frequency. Enable rain delay features to prevent unnecessary watering after storms.
Monitor your garden closely for the first two weeks. Are plants perky and soil moist but not soggy? Perfect. Seeing wilting or dry patches? Add five minutes to your duration. Notice pooling water or yellowing leaves? Scale back slightly. This observation period helps you fine-tune the schedule for your specific conditions, soil type, and climate. Remember, seasonal adjustments will be necessary as temperatures change throughout the year.
Maintaining Your Solar Timer System Year-Round
Seasonal Care and Adjustments
Your solar-powered irrigation timer works hard year-round, but it needs some attention as seasons change to keep performing at its best. I learned this the hard way my first year when I forgot to adjust my watering schedule in fall and ended up with a soggy, overwatered mess just as temperatures dropped.
Every three months, give your system a quick checkup. Clean the solar panel with a soft cloth and mild soap to remove pollen, dust, or debris that can reduce charging efficiency by up to 30 percent. Inspect connections for corrosion, especially after rainy seasons, and check battery health by noting how long the system runs without direct sunlight.
Adjusting watering schedules seasonally is crucial. Spring might need moderate watering as plants awaken, summer demands more frequent cycles during heat waves, fall requires gradual reduction, and winter needs minimal irrigation or complete shutdown depending on your climate. Most timers let you adjust duration and frequency without reprogramming everything from scratch.
For winter preparation in cold climates, disconnect and store your timer indoors to protect the battery from freezing temperatures. Drain all water from lines to prevent pipe damage. In milder regions, simply reducing watering frequency works fine. Before extreme weather events like heatwaves or storms, manually override schedules or temporarily disconnect the system to prevent damage. Your timer’s smart, but a little seasonal TLC goes a long way.
Troubleshooting Common Issues
If your timer isn’t activating, first check that the solar panel is positioned to receive direct sunlight for at least 6 hours daily. I learned this the hard way when mine stopped working because morning shade from a growing tree had crept over the panel! Clean any dust or debris off the panel surface with a soft cloth.
When the battery won’t hold charge, it might need replacing after 2-3 years of use. Most timers use standard rechargeable batteries that you can swap out easily. Before replacing, though, disconnect everything for 24 hours and let the battery fully recharge in bright sunlight.
For valves that don’t fully open or close, sediment buildup is usually the culprit. Turn off the water, unscrew the valve, and rinse the diaphragm and screen under running water. While you’re at it, check that water pressure stays between 20-80 PSI, as extremes cause valve issues.
Panel connectivity problems often come down to loose wire connections. Inspect all connection points, tighten any loose terminals, and look for corrosion on metal contacts. A bit of dielectric grease prevents future corrosion. If your system uses wireless connectivity between components, simply repositioning units closer together often solves signal problems.
Taking It Further: DIY Modifications and Upgrades
Adding Smart Sensors for Responsive Watering
Here’s where things get really exciting. Once you’ve got your solar-powered timer running smoothly, you can take your system to the next level with smart sensors that make your watering truly responsive to actual conditions.
I learned this lesson the hard way one summer when my timer dutifully watered my vegetable garden right through a three-day rainstorm. My tomatoes were not happy! That’s when I discovered the magic of add-on sensors.
Soil moisture sensors are game-changers. These simple devices stick into the ground near your plants and measure the actual water content in the soil. When moisture levels are adequate, they signal your timer to skip the scheduled watering. No more guessing whether your garden actually needs water. Most sensors connect easily to standard irrigation timers through a simple wire connection, and many solar-powered controllers now include sensor input terminals built right in.
Rain sensors work similarly but detect rainfall instead. Mounted on your roof or a fence post, they’ll temporarily override your timer when Mother Nature does the watering for you. Some advanced models even measure how much rain fell and adjust accordingly.
The beauty of both sensors is they’re typically low-power devices that won’t drain your solar system. You’re essentially letting your garden tell you when it’s thirsty, conserving water and keeping plants healthier through precision irrigation.
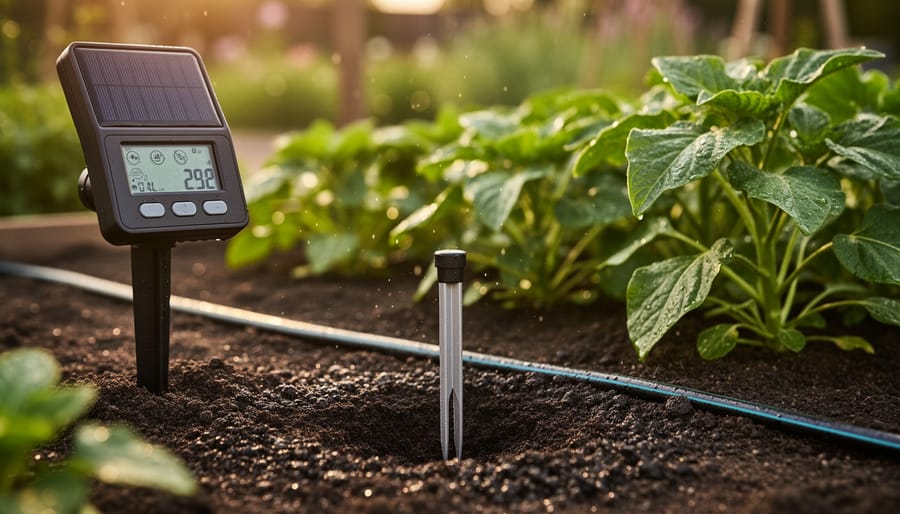
Adding soil moisture sensors to solar irrigation timers prevents overwatering by monitoring actual soil conditions.
Expanding Your System as Your Garden Grows
As your garden flourishes, your irrigation needs naturally expand. The good news? Growing from a single-zone timer to a comprehensive watering system is surprisingly straightforward.
Start by assessing your property’s zones. Different plant types, sun exposure, and soil conditions each require unique watering schedules. When I expanded my system last year, I discovered my tomatoes needed twice the watering time as my native flower beds—something a multi-zone setup handles beautifully.
For smaller expansions, multi-zone timers offer the simplest solution. These units connect to a single solar panel but control multiple valve outputs independently. You’ll run separate water lines to each zone, with dedicated valves controlled by different timer channels. Most models support 2-6 zones from one controller.
Larger properties might benefit from multiple independent timers. This approach works wonderfully when zones are far apart or when combining timers with solar-powered water pumps for remote areas. The key is synchronizing schedules to avoid overtaxing your water source—stagger start times by 15-30 minutes between units.
Wiring considerations matter too. Keep solar panels positioned for maximum sunlight, using outdoor-rated extension cables if needed. Label all valve connections clearly, and consider a simple diagram for future reference. Most importantly, test each zone individually before finalizing your setup to catch any pressure or coverage issues early.
Solar irrigation timers really are one of those brilliant solutions that just make sense. They take the hassle out of watering, eliminate your dependence on electrical outlets, and let you step away from your garden knowing everything’s under control. Whether you’re growing tomatoes or maintaining a sprawling landscape, this simple technology puts you in the driver’s seat.
I’ve been running my solar timer setup for three seasons now, and honestly, I can’t imagine going back. The peace of mind alone is worth it, but knowing I’m reducing my environmental footprint while building resilience into my watering system feels pretty good too. My garden has never been healthier, and I’ve actually lowered my water bill by avoiding the overwatering I used to do manually.
If you’re on the fence, start simple. Pick up a basic solar timer, connect it to your existing hose, and see how it transforms your routine. You’ll quickly discover what works for your specific needs, and you can always expand from there.
I’d love to hear about your experience. Are you already using a solar irrigation timer? Considering one? Drop your questions or stories in the comments below. Let’s keep learning from each other and building a community of resourceful, sustainable gardeners.
How useful was this post?
Click on a star to rate it!
Average rating 0 / 5. Vote count: 0
No votes so far! Be the first to rate this post.
We are sorry that this post was not useful for you!
Let us improve this post!
Tell us how we can improve this post?
charlesnoble
Here at Spheral Solar, I’m a hands-on solar power enthusiast, constantly exploring and experimenting with DIY solutions. I’m dedicated to sharing my discoveries, insights, and even the bumps I hit along the way, all in the pursuit of a more sustainable future.
How Does a Solar-Powered Drip Irrigation System Work by Paul September 13, 2021 Solar-powered drip irrigation can be installed in most gardens using a small solar system, readily available irrigation materials, and minimal tools. If you already have a home solar system, it can be tapped into without installing a dedicated system. And the installation of an average drip irrigation system is well…
5 Best Solar Irrigation Controllers in 2023 by Adeyomola June 15, 2021 Apart from a flexible timer function and a high-quality solar panel, the solar irrigation controller is uncomplicated, adaptable to various weather conditions, and durable. Some even come with rain sensors, multiple outlets, broad displays, and remote control, which can be integrated with smart devices. Things to Consider When choosing a…
Why Your Next Outdoor Water Pump Should Run on Sunshine by Charlesnoble March 12, 2026 Picture this: You’re standing in your garden on a sunny afternoon, watching crystal-clear water flow effortlessly from your well to your vegetable beds—no extension cords snaking across the lawn, no monthly electricity bills, and no guilt about your carbon footprint. That’s the promise of solar powered outdoor water pumps, and…
Solar Water Pumps That Bring Your Garden Features to… by Charlesnoble January 13, 2026 Match your pump’s wattage to your solar panel capacity by calculating total daily runtime hours multiplied by pump watts, then add 30% for cloudy days and battery charging losses. A typical 10-watt fountain pump running 8 hours daily needs a minimum 20-watt panel and 12-volt, 7-amp-hour battery to maintain consistent…
Build a Solar-Powered Drip System That Waters Your… by Charlesnoble October 18, 2025 Transform your garden into a self-sustaining oasis with solar-powered drip irrigation systems that combine clean energy with precision watering. This innovative solution slashes water consumption by up to 70% while delivering optimal moisture directly to plant roots, eliminating the hassle of manual watering and reducing your environmental footprint. By harnessing…
Solar Driveway Lights That Actually Work (No… by Charlesnoble December 5, 2025 Picture this: You’re pulling into your driveway after dark, and instead of fumbling for a flashlight or navigating by memory, your path is illuminated by a gentle row of lights that cost you absolutely nothing to operate. No electrician bills, no trenching through your yard, and no spike in your…
Subscribe for handpicked DIY projects, exclusive tips, and giveaways.
Grab a 9-volt solar panel from your local electronics supplier and test it with a multimeter in direct sunlight—if it produces 9-12 volts under load, you’ve got a working unit ready for small-scale projects. These compact panels excel at trickle-charging rechargeable 9V batteries, powering LED lighting systems for camping, or running low-draw electronics like portable… Read more: Why 9 Volt Solar Panels Are Perfect for Your First Portable Power Setup
Gather a small solar panel (1.5-6 volts), a lightweight toy car chassis or four bottle caps for wheels, a small DC motor, connecting wires, and a hot glue gun to create your science fair winner in an afternoon. Position the solar panel where it catches maximum sunlight—angled slightly toward the sky works best—and wire it… Read more: Build a Solar-Powered Car That Actually Wins Your Science Fair
Disconnect your 5G-enabled charge controller from the internet when you’re not actively monitoring it—this single step eliminates 80% of remote attack vectors while still allowing you to check in when needed. Change every default password on your solar monitoring system the day you install it, using unique 16-character combinations that include numbers and symbols, because… Read more: Your Solar Setup’s Hidden Vulnerability: Why 5G Could Be Your Charge Controller’s Weakest Link


")

")


")

")


