Heat Your Pool for Pennies Using Simple Black Hose
Updated:
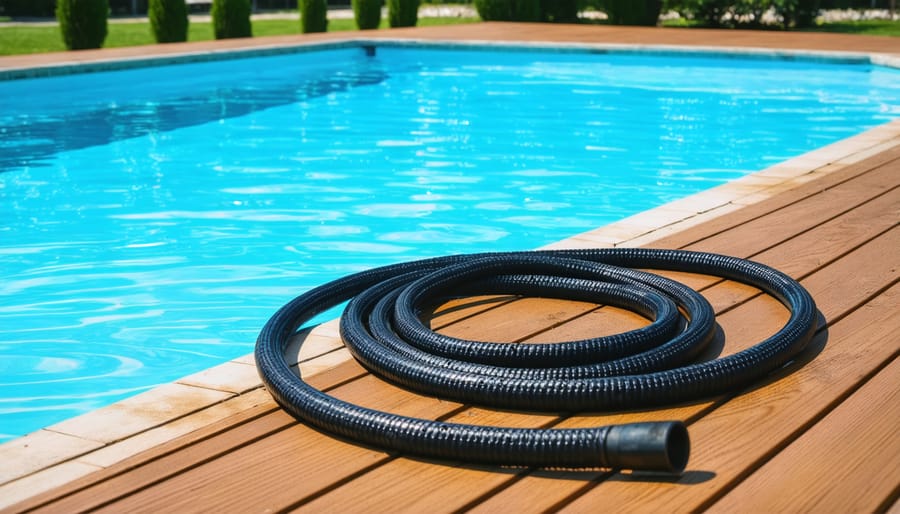
Coil 100-200 feet of black garden hose across a sunny spot near your pool, connect it to your pump system, and watch the sun transform cold water into a comfortable swimming temperature—sometimes adding 5-10 degrees in just a few hours. This simple hack works because black material absorbs solar radiation incredibly efficiently, and the longer your water travels through sun-baked hose, the warmer it gets when it returns to your pool.
I stumbled onto this solution three summers ago when my electric pool heater died right before a family gathering. Desperate and broke, I grabbed the black hose from my garage, arranged it in loops on my deck, and jury-rigged it to my pool filter. By afternoon, my kids were swimming comfortably in 78-degree water that had been 68 degrees that morning. That temporary fix became permanent when I realized I was heating my pool for essentially zero cost.
The beauty of this approach isn’t just the money you’ll save—it’s the satisfaction of building something functional with materials you might already own. You don’t need engineering expertise or specialty tools. A basic understanding of water flow and a free afternoon are enough to create a heating system that rivals commercial solar panels costing thousands of dollars.
This method works best in sunny climates during spring and fall when you need just a few extra degrees for comfortable swimming. It won’t turn your pool into a hot tub during winter, but it extends your swimming season by weeks or even months. The system requires minimal maintenance, operates silently, and reduces your carbon footprint while keeping your family comfortable.
Let me show you exactly how to build one that actually works.
Why Black Hose Works Better Than Expensive Pool Heaters
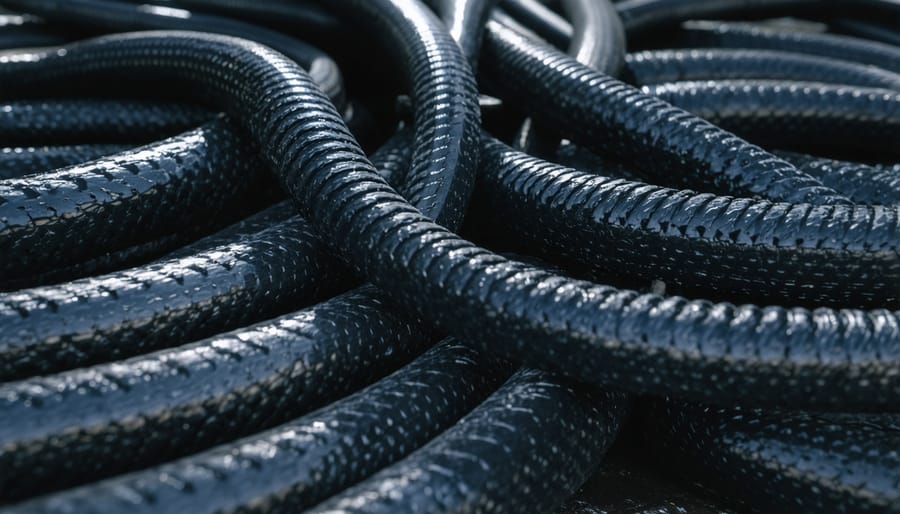
Black garden hose absorbs solar energy efficiently, making it an ideal material for DIY pool heating systems.
The Physics Made Simple
Here’s how your black hose solar pool heater actually works, and trust me, the science is surprisingly straightforward. When I first explained this to my neighbor, she said, “That’s it? That’s all there is to it?” Yep, that’s the beauty of it.
Black surfaces absorb sunlight incredibly well. While a white hose might reflect 80% of the sun’s energy back into the air, a black hose absorbs about 90% of it. That absorbed energy turns into heat, which is the first piece of the puzzle.
Next comes heat transfer. As your pool water flows through the heated black hose, the warmth moves from the hose material into the water itself. Think of it like warming your hands around a hot mug of coffee—the heat naturally flows from hot to cold. The longer the water spends inside that heated hose, the more warmth it picks up.
Finally, thermal gain is simply the temperature increase your water experiences during its journey through the hose. On a sunny 75-degree day, water entering at 68 degrees might exit at 75-80 degrees. That 7-12 degree boost might not sound dramatic, but multiply it by hundreds of gallons cycling through daily, and you’ve got serious heating power.
Understanding how solar pool heating works at this basic level helps you optimize your setup. More hose length equals more contact time equals warmer water. Position your coils in full sun, and you’re maximizing absorption. Simple physics, impressive results.
Cost Comparison: Black Hose vs. Traditional Heaters
Let me break down the real costs for you. When I built my first DIY solar pool heater with black hose, I spent around $150-$200 on materials—that’s 100-200 feet of black hose, connectors, and basic mounting supplies. Zero operating costs afterward since sunshine is free.
Compare that to traditional heaters: gas pool heaters run $2,000-$4,000 upfront, plus $300-$600 monthly in fuel costs during pool season. Electric heat pumps cost $2,500-$5,000 initially and add $150-$300 to your monthly electric bill. Even a professional pool solar installation runs $3,000-$7,000.
Here’s where it gets interesting. My black hose system paid for itself in the first month compared to gas heating. Over a typical five-year period, you’re looking at savings of $9,000-$18,000 compared to gas, and $4,500-$9,000 compared to electric heating.
The trade-off? Black hose systems heat slower and work best in sunny climates. But for weekend pool enjoyment and extending your swimming season by 2-3 months, the return on investment is unbeatable for budget-conscious DIYers.
What You’ll Need to Build Your Black Hose Pool Heater
Choosing the Right Black Hose
Not all black hoses are created equal when it comes to solar heating. I learned this the hard way when my first attempt used a regular vinyl garden hose that kinked constantly and barely moved the temperature needle.
For the best results, look for polyethylene or rubber hoses specifically designed for higher temperatures. Standard garden hoses work, but they’re not ideal. What you really want is black irrigation tubing or soaker hoses, which have thinner walls that transfer heat more efficiently.
Diameter matters more than you might think. Smaller diameters like half-inch to three-quarter-inch tubing heat water faster because there’s less volume inside, but they also create more resistance to your pump. I’ve found three-quarter-inch to be the sweet spot for most backyard pools, balancing heat transfer with adequate flow.
As for length, a good rule of thumb is to match 50-100% of your pool’s surface area with hose coverage. For a 15×30-foot pool (450 square feet), aim for 225-450 square feet of hose laid flat. That typically translates to 100-200 feet of hose, depending on your spacing. More surface area equals more heat collection, but remember you’ll need a pump strong enough to push water through the entire system without straining.
Additional Components You’ll Need
Beyond the black hose itself, you’ll need several key components to create a functioning solar pool heating system. Let’s break down what you’ll actually use to get water flowing and heated.
First up is a pool pump. If you already have one for filtration, you might be able to use it for your solar heater too. Otherwise, a small submersible pump (around 1/2 to 3/4 HP) works perfectly for most above-ground pools. I learned this the hard way when I first tried using a pump that was too weak—the water barely trickled through my hose array!
You’ll need hose connectors and adapters to link your black hose to the pump and return line. PVC fittings, hose clamps, and garden hose adapters are your friends here. Grab a variety pack because you’ll likely need different sizes as you fine-tune your setup.
A diverter valve or three-way valve is essential. This lets you bypass the solar heater when it’s cloudy or when your pool is warm enough. Think of it as your temperature control switch.
For mounting, consider zip ties, bungee cords, or mounting brackets to secure your hose to a roof, fence, or ground rack. The setup is similar to solar panel setup basics—you want stability and optimal sun exposure.
Optional additions include a thermometer to monitor temperature gains and a timer for automated operation.
Building Your Black Hose Solar Heater Step-by-Step
Planning Your Layout
Finding the right spot for your black hose solar heater can make or break its performance. I learned this the hard way when Charles first set up his system in a partially shaded area and only got lukewarm results. After relocating to full sun, his pool temperature jumped by 8 degrees.
Start by identifying south-facing locations that receive at least 6-8 hours of direct sunlight daily. Your roof, deck railing, or ground-mounted rack all work well. Avoid areas with afternoon shade from trees or buildings.
Next, calculate how much hose you’ll need. A good rule of thumb is matching 50-75% of your pool’s surface area with hose. For a 15×30 foot pool (450 square feet), aim for 225-340 square feet of hose coverage. Since standard black hose creates roughly 1 square foot per coil foot when laid flat, you’ll need 225-340 feet of hose.
Design your layout in a serpentine pattern or concentric circles to maximize sun exposure. Space coils about 2-3 inches apart for optimal heat absorption without excessive shading. Secure everything with UV-resistant zip ties or clips. Remember, tighter coils fit more hose in smaller spaces but may restrict water flow slightly, so find your balance between compact design and efficiency.
Setting Up the Hose Array
Now comes the fun part—setting up your hose array to maximize sun exposure. I remember Charles telling me about his first attempt, where he just tossed the hose in a pile on his deck. It worked, sort of, but once he organized it properly, the temperature jumped by nearly 10 degrees!
Start by choosing your location. A flat, south-facing surface works best—think deck, patio, or even your roof if you’re comfortable working up there. The goal is unobstructed sunlight for most of the day, ideally between 10 AM and 4 PM.
For the coiling method, lay your black hose in tight spirals, spacing each loop about 2-3 inches apart. This spacing is crucial—too close and the loops shade each other, too far and you’re wasting valuable space. Secure the coils using zip ties attached to a wooden pallet, wire mesh, or plastic grid laid underneath. Charles swears by heavy-duty zip ties every 12 inches or so to prevent the hose from shifting on windy days.
If you’re using a flat panel approach, snake the hose back and forth in an S-pattern on a plywood base painted black. This creates even more heat absorption. Some folks drill small holes through the hose at strategic points and use screws with washers to hold everything in place—just be careful not to puncture all the way through!
Whatever method you choose, ensure the entire array slopes slightly toward the return end for proper drainage and air release.
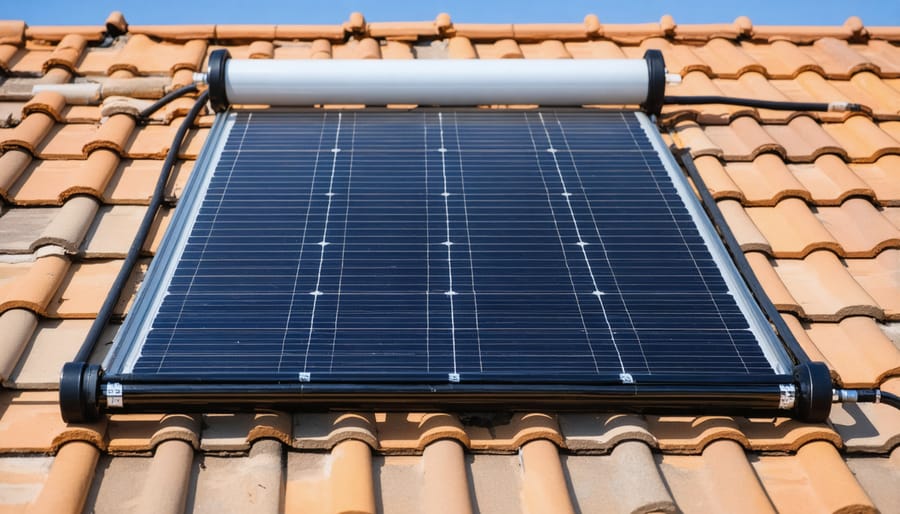
Mounting black hose on a roof maximizes sun exposure and heating efficiency for solar pool heating systems.
Connecting to Your Pool System
Now comes the moment where your black hose system becomes a real pool heater. You have two main options here, and the right choice depends on your existing setup and comfort level with plumbing.
The simplest approach uses your existing pool pump. I remember Charles telling me about his first setup: “I was nervous about messing with my pool’s plumbing, so I went the easy route.” He connected his hose system to the return line using a simple T-fitting with ball valves. This lets you divert some water through your solar heater while the rest flows normally. The beauty of this method is that you can control the flow rate with the valves, finding that sweet spot where water heats up without slowing circulation too much.
If your pool pump is underpowered or you want more flexibility, consider adding a small dedicated circulation pump. A basic 1/4 HP utility pump works great and costs around 80 to 120 dollars. This gives you independent control and means you can run your solar heater even when the main pool pump is off.
For connections, garden hose adapters that thread onto standard PVC fittings make life incredibly easy. No special tools needed. Just make sure every connection point has a shut-off valve so you can isolate your solar system for maintenance or during winter months.
The key safety tip: always install a bypass loop. This lets you redirect water flow if something goes wrong, preventing damage to either your pool system or your new solar heater. Test all connections at low pressure first, gradually increasing flow while checking for leaks.
Testing and Adjusting Flow Rate
Getting the water flow just right makes a huge difference in how much heat your system captures. Too fast, and the water doesn’t have enough time to warm up. Too slow, and you’re barely circulating anything. Here’s how to find that sweet spot.
Start by running your pool pump on its lowest setting and checking the temperature difference between the water entering and leaving your black hose array. You’re aiming for about a 5-10 degree increase. Charles learned this the hard way—his first setup had water racing through so quickly it only gained 2 degrees, which barely made a dent in his pool temperature.
If your water isn’t heating enough, try adding a valve to restrict flow slightly. You can use a simple ball valve on the return line to dial things in. Check the temperature every 15 minutes as you adjust until you hit that target range.
Common issues include air bubbles in the line (usually fixed by tilting your panels slightly or adding an air release valve) and uneven heating across different hose sections. If some coils feel significantly cooler, you might have kinks or blockages restricting flow to those areas.
Test your system on a sunny afternoon when you’ll see the most dramatic results, then fine-tune from there. Keep notes on what works best for your setup.
Maximizing Heat Output From Your System
Location and Angle Optimization
Getting your black hose positioned correctly can mean the difference between lukewarm and truly warm pool water. I learned this the hard way during my first attempt—I laid my coils in a shaded spot under a tree thinking the afternoon sun would be enough. Spoiler: it wasn’t!
For maximum efficiency, you want your hose catching sunlight from around 10 AM to 3 PM at minimum. South-facing placement works best in the Northern Hemisphere (north-facing for those below the equator). If you’re mounting on a roof, angle your hose setup to match your roof’s pitch—it’s already optimized for your location. Ground mounts give you more flexibility: aim for a 30 to 45-degree tilt toward the sun, which captures rays efficiently throughout the day.
Avoid common mistakes like placing your system near shade-casting structures or trees. Even partial shade can significantly reduce heating performance. If ground space is limited, consider building a simple wooden rack that elevates your coils at the right angle. Some DIYers get creative with old pallets or PVC frames—whatever keeps those coils sun-soaked and stable works perfectly.
Boosting Performance With Simple Upgrades
Once you’ve got your basic black hose solar heater up and running, a few simple tweaks can really boost its performance. I learned this the hard way after my first setup barely raised the water temperature by two degrees. Let me share what actually works.
Start with reflective surfaces. I placed white painted plywood boards behind my coiled hose, angling them slightly to bounce extra sunlight onto the black surface. This increased heat absorption by about 15-20% without any additional cost. You can also use aluminum foil or reflective emergency blankets if you have them lying around.
Insulation makes a huge difference too. Adding foam board insulation underneath your hose prevents heat loss to the ground. I used half-inch rigid foam from the hardware store, cut to fit my platform. This simple addition kept more of that precious heat where it belongs—in your water.
Consider extending your hose runs if you have the space. More surface area equals more heating potential. I started with 100 feet of hose but eventually expanded to 200 feet across my fence line. Just remember that longer runs also mean your pump needs to work harder, so check that your existing pump can handle the increased flow resistance. Speaking of pumps, if you’re upgrading your entire pool system, don’t forget about your solar pool skimmer for a completely eco-friendly setup.
Finally, position multiple smaller coils at different angles rather than one massive flat panel. This catches sunlight throughout the day as the sun moves across the sky.
What Results to Expect (Real Numbers)
Let’s talk real numbers, because I know that’s what you’re really here for. When I built my first black hose system, I was honestly skeptical about how much of a difference it would make. Here’s what actually happened.
My 15,000-gallon pool in central Florida gained about 5-7 degrees Fahrenheit on a sunny day with 300 feet of black hose running for 6-8 hours. Not enough to turn cold water into a hot tub, but definitely enough to extend my swimming season by several weeks on both ends. On cloudy days, I’d see maybe 2-3 degrees, which is still better than nothing.
Pool size matters more than you might think. Smaller pools see more dramatic results because you’re heating less water. Community member Sarah reported an 8-degree gain on her 10,000-gallon above-ground pool using just 200 feet of hose in Texas. Meanwhile, Mike in Pennsylvania with a 25,000-gallon pool needed 500 feet to achieve a modest 4-degree increase.
Climate plays the obvious role too. Southern states can expect gains between 5-10 degrees during peak summer with adequate hose length. Northern climates might see 3-6 degrees, which can still mean the difference between a bracing plunge and comfortable swimming.
A rough guideline: expect about 1 degree of heating per 50 feet of hose for every 5,000 gallons of pool water in sunny conditions. It’s not scientific precision, but it gets you in the ballpark.
The best part? These aren’t one-time gains. Run your system daily and you’ll maintain those elevated temperatures throughout the season. The investment pays off through extended pool usage, not necessarily Caribbean-level warmth. Set realistic expectations, and you won’t be disappointed.
Troubleshooting Common Problems
Even the best-planned DIY solar heaters can hit a few snags. Here’s how to tackle the most common issues.
If your pool isn’t warming up as expected, first check your hose layout. I learned this the hard way when Charles mentioned his initial setup wasn’t getting enough direct sun exposure. Make sure your black hose gets at least 6-8 hours of sunlight daily. Also verify that water is flowing slowly enough through the coils—too fast and the water doesn’t have time to absorb heat. Try partially closing your return valve to slow things down.
Leaks are the nemesis of every DIY pool project. Check all connection points where hose meets PVC fittings. Hose clamps should be snug but not overtightened, which can actually crack fittings. For pinhole leaks in the hose itself, a bit of waterproof tape works temporarily, but replacement is your long-term solution.
Flow problems usually stem from kinked hoses or air pockets in the system. Walk your entire setup and straighten any bends that restrict water movement. To purge air bubbles, open the highest point in your system briefly to let trapped air escape.
For seasonal challenges, remember that cloudy weather dramatically reduces heating efficiency—that’s just physics at work. During cooler months, consider adding an insulated pool cover at night to retain the heat you’ve gained during the day. Some DIYers also stack multiple hose coils or add reflective surfaces beneath their panels to boost performance when sun intensity drops.
A properly functioning DIY solar heater extends your swimming season by maintaining comfortable water temperatures without expensive energy bills.
You’ve just learned how to build one of the most cost-effective solar upgrades for your pool, and honestly, there’s no reason not to give it a shot. I remember Charles telling me about his first black hose setup—he spent about $50 and a Saturday afternoon, and by the next week, his kids were swimming in water that was 8 degrees warmer. That’s the beauty of this project: it’s simple, affordable, and it actually works.
The best part? You can start small. Grab a couple hundred feet of hose, lay it out on a sunny spot, and see what happens. If you love the results (and you probably will), you can always expand your system or experiment with different configurations. There’s no complicated installation, no permits to worry about, and if something doesn’t work perfectly the first time, adjusting is as easy as moving some hose around.
Now it’s your turn. We’d love to hear how your black hose solar heater performs. Did you get that 10-degree temperature boost? Did you try any creative mounting solutions? Drop a comment below and share your results with our community of solar DIYers. Your experience might be exactly what someone else needs to take the plunge. And if you hit any snags along the way, don’t hesitate to ask questions—we’re all figuring this out together, one sunny day at a time.
How useful was this post?
Click on a star to rate it!
Average rating 0 / 5. Vote count: 0
No votes so far! Be the first to rate this post.
We are sorry that this post was not useful for you!
Let us improve this post!
Tell us how we can improve this post?
charlesnoble
Here at Spheral Solar, I’m a hands-on solar power enthusiast, constantly exploring and experimenting with DIY solutions. I’m dedicated to sharing my discoveries, insights, and even the bumps I hit along the way, all in the pursuit of a more sustainable future.
DIY Solar Pool Heater – Beginner’s Guide With Diagrams by Paul June 27, 2021 Although you may think it’s a tall order, you can build a DIY solar pool heater using irrigation tubing and fittings, framing lumber, and basic tools and expertise, all in a weekend or less. And that’s not an exaggeration. You can build a functional and efficient solar pool heater using…
How Does a Solar-Powered Drip Irrigation System Work by Paul September 13, 2021 Solar-powered drip irrigation can be installed in most gardens using a small solar system, readily available irrigation materials, and minimal tools. If you already have a home solar system, it can be tapped into without installing a dedicated system. And the installation of an average drip irrigation system is well…
Pool Solar Panel Installation: Pro Installation or DIY? by Paul July 16, 2021 A DIY pool solar panel installation can save you almost half the cost of a pro installation, and before you doubt yourself, you CAN do it. Let’s get started with the basics. What Are Solar Panel Pool Heaters? A solar panel pool heater relies on pool water circulated through a…
Build a Solar-Powered Car That Actually Wins Your… by Charlesnoble April 5, 2026 Gather a small solar panel (1.5-6 volts), a lightweight toy car chassis or four bottle caps for wheels, a small DC motor, connecting wires, and a hot glue gun to create your science fair winner in an afternoon. Position the solar panel where it catches maximum sunlight—angled slightly toward the…
Why 6000 Volts Won’t Kill Your Livestock (But Will… by Charlesnoble April 9, 2026 Understand that 6000 volts sounds terrifying but delivers surprisingly low amperage—typically around 120 milliamps for just 3/10,000th of a second per pulse. This combination creates an unforgettable shock that trains animals to avoid the fence without causing lasting harm. The voltage pushes current through thick fur and hide, while the…
How to Build a Solar-powered Electric Fence (With Diagrams) by Paul November 1, 2021 You can build a permanent DIY, 3-acre solar-powered electric fence can with basic technical skills in under a week. And depending on whether you opt for a custom or off-the-shelf solar fence charger, costs between $1,400 and $1, 800. And it could be up and running in a couple of…
Subscribe for handpicked DIY projects, exclusive tips, and giveaways.
AGM batteries outperform traditional flooded lead acid batteries in nearly every practical measure that matters for solar installations, but whether that performance justifies their 50-100% higher upfront cost depends entirely on how hands-off you want your system to be and how often you’ll cycle the battery deeply. After running both types through real-world solar setups… Read more: AGM vs. Lead Acid Batteries: Which Is Better for Your Solar Setup?
A portable power station will typically run your camping devices for anywhere from a few hours to several days on a single charge, depending on what you’re powering and the station’s capacity. As for lifespan, most quality units last between 3 to 10 years before the battery degrades enough to need replacement. The distinction matters… Read more: Your Portable Power Station Won’t Last as Long as You Think (Here’s Why)
A J1772 solar charger combines a standard J1772 charging connector (the same Type 1 plug used by most North American EVs and electric bikes) with solar panels and battery components to create an off-grid or grid-supplemented charging system. You’ll need three core elements: solar panels (typically 400-800 watts for practical ebike charging), a battery storage… Read more: How to Choose a J1772 Solar Charger for Your Ebike: A Buying Guide


")
")


")
")


