Solar Power Brought My Garden Fountain to Life (Here’s How You Can Too)
Updated:
Picture this: I’m sitting by my campsite last summer, watching a small solar fountain I’d just installed bubble away in a portable basin, powered entirely by the sun overhead. No extension cords snaking through the wilderness, no battery changes at midnight, just pure, peaceful water movement that attracted birds and created the perfect ambient soundtrack for an entire weekend off-grid.
Solar-powered fountains have come a long way from those fragile novelty items you might remember from big-box stores. Today’s systems combine efficient photovoltaic panels with reliable pumps that can transform any outdoor space into a dynamic water feature, whether that’s your backyard garden, a remote cabin property, or even a semi-permanent camping setup. The technology has matured to the point where you can genuinely rely on solar power to keep water circulating from dawn to dusk without any complicated setup.
What makes this particularly exciting for DIY enthusiasts is the accessibility. You don’t need an electrical engineering degree or a contractor’s license to get a solar fountain up and running. The core concept is beautifully simple: solar panels capture sunlight, convert it to electricity, and drive a water pump. Beyond that basic framework, you have remarkable flexibility in terms of scale, design, and functionality.
This guide walks you through everything from selecting the right components based on your specific needs to installing your system with confidence, troubleshooting common issues, and maintaining peak performance year-round. Whether you’re creating a wildlife watering station for your homestead or adding ambiance to your outdoor living space, solar fountains offer an elegant intersection of sustainability and practicality.
Why Solar Power Makes Perfect Sense for Outdoor Fountains
Here’s something I learned the hard way during my first attempt at adding a fountain to my backyard: extension cords and water features are a headache you don’t need. After tripping over orange cables snaking across my patio for the third time, I knew there had to be a better way. That’s when I discovered solar fountains, and honestly, it felt like one of those “why didn’t I think of this sooner” moments.
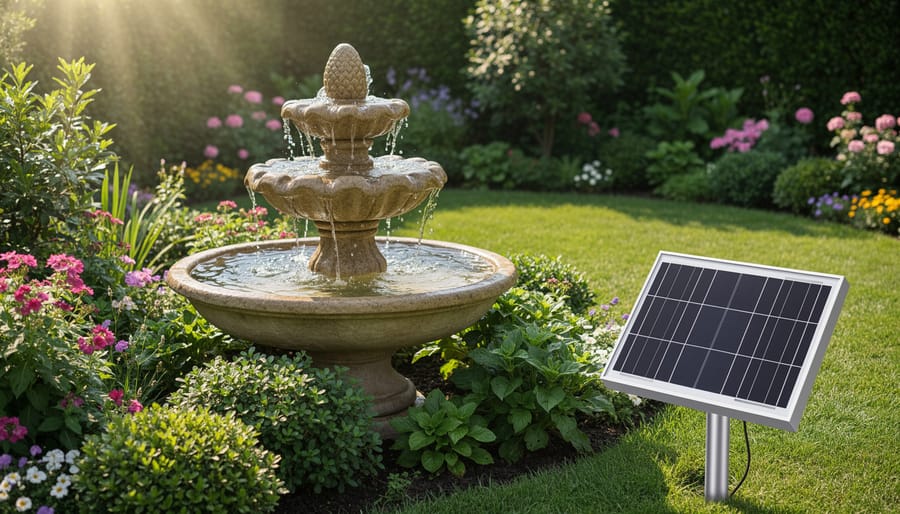
The beauty of solar-powered fountains lies in a simple fact of nature: water features look and sound best in open, sunny spots. You want your fountain where people can see and hear it, right? Well, those exact same sunny locations are where solar panels absolutely thrive. It’s a match made in heaven. While traditional electric fountains force you to plan around outlet locations or run unsightly extension cords, solar fountains give you the freedom to place your water feature exactly where it looks best.
Let’s talk about the practical benefits. First, you’re looking at zero ongoing electricity costs. None. Your fountain runs entirely on sunshine, which means you can enjoy the soothing sound of flowing water without watching your electric bill creep up each month. I’ve had mine running for three summers now, and the only cost has been the initial setup.
Installation flexibility is another game-changer. Want to create a peaceful water feature at your campsite? Planning a fountain for that sunny corner of your garden that’s nowhere near an outlet? Solar makes it possible. I’ve seen folks set up beautiful fountain displays in community gardens, at the edges of hiking trail rest areas, and even as temporary decorations for outdoor events.
From an environmental perspective, you’re harnessing clean, renewable energy to power something that already connects you with nature. There’s something genuinely satisfying about knowing your fountain runs on pure sunshine, with zero emissions and minimal environmental footprint.
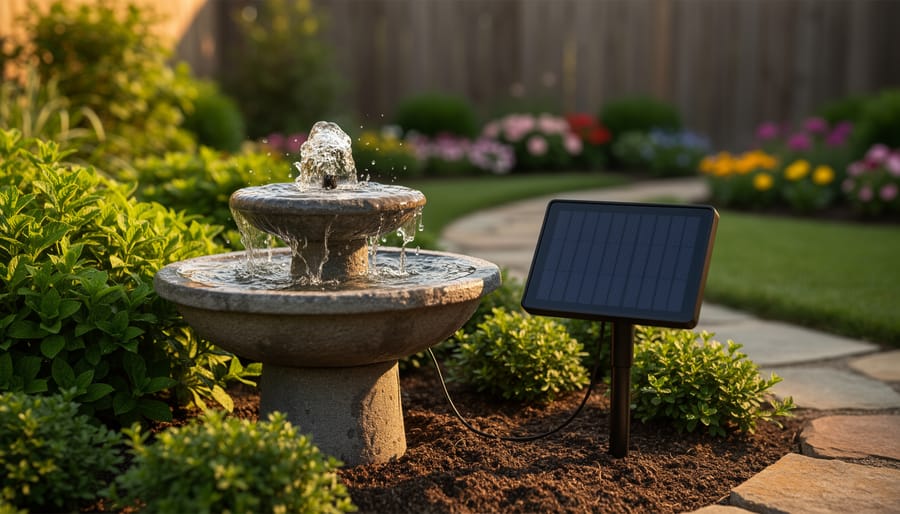
A solar-powered garden fountain operates independently without electrical wiring, with the solar panel positioned nearby to capture sunlight.
Understanding How Solar Fountain Systems Actually Work
The Three Essential Components
Getting your fountain up and running with solar power really comes down to three key pieces working together. Let me walk you through each one so you understand what’s happening under the hood.
First up is the solar panel, which is essentially your fountain’s power plant. These panels capture sunlight and convert it into electricity through photovoltaic cells. Think of them as tiny energy factories that wake up when the sun hits them. The bigger the panel, the more power you get, which means stronger water flow. When I installed my first solar fountain at the campsite, I learned pretty quickly that a panel rated at 5-10 watts works great for small decorative fountains, while larger setups need 20 watts or more.
Next is the water pump, the heart of your fountain system. This little workhorse does exactly what you’d expect: it pushes water through your fountain to create that peaceful flowing effect we all love. Solar pumps are designed to run on direct current, which is perfect because that’s exactly what your solar panel produces. Most come with different nozzle attachments so you can customize your water display.
Finally, there’s the battery backup, which is optional but honestly worth considering. Without it, your fountain only runs when the sun shines directly on the panel. Add a battery, and you can keep water flowing during cloudy periods or even into the evening hours. It stores excess energy during peak sunlight and releases it when needed, giving you much more flexibility with your fountain’s operation schedule.
Direct vs. Battery-Backed Systems
When I first started experimenting with solar fountains, I learned pretty quickly that there’s a fundamental choice to make: do you want your fountain running only when the sun’s shining, or do you want it bubbling away into the evening hours?
Direct solar systems are the simplest option. They connect your fountain pump straight to the solar panel with no middleman. When sunlight hits the panel, water flows. When clouds roll in or the sun sets, the show’s over. These systems are wonderfully straightforward, typically more affordable, and perfect if you mainly enjoy your outdoor space during daylight hours. I’ve installed these at several campsites where we’re only around during the day anyway, and they work beautifully.
Battery backup systems, on the other hand, store excess solar energy throughout the day so your fountain can keep running after sunset. This means you get that peaceful water sound during evening gatherings or while stargazing. The tradeoff? You’ll pay more upfront, and you’ll need to maintain the battery, which typically lasts 2-4 years before replacement.
Here’s my advice: if you spend most evenings outdoors or want your fountain operating 24/7, invest in battery backup. But if you’re working during the day and mainly use your outdoor space on weekends when the sun’s out, save yourself some money and complexity with a direct system. There’s no wrong choice, just the one that matches your lifestyle.
Choosing the Right Solar Fountain Setup for Your Space
Sizing Your Solar Panel and Pump
Here’s the thing about sizing solar fountains: it’s simpler than you’d think. I learned this the hard way when I overpowered my first birdbath fountain and sent water spraying all over my patio!
The basic rule is straightforward: your solar panel wattage should match or slightly exceed your pump’s power requirements. Most fountain pumps range from 1.5 watts for small birdbaths up to 10-15 watts for larger garden features.
Let me walk you through two real-world examples. For a small birdbath fountain, you’ll typically need a 2-watt pump, which pairs perfectly with a 5-watt solar panel. This gives you enough overhead for cloudy days and still keeps your fountain bubbling nicely. When I set up my own birdbath last spring, this combination worked like a charm even on partly sunny days.
Now, for a larger garden fountain with multiple tiers, you’re looking at an 8-10 watt pump. Here’s where portable solar panels in the 15-20 watt range come into play. The extra capacity ensures consistent flow even when clouds pass overhead.
Here’s a quick calculation method: Pump wattage times 1.5 equals your minimum panel wattage. So a 6-watt pump needs at least a 9-watt panel. This simple formula has saved me countless headaches and has kept my fountains running smoothly for years. Think of that extra capacity as insurance against disappointing performance.
All-in-One Kits vs. DIY Component Assembly
When I first started exploring solar fountains, I faced this exact decision: grab an all-in-one kit or piece together my own system? Here’s what I’ve learned from both approaches.
All-in-one kits are fantastic for beginners or anyone wanting a quick setup. Everything’s matched perfectly—the solar panel, pump, and fountain head work together right out of the box. You won’t waste time researching compatibility or worry about voltage mismatches. I recommend kits for small decorative fountains, camping trips where simplicity matters, or if you’re just testing the solar fountain waters. The downside? Limited customization and typically higher costs per component.
DIY component assembly shines when you have specific needs. Building my own system for a larger pond fountain saved me about 40% compared to comparable kits. You can select a more powerful pump, position panels farther from the fountain using extension cables, or upgrade individual parts later. This approach makes sense for permanent installations, unique fountain designs, or when you already own some components.
My advice: start with a kit for your first project to understand how everything works together. Once you’re comfortable with the basics, graduate to DIY assembly for your next fountain. You’ll appreciate the flexibility while avoiding beginner mistakes that come from mixing incompatible parts.
Location Matters: Sun Exposure and Panel Placement
Finding the perfect spot for your fountain starts with a simple observation: watch how sunlight moves across your yard throughout the day. Your solar panel needs at least 6-8 hours of direct sunlight for optimal performance, so avoid shaded areas under trees or building overhangs.
Here’s a tip I learned the hard way: morning sun counts just as much as afternoon sun. I once positioned a panel thinking it would catch “enough” light, only to realize a nearby fence cast shadows during peak hours. Use a sun calculator app on your phone to track patterns before committing to placement.
If your ideal fountain spot is shaded but you have a sunny area nearby, don’t worry. Extension cables let you separate the panel from the pump by 10-15 feet in most systems. This flexibility is similar to how solar panels for camping work, where you might place panels in clearings while keeping equipment at your campsite.
Position panels facing south (in the Northern Hemisphere) and tilt them at your latitude angle for best results. Most fountain kits include adjustable stands making this easy.
Setting Up Your Solar Fountain: A Step-by-Step Walkthrough
What You’ll Need to Get Started
Getting started with your solar fountain project is refreshingly straightforward, and I learned this firsthand when I set up my first one at our family’s cabin. You’ll need just a handful of items to bring your vision to life.
First, grab a solar panel kit designed for fountains. These typically include the panel itself, a submersible pump, and connecting cables. I recommend starting with a 5-10 watt panel for most backyard fountains, though smaller models work great for birdbaths.
You’ll also want a suitable basin or container to hold water. This could be anything from a decorative ceramic bowl to a repurposed whiskey barrel. Make sure it’s waterproof and large enough to accommodate your pump and any decorative elements.
Basic tools include waterproof silicone sealant for securing connections, a measuring tape, and scissors for trimming tubing if needed. Optional but helpful items include decorative stones to hide the pump, a water level indicator, and anti-algae treatment to keep things crystal clear.
That’s really it. No electrical wiring, no permits, no complex installations. Everything you need typically costs between fifty and two hundred dollars total.
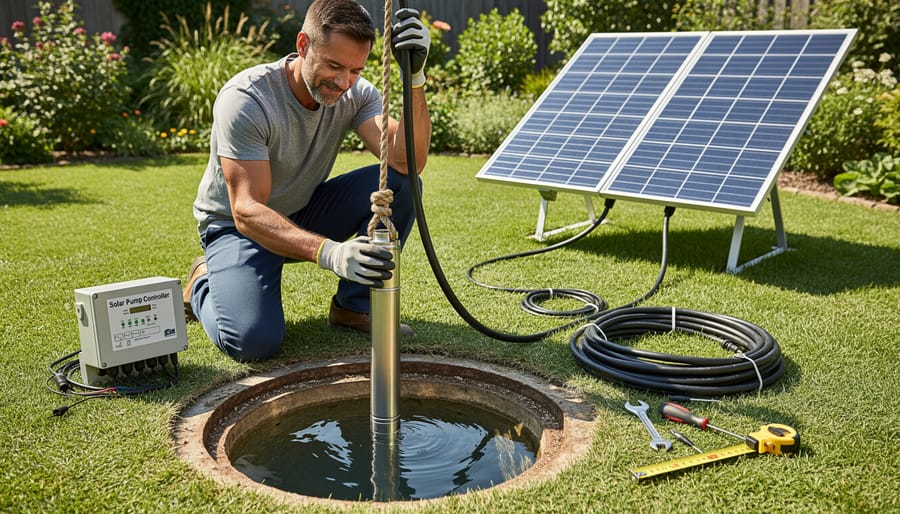
Installing the submersible solar pump is a straightforward process that requires no electrical expertise or special tools.
Installation Process
Setting up your solar fountain is easier than you might think! I remember my first installation – I was convinced I’d need an engineering degree, but I had water flowing in under 30 minutes. Let me walk you through it.
Start by unpacking everything and laying out all components. You should have your solar panel, pump, fountain head attachments, and connecting tubing. Check the instruction manual to verify you’ve got everything.
First, position your fountain basin or container where you want it. Choose a spot that gets at least 6 hours of direct sunlight daily. If your fountain location is shady, you’ll need to place the solar panel separately in a sunny spot – most systems come with extension cables for this exact scenario.
Next, attach the appropriate fountain head to your pump. Most kits include several spray patterns, so pick your favorite. You can always change it later. Connect the pump’s power cable to the solar panel’s output wire. The connections are typically plug-and-play with waterproof connectors – no electrical expertise needed.
Fill your fountain with water, ensuring the pump is completely submerged. The water level should be at least 2-3 inches above the pump intake to prevent dry running, which can damage the motor. Place the pump at the basin’s bottom, using the suction cups if provided.
Position your solar panel facing south (or north if you’re in the Southern Hemisphere) at about a 30-45 degree angle for optimal sun exposure. Secure it with the included stand or stake.
Now for the moment of truth – with adequate sunlight hitting the panel, your fountain should start pumping immediately. If nothing happens, here’s a quick troubleshooting checklist: Is the panel in direct sunlight? Are all connections tight? Is the pump fully submerged? Is debris blocking the intake filter?
One common first-timer issue I see is expecting the fountain to work in partial shade. Solar pumps need strong, direct sunlight to operate properly. If your flow seems weak, try adjusting the panel angle or moving it to a sunnier location.
Adding Battery Backup for Extended Operation
Want your fountain dancing after sunset or through overcast days? Adding battery backup is easier than you might think. I learned this trick camping in Oregon when my fountain’s solar panel couldn’t keep up with our shady campsite.
You’ll need a 12V deep-cycle battery matched to your pump’s voltage requirements. Connect it between your solar charge controller and pump using the controller’s battery terminals. The charge controller manages everything automatically, storing excess solar energy during sunny periods and drawing from the battery when needed.
For a typical small fountain pump drawing 5 watts, a 20Ah battery provides roughly 24 hours of runtime. Calculate your needs by dividing battery capacity (in watt-hours) by your pump’s wattage. Most systems run beautifully with 3-5 hours of daily sunlight to keep batteries topped off.
Position your battery in a weatherproof box near the fountain, ensuring proper ventilation. Check water levels monthly in flooded lead-acid batteries, or opt for maintenance-free AGM batteries if you prefer hands-off operation.
Beyond the Backyard: Solar Fountains for Camping and Outdoor Adventures
Solar fountains aren’t just for backyards anymore. I discovered this during a week-long camping trip in Utah when I brought along a compact solar fountain kit. The gentle water sounds transformed our dusty campsite into a surprisingly peaceful retreat, and within hours, we had birds visiting that we’d never have spotted otherwise.
Portable solar fountain systems are game-changers for outdoor adventures. Modern setups weigh as little as two pounds and pack flat, making them perfect companions for RV trips, extended camping excursions, or even tailgating events. Unlike traditional methods of getting electricity while camping, solar fountains require zero fuel, produce no fumes, and operate completely off-grid.
For wildlife enthusiasts, these fountains double as watering stations. Set up a simple basin with your solar pump near your campsite perimeter, and you’ll attract songbirds, butterflies, and small mammals. Just remember to position it where you can observe from a distance without disturbing visitors. I’ve captured some of my best wildlife photography this way.
The practical benefits extend beyond ambiance. RVers use solar fountains to aerate water storage tanks, preventing stagnation during long trips. Festival-goers create community gathering spots by setting up decorative water features at group campsites. Since these systems represent perfect silent power solutions, they won’t disturb the natural soundscape or annoy neighboring campers.
When selecting a camping fountain, prioritize durability and simplicity. Look for systems with reinforced tubing, shock-resistant pumps, and integrated battery backup for cloudy conditions. Collapsible basins work better than rigid containers for transport. My current setup runs for three hours after sunset thanks to its built-in battery, providing relaxing sounds well into the evening around the campfire.
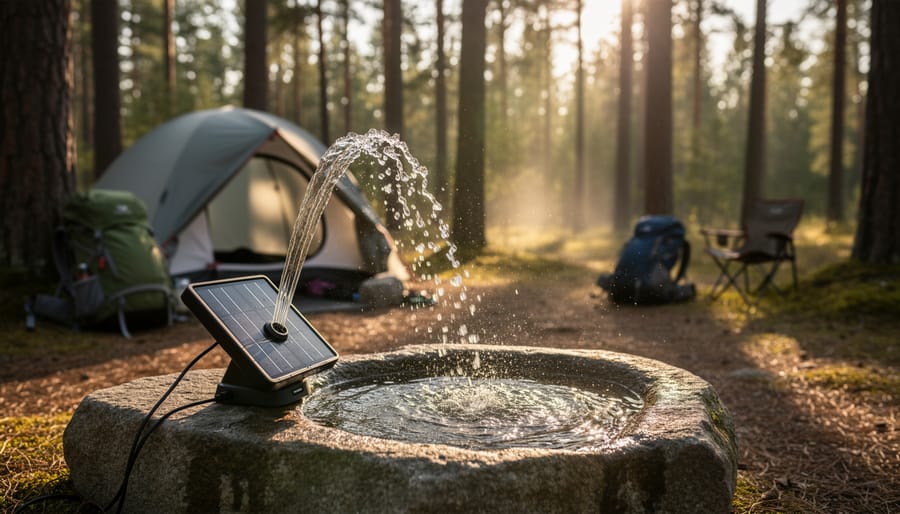
Portable solar fountains bring the soothing sound of water to remote campsites and outdoor adventures without requiring electrical hookups.
Maintaining Your Solar Fountain for Long-Term Performance
Here’s the good news: solar fountains practically take care of themselves. I learned this during my first season running one at my cabin—I was worried about constant upkeep, but honestly, it’s been one of my lowest-maintenance projects.
Your main task is keeping those solar panels clean. Dust, pollen, and bird droppings can reduce efficiency by up to 25%, so give them a quick wipe with a damp cloth every couple of weeks. Takes maybe two minutes. I usually do it when I’m already outside enjoying my coffee.
The pump needs a monthly check-in. Remove it from the water, rinse off any algae or debris, and make sure the intake isn’t clogged. If you notice reduced water flow, this simple cleaning usually fixes it immediately. For fountains with filters, a quick rinse under the hose keeps everything flowing smoothly.
Battery maintenance depends on your system type. Most modern lithium-ion batteries are pretty hands-off, but check connections seasonally to ensure they’re clean and tight. If you have lead-acid batteries, you might need to check water levels occasionally.
Winterizing is crucial in cold climates. Before the first freeze, drain your fountain completely, remove and clean the pump, and store it indoors. I learned this the hard way my first winter—frozen water can crack components fast. Cover or bring in your solar panel if possible, though quality panels handle cold just fine.
The beauty of solar fountains is that this minimal maintenance routine keeps them running reliably for years. Spend 15 minutes monthly, and you’re golden.
Common Challenges and How to Solve Them
Even the best solar fountain setup can hit a few snags, but don’t worry—most issues have straightforward fixes that won’t require a toolbox full of gadgets.
If you’re dealing with weak water flow or your fountain barely spitting water, the culprit is usually a dirty solar panel or pump filter. I learned this the hard way during my first camping trip with a portable fountain—after two dusty days, my once-impressive spray turned into a sad dribble. A quick wipe of the panel with a damp cloth and a rinse of the pump filter brought it right back to life. Make it a habit to clean your panel weekly and check the pump inlet for debris like leaves or algae.
Intermittent operation, where your fountain works one minute and stops the next, typically points to inconsistent sunlight. Clouds, shade from trees, or even nearby buildings can interrupt power. The solution? Reposition your panel to catch direct sunlight for most of the day, or consider adding a small battery backup system to smooth out those power gaps. This works brilliantly for fountains at campsites where tree cover shifts throughout the day.
Algae buildup is nature’s way of crashing your fountain party, especially in warm weather. Adding a fountain-safe algae inhibitor to your water reservoir helps tremendously. I also drain and scrub my fountain basin every two weeks during summer months—it takes ten minutes but prevents that green slime takeover.
Seasonal performance variations are totally normal. During winter or cloudy seasons, your fountain naturally produces less flow. Rather than fighting it, embrace the rhythm—run your fountain during peak sun hours or give it a seasonal rest. Your pump will thank you with a longer lifespan.
There’s something truly magical about watching water dance in the sunlight, powered by nothing more than the sun’s rays. Whether you’ve just added your first solar fountain to your backyard patio or you’re planning a more ambitious water feature for your off-grid cabin, you’ve taken a meaningful step toward renewable energy independence.
My advice? Start small and let your confidence grow. That simple birdbath fountain I mentioned earlier? It taught me more about solar panel positioning and battery management than any textbook could. Don’t be afraid to experiment with different setups, move your panels around, and find what works best for your unique situation.
Remember, every solar-powered fountain is a conversation starter and a learning opportunity. I’d love to hear about your projects, challenges, and creative solutions. Share your experiences with the Spheral Solar community because your backyard experiment today could inspire someone else’s breakthrough tomorrow.
You’re not just building a fountain. You’re taking control of your energy future, one sunny day at a time. And honestly, that’s pretty empowering. So grab that solar panel, position your pump, and let’s make some waves together.
How useful was this post?
Click on a star to rate it!
Average rating 0 / 5. Vote count: 0
No votes so far! Be the first to rate this post.
We are sorry that this post was not useful for you!
Let us improve this post!
Tell us how we can improve this post?
charlesnoble
Here at Spheral Solar, I’m a hands-on solar power enthusiast, constantly exploring and experimenting with DIY solutions. I’m dedicated to sharing my discoveries, insights, and even the bumps I hit along the way, all in the pursuit of a more sustainable future.
Your Camping Trip Needs Silent Power (Here’s How to Get It) by Charlesnoble November 1, 2025 Choose a portable power station with an inverter rating below 50 decibels—quieter than normal conversation—so you can run your essential camping gear without the rattling drone that ruins peaceful mornings at the campsite. Unlike gas generators that shatter the tranquility you came outdoors to find, modern lithium battery power stations…
Why Your Motorhome Electrical System Keeps Failing… by Charlesnoble November 18, 2025 Picture this: You’re three days into a dream cross-country trip when your lights flicker, the refrigerator stops cooling, and you’re left wondering whether to call for expensive roadside assistance or figure it out yourself. I’ve been there, and here’s what I wish someone had told me before my first electrical…
Solar Portable Lamps That Actually Work When You… by Charlesnoble February 25, 2026 Picture this: It’s 2 AM during a power outage, and you’re fumbling in the dark for candles and matches. Now imagine instead reaching for a lamp that’s been charging silently on your windowsill all day, ready to illuminate your space for hours without electricity bills or fire hazards. That’s the…
Why Quiet Camping Generators Beat Solar (And When… by Charlesnoble November 27, 2025 Choose a generator rated at 50-55 decibels or lower to ensure peaceful camping without disturbing wildlife or neighboring campers—models with inverter technology automatically adjust engine speed based on power demand, reducing noise significantly compared to conventional generators. Look for four-stroke engines with enclosed designs and rubber mounting feet that absorb…
Why Your Camper Van Power System Keeps Failing (And… by Charlesnoble January 24, 2026 Picture this: You’re parked along a stunning coastline, laptop open, fridge humming, and lights glowing as the sun sets—all powered by the system you built yourself. A well-designed camper van power system transforms your vehicle from basic transportation into true freedom on wheels, letting you work remotely, cook meals, and…
Why Your Qi Solar Power Bank Might Be Wasting Your… by Charlesnoble December 8, 2025 Expect your qi solar power bank to charge your phone wirelessly, but don’t count on the solar panel as your primary power source. I learned this the hard way during a three-day camping trip when I thought the built-in solar panel would keep my devices running indefinitely. The reality? Those…
Subscribe for handpicked DIY projects, exclusive tips, and giveaways.
A J1772 solar charger combines a standard J1772 charging connector (the same Type 1 plug used by most North American EVs and electric bikes) with solar panels and battery components to create an off-grid or grid-supplemented charging system. You’ll need three core elements: solar panels (typically 400-800 watts for practical ebike charging), a battery storage… Read more: How to Choose a J1772 Solar Charger for Your Ebike: A Buying Guide
Installing a whole house ventilation system powered by solar takes about 6 to 8 hours for a moderately skilled DIYer and delivers continuous fresh air circulation without touching your electric bill. The core method involves mounting a solar panel on your roof to power an intake or exhaust fan, routing ductwork through your attic or… Read more: How to Install a Whole House Ventilation System Using Solar Power
Connecting your SolarEdge inverter to your home network via Ethernet cable takes about 15 minutes and gives you real-time access to your system’s performance data from any device with internet access. You’ll plug a standard Ethernet cable into the RJ45 port on your inverter (usually labeled “LAN” or “Ethernet”), run it to your router, and… Read more: How to Connect SolarEdge to Ethernet for Seamless System Monitoring
")
")

")
")
")
")
")

")
")
")


