Choose a durable 5-gallon water bag with built-in solar absorption panels, typically black PVC or specialized solar fabric that heats water to 110°F in just 3 hours of direct sunlight. Position your solar shower bag on a flat, dark surface like a car roof or tent top during mid-day hours for maximum heat absorption, rotating it every 45 minutes to ensure even warming throughout.
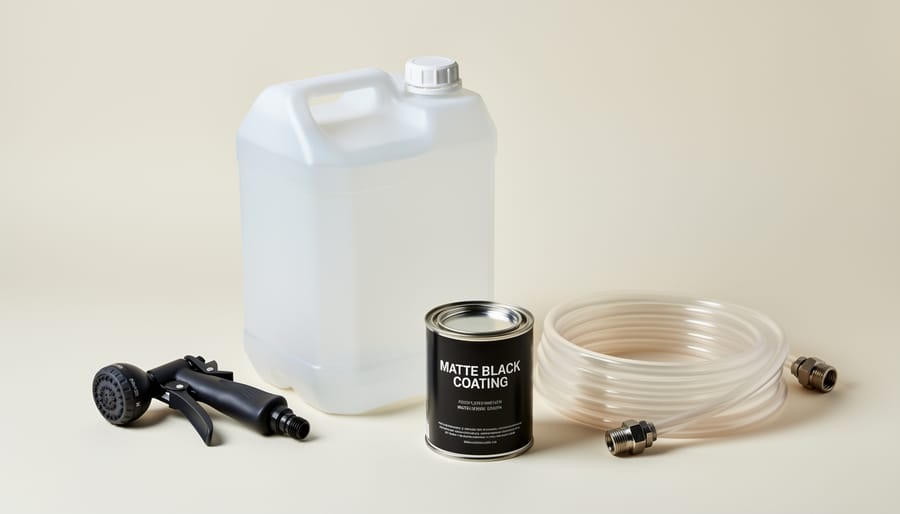
Build your own system by purchasing a food-grade 5-gallon container, painting it matte black with heat-resistant spray paint, and attaching a simple shower nozzle assembly from any hardware store for under $25 total. This DIY approach gives you complete control over components and lets you customize features like adjustable flow rates or temperature indicators.
Test water temperature before use by running a small amount over your wrist—the same method you’d use for a baby’s bath—since 5 gallons of 120°F water can cause discomfort or mild burns if you’re not careful. I learned this the hard way during my first camping trip in Colorado when I assumed cooler air temperature meant cooler water temperature.
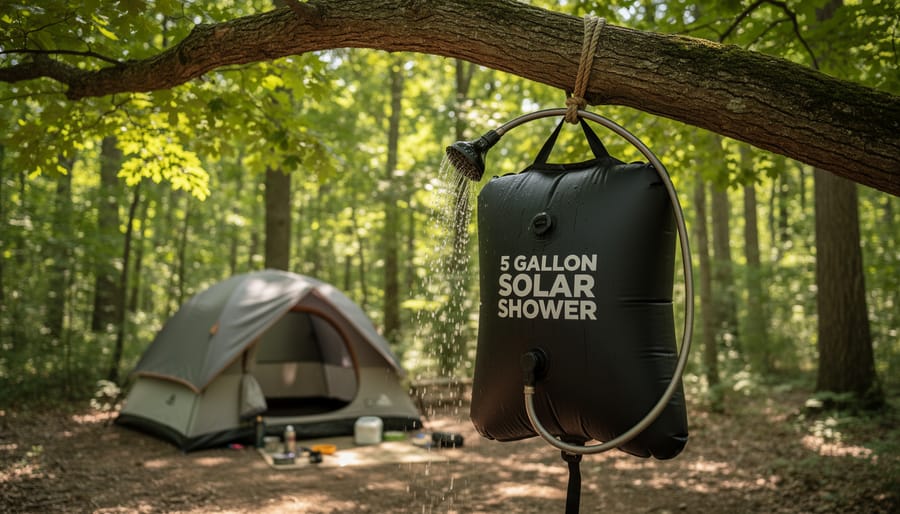
Hang your shower from a sturdy tree branch, roof rack, or portable tripod stand at least 7 feet high to generate enough water pressure for a satisfying rinse. Five gallons provides approximately 7-10 minutes of continuous flow with a standard nozzle, enough for a thorough outdoor shower if you turn off the water while soaping up.
Compare features across different models by reviewing best solar showers to understand which capacity, heating efficiency, and durability specifications match your specific camping frequency and group size needs.
Why 5 Gallons Is the Sweet Spot for Portable Solar Showers
When I first started exploring solar showers for my camping trips, I quickly learned that capacity matters more than you might think. After testing various sizes, I can tell you that 5 gallons really is the Goldilocks zone for portable solar showers—not too heavy to carry, yet enough water for practical use.
Let’s talk numbers. Five gallons of water weighs about 40 pounds when full, which is manageable for most adults to carry short distances to your shower spot. Compare that to a 10-gallon option at 80 pounds, and you’ll understand why bigger isn’t always better when you’re hauling gear to a campsite. Think of it like packing for a trip—you want enough supplies without breaking your back.
So how many showers can you actually get from 5 gallons? With a conservative flow rate and some water-saving techniques, you can comfortably get 2-3 decent showers for adults, or 4-5 quick rinse-offs. A typical shower uses about 1.5 to 2 gallons if you’re being mindful—wetting down, turning off the flow while soaping up, then rinsing. This makes the 5-gallon capacity perfect for a couple on a weekend trip or a small family for quick clean-ups.
The smaller 3-gallon models have their place for ultralight backpackers or solo adventurers on short trips, but they can feel limiting if you have long hair or want a thorough wash. Meanwhile, 10-gallon versions offer more water but become cumbersome to hang safely and transport, especially if you’re also managing electricity while camping setups and other gear.
For most recreational campers, the 5-gallon sweet spot provides flexibility. You can use it sparingly for multiple days, or enjoy a more generous shower experience for shorter outings. It’s the practical middle ground that respects both your comfort needs and physical limitations when exploring off-grid.
A completed 5-gallon solar shower system hanging from a tree demonstrates the simple yet effective design for off-grid camping.Essential materials for building a DIY solar shower include a food-grade container, spray nozzle, tubing, and matte black coating for heat absorption.
Materials and Tools You’ll Need
Choosing Your Container
When I built my first solar shower, I quickly learned that container choice makes or breaks the experience. You’ll find two main options for your 5-gallon setup: rigid buckets and flexible water bags.
Rigid buckets, typically made from HDPE plastic, offer exceptional durability and stability. They resist punctures, stand up to rough handling, and maintain their shape when hanging. The downside? They’re bulky to transport and store when you’re not using them. I’ve used standard paint buckets successfully, but make sure you choose food-grade certified containers to avoid chemical leaching into your shower water, especially when the sun heats everything up.
Flexible water bags are the lightweight champions of portable DIY solar shower designs. They pack down to almost nothing, making them perfect for backpacking or limited storage spaces. Modern bags often come with built-in hanging loops and shower nozzles. However, they’re more susceptible to punctures from branches or rough surfaces, and cheaper versions can split along seams after repeated use.
For hanging and mounting, rigid buckets need sturdy rope handles or metal bail handles that can support the weight when full. Bags typically feature reinforced straps designed specifically for hanging. Whichever you choose, test the hanging mechanism at home before heading into the wilderness.
The Right Nozzle Makes All the Difference
The nozzle you choose dramatically impacts your shower experience and how long your 5 gallons will last. I learned this the hard way during my first camping trip when I burned through my water in under three minutes with a wide-open spigot!
For basic setups, a simple ball valve or twist spigot works perfectly. These gravity-fed options give you manual control over flow rate, and they’re incredibly affordable at around $5-10. The key is learning to crack the valve just enough for a steady trickle rather than a full stream.
If you want a more home-like experience, pressure-style shower heads designed for camping are worth considering. Look for models with flow rates between 0.5 to 1.5 gallons per minute. At 1 gallon per minute, your 5-gallon shower lasts a solid five minutes, which is plenty for a thorough rinse if you turn off the water while soaping up.
My personal favorite is an adjustable spray nozzle with an on-off thumb trigger. This setup lets you pause water flow instantly without adjusting the main valve, stretching that precious heated water even further. Some campers report getting 8-10 minute showers using this technique, making every drop count.
Step-by-Step Construction Process
Preparing Your Container for Maximum Heat Absorption
Getting your 5-gallon container ready for heat absorption is where the magic really happens. I learned this the hard way on my first attempt when I used a white jug and wondered why my shower stayed lukewarm even after hours in the sun. The difference proper preparation makes is honestly remarkable.
Start by thoroughly cleaning your container inside and out with soap and water. Any residue or oils can interfere with paint adhesion and potentially contaminate your shower water. Rinse completely and let it dry for at least 24 hours in a warm, ventilated area.
Now comes the critical part: coating your container in matte black paint. Dark colors absorb significantly more solar radiation than light ones, with black absorbing up to 90% of the sun’s energy while white reflects most of it away. Think of it like wearing a black t-shirt versus a white one on a sunny day. For best results, use outdoor-rated spray paint or a weatherproof acrylic paint designed for plastic surfaces. Matte finishes outperform glossy ones because they don’t reflect heat away.
Apply two to three thin coats rather than one thick coat, allowing each layer to dry for the time specified on your paint can, usually 2-4 hours between coats. The final cure time typically takes 24-48 hours.
For added weatherproofing and longevity, consider applying a clear UV-resistant sealant once your black coating has fully cured. This extra step protects against paint chipping and extends your solar shower’s lifespan, especially if you’re planning multiple camping seasons of use.
Installing the Shower Head and Valve System
Now comes the part that determines whether you’ll have a refreshing shower or a frustrating dribble followed by a puddle at your feet. Let me walk you through installing your shower head and valve system properly – I learned these tricks the hard way during my first build when I ended up with more water on the ground than on me!
Start by marking your hole location on the bottom corner of your 5-gallon container. You want it positioned where gravity will help the water flow but not so far in the corner that the valve assembly won’t fit properly. Use a drill bit that matches your valve size – typically between 1/2 inch and 3/4 inch for most shower valves. Here’s a pro tip: drill from the inside out to prevent the plastic from cracking or creating rough edges around the hole.
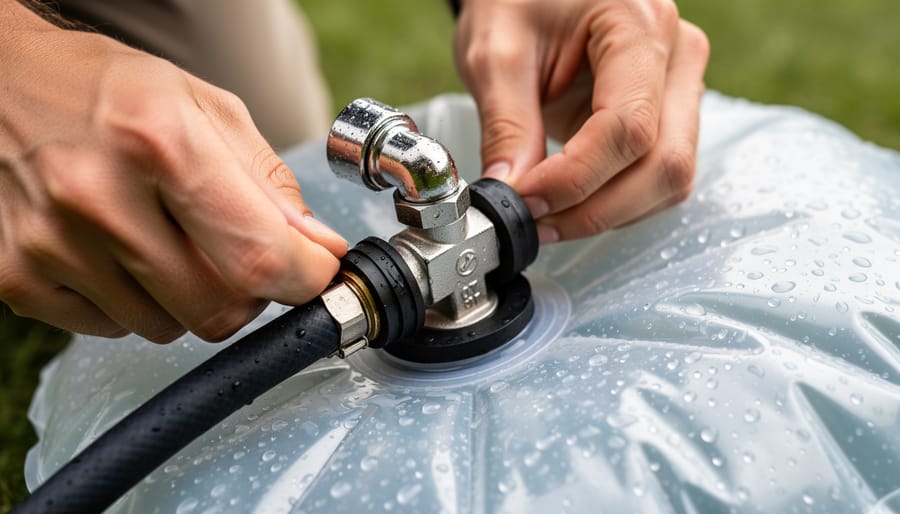
Before inserting anything, slip a rubber grommet over the valve threads. This little washer-like piece is your first line of defense against leaks. Push the valve through from inside the container, then add the second grommet on the outside. Tighten the mounting nut hand-tight, then give it just a quarter turn more with pliers – overtightening can actually compress the rubber too much and create leaks.
Attach your shower nozzle to the valve using plumber’s tape wrapped clockwise around the threads. Use 3-4 wraps for a good seal. Connect any tubing firmly, ensuring connections click or seat completely.
For leak troubleshooting: if water seeps around the valve base, your grommets may be misaligned or you need an additional wrap of plumber’s tape. If the nozzle connection drips, remove it, add more tape, and reattach. Always test your system before heading out – fill it partially and let it sit for 30 minutes while checking for moisture.
Proper installation of the valve and nozzle system with rubber grommets ensures a leak-free connection for your solar shower.
Creating a Hanging or Mounting System
Once your 5-gallon solar shower is ready, you’ll need a secure way to hang it about 6-7 feet overhead. I learned this the hard way during my first camping trip when my poorly secured bag crashed down mid-shower – not fun!
The most reliable mounting options include sturdy tree branches (at least 4 inches in diameter), collapsible shower tripods, or vehicle roof racks. For tree mounting, use climbing-rated rope or webbing with a minimum 200-pound weight rating. Thread the rope over the branch, attach a locking carabiner to the shower’s reinforced handle, and use a trucker’s hitch knot for easy height adjustment.
Here’s a crucial safety tip: a full 5-gallon shower weighs around 40 pounds, so always test your setup with water before getting underneath. Give the bag a good shake to simulate movement – if it holds steady, you’re good to go.
For vehicle mounting, drape the bag over roof rack crossbars or attach D-ring anchors. Tripod users should position legs wide for stability and stake them down on windy days.
Pro tip from experience: always hang your shower on level ground where you’re standing, not the bag. Nobody wants a tilted shower experience!
Adding Optional Upgrades
Once you’ve got your basic 5-gallon solar shower working, a few simple upgrades can take it from good to great. I learned this the hard way during a week-long camping trip when my first attempt cooled down way too fast in the evening breeze.
An insulation sleeve is probably the most practical addition you can make. These neoprene or foam wraps fit around your water bag and keep the heat in for hours longer. You can buy one designed for solar showers or make your own from camping mat material.
Temperature gauges take the guesswork out of knowing when your shower is ready. Small adhesive thermometer strips stick right onto the bag and show you at a glance whether you’re dealing with lukewarm water or something that’ll scald you. Trust me, testing water temperature with your hand gets old fast.
If you want better water pressure, consider adding a small battery-powered pump. These compact units attach between your bag and showerhead, giving you that satisfying flow you’re used to at home.
Finally, transparent or semi-transparent panels let you monitor your water level without having to squeeze the bag. Some folks even add simple sight gauges using clear tubing attached to the side.
Getting the Water Hot: Solar Heating Basics
The science behind heating water with sunlight is beautifully simple, though I’ll admit I learned some important lessons through trial and error. The basic principle is straightforward: dark surfaces absorb solar energy and convert it into heat, which then transfers to the water inside your shower bag.
For optimal heating, position your solar shower bag in direct sunlight where it’ll receive uninterrupted sun exposure. I learned this the hard way during my first camping trip with a DIY solar shower. I casually hung the bag on a tree branch around 10 AM, thinking I was being smart by getting it up early. When shower time rolled around at 5 PM, the water was barely lukewarm. Why? That tree branch had moved into shade by noon, and my bag spent most of the afternoon in shadow. Now I always scout out a spot that gets full sun from at least 11 AM to 3 PM, which are your peak heating hours.
Heating times vary significantly based on conditions. On a bright summer day with temperatures in the 80s or 90s, expect your 5-gallon bag to reach a comfortable shower temperature in about 2 to 3 hours. You’re typically looking at water temperatures between 90 and 110 degrees Fahrenheit, which feels surprisingly refreshing after a day of hiking. In cooler weather or during spring and fall, you might need 4 to 5 hours, and the water may only reach 80 to 95 degrees. Winter solar showers are possible but challenging, sometimes requiring most of a sunny day to get adequately warm water.
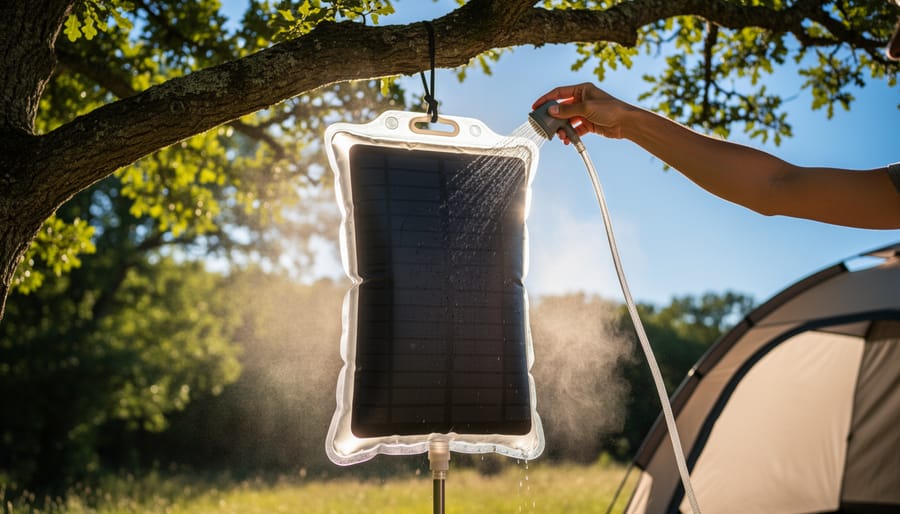
Want to speed things up? Try laying your bag flat on a dark surface like a car hood or large dark rock rather than hanging it vertically. This increases the surface area exposed to direct sunlight. You can also fill the bag with pre-warmed water from a campfire kettle if you’re impatient. Similar to how solar panels for camping work best with optimal sun angles, your shower bag performs better when positioned perpendicular to the sun’s rays. On partly cloudy days, don’t give up. Even intermittent sunlight will gradually warm your water, though you’ll want to add an extra hour or two to your heating time.
Positioning your solar shower in direct sunlight for several hours allows the dark surface to absorb heat and warm water to comfortable temperatures.
Using Your Solar Shower Efficiently
Getting the most from your 5-gallon solar shower comes down to smart water management. I learned this the hard way on a week-long camping trip when I ran through my entire shower in about three minutes flat. Not fun when you’re still covered in soap!
The key technique to master is the “navy shower” method. Turn the water on just long enough to wet yourself down, then shut it off completely while you lather up with soap and shampoo. Turn it back on for a final rinse. This simple approach can stretch your 5 gallons surprisingly far. When I started using this method, my showers went from using the entire bag to only needing about 2-3 gallons.
For solo campers, a 5-gallon shower bag typically provides enough water for 2-3 good showers using the navy method, or one luxurious rinse if you’re feeling indulgent after a particularly dusty hike. If you’re camping with a partner or small group, plan on one full bag per person every 2-3 days.
Water pressure management also matters. Keep the nozzle partially closed to create a steady stream rather than a full blast. This conserves water while still giving you enough flow to rinse effectively. Position the bag about 6-7 feet above your head for optimal pressure without wasting water.
For group camping situations, establish a shower schedule and designate someone to refill and heat bags throughout the day. Having multiple bags rotating through the heating process ensures everyone gets a warm shower. Some families even make it a game, challenging each other to take the quickest effective shower.
Consider keeping a small basin underneath to catch grey water for washing dishes or boots. Every drop counts when you’re off-grid, and maximizing your water efficiency makes the experience better for everyone.
Common Problems and How to Fix Them
Even the best DIY solar shower can hit a few snags, but don’t worry—most issues have straightforward fixes that’ll have you back to enjoying warm outdoor showers in no time.
If your water isn’t heating up enough, the culprit is usually placement or timing. I learned this the hard way during my first camping trip with a homemade shower—I hung it in partial shade and wondered why my water was lukewarm at best! Make sure your shower bag gets direct sunlight for at least 3-4 hours. Black containers absorb heat best, so if you’re using a translucent jug, consider painting it or wrapping it in black fabric. Also, fill your container in the morning so it has maximum sun exposure during peak heating hours.
Leaks at connection points are super common, especially where your hose meets the container. Tighten all fittings with pliers (but not too tight—you can crack plastic threading). Apply plumber’s tape or food-safe silicone sealant around threaded connections. If your spigot leaks, the washer inside might need replacing—these cost just pennies at hardware stores.
Low water pressure frustrates everyone, but physics is working against you here. Hang your shower as high as possible—gravity is your friend! Even an extra two feet of elevation makes a noticeable difference. If that doesn’t help, check that your hose isn’t kinked and your nozzle holes aren’t clogged with debris.
Container degradation from UV exposure happens over time, causing plastic to become brittle. Choose UV-resistant containers when possible, or store your shower in shade when not actively heating water. Replace containers showing cracks or cloudiness.
Algae growth in stored water is gross but preventable. Never leave water sitting in your shower for more than a few days. Between uses, empty completely and let it dry out. Adding a drop of bleach per gallon (then rinsing thoroughly) can sanitize your container before storage. Keep your shower clean, and it’ll keep you clean!
Maintenance and Winter Storage
After each use, proper maintenance will keep your 5-gallon solar shower functioning beautifully for years. I learned this the hard way when I ignored my first shower for a month during camping season and discovered a science experiment I definitely didn’t sign up for!
Start by draining your shower completely after every use. Even small amounts of standing water create perfect breeding grounds for mold and bacteria. Turn the container upside down and let gravity do its work, then give it a good shake to dislodge any remaining droplets.
For cleaning, mix a solution of one tablespoon white vinegar per gallon of water and fill your container about halfway. Shake vigorously for 30 seconds, let it sit for five minutes, then rinse thoroughly with clean water. This natural approach kills bacteria without harsh chemicals that might degrade your materials. Do this weekly during active use, or before storing.
When winter approaches, give your shower a deep clean and ensure it’s bone dry inside. Store it in a climate-controlled space like a basement or garage rather than an unheated shed. Extreme cold can crack plastic containers and damage tubing. Remove any batteries from pump systems if you’ve added one.
Check rubber seals and gaskets every few months. A light coating of food-grade silicone lubricant keeps them flexible and prevents cracking. Inspect your shower head and hose connections for mineral buildup, soaking them in vinegar if needed.
With this simple routine, your DIY solar shower will be ready for adventures season after season, saving you money while keeping things eco-friendly.
There’s something incredibly satisfying about taking a hot shower under the open sky, knowing you built the system yourself with just a few simple materials and the power of the sun. I still remember my first DIY solar shower experience—standing in the Colorado wilderness after a long hike, feeling that warm water cascade down, and thinking, “I actually made this work.” That sense of accomplishment never gets old.
Building your own 5-gallon solar shower is more than just a weekend project. It’s a step toward greater self-reliance and a practical introduction to renewable energy applications. Once you’ve mastered this build, you’ll find yourself looking at other solar projects differently, whether that’s experimenting with portable solar panels for charging devices or designing larger water heating systems.
The beauty of this project lies in its simplicity and immediate usefulness. You’re not just learning theory—you’re creating something that will genuinely improve your outdoor adventures while reducing your environmental footprint.
Now it’s your turn. Gather your materials, pick a sunny weekend, and start building. I’d love to hear how your project turns out or help troubleshoot any challenges you encounter along the way. Share photos of your finished solar shower or ask questions in the comments below. Let’s keep this community growing, one DIY solar project at a time.
How useful was this post?
Click on a star to rate it!
Average rating 0 / 5. Vote count: 0
No votes so far! Be the first to rate this post.
We are sorry that this post was not useful for you!
Let us improve this post!
Tell us how we can improve this post?
charlesnoble
Here at Spheral Solar, I’m a hands-on solar power enthusiast, constantly exploring and experimenting with DIY solutions. I’m dedicated to sharing my discoveries, insights, and even the bumps I hit along the way, all in the pursuit of a more sustainable future.
8 Best Solar Showers for Camping in 2023 by Adeyomola July 28, 2021 You could get a solar shower with a large storage capacity, top-notch add-ons, and a quality build. But the ultimate mark of quality of the best solar shower is a fast heating rate. The larger the storage capacity of a solar shower bag, the more water you can store for…
Solar Powered Tent – 4 Common Setups for Solar Tents by Nick August 27, 2021 Solar-powered tents are a growing trend in the camping world. People are becoming more and more interested in experiencing life outdoors while maintaining some of life’s modern luxuries. Dream or reality in experiencing the solar tent is a great adventure. There are several different ways to incorporate solar power into…
DIY Solar Shower Ideas – Guide With Diagrams by Paul June 20, 2021 In the afternoon, you can easily build a DIY solar shower with affordable hardware store supplies such as PVC pipes, hoses, buckets, and garden-grade spigots or spray heads. In addition, most solar shower projects, particularly simple, mobile types, require no specialized technical skills or equipment. On the other hand, formal,…
Build a Solar Kiln That Actually Works (Without… by Charlesnoble November 2, 2025 Build a solar kiln in your backyard and you’ll cut lumber drying time from months to weeks while spending zero on electricity. Position your kiln where it receives 6-8 hours of direct southern exposure daily, construct the framework using pressure-treated 2x4s with transparent polycarbonate panels for maximum heat capture, and…
10 Best Solar Battery Maintainer for Cars and RVs by Charlesnoble September 11, 2021 Unfortunately, emergencies strike when you least expect it for many, but having a quick and reliable method to restore battery power can be a lifesaver. In many cases, when you can least handle it. Being out shopping when your car battery decides to die can be a massive headache. Out…
10 Best Solar Panels for RV in 2023 by Nick April 2, 2021 You’ve decided to build an RV, and your feelings of excitement are through the roof. Though in the back of your mind, you still feel a bit of anxiety, thinking about the things that go into building an RV. One of these things is probably your RV electric system. Best…
Subscribe for handpicked DIY projects, exclusive tips, and giveaways.
A portable power station will typically run your camping devices for anywhere from a few hours to several days on a single charge, depending on what you’re powering and the station’s capacity. As for lifespan, most quality units last between 3 to 10 years before the battery degrades enough to need replacement. The distinction matters… Read more: Your Portable Power Station Won’t Last as Long as You Think (Here’s Why)
A J1772 solar charger combines a standard J1772 charging connector (the same Type 1 plug used by most North American EVs and electric bikes) with solar panels and battery components to create an off-grid or grid-supplemented charging system. You’ll need three core elements: solar panels (typically 400-800 watts for practical ebike charging), a battery storage… Read more: How to Choose a J1772 Solar Charger for Your Ebike: A Buying Guide
Installing a whole house ventilation system powered by solar takes about 6 to 8 hours for a moderately skilled DIYer and delivers continuous fresh air circulation without touching your electric bill. The core method involves mounting a solar panel on your roof to power an intake or exhaust fan, routing ductwork through your attic or… Read more: How to Install a Whole House Ventilation System Using Solar Power


")


")


