How to Connect SolarEdge to Ethernet for Seamless System Monitoring
Updated:
Connecting your SolarEdge inverter to your home network via Ethernet cable takes about 15 minutes and gives you real-time access to your system’s performance data from any device with internet access. You’ll plug a standard Ethernet cable into the RJ45 port on your inverter (usually labeled “LAN” or “Ethernet”), run it to your router, and complete a quick setup through the SolarEdge monitoring portal. Once connected, you can track energy production, spot issues before they become expensive problems, and share your solar victories with the rest of us who get way too excited about good production days.
Key Takeaway: Ethernet connection provides the most reliable wired monitoring option for your SolarEdge inverter, typically requiring 15 minutes to set up and delivering instant access to production data, system health alerts, and historical performance tracking from any internet-connected device.
I still remember the first time I got my SolarEdge system online back in 2019. Charles (my neighbor and the brain behind Spheral Solar) walked me through the setup, and I spent the next week obsessively checking my phone every hour to see my panels working. My wife thought I’d lost it. She wasn’t entirely wrong.
The beauty of Ethernet monitoring is its simplicity and reliability. Unlike wireless options that can drop signals or struggle with inverter placement in metal electrical panels, a physical cable connection just works. You get consistent data flow without interference, faster response times when checking your dashboard, and one less device competing for Wi-Fi bandwidth in your home. For most residential setups, you’re looking at running a cable from your inverter location (garage, side of house, utility area) to the nearest router or network switch.
This guide walks you through everything: the tools you’ll need (spoiler: not many), critical safety steps when working near your inverter, the actual connection process broken down into simple steps, and how to verify everything’s communicating properly. We’ll also troubleshoot the common hiccups that trip people up, because I’ve seen them all.
Understanding SolarEdge Ethernet Connection in Context
Why Ethernet Beats Other Monitoring Methods
I’ll be honest, when I first set up my solar monitoring, I went down the RS485 rabbit hole. It worked, sure, but getting everything configured felt like decoding a treasure map written in hieroglyphics. Ethernet? Night and day difference.
The biggest win with Ethernet is plug-and-play simplicity. You connect a standard network cable from your inverter to your router, and you’re essentially done. Compare that to RS485 monitoring which requires specific wiring configurations, termination resistors, and careful attention to polarity. One reversed wire and you’re troubleshooting for an hour. Ethernet eliminates that headache entirely.
Speed matters too. Ethernet delivers real-time data updates, I’m talking seconds, not minutes. RS485 can lag depending on how many devices share the bus, and CAN bus setups often need additional gateway hardware to get your data online. With Ethernet, your inverter talks directly to your home network and pushes updates to the SolarEdge portal almost instantly.
The integration advantage is huge if you’re tech-minded. Your inverter becomes just another device on your network, accessible from any browser on your LAN. Want to check production from your laptop without logging into the cloud portal? Easy. Planning to hook your data into Home Assistant or another automation platform? Ethernet makes that straightforward. RS485 and CAN require extra converters and configuration layers that most DIYers would rather skip.
For reliability in typical residential setups, Ethernet wins hands down.
What SolarEdge Ethernet Connection Actually Does
Your SolarEdge inverter is constantly collecting performance data, how much power it’s generating, what each panel optimizer is doing, voltage levels, temperature readings, and more. The Ethernet connection is essentially the pathway that gets all this information from your garage or wherever the inverter lives to the outside world.
Here’s what actually happens: The inverter packages up performance snapshots every few minutes and sends them over your home network to SolarEdge’s cloud servers. This happens in the background, quietly and automatically. You don’t need to do anything once it’s set up.
From there, you can log into the SolarEdge monitoring portal from any device, your phone, laptop, tablet, and see real-time data about your system. It’s the same connection that lets the installer or support team check your system remotely if something goes wrong.
Think of it like your security camera sending footage to the cloud. The Ethernet cable gives your inverter a reliable, always-on internet connection so it can report home regularly. Unlike Wi-Fi dongles or cellular modems, it just works, no signal strength issues, no monthly fees, no fiddling with passwords after a router reset.
Tools and Materials You’ll Need
Before you start connecting your SolarEdge inverter to your home network, you’ll want to gather everything you need in one place. I learned this the hard way after making three trips between my garage and the inverter during my first setup, trust me, having it all ready saves time and frustration.
Here’s what you’ll need to get your Ethernet connection up and running:
Ethernet cable (Cat5e or Cat6, length depending on distance from inverter to router, I recommend measuring twice and adding 20% for slack)
SolarEdge inverter with Ethernet port (most models from 2012 onward have this; check your inverter’s data sheet if unsure)
Network router or switch with at least one available Ethernet port
Small flathead or Phillips screwdriver (for opening the inverter’s communication cover, if needed)
Cable clips or outdoor-rated cable ties (if routing cable outdoors or along walls)
Optional: PoE (Power over Ethernet) injector if you want to power accessories through the same cable
Optional: Outdoor-rated Ethernet cable or conduit if running cable exposed to weather
The Ethernet cable is your most important decision. While Cat5e works fine for monitoring data, I suggest Cat6 if you’re buying new, it’s barely more expensive and gives you better shielding against electrical interference from your solar equipment. For outdoor runs, look for cables specifically rated for UV exposure and temperature swings, or plan to run standard cable through conduit.
Most home routers have four or more Ethernet ports on the back, and you only need one. If all your ports are occupied, an inexpensive network switch expands your capacity, just plug it into your router and you’ve got additional ports for the inverter and other devices.
One thing people often forget: check that your router is close enough for a direct cable run, or that you’re prepared to route cable through walls or outdoors. The average home installation needs anywhere from 15 to 75 feet of cable, depending on where your electrical panel and router live relative to each other.
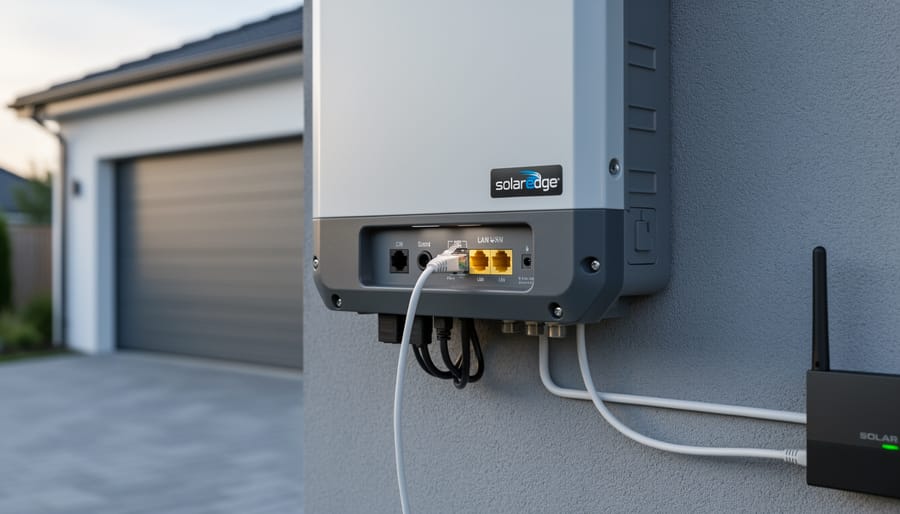
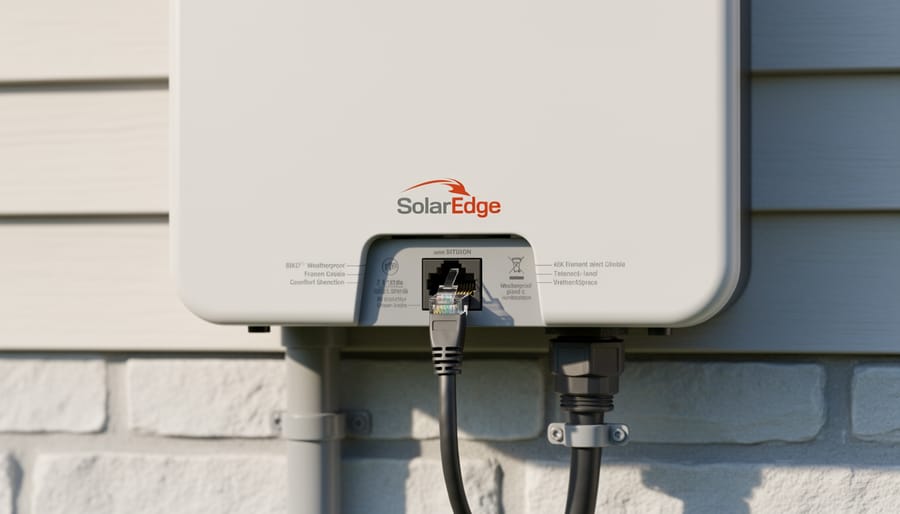
A clear view of the SolarEdge inverter and where the Ethernet cable connection is made in an outdoor-ready installation.
Safety Precautions Before You Start
Good news: connecting an Ethernet cable to your SolarEdge inverter is one of the safest tasks you’ll tackle in your solar journey. Unlike working with panels on a roof or rewiring electrical connections, you’re simply plugging a network cable into a port designed for exactly this purpose. That said, you’re still working near equipment that carries serious voltage, so a few sensible precautions will keep the job smooth and safe.
Warning: Always turn off your inverter’s AC and DC disconnects before opening any covers or working near electrical terminals, and never work on your system during rain or wet conditions.
First, familiarize yourself with your system’s disconnect switches. Your SolarEdge inverter has both AC (alternating current) and DC (direct current) disconnects that stop power flow. While you won’t typically need to disconnect solar panels just to plug in an Ethernet cable, knowing where these switches are and how to use them is fundamental. If you need to open the inverter cover to access the Ethernet port, power down the system first. Some models have easily accessible ports that don’t require opening anything, but check your manual to be sure.
Treat the area around your inverter with respect. Even with disconnects off, capacitors inside can hold charge. Don’t touch any electrical terminals, and keep your work focused on the clearly labeled communication ports. Verify that your system has proper solar grounding in place, which protects both you and your equipment from electrical faults.
Basic electrical code safety applies here too. Use dry hands, wear rubber-soled shoes, and avoid working in damp conditions. If your inverter is outdoors, pick a clear, dry day for the installation. These simple precautions ensure your Ethernet connection project stays as straightforward as it should be.
Step-by-Step: Connecting Your SolarEdge Inverter to Ethernet
Step 1: Locate and Access the Ethernet Port
Most SolarEdge inverters hide the Ethernet port behind a protective cover on the bottom or side of the unit. You’ll see a panel marked “COMMUNICATIONS” or similar, this is your target.
First, make absolutely sure the DC disconnect switch is off and you’ve followed the safety steps from the previous section. The Ethernet port itself carries only low-voltage data signals, but you don’t want to jostle other components while poking around inside.
Pop open the communications cover by unscrewing the small Phillips or flathead screws (usually two or three). Some newer models use a snap-fit cover you can pry gently with your fingers. Inside, you’ll spot the RJ45 Ethernet jack alongside other ports like RS485 terminals. It looks identical to the port on your laptop or router, a rectangular socket with eight metal pins.
If your inverter has multiple communication ports clustered together, the Ethernet jack is typically labeled “LAN” or has a small Ethernet icon stamped nearby. On my own setup, I initially mistook the RS485 terminals for the Ethernet port until I looked closer at the labeling. Don’t force anything, the correct port accepts a standard Ethernet cable with a satisfying click.
Step 2: Run Your Ethernet Cable
Running the cable might seem simple, but doing it right prevents headaches later. I learned this the hard way when I initially used indoor Cat5e for a quick test, six months later, the jacket had cracked from UV exposure and moisture had corroded the connections.
Start by measuring the distance from your inverter to your router. Add an extra 20% for routing around obstacles and avoiding tight bends, which can damage the cable internals. For outdoor runs or exposed areas, use Cat5e or Cat6 rated for outdoor/direct burial use. These cables have UV-resistant jackets and better moisture protection. Indoor-rated cable deteriorates quickly under sun and weather, even if tucked under eaves.
Route your cable along existing conduit paths or roof lines when possible. Secure it every 12-18 inches with cable clips designed for outdoor use. Avoid running parallel to AC power lines for long stretches (crossing perpendicular is fine) to minimize electrical interference. If you must cross walking areas or potential snag points, protect the cable with conduit or raceway.
When entering buildings, seal penetrations with weatherproof cable glands or silicone sealant to prevent water intrusion. Leave a small drip loop just outside the entry point so rain runs off rather than following the cable inside. These small details, much like those you’d apply to avoid wiring mistakes in panel installations, make the difference between a connection that lasts years versus one you’re troubleshooting next season.
Step 3: Make the Physical Connection
With your cable routed and ready, making the actual connection is refreshingly straightforward, no special tools required.
Start by plugging one end of your Ethernet cable firmly into the port on your SolarEdge inverter. You should hear and feel a distinct click as the RJ45 connector locks into place. Give it a gentle tug to confirm it’s seated properly; a loose connection here will cause intermittent monitoring issues that’ll drive you crazy later.
Next, connect the other end to an available port on your router or network switch. Again, listen for that satisfying click. If you’re using a longer cable run, double-check both ends, I’ve embarrassed myself more than once troubleshooting “network issues” that turned out to be a cable that hadn’t fully clicked in.
Once connected, look for indicator lights near the Ethernet port on your inverter (not all models have them). A steady green light typically means you’ve got a good physical connection and network link. A blinking light indicates active data transmission, exactly what you want to see. No lights at all? Time to check your cable connections and verify your router port is working.
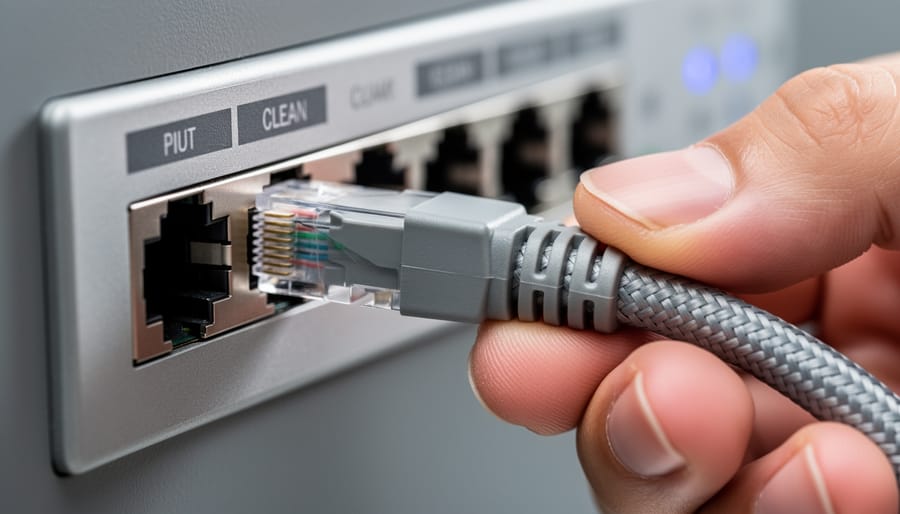
Close-up of the physical Ethernet connection step, emphasizing secure plugging and careful cable handling.
Step 4: Configure Network Settings on the Inverter
Now that your cable is connected, you need to tell the inverter how to join your network. SolarEdge inverters offer two ways to handle this: through the LCD screen on the front panel, or via a temporary direct connection to your laptop.
For most home setups, I recommend starting with the LCD interface, it’s straightforward and doesn’t require any extra equipment. Press the menu button (usually marked with three horizontal lines) and navigate to Communication > Ethernet. You’ll see options for network configuration.
The first decision is DHCP versus static IP. DHCP is the easier choice for most DIYers. Your router automatically assigns an IP address to the inverter, and it’ll just work without you needing to understand network addressing. Select “DHCP Enable” and the inverter will grab an available address from your router.
However, if you plan to access the inverter’s built-in web interface regularly, a static IP makes life simpler. Choose “DHCP Disable” and you’ll need to manually enter four pieces of information: IP address, subnet mask, gateway, and DNS server. If this sounds daunting, check your router’s settings page, it usually shows these values for other devices on your network. Pick an IP address outside your router’s DHCP range (often something like ) to avoid conflicts.
Tip: Write down the IP address you assign or that DHCP provides, you’ll need it later to access monitoring data or troubleshoot issues.
Some models also ask for network credentials if you’re on a managed network, but typical home routers don’t require this. Save your settings and the inverter will attempt to connect. Watch for the Ethernet status indicator on the LCD to change from “Disconnected” to “Connected”, that’s your green light to move forward.
Step 5: Register or Link to the SolarEdge Monitoring Portal
Once your inverter’s talking to your network, it’s time to claim it in the SolarEdge monitoring portal. Head to and either log in or create a new account if this is your first SolarEdge system.
After logging in, look for an option like “Add Site” or “Register Inverter” in your dashboard. You’ll need your inverter’s serial number, which you’ll find on the label inside the inverter cover or on the original packaging. The serial number typically starts with letters followed by numbers.
Enter the serial number exactly as shown, then fill in your site details: installation address, system size, and installation date. The portal will verify the inverter is online and communicating. This usually takes just a few seconds if your Ethernet connection is solid.
You’ll also set your portal preferences here, like units of measurement, timezone, and notification settings. I recommend enabling email alerts for system errors right away so you catch issues early.
Within 15 minutes, you should see your first data appear, showing current production and system status.
Testing and Verification
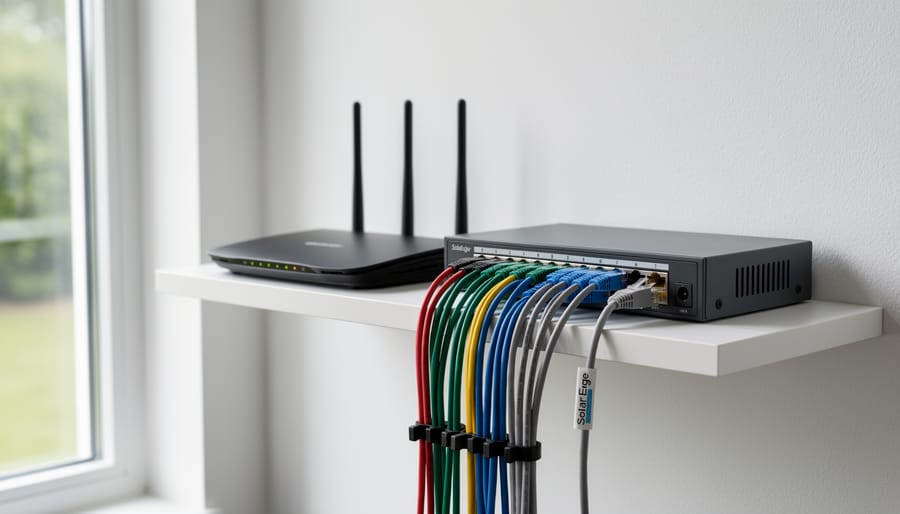
The home networking side of the install, router and Ethernet gear, illustrates where the SolarEdge cable plugs in.A connectivity-focused image that visually reinforces that your Ethernet link is active and ready for monitoring data to flow.
Checking Connection Status
Once you’ve completed the setup steps, it’s time to make sure everything’s actually talking to each other. I learned this the hard way when I assumed my first inverter connection was working, only to discover days later that no data had uploaded, don’t be me.
Start with the inverter itself. Most SolarEdge models have an LCD screen that shows connection status. Navigate to the communication menu (usually under Settings or Communication), and you should see an Ethernet status indicator showing “Connected” or displaying your assigned IP address. If you see “Disconnected” or no IP address, something’s not right with the physical connection or network settings.
Next, check your router’s admin panel. Log in (typically by typing or into your browser) and look at the list of connected devices. Your SolarEdge inverter should appear there, often labeled with its serial number or model name. This confirms the inverter has successfully joined your network and received an IP address.
Finally, the real test: your SolarEdge monitoring portal. Log in and check whether your system is showing current data. Fresh installations might take 15-20 minutes for the first data upload, so give it some time. Once connected, you should see live or recent production figures, system status, and communication timestamps.
Here’s a quick verification checklist to run through:
Green LED or “Connected” status on the inverter display
Valid IP address shown in the inverter’s communication menu
Inverter appears in your router’s connected devices list
Monitoring portal shows recent data with current timestamps
Successful ping test from a computer on the same network to the inverter’s IP address
If everything checks out across these points, you’re golden. Your inverter is successfully communicating with SolarEdge’s servers, and you can start enjoying real-time insights into your system’s performance. If one or more of these checks fails, don’t panic, the troubleshooting section that follows will help you track down the issue.
Common Issues and Quick Fixes
No one’s Ethernet connection works perfectly on the first try, I’ve learned that the hard way. Here are the most common hiccups you’ll encounter and how to fix them fast.
Inverter shows “No Connection” or won’t connect at all: First, check both ends of your Ethernet cable are seated firmly. They should click into place. Next, verify your router shows the inverter as a connected device in its admin panel. If it doesn’t appear, try a different cable, cheap cables fail more often than you’d think. Also confirm your router has DHCP enabled unless you manually set a static IP.
Data appears in the portal, then disappears or updates sporadically: This usually means a weak or unstable network signal. If you’re using a long cable run, try a shorter quality cable to test. Power cycle both the inverter and your router by unplugging them for 30 seconds, then reconnect. Check your router’s firewall settings aren’t blocking the inverter’s communication with SolarEdge servers.
Portal shows “Communicating” but no production data: Wait 15-20 minutes after connection. The system needs time to establish full communication and sync. If still nothing, verify your inverter’s date and time settings are correct, incorrect time stamps can prevent data upload.
Connection works, then stops after a few days: Your router may be reassigning the inverter’s IP address. Switch to a static IP in the inverter’s network settings menu, or configure your router to reserve the same IP for the inverter’s MAC address permanently.
Optimizing Your Monitoring Setup
Once you’ve got your SolarEdge inverter talking to your network, you’ve unlocked way more than just checking production numbers on a website. Charles spent months just glancing at the basic portal graphs before realizing he was barely scratching the surface, here’s how to actually squeeze some value out of that connection.
Start by exploring what you can do beyond the standard monitoring portal:
Access the inverter’s local web interface by typing its IP address into your browser for real-time stats without internet dependency
Set up the SolarEdge mobile app on your phone for quick production checks and instant notifications
Configure custom alert thresholds for underperformance, grid issues, or component failures so you catch problems early
Export production data to build your own dashboards in spreadsheets or visualization tools if you like tracking trends
The local network access deserves special attention. When your inverter is on Ethernet, you can pull data directly from its IP address without bouncing through SolarEdge’s cloud servers. This means faster updates and access even if your internet goes down. Just navigate to the IP address you noted during setup, and you’ll find detailed performance metrics, configuration options, and diagnostic information that doesn’t always surface in the portal. Some folks use this for home automation integration, feeding solar production data into systems like Home Assistant to trigger smart home actions based on available power.
Alert configuration makes the real difference between passive monitoring and active system management. Don’t rely on the default settings. Dive into the portal’s alert section and customize thresholds based on your system’s normal behavior. Set alerts for production drops below expected levels, communication losses, or specific error codes. Charles configured his to text him if production falls 20% below forecast on sunny days, which once caught a single optimizer failure before it significantly impacted his monthly output.
The monitoring portal also lets you grant access to installers, maintenance providers, or even curious family members with different permission levels. Use this thoughtfully, guest access lets people view production without changing settings, which works great for showing off your system without risking accidental configuration changes.
Frequently Asked Questions
Setting up an Ethernet connection for your SolarEdge inverter typically raises a handful of practical questions, especially if you’re doing it yourself for the first time. I’ve fielded quite a few of these from the Spheral Solar community over the years, so let’s tackle the most common ones head-on.
Can I use WiFi instead of Ethernet?
Some newer SolarEdge inverter models support WiFi connectivity as an alternative to Ethernet, but the built-in WiFi option isn’t available on all models. If your inverter doesn’t have native WiFi, you can use a wireless bridge adapter to convert your Ethernet port into a wireless connection, though this adds another device to manage and troubleshoot.
What’s the maximum Ethernet cable length I can run?
Standard Ethernet cables work reliably up to 100 meters (about 328 feet) without signal degradation. For most residential installations, this distance is more than sufficient to reach from your inverter to your router, even if they’re on opposite sides of your property.
Does my inverter need constant internet access to function?
No, your inverter will continue generating power and managing your solar array even without internet connectivity. The Ethernet connection is purely for monitoring and remote management, so a temporary internet outage won’t affect your system’s power production.
Can I connect multiple SolarEdge inverters to one router?
Absolutely, each inverter gets its own IP address on your network, so you can connect as many inverters as your router supports. Just make sure you have enough available Ethernet ports or use a network switch to expand your connection capacity.
Another question I hear frequently concerns routers located far from the inverter installation. If running a cable across your property feels impractical, you have options beyond a single long cable run. A powerline adapter can use your home’s electrical wiring to bridge the distance, or you can add a network switch partway between the inverter and router if you need to split or extend connections. These solutions let you work around physical obstacles without compromising connection quality.
The beauty of Ethernet monitoring is its flexibility once you understand the basics. Your network doesn’t need to be complicated or expensive to deliver reliable data flow from your inverter to the monitoring portal, and most connection challenges have straightforward workarounds that don’t require an IT degree to implement.
Setting up your SolarEdge inverter with an Ethernet connection transforms how you interact with your solar system. Instead of wondering whether everything’s running smoothly, you get real-time visibility into production, consumption, and system health, all accessible from your phone or computer wherever you are.
The beauty of Ethernet monitoring isn’t just the data itself. It’s the peace of mind that comes from knowing immediately if something needs attention, the satisfaction of tracking your energy independence in real numbers, and the ability to optimize your system based on actual performance patterns rather than guesswork.
I started my monitoring journey checking the inverter display every few days, then graduated to periodic portal logins, and finally landed on the setup I have now: Ethernet connection feeding continuous data to my home network, with custom alerts that let me know instantly if production drops unexpectedly. That evolution made solar feel less like an experiment and more like a reliable part of my home infrastructure.
Your experience might differ from mine, and that’s exactly why we’d love to hear about it. Drop a comment below sharing what monitoring setup works for you, any challenges you encountered during installation, or creative solutions you discovered along the way. The Spheral Solar community thrives on shared knowledge, your insight might be exactly what another DIYer needs to hear.
Now get out there and connect that inverter. Your data’s waiting.
How useful was this post?
Click on a star to rate it!
Average rating 0 / 5. Vote count: 0
No votes so far! Be the first to rate this post.
We are sorry that this post was not useful for you!
Let us improve this post!
Tell us how we can improve this post?
charlesnoble
Here at Spheral Solar, I’m a hands-on solar power enthusiast, constantly exploring and experimenting with DIY solutions. I’m dedicated to sharing my discoveries, insights, and even the bumps I hit along the way, all in the pursuit of a more sustainable future.
How to Wire a 7-Way RV Plug: Step-by-Step Diagram… by Charlesnoble September 12, 2026 Wiring a 7-pin RV plug correctly connects your tow vehicle to your trailer’s lights, brakes, and auxiliary power in about 45 minutes with basic hand tools and careful attention to the color-coded wire standard. The diagram follows a specific layout mandated by the RV Industry Association: each pin controls a…
How to Install a Solar Heating System for Your… by Charlesnoble August 25, 2026 You can heat your inground pool with solar panels mounted on your roof, garage, or ground rack, capturing free energy from the sun and extending your swim season by months while slashing heating costs to nearly zero. A properly sized solar heating system circulates pool water through black collector panels…
How to Run Functional Performance Testing on Your… by Charlesnoble August 17, 2026 Functional performance testing measures whether your DIY solar system delivers the power output it’s designed to produce. You’ll check voltage, current, and total wattage under real-world conditions, then compare those numbers to your system’s nameplate ratings to calculate a Performance Ratio, the gold standard metric that tells you if everything’s…
6 Best Solar Spot Lights of 2026, Tested and Reviewed by Charlesnoble August 8, 2026 After testing dozens of solar spotlights in real-world conditions throughout 2026, the AloftSun Solar Motion Sensor Outdoor Lights emerged as the top overall choice for most homeowners, thanks to its reliable performance and versatility across different landscape lighting scenarios. But picking the right solar spotlight depends entirely on what you’re…
What Should a Pool Be Heated To? The Complete… by Charlesnoble July 4, 2026 Most residential swimming pools should be heated to 78-82°F for comfortable recreational use, though your ideal temperature depends on how you plan to use the pool, who’s swimming, and whether you want to keep energy costs in check. If you’re heating with solar, you’ll find this sweet spot is easy…
Why Is My Solar Inverter Showing Arc Fault E050?… by Charlesnoble September 9, 2026 Nine times out of ten, an E050 arc fault error on your solar inverter means a loose connection somewhere in your DC wiring. Before you panic or call an expensive technician, check every MC4 connector between your panels and inverter. A single connection that wasn’t snapped fully closed or has…
Subscribe for handpicked DIY projects, exclusive tips, and giveaways.
Nine times out of ten, an RV generator that won’t start has a stale fuel problem. If your generator hasn’t run in more than 30 days, degraded gasoline is likely gumming up the carburetor and preventing ignition. Before you panic or call for expensive roadside service, try this: turn on the generator’s fuel valve (if… Read more: RV Generator Troubleshooting: Common Problems and How to Fix Them
A 5kW solar system occupies between 250 and 350 square feet of roof or ground space and produces roughly 20 to 25 kilowatt-hours of electricity per day in most U.S. locations. That’s enough to power a typical three-bedroom home with moderate energy use, though your exact needs depend on your daily consumption patterns, climate zone,… Read more: How to Size a 5kW Solar System for Your Home or RV
Installing a home solar system yourself takes 2-4 weekends for an average 5kW setup, requires solid electrical knowledge and comfort working at heights, and can save you $5,000-$8,000 in labor costs if you tackle everything except the final utility interconnection. The process breaks down into five main phases: permitting and design, mounting the racking system,… Read more: Solar Power Installation Step by Step: Complete DIY Guide From Start to Finish