Build Your Perfect Camper Electrical System (With Clear Diagrams)
Updated:
Understanding your camper’s electrical system begins with a clear, well-organized diagram that maps out every component from batteries to appliances. Whether you’re building a new system or troubleshooting an existing one, a proper electrical diagram serves as your roadmap to safe, reliable power on the road.
Think of your camper’s electrical system like a city’s power grid in miniature – with power sources (batteries, shore power, solar panels) feeding into distribution centers (fuse boxes, inverters) that ultimately power your essential devices. A comprehensive diagram tracks every wire, connection, and component, ensuring you can trace any electrical issue to its source and make informed upgrades as needed.
This guide will walk you through creating and interpreting camper electrical diagrams, from basic 12V systems to complex setups incorporating multiple power sources. We’ll cover essential components, standard symbols, safety considerations, and best practices for designing a system that meets your specific camping needs. Whether you’re a weekend warrior or full-time RVer, understanding your electrical system’s layout is crucial for safe, comfortable adventures off the grid.
Let’s dive into the key elements every camper electrical diagram must include and how to organize them effectively for both functionality and future maintenance.
Understanding Your Camper’s Electrical Needs
Power Sources: Battery, Shore Power, and Solar
A well-designed camper electrical system typically relies on three main power sources, each serving different purposes and working together to ensure reliable power supply. Let’s break down these essential components:
The heart of your camper’s electrical system is the battery bank, usually consisting of deep-cycle batteries designed for recreational vehicles. These batteries provide consistent 12V DC power for your essential appliances and lighting when you’re off-grid. I’ve found that most campers benefit from having at least two batteries connected in parallel for extended capacity.
Shore power is your direct connection to the grid, typically through a 30 or 50-amp service connection. When plugged in at a campsite, shore power provides 120V AC power and simultaneously charges your batteries through a converter/charger. This is particularly useful for running high-draw appliances like air conditioners and microwaves.
Solar power has become increasingly popular, and knowing how to connect solar panels to batteries properly is crucial for sustainable camping. When selecting best RV solar panels, consider your daily power consumption and available roof space. A typical setup includes panels, a charge controller, and proper wiring to integrate with your existing system.
The key to maximizing these power sources is proper integration. A transfer switch automatically selects between shore power and battery power, while your charge controller manages the solar input. This creates a seamless power delivery system that prioritizes renewable energy when available and falls back on shore power when needed.
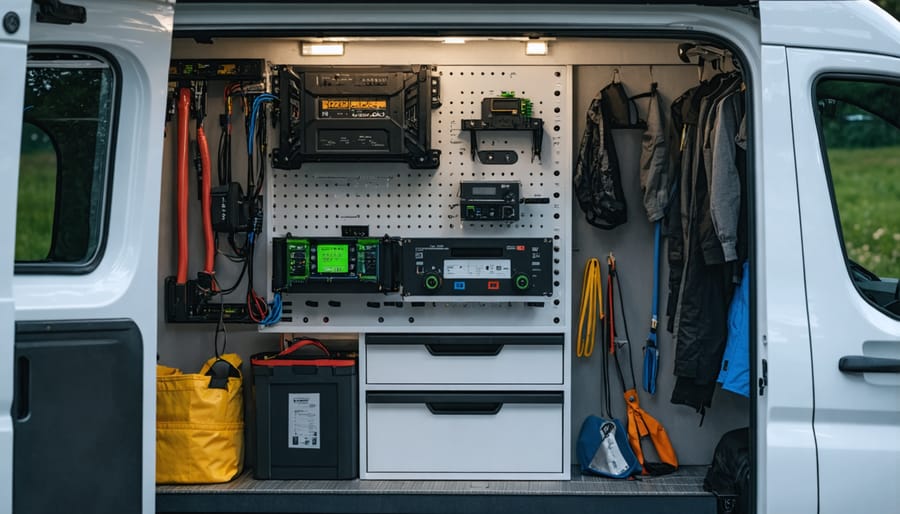
Professional battery and controller installation showcases clean integration of electrical components in a modern camper van.
Essential Components and Their Functions
Every camper’s electrical system relies on several key components working together harmoniously. Let’s break down these essential elements and their roles in powering your home on wheels.
The inverter is your system’s powerhouse, converting 12V DC power from your batteries into 120V AC power that your household appliances need. When you wire inverter to RV breaker box, you’re creating the bridge between your power source and your appliances.
Converters work in the opposite direction, transforming 120V AC shore power into 12V DC to charge your batteries and power DC appliances. Understanding proper DC-to-DC charger sizing is crucial for maintaining your battery bank effectively.
The fuse box acts as your system’s security guard, protecting your electrical components from potential overloads. I always tell my workshop participants that it’s like having a bouncer at a club – it stops anything dangerous from getting through and damaging your equipment.
Switches are the control centers that let you manage different circuits independently. You’ll want a combination of DC and AC switches to control various aspects of your system. I recommend installing clearly labeled switches for different zones in your camper – one for the kitchen, another for the bedroom area, and so on.
Remember, these components need to be properly sized for your specific setup. From my experience, it’s better to slightly oversize your components than to push them to their limits. This provides a safety buffer and extends the life of your system.
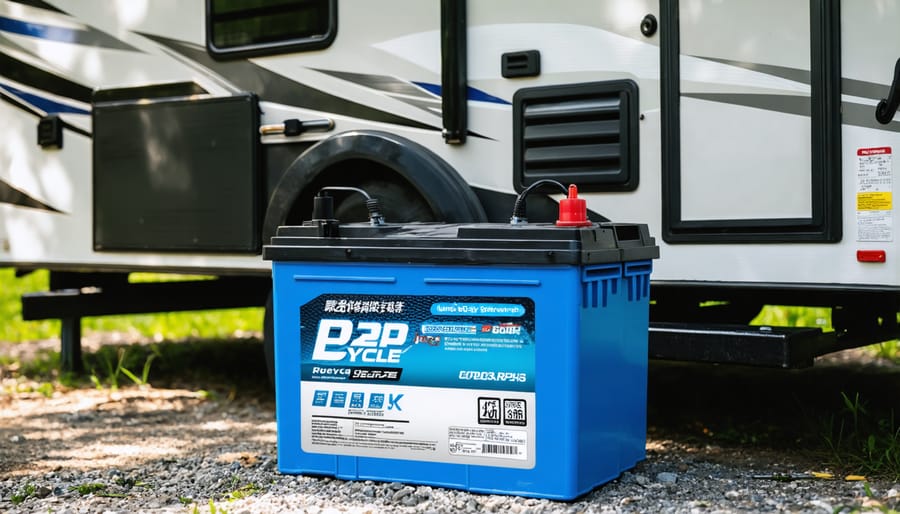
High-quality deep cycle batteries form the foundation of reliable camper electrical systems.Properly mounted solar panels provide sustainable power for extended off-grid camping.
Reading and Creating Electrical Diagrams
Basic Electrical Symbols and Notation
Understanding electrical symbols is like learning a new language, and it’s essential for reading and creating your camper’s electrical diagram. Let me share these symbols in a way that won’t make your head spin – I remember how overwhelming they looked when I first started!
The battery symbol looks like a series of long and short parallel lines, representing the positive and negative plates. For your solar panels, you’ll see a circle with diagonal lines inside, often with a “+” and “-” marking the terminals.
Switches are shown as a line with a small break in it, while fuses appear as a small rectangle with a zigzag line through it. Circuit breakers look similar but have a slightly different break pattern.
For wiring, solid lines represent positive (usually red) connections, while dashed lines often indicate negative (black) connections. Ground symbols appear as three parallel lines of decreasing length.
You’ll frequently see rectangles representing electrical devices or appliances, with their voltage and amperage ratings noted nearby. Inverters are typically shown as a box with “DC to AC” written inside.
Connection points are marked with dots where lines meet, while wire crossings without dots mean the wires don’t connect – they just pass over each other.
These symbols might seem basic, but they’re the building blocks of every electrical diagram you’ll encounter in your camper projects. Keep this guide handy as you plan your system!
Sample Diagrams for Different Setups
Let me share three common setups I’ve encountered during my years of building camper electrical systems. These diagrams will help you visualize different complexity levels and choose what’s right for your needs.
Basic Setup (Starter System):
This simple configuration includes a single 12V deep-cycle battery connected to essential components: interior lights, a small fan, and a couple of USB charging outlets. The battery is charged through shore power via a basic converter/charger. It’s perfect for weekend warriors who mainly stay at campgrounds and need basic power capabilities.
Intermediate Setup (Weekend Warrior):
This system builds upon the basic setup by adding solar capability. A 200W solar panel connects to a charge controller, which feeds a pair of 12V batteries wired in parallel. The system powers a small inverter (1000W) for occasional AC needs, a 12V refrigerator, and multiple outlets. A battery monitor helps track power usage, while an automatic transfer switch manages shore power and solar input.
Advanced Setup (Full-time Living):
For those embracing the full-time van life, this comprehensive system features a 400W solar array feeding into a sophisticated MPPT charge controller. The heart of the system consists of four 6V batteries wired in series-parallel for 12V output with high capacity. A 2000W pure sine wave inverter powers AC appliances, while a smart battery monitor system provides detailed power consumption data. The setup includes automatic charging from the vehicle’s alternator and integrated shore power with a multi-stage charger.
I always recommend starting with a simpler setup and upgrading as your needs grow. Remember, these are just examples – your ideal system might combine elements from different setups based on your specific requirements and camping style.
Planning Your System Layout
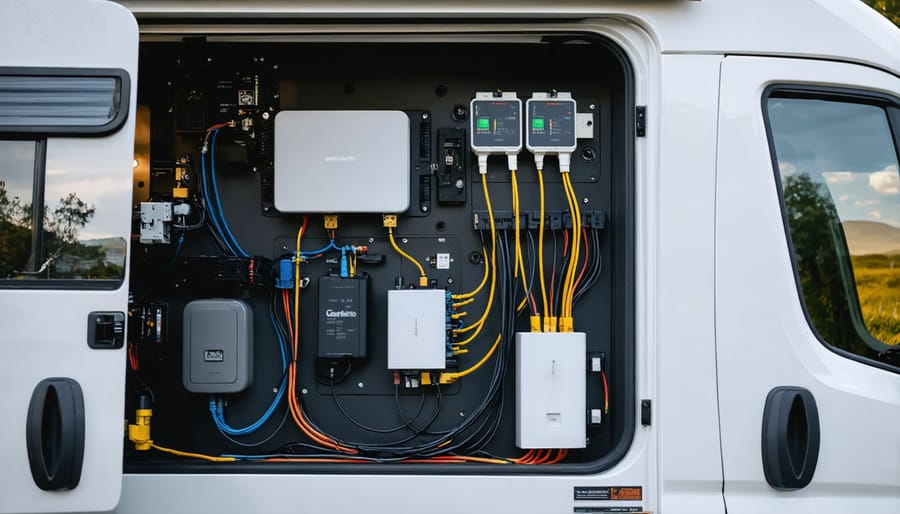
A well-planned electrical system powers comfortable off-grid living in modern camper vans.
Component Placement and Wire Routing
When planning your camper’s electrical system layout, think strategically about component placement and wire management. Start by positioning major components like batteries and inverters close to each other to minimize voltage drop. I learned this the hard way when I initially placed my batteries too far from the inverter, resulting in unnecessary power loss.
Mount all electrical components in dry, well-ventilated areas, keeping batteries in particular away from living spaces due to potential off-gassing. Use dedicated wire channels or conduit to protect cables from physical damage and maintain a clean installation. Bundle wires together where appropriate, but keep AC and DC wiring separated to prevent interference.
Label all wires clearly at both ends using durable tags or heat-shrink labels – this will be invaluable during future maintenance. Create service loops at connection points to reduce strain on terminals and allow for future modifications. Mount circuit breakers and fuse boxes in easily accessible locations, but protect them from accidental contact.
Remember to secure all components firmly to prevent movement during travel, using appropriate mounting hardware rated for mobile applications. Leave enough space around components for proper ventilation and future maintenance access.
Safety Considerations and Common Mistakes
Safety should always be your top priority when working with electrical systems in your camper. Never attempt electrical work without proper knowledge and tools, and always disconnect power sources before starting any modifications. One common mistake is forgetting to install proper circuit protection – fuses and circuit breakers are essential safeguards against electrical fires and system damage.
Make sure to use correctly sized wiring for your power demands; undersized cables can overheat and create fire hazards. When following inverter operation guidelines, pay special attention to ventilation requirements and mounting locations.
Ground fault protection is often overlooked but crucial for safety. Install GFCI outlets in wet areas like kitchens and bathrooms. Another frequent mistake is mixing different wire gauges inappropriately or making loose connections that can create resistance and heat.
Always use marine-grade components designed for mobile applications – household electrical parts aren’t suitable for the vibrations and movement in campers. Document all modifications and keep your diagram updated to help with future troubleshooting and maintenance. When in doubt, consult a qualified RV electrician rather than risking costly or dangerous mistakes.
Understanding your camper’s electrical system doesn’t have to be overwhelming. By breaking down the components and following a clear diagram, you can create a safe and efficient power setup for your adventures. Remember to start with calculating your power needs, choosing appropriate components, and always prioritizing safety in your installation. Whether you’re planning a simple setup or a comprehensive solar-powered system, having a well-designed diagram is your roadmap to success. Take time to double-check your connections, use proper wire gauges, and consider future expansion needs. If you’re unsure about any aspect of the installation, don’t hesitate to consult with experienced RV electricians. With careful planning and attention to detail, you’ll be ready to power your home on wheels confidently and safely.
How useful was this post?
Click on a star to rate it!
Average rating 0 / 5. Vote count: 0
No votes so far! Be the first to rate this post.
We are sorry that this post was not useful for you!
Let us improve this post!
Tell us how we can improve this post?
charlesnoble
Here at Spheral Solar, I’m a hands-on solar power enthusiast, constantly exploring and experimenting with DIY solutions. I’m dedicated to sharing my discoveries, insights, and even the bumps I hit along the way, all in the pursuit of a more sustainable future.
Why Your RV Appliances Keep Tripping the Breaker… by Charlesnoble November 17, 2025 Turn off shore power and disconnect your battery bank before touching any wire in your RV—this single step prevents the most common DIY electrical accidents. Check your circuit breaker panel ratings against your actual appliance loads, because that microwave drawing 1500 watts on a 15-amp circuit is exactly why you’re…
Why Your Motorhome Electrical System Keeps Failing… by Charlesnoble November 18, 2025 Picture this: You’re three days into a dream cross-country trip when your lights flicker, the refrigerator stops cooling, and you’re left wondering whether to call for expensive roadside assistance or figure it out yourself. I’ve been there, and here’s what I wish someone had told me before my first electrical…
Should an RV Inverter Be Left on When Plugged In? by Charlesnoble October 31, 2023 Generally, RV inverters should be turned off when not in use to avoid unnecessary battery drain. However, whether an RV inverter should be left on or off when plugged in depends on several factors, primarily the type of inverter and the manufacturer’s recommendations. In this comprehensive guide, we’ll look in-depth…
Solar Combiner Box Wiring Diagram: Essential… by Paul June 8, 2021 If you have a solar combiner box with a confusing or missing wiring diagram, you’ll have to find a better example, seek advice on deciphering it, or even draw one up yourself. We can help you do this by describing the different types of diagrams you may encounter and how…
Why Your RV Solar Panels Aren’t Charging (And How to… by Charlesnoble November 30, 2025 Check your multimeter readings at each connection point along your solar charging path—from panels to charge controller to battery—to pinpoint exactly where voltage disappears. Most RV solar systems lose 10-30% of their potential power to voltage drop, but this invisible thief often goes undetected until you systematically measure and compare…
Why Your RV Battery Dies Overnight (And How a 55 Amp… by Charlesnoble December 5, 2025 Your RV’s lights are flickering, the refrigerator isn’t keeping food cold, and your phone charger barely works. Sound familiar? That frustrating power struggle often points to an undersized or failing power converter, and upgrading to a 55 amp RV power converter might be exactly what you need. Here’s what’s happening:…
Subscribe for handpicked DIY projects, exclusive tips, and giveaways.
Match your solar panels to microinverters or power optimizers based on your roof’s shading patterns—even partial shade from a chimney or tree during morning hours means module-level power electronics will recover 15-25% more energy than string inverters lose to the weakest panel. Install power optimizers when you’re working with mixed panel orientations across multiple roof… Read more: Why Smart Solar Modules Could Save Your DIY Array (Before It’s Too Late)
Measure your conduit run before purchasing materials by mapping the exact path from your solar array to the inverter and battery location, accounting for a 10% waste factor and additional length for bends. PVC electrical conduit remains the most cost-effective protective solution for DIY solar installations, but improper installation creates fire hazards, code violations, and… Read more: Why Your Solar Conduit Installation Could Start a Fire (And How to Do It Right)
Walk down to your nearest stream with a five-gallon bucket and a stopwatch. Fill that bucket and time how long it takes—this simple test reveals whether you have enough flowing water to power your off-grid home. If you can fill it in under 10 seconds from a source that drops at least 10 feet in… Read more: The Stream Behind Your House Could Power It (Here’s How Micro Hydro Works)


")
")


")
")
")
")


")
")


