Why Your Flagpole Deserves Solar Light (And How to Make It Happen)
Updated:
Choose a solar light specifically designed for flagpole tops—not generic garden lights—with at least 20 lumens output and a downward-facing beam angle that creates the proper illumination pattern required by U.S. Flag Code. Mount the solar panel where it receives 6-8 hours of direct sunlight daily, even if that means positioning it separately from the light fixture using an extension cable. Secure all components with marine-grade adhesive or adjustable straps rather than drilling into your telescoping pole, which would compromise its structural integrity and retraction capability.
I learned this the hard way three years ago when I installed my first flagpole solar light. I excitedly attached a $15 solar garden stake light to my 20-foot telescoping pole, only to discover it barely produced enough light to see the flag’s outline—certainly not the respectful illumination Old Glory deserves. After neighbors politely mentioned my dimly-lit flag, I spent weeks researching and testing different solutions until I found what actually works.
The challenge with telescoping flagpoles isn’t just finding any solar light—it’s finding one that delivers adequate illumination without permanent wiring, survives wind stress at elevation, and doesn’t interfere with raising and lowering your pole. Unlike traditional in-ground flagpoles with nearby electrical access, telescoping poles demand creative solutions that balance portability, durability, and genuine lighting performance.
This guide walks you through selecting the right solar flagpole light, understanding the technical specifications that matter (and those that don’t), and installing it properly so your flag receives the dignified nighttime display it deserves—all while keeping your setup flexible and solar-powered.
The Problem with Traditional Flagpole Lighting
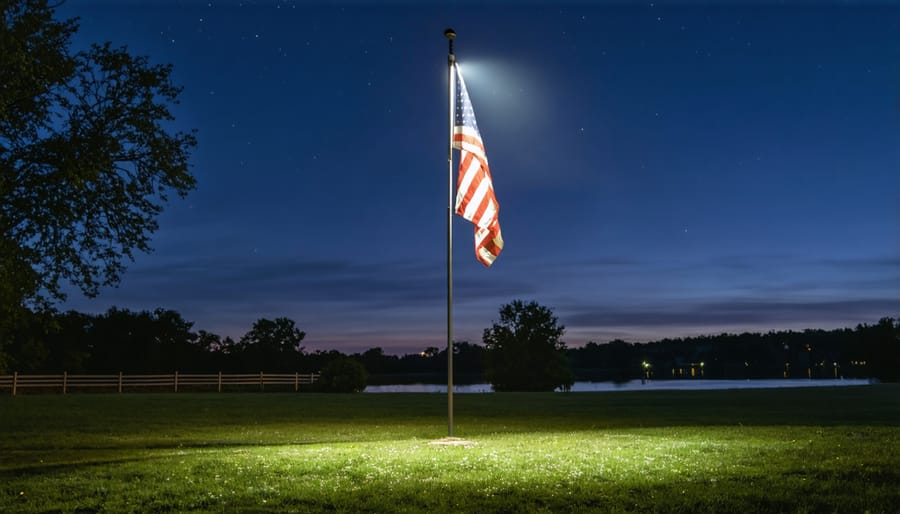
Without proper lighting, flags on telescoping poles become nearly invisible after sunset, creating a common frustration for homeowners.
Why Telescoping Poles Are Different
Telescoping flagpoles have become incredibly popular with homeowners—and for good reason. Unlike traditional fixed poles cemented into the ground, these ingenious designs collapse down to a fraction of their full height, making them easy to store during bad weather or when you need to clean your flag. I remember when my neighbor Charles installed his first telescoping pole; he was thrilled that he could raise and lower his flag without needing a ladder or calling for help.
But here’s where lighting gets tricky. Traditional flagpole lighting relies on ground-mounted spotlights or hardwired fixtures—options that don’t work well when your pole might move or retract. You can’t exactly run electrical wiring up a pole that needs to collapse smoothly. Plus, many folks choose telescoping poles specifically because they want flexibility. Maybe you’re renting, or perhaps you like bringing your pole down seasonally. Permanent electrical installations defeat that purpose entirely.
The retractable nature also means any lighting solution needs to travel with the pole sections as they extend and retract, without tangling, breaking, or interfering with the mechanism. This unique challenge is exactly why solar lights designed specifically for telescoping poles have become such game-changers for flag enthusiasts.
The Cost of Running Electrical Lines
I learned this lesson the hard way when I first wanted to light up my flagpole. I called three electricians for quotes, and the estimates ranged from $800 to $1,500—just to run a simple line about 40 feet from my house to the pole. One contractor even suggested trenching through my newly landscaped yard!
Here’s what you’re really paying for with traditional wiring: an electrician’s labor (usually $75-150 per hour), materials like conduit and weatherproof fixtures, trenching if the line runs underground, and potentially a permit from your local building department. For a basic flagpole light installation, you’re looking at 6-10 hours of work minimum.
The real kicker? Most residential flagpoles only need about 10-20 watts of lighting to properly illuminate a standard 3’x5′ flag. Running permanent electrical for such modest power needs is like using a sledgehammer to crack a walnut. Plus, if you ever move your telescoping pole—one of its key advantages—that expensive wiring becomes useless.
Solar lighting eliminates all these hassles while delivering the same patriotic glow at a fraction of the cost.
How Solar Flagpole Lights Actually Work
The Three Essential Components
Let me break down what makes these lights tick—it’s simpler than you might think! When I first started exploring outdoor solar lighting options for flagpoles, I realized the beauty is in how three straightforward components work together.
**The Solar Panel** sits at the top of your setup, usually a compact photovoltaic cell about the size of a drink coaster. During daylight hours, it converts sunlight into electrical energy—think of it as a tiny power plant that works silently all day. Most flagpole lights use monocrystalline or polycrystalline panels, which are just fancy ways of saying they’re made from silicon crystals that capture sunlight efficiently.
**The Rechargeable Battery** stores all that collected energy for nighttime use. These are typically lithium-ion or NiMH (nickel-metal hydride) batteries, similar to what’s in your phone or power tools. They’re tucked away in a weatherproof housing and usually last 2-3 years before needing replacement. The battery capacity determines how long your light runs each night—typically 8-10 hours on a full charge.
**The LED Light** is where the magic happens. LEDs (light-emitting diodes) are incredibly energy-efficient, converting nearly all stored power into visible light rather than wasted heat. Most flagpole lights use cool white or warm white LEDs that provide adequate illumination while sipping minimal power. This efficiency is why your flag can stay beautifully lit all night from just a day’s worth of sunshine.
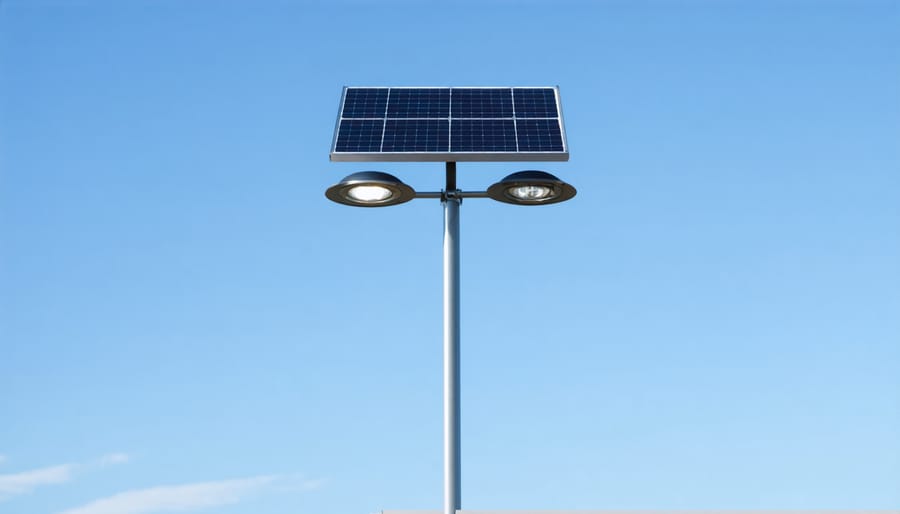
Modern solar flagpole lights integrate photovoltaic panels, rechargeable batteries, and efficient LED components into compact weather-resistant housings.
Why This Setup Works Year-Round
I’ll be honest—when I first installed my telescoping flagpole solar light, I worried it wouldn’t cut it during our gray Midwest winters. But here’s what I’ve learned over three years of real-world use: modern solar panels are surprisingly efficient, even in less-than-ideal conditions.
Yes, your light will charge slower on overcast days, but quality units with efficient batteries still store enough power for several hours of illumination. During winter’s shorter days, you might see reduced runtime—maybe four hours instead of eight—but that’s often plenty for evening flag display.
The key is choosing a light with a decent battery capacity (look for at least 2000mAh) and positioning your panel to capture maximum available light. I angle mine slightly south, which helps during low winter sun. On particularly gloomy stretches, the battery reserve carries you through.
Here’s the beauty of this setup: it adapts naturally to seasonal changes. Longer summer days mean fuller charges and extended illumination when you’re actually outside enjoying it. Shorter winter evenings? The light still honors your flag during peak visibility hours.
For northernmost climates with extreme conditions, consider models with removable panels you can occasionally charge indoors during prolonged overcast periods.
Choosing the Right Solar Light for Your Telescoping Flagpole
Matching Light Output to Pole Height
Getting the right brightness for your flagpole height is crucial—I learned this the hard way when my first solar light barely illuminated the bottom third of my 20-foot pole! Here’s what actually works in real-world conditions.
For **15-foot poles**, you’ll want a minimum of 300-400 lumens. This provides adequate illumination for most residential flags without overwhelming your yard. I’ve found that lights in this range work beautifully for standard 3×5 foot flags.
**20-foot poles** need a step up to 500-700 lumens. At this height, light disperses more, so that extra brightness ensures your flag remains visible from the street. When I upgraded to a 600-lumen unit on my 20-footer, the difference was night-and-day compared to my underpowered first attempt.
**25-foot and taller poles** demand 800+ lumens, sometimes requiring multiple lights or specialized high-output models. Consider that commercial flagpoles often use 1000+ lumen systems. Check out the best solar flagpole lights to compare options across different brightness levels.
Here’s a practical test: if you can clearly read text on your flag from 30 feet away at night, you’ve nailed the right lumen count. Under-lighting creates a dim, washed-out appearance that defeats the purpose entirely.
Top-Mount vs. Ground-Based Solar Options
When it comes to lighting your telescoping flagpole, you’ve got two solid paths: top-mount lights that attach directly to the pole’s finial, or ground-based spotlights that illuminate from below. Each has its sweet spot depending on your setup.
Top-mount solar lights are my go-to recommendation for most telescoping poles. They’re incredibly convenient—just attach and forget. Since they sit at the peak, they catch maximum sunlight throughout the day and provide downward illumination that really showcases your flag’s texture. The downside? You’ll need to lower your pole to change batteries or clean the solar panel, which can be a hassle if you’ve got a 25-footer.
Ground-based options, similar to solar landscape lighting, give you easy maintenance access and typically pack more powerful LEDs. I learned this the hard way when my first top-mount light wasn’t bright enough for my 20-foot pole—the ground spotlight solved that instantly. However, they require careful positioning to avoid shadows from trees or structures, and they’re more vulnerable to lawn equipment damage.
For telescoping poles specifically, consider how often you adjust your pole’s height. Frequent adjusters usually prefer ground-based systems for the hassle-free access.
Weather Resistance Features That Actually Matter
When I first installed solar lights on my flagpole, I learned the hard way that not all “weatherproof” claims are equal. After one brutal winter, my bargain light stopped working entirely—a lesson that taught me which specifications actually protect your investment.
**Understanding IP Ratings**
The IP (Ingress Protection) rating tells you exactly what your light can handle. Look for at least **IP65**, which means complete dust protection and resistance to water jets from any direction. For coastal areas or regions with heavy snow, IP67 is worth the extra investment—it handles temporary submersion, which matters when snow piles up or heavy rain pools around your pole base.
**Material Considerations for Your Climate**
ABS plastic housings work fine in mild climates, but if you experience temperature swings or intense UV exposure, aluminum construction with powder coating resists cracking and fading much better. The solar panel covering should be tempered glass rather than plastic—it costs more upfront but maintains efficiency for years longer.
**Climate-Specific Priorities**
Hot, sunny regions need UV-resistant materials and heat-tolerant batteries. Cold climates require lithium batteries that function below freezing (lead-acid batteries often fail under 32°F). Coastal installations demand corrosion-resistant hardware and sealed electronics to prevent salt damage.
Installing Your Solar Flagpole Light: A Step-by-Step Approach
Tools and Prep Work You’ll Need
Before you start your installation, let’s gather everything you’ll need. From my own experience, having all your materials ready makes the job so much smoother—I learned this the hard way!
**What You’ll Need:**
– Your telescoping flagpole solar light (with mounting hardware included)
– Screwdriver or drill (check your light’s requirements)
– Clean cloth for wiping the pole
– Measuring tape
– Ladder or step stool for safe access
– Your flagpole’s instruction manual (helpful for specifications)
**Quick Prep Steps:**
1. Choose a sunny day for installation—you’ll want to test the light immediately
2. Lower your flagpole completely and remove the flag
3. Clean the top section where the light will mount
4. Lay out all hardware pieces and verify nothing’s missing
5. Charge the solar light for 6-8 hours before installation if possible
This simple preparation ensures you won’t be scrambling mid-project!
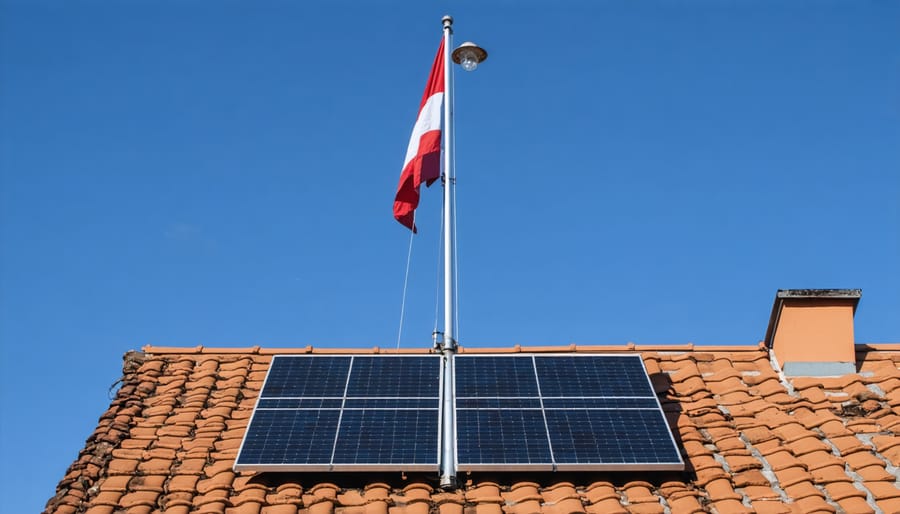
Installing a solar light on a telescoping flagpole is a straightforward DIY project requiring basic tools and minimal technical expertise.
Top-Mount Installation Walkthrough
Installing a solar light on your telescoping flagpole is surprisingly straightforward, but safety comes first. I learned this the hard way when I nearly dropped my first solar light from 20 feet up—not my finest DIY moment!
Start by fully retracting your telescoping pole and securing it at a comfortable working height. Most top-mount solar lights simply replace your existing finial (that decorative ball or eagle on top). Remove the current finial by unscrewing it counterclockwise—you might need pliers if it’s been on awhile and weathered tight.
Before attaching your new solar light, clean the threaded mount with a wire brush to ensure a secure fit. This prevents the light from loosening in wind. Thread your solar light clockwise onto the pole, hand-tightening firmly. Some models include a rubber gasket—make sure it’s positioned correctly to prevent water infiltration.
Here’s a critical safety tip: Never extend a telescoping pole with just one person holding it. Have a buddy help guide the sections as you extend them back to full height. The pole becomes increasingly unwieldy as it rises, and wind can catch you off guard.
Once extended, lock each section according to your pole’s mechanism—typically twist-locks or clip-locks. Give the pole a gentle shake test before walking away. Your solar light should face south for maximum sun exposure in North America.
Most importantly, mark your calendar to check the mounting tightness quarterly. Vibration from wind gradually loosens connections, and a quick tightening session prevents expensive replacements.
Ground-Based Solar Spotlight Setup
Not everyone wants to attach a light directly to their flagpole, and that’s perfectly okay! Ground-based solar spotlights offer a fantastic alternative that’s often easier to install and maintain.
I remember helping my neighbor Janet set up her flag lighting last summer. She was worried about modifying her beautiful new telescoping pole, so we positioned two solar spotlights about 6-8 feet from the base, angling them upward at roughly 45 degrees. The result? Her flag looked absolutely stunning at night, and she didn’t have to touch the pole at all.
When positioning ground-based spotlights, aim for that sweet spot where the light beam hits the flag evenly from bottom to top. You’ll want lights with at least 200 lumens each—two positioned on opposite sides creates beautiful, balanced illumination without harsh shadows. Think of it like stage lighting for your flag!
Here’s a pro tip: use adjustable spotlights with stakes that let you fine-tune the angle. As seasons change and your flag’s position shifts slightly, you can easily readjust without any tools. Place them where they’ll receive 6-8 hours of direct sunlight daily—usually the south-facing side of your yard works best.
The beauty of this setup? It’s completely portable. Moving to a new house or rearranging your yard? Just pull up the stakes and replant them. No wiring, no complicated installation, just simple solar power doing its job beautifully.
Maximizing Performance and Troubleshooting Common Issues
Getting the Best Sun Exposure
Getting proper sun exposure is absolutely crucial for your flagpole solar light—I learned this the hard way when my first setup barely lasted through the evening! The solar panel needs at least 6-8 hours of direct sunlight daily to fully charge the battery.
Start by observing your flagpole’s location throughout the day. Walk around it at different times—morning, noon, and afternoon—to identify shade patterns from trees, buildings, or roof overhangs. Even partial shade for a few hours can significantly reduce charging efficiency. If your pole’s base sits in shade, consider angling the solar panel (if detachable) toward the sunniest spot, or mounting it separately on a nearby surface that catches better rays.
Here’s something many folks overlook: seasonal changes matter! That tree providing lovely summer shade? In winter, when the sun sits lower in the sky, it might block crucial light. Make adjustments as seasons shift, repositioning your pole or trimming back branches if possible.
For those of you already using other solar-powered outdoor equipment, you know the drill—clear any dirt or debris from panels monthly to maintain peak performance. A clean panel can make the difference between bright illumination all night and disappointing dim light by midnight.
When Your Light Isn’t Performing
I’ll be honest—nothing’s more frustrating than watching your flagpole light flicker or fade when it should be shining proudly. I’ve been there myself, standing in my driveway at dusk wondering if I’d wasted my money. The good news? Most solar light issues have simple fixes that don’t require an engineering degree.
**Dim or flickering lights** usually point to dirty solar panels. Just like your car windshield, those panels collect dust, pollen, and grime that block sunlight. Take a soft cloth with some warm water and gently wipe the panel surface monthly—you’d be amazed how much brighter your light becomes. I noticed a 40% improvement in brightness after my first cleaning!
**Inconsistent operation** often relates to placement. Your solar panel needs at least 6-8 hours of direct sunlight daily. Check if tree branches have grown to create new shadows, or if your flagpole position has shifted. Sometimes the fix is as simple as rotating the panel to face south.
**Battery problems** typically emerge after 2-3 years of use. If your light only stays on for an hour or two, the rechargeable battery may need replacing. Most units use standard AA or AAA rechargeable batteries—check your manual for the specific type. Swap them out and you’re back in business.
One tip from experience: let your new solar light charge for 2-3 full sunny days before judging its performance. That initial charge cycle makes all the difference in establishing strong battery health.
Real-World Performance: What to Actually Expect
I’ll be straight with you—after testing solar lights on my own telescoping flagpole and hearing from dozens of community members, the performance isn’t quite what the packaging promises, but it’s still pretty darn good when you know what you’re getting into.
Most quality solar flagpole lights will give you about 6-8 hours of solid illumination on a full charge during spring and summer months. That’s enough to keep Old Glory properly lit through the night in most parts of the country. However, come winter, expect that runtime to drop to 4-6 hours—sometimes less if you’re in northern regions with limited sunlight. One member of our solar enthusiast group in Michigan shared that his light barely made it past midnight during December, which honestly tracks with the reduced daylight hours and lower sun angles.
The brightness issue is real, too. That brilliant LED glow you see on day one? It’ll gradually dim over the first year as the battery capacity decreases. I noticed about a 20-30% reduction in brightness after twelve months on my setup. It’s not a dealbreaker—the flag remained visible—but it’s worth knowing upfront.
Here’s what actually works in real-world conditions: Position your pole where it gets at least 6 hours of direct sunlight daily. Shaded locations will disappoint you every time. Clean those solar panels monthly—dust and pollen are surprisingly effective at killing performance. And budget for battery replacement every 18-24 months if you want consistent results.
The good news? Even with these limitations, most users find solar flagpole lights meet their needs for respectful flag display without the hassle of running electrical lines. Just go in with eyes open about seasonal variations and maintenance requirements.
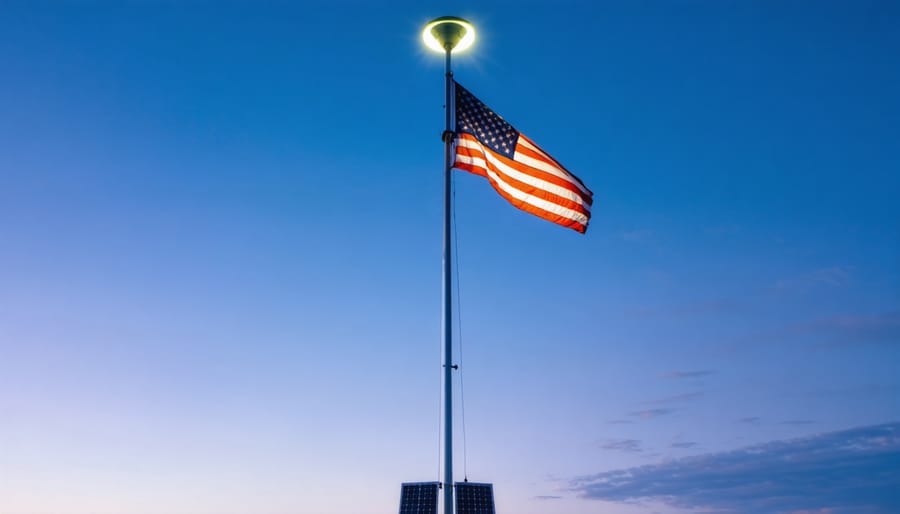
A properly installed solar flagpole light delivers reliable nighttime illumination, ensuring your flag remains visible and dignified after dark.
You’ve made it this far, and that tells me something important—you’re ready to take control of your home’s energy future, one project at a time. Installing a solar light on your telescoping flagpole isn’t just about illuminating Old Glory (though that’s certainly reason enough). It’s about proving to yourself that renewable energy isn’t some distant, complicated dream reserved for experts with engineering degrees.
I remember my first solar flagpole project. I stood there at dusk, watching that light click on automatically for the first time, and felt genuinely proud. Not because I’d done anything extraordinarily complex, but because I’d taken a small step toward energy independence. You’re about to experience that same satisfaction.
The beauty of this project is its simplicity—no trenching, no electricians, no monthly costs. Just clean, free energy from the sun doing exactly what you need it to do. And here’s the thing: once you’ve completed this installation, you’ll look around your property with new eyes, spotting opportunities everywhere for solar solutions.
We’d love to hear how your project turns out! Share your photos, challenges, and victories with the Spheral Solar community in the comments below. Your experience might be exactly what inspires the next person to get started. And if you’re hungry for more, explore other DIY solar projects that can transform your home while shrinking your carbon footprint. The sun’s waiting—let’s put it to work.
How useful was this post?
Click on a star to rate it!
Average rating 0 / 5. Vote count: 0
No votes so far! Be the first to rate this post.
We are sorry that this post was not useful for you!
Let us improve this post!
Tell us how we can improve this post?
charlesnoble
Here at Spheral Solar, I’m a hands-on solar power enthusiast, constantly exploring and experimenting with DIY solutions. I’m dedicated to sharing my discoveries, insights, and even the bumps I hit along the way, all in the pursuit of a more sustainable future.
8 Best Solar Flagpole Light Reviews of 2023 by Nick June 20, 2021 The best solar flagpole lights are the ones that can handle any kind of weather while providing a bright sustaining light on the flag to last through the night. It is also important to consider which of the solar flagpole lights fits the particular flag pole being used and is…
Transform Your Yard After Dark: Solar Lights That… by Charlesnoble March 21, 2026 Position your solar path lights along walkways where they’ll receive at least 6-8 hours of direct sunlight daily—shaded placement is the number one reason homeowners complain about dim performance after sunset. I learned this the hard way when I installed a beautiful string of solar lanterns under my patio overhang,…
Solar Inground Lights That Actually Survive Winter… by Charlesnoble February 5, 2026 Bury solar inground lights 4-6 inches deep in compacted soil along pathways, ensuring the solar panel faces true south for maximum charge—a lesson I learned after my first installation facing southeast yielded only 3 hours of nightly illumination instead of the promised 8. Test soil drainage before purchasing by digging…
10 Best Outdoor Solar Lights in 2023 by Adeyomola August 30, 2021 You will get the best experience with outdoor solar lights when you opt for lights with good solar panels and long lighting times. But besides that, ensure your choice can charge quickly and offers sufficient brightness. Such a selection will give you a complete experience. Best Solar Lights for Outdoors…
This Floating Solar Sphere Transformed My Garden… by Charlesnoble October 31, 2025 # Transform Your Garden with a Solar Powered Water Feature Sphere Picture this: a perfectly balanced sphere of water, cascading gently over smooth stone, powered entirely by the sun—no electrical outlets, no tangled extension cords, just pure renewable energy creating a mesmerizing focal point in your outdoor space. **Build your…
Solar Pest Repellent That Actually Works (And Saves… by Charlesnoble December 20, 2025 Mosquitoes ruined my backyard barbecues for years until I discovered solar pest repellents could create an invisible barrier around my deck without extension cords or monthly electricity bills. These devices harness sunlight to power ultrasonic waves, electromagnetic pulses, or LED lights that claim to repel everything from rodents to insects,…
Subscribe for handpicked DIY projects, exclusive tips, and giveaways.
Measure your inverter’s efficiency by comparing DC input power to AC output power using a simple multimeter—a ratio below 95% signals it’s time to investigate performance issues. Track voltage and current readings at both the solar panel array and your home’s load center during peak sun hours, then multiply volts by amps to calculate actual… Read more: Your DIY Solar Inverter Might Be Wasting Power (Here’s How to Find Out)
Check your solar inverter’s communication ports right now – if you see two screw terminals labeled A and B (or D+ and D-), you’re looking at 2-wire RS485, the most common communication protocol in DIY solar monitoring setups. This simple two-wire system lets your solar equipment talk to monitoring devices, allowing you to track power… Read more: Why 2-Wire RS485 Is the Smartest Choice for Your DIY Solar Monitoring System
Match your solar panels to microinverters or power optimizers based on your roof’s shading patterns—even partial shade from a chimney or tree during morning hours means module-level power electronics will recover 15-25% more energy than string inverters lose to the weakest panel. Install power optimizers when you’re working with mixed panel orientations across multiple roof… Read more: Why Smart Solar Modules Could Save Your DIY Array (Before It’s Too Late)


")

")
")


")

")
")