Why Your Greenhouse Needs a Solar Ventilation Fan (Before Summer Hits)
Updated:
Monitor your greenhouse temperature daily during peak sun hours—if it consistently exceeds 85°F or condensation builds up on interior surfaces, you’re losing crops to heat stress and creating the perfect environment for fungal diseases. A greenhouse solar ventilation fan addresses both problems without adding a penny to your electricity bill, making it one of the smartest investments for year-round growing success.
Position your solar-powered exhaust fan on the side of your greenhouse that receives at least 6 hours of direct sunlight, typically south-facing in the Northern Hemisphere, and mount it opposite your intake vents to create a cross-breeze that pulls hot air out while drawing fresh air in. The same principles that make home solar ventilation systems effective apply perfectly to greenhouse environments—except your plants are far less forgiving of temperature fluctuations than your living room furniture.
Calculate your cubic footage by multiplying length times width times height, then choose a fan that can exchange that entire volume at least once per minute during hot weather. A 10×12 greenhouse with 8-foot walls contains 960 cubic feet, requiring a fan rated for at least 960 CFM (cubic feet per minute) to maintain optimal airflow when temperatures spike.
I learned this lesson the hard way when my first attempt at greenhouse gardening resulted in a spectacular tomato plant meltdown during an unexpected May heat wave. The plants literally wilted before lunch, and I spent the afternoon desperately propping open doors with cinder blocks. That experience taught me that passive ventilation isn’t enough—you need consistent, automatic airflow that works even when you’re not there to babysit your plants.
What Is a Greenhouse Solar Ventilation Fan?
A greenhouse solar ventilation fan is exactly what it sounds like: a ventilation system that runs entirely on sunshine, no electrical outlet required. These clever devices combine a small solar panel with a fan motor to automatically circulate air in your greenhouse, helping to prevent the overheating and humidity spikes that can turn your thriving garden into a wilted mess.
Here’s how they work: The solar panel (usually mounted on the roof or side of your greenhouse) captures sunlight and converts it into electricity. This power directly runs the fan motor, which pulls hot, stale air out of your greenhouse while drawing in fresh air from outside. The beauty of this setup is that it works hardest when you need it most. On bright, sunny days when your greenhouse gets hottest, the solar panel generates maximum power and the fan spins faster. On cloudy, cooler days, the fan slows down naturally since there’s less need for ventilation.
I remember setting up my first solar fan in my backyard greenhouse about five years ago. I was skeptical at first, but watching it automatically kick into high gear during those scorching summer afternoons was genuinely satisfying. No timers, no electricity bills, just pure solar-powered climate control.
To help you understand the key concepts, here are some terms you’ll encounter:
Photovoltaic Panel
The solar panel component that converts sunlight into electrical energy to power the fan motor. It’s typically a small, weather-resistant panel that mounts externally on your greenhouse.
CFM Rating
Cubic Feet per Minute measures how much air the fan moves. Higher CFM ratings mean more powerful ventilation, which you’ll need for larger greenhouses.
Passive Ventilation
Uses roof vents or louvers that open automatically with heat expansion, requiring no power source. This is the simplest but least controllable method.
Active Ventilation
Employs powered fans (solar or electric) to forcibly move air through the greenhouse. This gives you much better control over airflow and temperature.
Thermostat Control
An optional feature that switches the fan on or off based on temperature, even when solar power is available. This provides precision climate management beyond basic solar-responsive operation.
Most greenhouse solar fans fall into the active ventilation category, though they work alongside your existing passive vents for maximum efficiency. The key difference is control: passive systems rely entirely on physics and natural airflow, while active solar fans give you the power to move significantly more air exactly when conditions demand it.
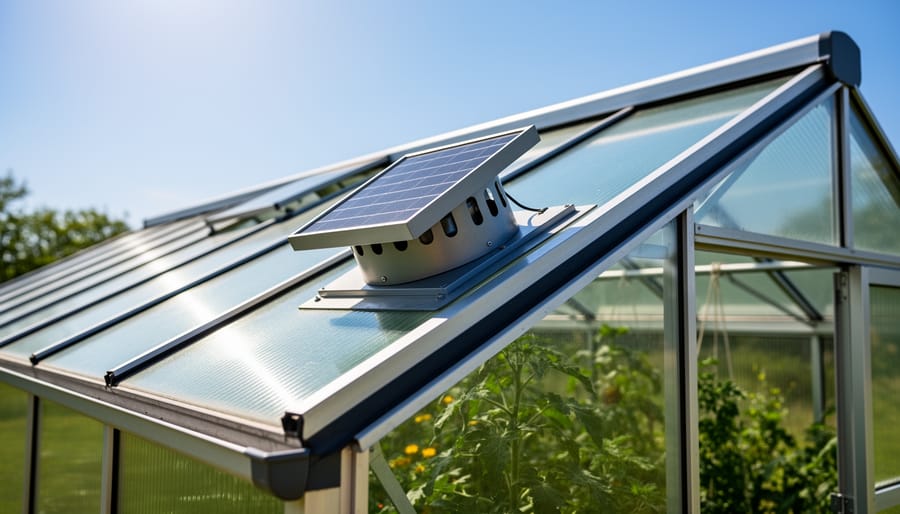
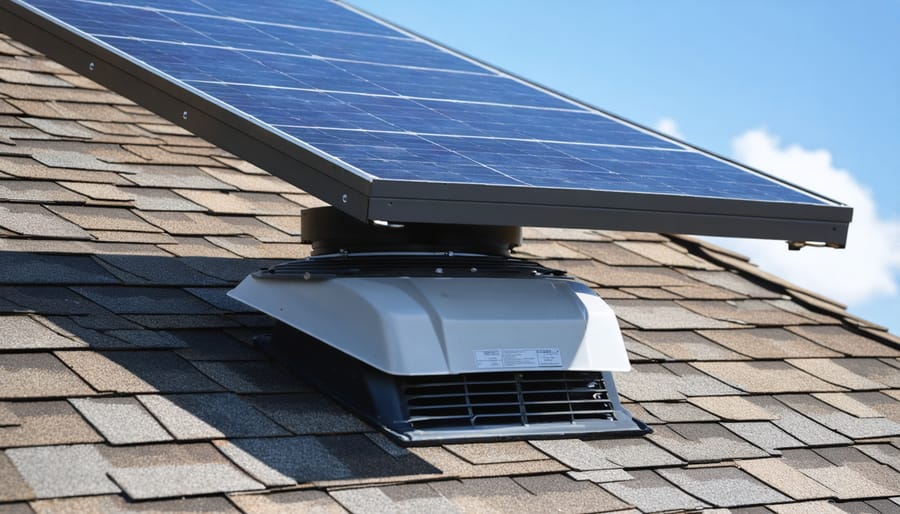
A solar ventilation fan installed on a greenhouse roof operates automatically when sunlight is available, providing natural cooling without electrical wiring.
Why Solar Power Makes Perfect Sense for Greenhouse Ventilation
Here’s something I discovered during my first spring with a backyard greenhouse: by 10 AM on a sunny day, my seedlings were already wilting from the heat. The irony hit me immediately—the same brilliant sunshine causing my ventilation problem could actually solve it. This natural connection between solar power and greenhouse cooling is what makes solar ventilation fans such an elegant solution.
Think about when your greenhouse needs the most cooling. It’s during those bright, hot afternoons when the sun is beating down, right? That’s precisely when solar panels generate their maximum power. Unlike electric fans that draw from the grid regardless of actual need, solar-powered fans automatically ramp up their speed as temperatures rise and sunlight intensifies. When clouds roll in or evening approaches, the fan slows down naturally—which is exactly what you want since cooling demands decrease too. This built-in synchronization means you’re not wasting energy or relying on timers and thermostats.
The cost advantages go beyond this perfect timing. After your initial investment, you’re essentially getting free ventilation for years to come. No monthly electric bills, no wiring to run from your house (which can cost hundreds of dollars alone), and no electrician fees. When comparing solar versus electric options, remember that solar fans typically pay for themselves within two to three growing seasons through energy savings.
Installation simplicity is another major win. Most solar greenhouse fans are genuinely DIY-friendly—mount the panel somewhere sunny, attach the fan to your vent opening, connect the wires, and you’re done. I installed my first one in about an hour with just a drill and screwdriver. No permits needed in most areas since you’re not touching your home’s electrical system.
Perhaps the biggest advantage is independence. Greenhouses are often located away from convenient power sources. Solar ventilation means you can place your greenhouse anywhere on your property without worrying about running extension cords or trenching for buried cables. During power outages, your plants keep getting the airflow they need. For off-grid gardeners or those with remote growing spaces, this freedom is invaluable.
Proper ventilation creates the ideal growing environment with controlled temperature and humidity levels that promote healthy plant development.
How Greenhouse Solar Fans Protect Your Plants
Temperature Regulation
Here’s the thing about greenhouse temperature: you’d be surprised how quickly a sunny day can turn your plant paradise into a pressure cooker. I learned this the hard way when my first small greenhouse hit 115°F on what seemed like a mild spring afternoon. My tomato seedlings looked like they’d been through a desert hike.
Most greenhouse plants thrive between 65-75°F during the day, with some vegetables tolerating up to 85°F. Beyond that, you’re risking serious damage. At temperatures above 90°F, plants stop photosynthesizing effectively and start focusing all their energy on simply surviving. Above 100°F, you’re looking at wilting, leaf scorch, and potentially losing your entire crop.
This is where solar ventilation fans become absolute lifesavers. By continuously exchanging hot, stale air with fresh outdoor air, these fans prevent that dangerous heat buildup. Even a modest 10-watt solar fan can cycle the air in a small greenhouse several times per hour, typically keeping temperatures within 10-15°F of outdoor conditions. On a 75°F day, that means your greenhouse stays at a plant-friendly 85-90°F instead of climbing into the danger zone above 100°F.
Humidity Control
Here’s something I learned the hard way during my first greenhouse season: humidity isn’t just about comfort, it’s about plant health. When moisture levels climb above 85-90%, you’re essentially rolling out the welcome mat for powdery mildew, botrytillis, and other fungal diseases that can devastate your plants overnight.
A solar ventilation fan tackles this by creating consistent air movement, even when you’re not around to manually open vents. The constant air circulation prevents moisture from settling on leaves and soil surfaces where fungi thrive. I remember watching condensation drip from my tomato plants one morning, only to find white spots appearing by afternoon. That was my wake-up call.
The beauty of solar-powered systems is they work hardest when you need them most. On sunny days when transpiration rates skyrocket and humidity builds up quickly, your fan automatically kicks into high gear. For a typical 8×10 foot hobby greenhouse, you’ll want a fan that exchanges the air volume at least once per hour, more if you’re growing moisture-sensitive crops like herbs or certain flowers.
Pro tip: position your fan opposite your intake vents to create cross-ventilation. This draws humid air out while pulling fresh, drier air through, maintaining that sweet spot of 50-70% humidity where most plants thrive.
Air Circulation and CO2 Exchange
Your greenhouse plants are basically breathing machines, and they need a steady supply of fresh air to thrive. During photosynthesis, plants absorb carbon dioxide from the air and release oxygen—a process that slows dramatically when CO2 levels drop in stagnant air pockets. I learned this the hard way when my first greenhouse setup left my tomatoes looking pretty lackluster despite plenty of sunlight and water.
Here’s what’s happening: without proper air circulation, the thin layer of air surrounding each leaf becomes depleted of CO2 within minutes. This creates an invisible bottleneck in your plants’ growth potential, as elevated CO2 enhances photosynthesis and supports healthier development. A solar ventilation fan solves this by continuously exchanging stale interior air with fresh outdoor air, replenishing CO2 levels naturally. The beauty of solar-powered fans is they work hardest when your plants need it most—during sunny days when photosynthesis peaks. This constant air movement also prevents those dead zones where humidity builds up and airborne diseases find their perfect breeding ground.
Pest and Disease Prevention
I learned this lesson the hard way during my first greenhouse season. Stagnant air became a breeding ground for aphids and powdery mildew, nearly wiping out my tomato crop. When I installed a solar ventilation fan, I noticed a dramatic difference within weeks.
Here’s why proper airflow matters: pests like whiteflies and spider mites thrive in still, humid conditions. They settle on leaf undersides where air doesn’t move. A ventilation fan disrupts these cozy microclimates, making your greenhouse less inviting to unwanted guests.
Disease prevention works similarly. Fungal diseases need moisture to spread their spores. When air circulates constantly, it prevents water from sitting on leaves and reduces humidity levels where fungi flourish. The moving air essentially dries out the conditions that pathogens need to multiply.
Your solar fan runs consistently during sunny days when temperatures and humidity peak, providing protection exactly when your plants are most vulnerable. It’s passive pest management that works while you’re not even there.
Choosing the Right Solar Ventilation Fan for Your Greenhouse
Calculating Your Ventilation Needs
Figuring out how much airflow your greenhouse needs doesn’t require a degree in engineering. The basic principle is simple: you want to exchange all the air in your greenhouse every minute or two during the hottest parts of the day.
Here’s a straightforward formula to get you started. First, calculate your greenhouse volume by multiplying length times width times average height (in feet). Then multiply that number by the air changes per minute you need. For most climates, aim for 1-1.5 air exchange rates per minute. If you’re in a particularly hot region like Arizona or southern Texas, bump that up to 2 air changes per minute.
For example, if you have a 10-foot by 12-foot greenhouse with an 8-foot average height, that’s 960 cubic feet. Multiply by 1.5 air changes per minute, and you need about 1,440 CFM (cubic feet per minute) of ventilation capacity.
I learned this the hard way when I first started growing tomatoes in my backyard greenhouse. I underestimated my needs by half, and my plants showed it during that first summer heat wave.
Your climate zone matters too. Humid regions need more air movement to combat moisture buildup, while dry climates might get by with slightly less. To make this easier, we’ve created a free calculator tool at Spheral Solar that factors in your specific location and greenhouse dimensions. You can also explore different CFM calculation methods to fine-tune your setup for optimal performance.
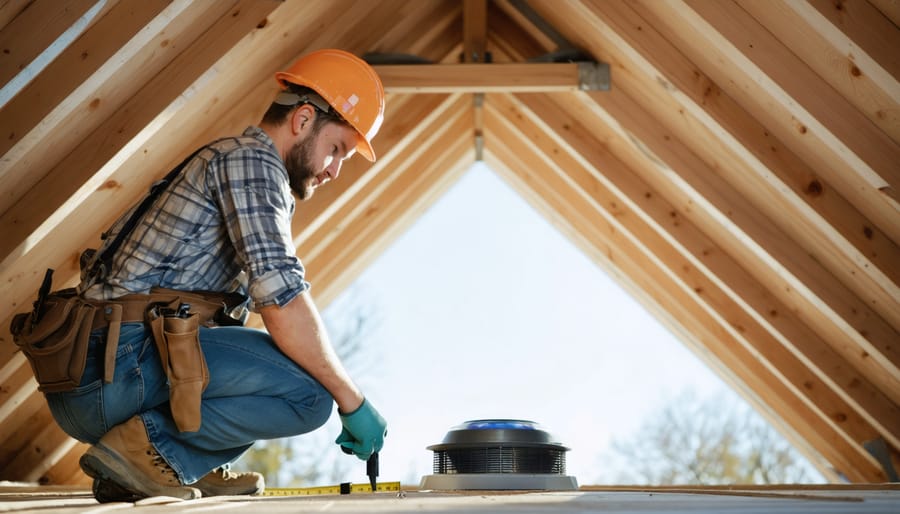
Measuring your greenhouse dimensions and understanding airflow requirements helps determine the appropriate fan size and CFM rating needed.
Key Features to Look For
When I first started shopping for a solar ventilation fan for my greenhouse, I quickly realized that not all units are created equal. Here’s what I’ve learned matters most when making your selection.
Start with the solar panel wattage and size. Most greenhouse fans use panels ranging from 5 to 20 watts. A 10-watt panel typically provides enough power for small to medium greenhouses (up to 150 square feet), while larger spaces benefit from 15-20 watt systems. The panel size affects not just power output but also how much roof or wall space you’ll need for installation.
Battery backup is a feature worth serious consideration. Without it, your fan only runs when the sun shines directly on the panel. Models with built-in rechargeable batteries continue operating during cloudy periods and into the evening when heat can still build up. I’ve found this particularly valuable during those muggy summer nights when my tomatoes need all the air circulation they can get.
Thermostat controls add convenience and efficiency. Instead of running constantly, thermostatic fans activate only when temperatures reach your set threshold, usually between 60-90 degrees Fahrenheit. This extends the lifespan of your fan and prevents unnecessary cooling on mild days.
Build quality separates the top-rated solar fans from budget disappointments. Look for corrosion-resistant materials like aluminum housings and stainless steel hardware, especially if you’re in a humid climate. UV-resistant solar panels maintain efficiency longer, and sealed motors resist moisture damage from greenhouse humidity.
Finally, check the CFM rating (cubic feet per minute). This tells you how much air the fan moves. Calculate your greenhouse volume and aim for complete air exchange every 1-2 minutes during peak heat.
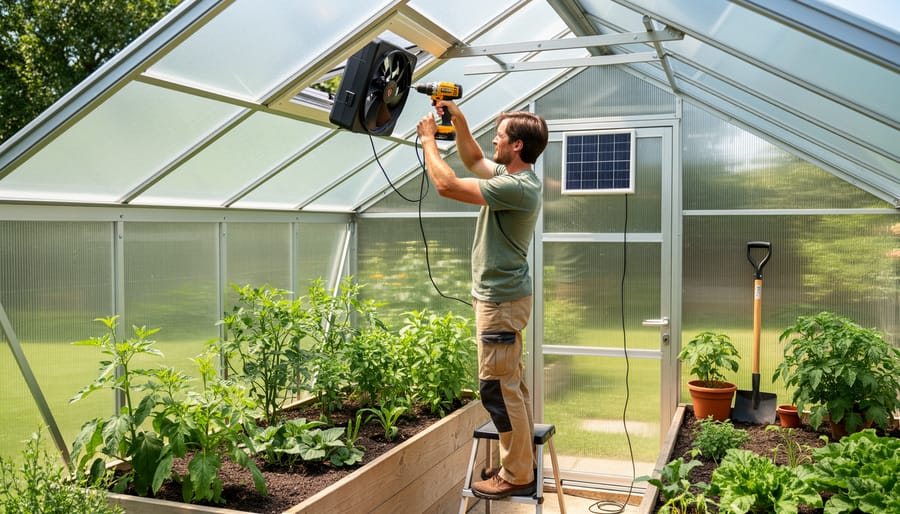
Installing a solar greenhouse fan is a straightforward DIY project that most greenhouse owners can complete in an afternoon with basic tools.
Installing Your Greenhouse Solar Ventilation Fan
Installing a solar ventilation fan in your greenhouse is one of those weekend projects that looks intimidating but turns out to be surprisingly straightforward. I remember when I tackled my first installation – I spent more time overthinking it than actually doing the work! Let me walk you through the process so you can skip the unnecessary worry and get straight to enjoying better airflow.
Before you start, gather your basic tools: a drill with appropriate bits, screws (usually included with your fan), a pencil for marking, and a measuring tape. You’ll also want safety glasses and maybe a helper to hold things steady while you secure everything in place.
The most critical decision you’ll make is where to position your fan. Think about airflow patterns in your greenhouse. Hot air naturally rises and collects at the highest points, so mounting your fan near the roof peak makes the most sense. I positioned mine on the south-facing wall about 18 inches from the roofline, which gave me maximum sun exposure for the solar panel while capturing that trapped hot air. Make sure there’s nothing blocking the solar panel – even partial shade from nearby trees or structures can reduce efficiency significantly.
Once you’ve chosen your spot, here’s how to proceed:
Mark your mounting holes by holding the fan’s base plate against the wall or roof panel where you want it installed, then trace or mark through the screw holes with your pencil.
Pre-drill pilot holes at your marks using a bit slightly smaller than your mounting screws to prevent the greenhouse material from cracking.
Apply weatherproof sealant around the fan’s mounting surface if your greenhouse is polycarbonate or glass to prevent moisture intrusion.
Secure the fan unit with the provided screws, working in a cross-pattern to ensure even pressure and a flush fit.
Connect the solar panel cable to the fan motor, following the color-coded wiring instructions that come with your specific model.
Mount the solar panel in its optimal position, either directly on the fan housing or separately if your kit includes an extension cable.
Test the installation by covering and uncovering the solar panel to ensure the fan activates properly in sunlight.
For proper air circulation, consider creating an intake vent on the opposite end of your greenhouse at a lower level. This creates a natural convection current that pulls fresh air in while exhausting hot air out the top.
The beauty of DIY solar fan installation is that there’s no electrical wiring to worry about – the solar panel powers everything directly. This means no permits, no electrician costs, and the flexibility to relocate your fan if you find a better position later.
During my installation, I learned that tightening screws gradually and checking alignment frequently prevents that frustrating moment when everything’s secure but slightly crooked. Take your time with the positioning phase, and the rest flows smoothly.
Common Challenges and How to Solve Them
Even the best solar ventilation fans can hit a snag now and then, but don’t worry—most issues have straightforward fixes that won’t require calling in an expert.
One challenge I encountered early on was the fan simply not spinning, even in direct sunlight. Before panicking, check the basics: is the solar panel clean? Dust, pollen, and water spots can block up to 25% of sunlight absorption. A quick wipe with a damp cloth usually does the trick. Also, verify that all connections are secure. Loose wiring is surprisingly common, especially after installation or during windy days when vibrations might loosen things up.
Another frequent issue is weak or intermittent airflow. This often happens when the fan isn’t getting enough sunlight throughout the day. I learned this the hard way when I mounted mine where afternoon shade from a nearby tree reduced performance. The solution? Reposition your solar panel to face south (in the Northern Hemisphere) with minimal obstructions, or consider adding a small battery backup to maintain consistent operation during cloudy periods.
Moisture buildup inside the fan housing can also cause problems. While most greenhouse solar fans are weather-resistant, they’re not always completely waterproof. If you notice condensation or corrosion, apply silicone sealant around joints and entry points. This simple weatherproofing step extends the fan’s lifespan significantly.
If your fan runs but doesn’t seem to cool your greenhouse effectively, you might have a sizing mismatch. Calculate your greenhouse’s cubic footage and ensure your fan’s CFM (cubic feet per minute) rating can exchange the air at least once every few minutes. Sometimes adding a second smaller fan creates better cross-ventilation than one larger unit alone.
Finally, strange noises usually indicate debris caught in the blades or worn bearings. Power down the unit, clear any obstructions, and apply a drop of lubricant to moving parts if needed. Remember, a little preventive maintenance goes a long way in keeping your solar fan running smoothly season after season.
Maximizing Performance: Tips from the Field
After years of tinkering in my own greenhouse, I’ve learned that getting the most from your solar ventilation fan isn’t just about installation—it’s about smart optimization. Let me share some field-tested strategies that have made a real difference for me and the community members I’ve worked with.
First, let’s talk seasonal adjustments. I discovered this the hard way during my first summer when my fan ran at full blast even on mild mornings, wasting precious solar energy. Now I adjust the fan’s angle twice a year. In summer, I tilt my solar panel slightly to capture those intense midday rays when cooling needs peak. Come winter, I angle it more steeply to catch the lower sun while reducing airflow when I actually want to retain some warmth. This simple repositioning trick has improved my efficiency by about 30 percent.
Tip: Position your fan near the greenhouse ridge on the opposite end from your intake vents to create a full cross-ventilation pathway, maximizing air movement throughout the entire space.
One creative solution I’ve adopted is pairing my solar fan with passive ventilation. I installed automatic roof vents that open based on temperature, working in tandem with the solar fan. The fan handles the consistent airflow, while the vents provide emergency heat release during unexpected hot spells. This redundancy has saved several crops when my solar panel got shaded by an overgrown tree.
For maintenance, keep it simple but consistent. Every six weeks, I wipe down the solar panel with a damp microfiber cloth—you’d be amazed how much dust accumulates. I also check the fan blades for debris and listen for unusual sounds that might indicate bearing wear. These quick checks take maybe ten minutes but extend the fan’s lifespan significantly.
Finally, consider adding a small backup battery if your budget allows. While not essential, it provides gentle evening airflow that helps prevent condensation buildup overnight, something that’s been a game-changer for my tomato plants.
Beyond the Greenhouse: Other Uses for Solar Ventilation
Here’s something I love about solar ventilation: once you’ve mastered the basics for your greenhouse, a whole world of applications opens up. The same principles that keep your tomatoes happy can work wonders in sheds, workshops, tiny homes, and RVs.
I learned this firsthand when a friend visited my greenhouse setup and immediately said, “Can you help me do this in my workshop?” He was tired of stepping into a stuffy, paint-fume-filled space every afternoon. We installed a similar solar fan system, and the difference was night and day. No extension cords, no electricity bills, just fresh air when the sun shines and temperatures rise.
Sheds benefit enormously from solar ventilation, especially if you store anything sensitive to heat or moisture. Workshop owners appreciate the automatic air circulation without adding to their power bill. The tiny home and RV communities have embraced these systems enthusiastically because they’re dealing with small spaces where heat builds up quickly, and every watt of power consumption matters when you’re off-grid or running on limited battery capacity.
The beauty is that the sizing calculations remain similar. You’re still working with cubic footage, desired air changes per hour, and matching fan capacity to your space. The mounting might differ slightly, and you might need to get creative with panel placement on a curved RV roof, but the core concept stays the same: free, automatic ventilation powered by the sun.
There you have it – everything you need to know about harnessing the sun’s energy to keep your greenhouse thriving. I’ve been running solar ventilation fans in my own greenhouses for years now, and honestly, I can’t imagine going back to the days of manually opening vents or worrying about electrical costs. The beauty of these systems is that they work hardest when you need them most – on those scorching sunny days when temperatures can quickly spiral out of control.
Whether you’re starting with a small hobby greenhouse or managing a larger growing operation, adding a solar ventilation fan is one of those projects that delivers immediate, tangible results. You’ll notice the difference in plant health, reduced disease pressure, and the peace of mind knowing your system runs independently of the grid.
Ready to take the next step? At Spheral Solar, we’ve got plenty of additional resources to help you expand your solar journey beyond the greenhouse. From whole-home ventilation solutions to other practical solar applications, there’s a world of possibilities waiting. I’d love to hear about your own greenhouse projects – share your experiences, questions, or success stories with our community. Together, we’re building a more sustainable, self-sufficient future, one solar panel at a time.
How useful was this post?
Click on a star to rate it!
Average rating 0 / 5. Vote count: 0
No votes so far! Be the first to rate this post.
We are sorry that this post was not useful for you!
Let us improve this post!
Tell us how we can improve this post?
charlesnoble
Here at Spheral Solar, I’m a hands-on solar power enthusiast, constantly exploring and experimenting with DIY solutions. I’m dedicated to sharing my discoveries, insights, and even the bumps I hit along the way, all in the pursuit of a more sustainable future.
Why Your Attic Needs Exactly This Much Ventilation… by Charlesnoble November 22, 2025 Calculate your attic’s square footage by multiplying length times width, then divide by 150 to determine the minimum net free ventilation area (NFVA) required in square inches. For example, a 30-foot by 40-foot attic (1,200 square feet) needs at least 8 square inches of ventilation. Split this requirement evenly between…
Why Your Attic Solar System is Dripping Wet (And How… by Charlesnoble April 18, 2026 Look up at your attic ceiling on a cold morning and spot water droplets collecting near your solar equipment. That moisture isn’t coming from a roof leak—it’s condensation, and if you’ve recently installed solar components in your attic space, you’re not alone in dealing with this frustrating issue. Condensation forms…
Solar Ventilation Just Saved My Attic (And Cut My… by Charlesnoble November 3, 2025 **Assess your home’s air quality by standing in your living space right now—if you notice stale odors, condensation on windows, or that stuffy feeling when you walk in the door, your home is telling you it needs better ventilation.** Most homes built in the last 30 years are sealed tight…
Best Way to Keep Attic Cool – 7 Energy Efficient Ways by Adeyomola June 1, 2021 Fixing the leaks and opening the skylights might help make your attic cool, but harnessing the sun’s power – transforming it from problem to solution – could be the answer to keeping your attic cool. But how can you keep your attic cool using the sun? Well, you can improve…
Solar-Powered Ventilation That Slashes Your Energy… by Charlesnoble March 11, 2026 Calculate your home’s air exchange rate by dividing your square footage by 60—most homes need complete air replacement every 1-3 hours to prevent moisture buildup, stale air, and indoor pollutants that trigger allergies and respiratory issues. A 1,500 square foot home requires roughly 25-50 cubic feet per minute of continuous…
Why Your Attic Needs a Solar Roof Vent (Before Summer Hits) by Charlesnoble February 21, 2026 Your attic is probably hotter than you think. On a summer day, temperatures up there can soar past 150°F, turning your top floor into an oven and forcing your air conditioner to work overtime. A solar ventilation fan for your roof tackles this problem head-on by pulling hot air out…
Subscribe for handpicked DIY projects, exclusive tips, and giveaways.
A 5kW solar system occupies between 250 and 350 square feet of roof or ground space and produces roughly 20 to 25 kilowatt-hours of electricity per day in most U.S. locations. That’s enough to power a typical three-bedroom home with moderate energy use, though your exact needs depend on your daily consumption patterns, climate zone,… Read more: How to Size a 5kW Solar System for Your Home or RV
Installing a home solar system yourself takes 2-4 weekends for an average 5kW setup, requires solid electrical knowledge and comfort working at heights, and can save you $5,000-$8,000 in labor costs if you tackle everything except the final utility interconnection. The process breaks down into five main phases: permitting and design, mounting the racking system,… Read more: Solar Power Installation Step by Step: Complete DIY Guide From Start to Finish
After testing dozens of solar chargers across camping trips, power outages, and backyard experiments, we found the X-Dragon 20W delivers the most reliable charging performance for phones and tablets, while the Goal Zero Nomad 50W steps up when you need to power larger devices or handle extended emergencies. If you’re planning weekend hikes, assembling an… Read more: 7 Best Solar Powered USB Chargers of 2026, Tested and Reviewed