Why Your Solar Path Lights Keep Failing (And Which Lanterns Actually Last)
Updated:
Look beyond the advertised lumens and focus on actual light distribution patterns when comparing lantern solar path lights—a 10-lumen fixture with a well-designed diffuser will outperform a 20-lumen light with poor optics every single time. I learned this the hard way after installing my first set of bargain solar lights that promised brightness but created harsh spotlights instead of the warm, welcoming glow I expected along my garden path.
The quality of the solar panel matters more than its size. A 2×2 inch monocrystalline panel will charge faster and perform better in partial shade than a 3×3 inch polycrystalline panel, especially during shorter winter days when your lights need every photon they can capture. Check the panel angle too—adjustable panels let you optimize for your specific latitude and seasonal sun position.
Battery capacity determines whether your lights last through the night or fade by midnight. Look for replaceable 18650 lithium-ion batteries with at least 2000mAh capacity rather than sealed AA NiMH batteries. This single specification explains why some lights cost three times more than others, and why they actually deliver on their runtime promises.
Lantern-style fixtures create ambient lighting rather than task lighting, making them ideal for marking pathways without light pollution. The traditional design diffuses light through glass or acrylic panels in multiple directions, creating a welcoming atmosphere while providing enough illumination for safe navigation. Understanding these fundamental differences between marketing claims and real-world performance will save you from the disappointment of dimly lit paths and premature replacements.
What Makes Solar Lantern Path Lights Different from Regular Solar Stakes
When I first switched from traditional solar stake lights to lantern-style path lights, I honestly didn’t expect much of a difference beyond aesthetics. But after a few months of use, the distinctions became pretty obvious, and I wish I’d made the switch sooner.
The most noticeable difference is how lantern solar path lights distribute light. Regular stake lights typically have a single LED pointing downward or in one direction, creating a small pool of illumination directly beneath them. Lantern designs, on the other hand, feature a housing that diffuses light in multiple directions, often 360 degrees. This means you get broader, more even coverage with fewer fixtures. In my garden, I found I could use three lantern lights where I previously needed five traditional stakes to achieve similar visibility.
Durability is another area where lanterns pull ahead. The enclosed design protects the solar panel and LED components better than exposed stake lights. Most lantern models position the solar panel on top with a protective cover, while the LED sits inside a weather-resistant housing. Traditional stakes often leave these components more vulnerable to rain, dirt, and physical damage. I’ve had cheap stake lights fail after one rainy season, but quality lantern lights have lasted me several years with minimal maintenance.
From an aesthetic standpoint, lantern solar path lights add visual interest even during daylight hours. They become decorative elements in your landscape rather than just functional fixtures that disappear during the day. The varied designs, from traditional coach-style lanterns to modern cylindrical shapes, let you match your outdoor decor in ways that basic stakes simply can’t.
The trade-off is usually size and cost. Lantern lights take up more visual space and typically cost more upfront than simple stakes. However, considering their durability, better light distribution, and dual function as daytime decoration, they often provide better long-term value. For pathways where you want both safety and ambiance, the lantern style consistently outperforms traditional options in my experience.
Lantern-style solar path lights provide both functional illumination and decorative appeal along garden walkways.
The Core Features That Separate Quality from Junk
Solar Panel Quality and Positioning
When I first started testing solar path lights around my yard, I quickly learned that not all solar panels are created equal. The type of solar panel in your lantern makes a real difference in how well it charges, especially during those shorter winter days or in partially shaded areas.
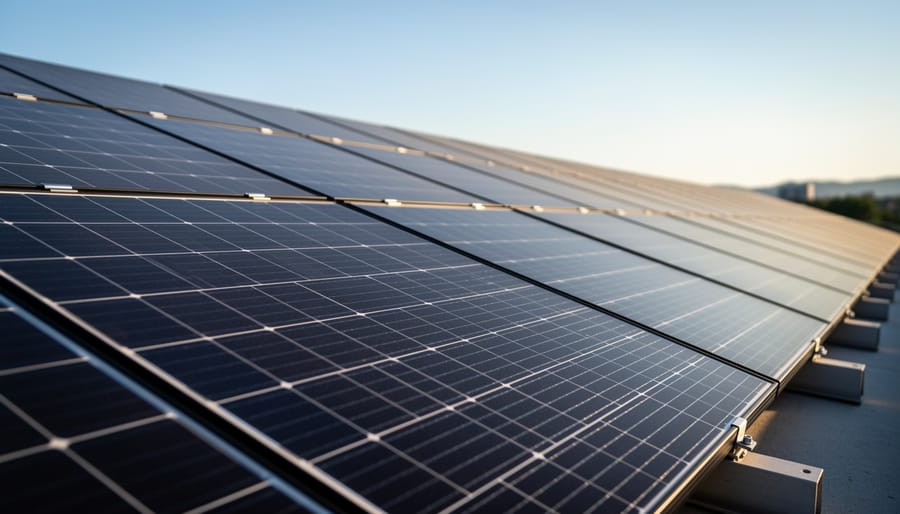
Most lantern solar path lights use one of two panel types: monocrystalline or polycrystalline. Monocrystalline panels are the dark, uniform-looking ones, and they’re the efficiency champions. They convert sunlight to electricity more effectively, which means your lights charge faster and work better in less-than-perfect conditions. Polycrystalline panels have that bluish, fragmented appearance and are typically less expensive, but they need more direct sunlight to perform well.
Here’s what I recommend: look for panels with at least 15-17% efficiency rating for dependable performance. Anything below that, and you might find your lights dimming early in the evening or not turning on at all during cloudy stretches.
Panel placement matters more than most people realize. Panels mounted on top of the lantern capture the most direct sunlight throughout the day, while side-mounted panels can miss out on peak charging hours. I’ve seen gorgeous decorative lanterns with tiny, poorly positioned panels that simply don’t collect enough energy to last through the night.
Before buying, check where the panel sits and whether nearby structures or trees might cast shadows during prime charging hours (typically 10 AM to 2 PM). A beautifully designed lantern won’t help much if its solar panel spends the day in the shade.
High-quality monocrystalline solar panels are essential for reliable charging and long-term performance.
Battery Capacity and Replacement Options
Here’s something I learned the hard way during my first solar lighting project: cheap batteries turn your beautiful pathway lights into frustrating disappointments within months. The battery is truly the heart of your solar lantern, and understanding what’s inside makes all the difference.
Most solar path lights use either NiMH vs Li-ion batteries. NiMH (Nickel-Metal Hydride) batteries are the budget-friendly workhorses you’ll find in most entry-level lights. They’re reliable and affordable, but they lose capacity faster in cold weather and gradually wear down over time. Li-ion batteries cost more upfront but deliver consistent performance across wider temperature ranges and typically last longer between charges.
When comparing battery capacity ratings, you’ll see numbers like 600mAh, 1200mAh, or even 2000mAh. Think of this as your fuel tank size. A 600mAh battery might give you 4-6 hours of decent illumination, while a 1200mAh could stretch to 8-10 hours, assuming full charging and reasonable LED efficiency.
Here’s the game-changer though: replaceable batteries. I cannot stress this enough. Lights with sealed, non-replaceable batteries become expensive trash after 1-2 years. Look for models with accessible battery compartments. Yes, you’ll eventually spend fifteen dollars replacing batteries, but that beats tossing sixty-dollar lanterns in the landfill. Check product specifications carefully, because some manufacturers deliberately make battery replacement difficult or impossible. Your future self will thank you for choosing wisely today.
LED Brightness and Color Temperature
When I first started shopping for solar path lights, I made the classic rookie mistake of assuming “brighter is always better.” After installing 100-lumen lights along my garden walkway, I learned the hard way that my evening strolls felt more like a security perimeter inspection than a peaceful garden experience. Let me help you avoid that same misstep.
Understanding lumens is simpler than you might think. Lumens measure the total amount of visible light output. For path lighting, you’re typically looking at a range between 5 and 100 lumens per fixture. Here’s what actually works in real-world scenarios: 5-15 lumens creates soft ambient lighting perfect for marking a path without overwhelming your landscape’s natural nighttime beauty. These work wonderfully for decorative purposes or garden areas where you want subtle guidance. The 15-30 lumen range offers that sweet spot for most residential pathways, providing enough light to see where you’re stepping without feeling like you’re on a runway. If you need functional lighting for areas requiring better visibility or safety concerns, 50-100 lumens makes sense, though you’ll sacrifice some ambiance.
Color temperature matters more than most people realize. Measured in Kelvin, warm white (2700-3000K) produces that cozy, inviting amber glow similar to traditional incandescent bulbs. Cool white (5000-6500K) appears brighter and more energizing, with a bluish tone. For path lighting, I’ve found warm white wins nearly every time because it complements landscape features and creates welcoming outdoor spaces. Cool white can feel clinical and harsh for residential settings, though it does offer slightly better visibility in foggy conditions.
Weather Resistance That Actually Holds Up
When I first started testing solar path lights, I’d see “IP65” stamped on the box and think it sounded impressive. But after watching several supposedly waterproof lights fail during their first rainstorm, I learned that understanding these ratings really matters.
IP ratings have two numbers. The first tells you protection against solid particles like dust, while the second indicates water resistance. For lantern solar path lights, you want at least IP44 (protected against objects over 1mm and splashing water). However, I recommend IP65 or higher, which means dust-tight and protected against water jets from any direction. Anything less, and you’re gambling with your investment.
Here’s what I’ve learned from real-world testing: an IP rating only tells part of the story. The materials matter just as much. I once had IP65-rated lights where water couldn’t get in, but the plastic housing became brittle and cracked after six months of sun exposure. That’s why I now look for UV-stabilized polycarbonate or tempered glass housings rather than cheap ABS plastic.
Metal components present their own challenges. Aluminum holds up beautifully, but I’ve seen steel fixtures rust through their powder coating within a year. Check if metal parts have proper corrosion-resistant treatment, especially if you live in humid or coastal areas.
The solar panel cover deserves attention too. Quality lights use impact-resistant polycarbonate that maintains transparency even after years of UV exposure. I’ve tested panels that yellowed within months, reducing charging efficiency by thirty percent or more. That yellowing isn’t just cosmetic—it directly impacts how well your lights perform over time.
Smart Features Worth Paying For (And Gimmicks to Ignore)
When I first started exploring solar path lights, I got swept up in all the fancy features—color-changing modes, smartphone apps, the works. After using dozens of models over the years, I’ve learned which features actually make your life easier and which just drain your battery faster.
Let’s start with the genuine winners. Auto on/off sensors based on ambient light are absolutely essential. This isn’t a fancy extra—it’s basic functionality that saves you from manually controlling your lights every evening. Quality sensors activate at true dusk and shut off at dawn, conserving battery life. Look for lights with adjustable sensitivity settings, especially if you’re placing them near streetlights or porch lights that might confuse cheaper sensors.
Motion detection features fall into the “depends on your needs” category. For pathway lighting near entry points or driveways, motion sensors make excellent sense—they save energy by brightening only when needed and provide security benefits. However, for purely decorative garden paths, constant illumination often works better. The key is ensuring motion sensors can be disabled if you prefer steady lighting.
Battery level indicators are surprisingly useful, especially for troubleshooting. Simple LED indicators showing charge status help you identify failing batteries or inadequate sun exposure before complete failure. This saved me countless hours of guesswork when lights started dimming prematurely.
Now for the gimmicks. Color-changing RGB modes sound appealing but typically deliver disappointing results. The shifting colors often appear washed out, and the feature significantly reduces battery life. Unless you’re specifically creating a party atmosphere, stick with warm white or cool white options—they’re brighter, last longer, and look better.
Remote controls and smartphone apps rarely justify their added cost for path lights. The convenience factor seems great until you’re fumbling for your phone or a tiny remote in the dark. Manual switches work fine for the occasional adjustment.
Weather alert systems and built-in Bluetooth speakers? Pure marketing fluff. These drain batteries quickly and add failure points. Your path lights should focus on one job: reliable illumination.
The bottom line? Prioritize quality light sensors, reliable construction, and simple operation over flashy features that compromise core performance.
Solar lantern path lights come in various materials and styles, each offering different durability and aesthetic benefits.
Comparing the Most Common Solar Lantern Path Light Styles
Hanging Lantern Style vs Ground-Mounted
When I first experimented with solar path lights, I quickly discovered that choosing between hanging lantern styles and ground-mounted versions really depends on what you’re trying to achieve in your outdoor space.
Ground-mounted lantern solar lights are your traditional stake-in-the-ground option. They’re incredibly easy to install – literally just push them into soft soil and you’re done in seconds. No tools required! These work beautifully along walkways, garden borders, and driveways. The light spreads downward and outward, creating those gentle pools of illumination that guide your steps. I’ve found they’re perfect for marking paths without overwhelming your landscape with brightness.
Hanging lantern styles, on the other hand, require a bit more planning. You’ll need shepherd’s hooks, wall brackets, or existing structures like pergolas and porch overhangs. The installation takes longer, but the payoff is impressive. Suspended lanterns cast light in a wider, more ambient pattern that creates a welcoming atmosphere. They’re my go-to choice for entertaining areas, patios, and entryways where you want functional light with decorative appeal.
Here’s my practical advice: use ground-mounted versions for actual path lighting where you need consistent spacing and direction. Reserve hanging styles for accent areas where you want to create mood and visual interest. Many homeowners, myself included, mix both styles throughout their yard for the best overall effect.
Glass vs Plastic vs Metal Construction
Each material brings distinct advantages and compromises to your solar path lights. Let me share what I’ve learned through years of testing different lanterns in my own garden and helping neighbors choose theirs.
Glass offers the most authentic lantern look with superior light transmission. I’ve noticed glass panels cast the warmest, most traditional glow that really captures that old-world charm. However, they’re heavier and more fragile. In my zone 6 garden, glass has held up beautifully, but my cousin in coastal Florida deals with occasional hurricane damage. If you have children playing nearby or live in hail-prone areas, consider the breakage risk carefully.
Plastic construction, particularly high-grade polycarbonate, surprises many people with its resilience. Modern UV-stabilized plastics resist yellowing far better than older versions. They’re lightweight, shatter-resistant, and handle temperature swings impressively well. The trade-off? They rarely achieve the same visual depth as glass, and cheaper versions can look noticeably artificial in daylight.
Metal construction typically refers to the frame rather than light panels, but powder-coated aluminum or stainless steel frames significantly impact longevity. I’ve replaced corroded fixtures in humid climates, while properly treated metal has lasted over a decade in drier regions. Metal adds weight and stability, preventing those frustrating tip-overs during storms.
Your climate matters enormously here. Extreme temperature fluctuations favor plastic, while stable climates let glass shine aesthetically.
Integrated vs Separate Solar Panels
When you’re shopping for lantern solar path lights, you’ll notice two main designs: those with integrated solar panels built right into the top of the lantern, and those with separate panels connected by a cable. Each has its advantages, and understanding the difference can really impact your satisfaction with your purchase.
Integrated panels are the simpler option. Everything’s contained in one unit, which makes installation a breeze and gives a cleaner look. I learned this firsthand when I installed my first set along a shaded walkway. The problem? Those integrated panels need direct sunlight where the lantern sits. If your path runs under tree cover or along a north-facing wall, you might end up with dim lights that barely last through the evening.
Separate panels on cables give you flexibility. You can position the lantern in the perfect decorative spot while running the panel cable to a sunny location up to several feet away. This typically means better charging efficiency since you’re not compromising on sunlight exposure. The trade-off is a slightly more complex installation and a visible cable you’ll need to secure properly.
For most homeowners, separate panels offer the best long-term performance, especially if your landscape has mixed sun and shade conditions. However, if your path enjoys full sun throughout the day, integrated panels work just fine and keep things simple.
What to Expect: Real-World Performance and Limitations
Let me be honest with you: solar lantern path lights aren’t magic. They’re incredible little devices, but understanding their real-world limitations will save you from disappointment and help you use them more effectively.
I’ve been running solar path lights on my property for three years now, and I’ve learned that winter is the ultimate reality check. During summer months, my lights typically run 8-10 hours without breaking a sweat. Come December, though, that drops to maybe 4-6 hours on a good day. The shorter daylight hours combined with the sun’s lower angle means your panels simply can’t gather as much energy. I actually move some of my portable lantern lights to sunnier spots during winter months to maximize their charging potential.
Shade is your biggest enemy. I placed three beautiful lanterns along a walkway near my maple tree, thinking they’d get “enough” sun. Wrong. Even dappled shade cut their performance by about 60 percent. After relocating them to a fully exposed area, they transformed into reliable performers. If you’re determined to light a shaded path, you’ll need lights with separate solar panels that you can position in sunny spots while keeping the lanterns where you need the illumination.
Weather affects performance more than you’d think. A single cloudy week in spring had my lights running at maybe 70 percent capacity. Heavy snow covering the panels obviously stops charging completely until you clear them off. I’ve made it a habit to brush snow off mine during winter, which takes maybe five minutes but makes a real difference.
Here’s something interesting I discovered: temperature affects battery performance. My lights actually charge better on cool, sunny days than brutally hot ones. The panels work more efficiently in moderate temperatures, though the batteries don’t hold charges quite as well in extreme cold.
The takeaway? Place your lights strategically where they’ll get maximum sun exposure, adjust your expectations seasonally, and you’ll enjoy reliable performance most of the year.
Getting the Most Life Out of Your Solar Lantern Lights
I learned this lesson the hard way during my first winter with solar lanterns—proper care makes all the difference between lights that last a season and ones that shine for years. Let me share what I’ve picked up through trial and error so you can avoid my mistakes.
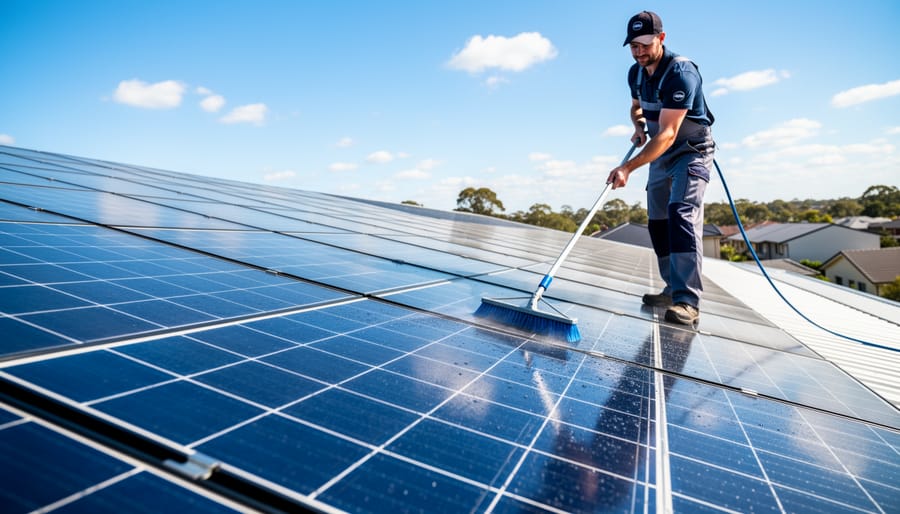
The single most important maintenance task is keeping those solar panels clean. Dust, pollen, and grime can reduce charging efficiency by up to 30%. I make it a habit to wipe down my panels every two weeks with a soft cloth and mild soapy water. For detailed techniques, check out our guide on cleaning solar panels. Trust me, this five-minute task makes a world of difference in performance.
Battery replacement typically becomes necessary every 1-2 years, depending on your climate and usage. When you notice lights dimming significantly or not lasting through the night, it’s time for fresh batteries. Most lanterns use standard rechargeable NiMH batteries that cost just a few dollars. I mark my calendar each spring to check battery health—it’s easier than waiting until they fail.
Winterization is crucial if you live in cold climates. I bring my lanterns inside during harsh winter months, storing them in a spot where they can still charge occasionally through a window. This prevents battery damage from freezing temperatures and extends their overall lifespan considerably.
When problems arise, don’t panic. Most issues have simple fixes, from adjusting panel angles to checking for corrosion on battery contacts. Our comprehensive resource on troubleshooting common issues walks you through solutions step-by-step. With these practices, you’ll maximize your investment and enjoy reliable lighting for years to come.
Regular cleaning of solar panels ensures optimal charging performance and extends the life of your investment.
Here’s the truth I’ve learned after years of testing solar path lights in my own backyard: quality solar lantern path lights absolutely exist, but finding them means cutting through marketing hype and focusing on what actually matters. You now have the knowledge to make that informed choice.
Remember, the three non-negotiables are replaceable batteries, adequate solar panel size (at least 2×2 inches for reliable performance), and genuine weather resistance with proper IP ratings. I’ve watched too many beautiful lanterns with impressive lumens fail within months because they skimped on these fundamentals. Meanwhile, my simpler units with user-accessible battery compartments are still going strong after three winters.
Don’t get distracted by fancy features like color-changing modes or smartphone connectivity unless you’ve verified the basics first. A lantern that looks amazing but dies after six months is just expensive yard waste. Start with durability, then add features if your budget allows.
I’d love to hear about your own experiences with solar lantern path lights. What’s worked in your yard? What mistakes have you made so the rest of us can avoid them? Head over to the Spheral Solar community forums and share your story. Your real-world insights help everyone make better choices.
And if you’re hungry for more solar lighting knowledge, explore our related resources on maximizing solar panel efficiency and extending battery life in outdoor applications. Happy lighting, and here’s to pathways that actually stay lit!
How useful was this post?
Click on a star to rate it!
Average rating 0 / 5. Vote count: 0
No votes so far! Be the first to rate this post.
We are sorry that this post was not useful for you!
Let us improve this post!
Tell us how we can improve this post?
charlesnoble
Here at Spheral Solar, I’m a hands-on solar power enthusiast, constantly exploring and experimenting with DIY solutions. I’m dedicated to sharing my discoveries, insights, and even the bumps I hit along the way, all in the pursuit of a more sustainable future.
10 Best Solar Lanterns in 2023 by Nick August 23, 2021 The primary function of solar lanterns is to provide light for outdoor adventures, camping trips, or decorative lighting in any outdoor space. The best solar lantern will have ways to supply power if there is no sunlight and come with additional perks convenient for camping or emergencies. Solar lanterns work…
10 Best Outdoor Solar Lights in 2023 by Adeyomola August 30, 2021 You will get the best experience with outdoor solar lights when you opt for lights with good solar panels and long lighting times. But besides that, ensure your choice can charge quickly and offers sufficient brightness. Such a selection will give you a complete experience. Best Solar Lights for Outdoors…
8 Best Indoor Solar Lights in 2023 by Adeyomola June 30, 2021 Manufacturers compete on the range of brightness and panel quality of their indoor solar lights, but lighting times ultimately distinguish the best from the rest. The best indoor solar lights have the longest lighting times. But more than having long lighting times, top-quality indoor solar lights are revered for their…
Why Your Solar Lights Glow Yellow (And How to Fix Them) by Charlesnoble December 30, 2025 Notice your once-bright solar lights glowing yellow or dim? This frustrating problem typically signals one of three culprits: aging batteries that can’t hold a full charge, dirty solar panels blocking sunlight absorption, or LEDs nearing the end of their lifespan. I’ve dealt with this issue countless times in my own…
8 Best Solar Gutter Lights in 2023 by Adeyomola May 18, 2021 People often complain that their solar gutter lights are fragile, not bright enough, and do not stay on through the night. So, in putting this article together, we scrutinized various products for high luminous flux (brightness), weather-resistant materials, high solar panel capacity, and high battery capacity. Best Solar Gutter Lights…
8 Best Solar Flood Lights in 2023 by Nick April 27, 2021 Searching for the best solar flood lights among thousands of other floodlights was no child’s play. We scrutinized several brands ranging from quality dusk to dawn light to reliable motion sensor lights. We also looked for vital features that make a great solar light—excellent IP rating, battery capacity and type,…
Subscribe for handpicked DIY projects, exclusive tips, and giveaways.
Walk down to your nearest stream with a five-gallon bucket and a stopwatch. Fill that bucket and time how long it takes—this simple test reveals whether you have enough flowing water to power your off-grid home. If you can fill it in under 10 seconds from a source that drops at least 10 feet in… Read more: The Stream Behind Your House Could Power It (Here’s How Micro Hydro Works)
Brush snow off your panels with a soft-bristled roof rake from ground level, working gently from bottom to top to avoid scratching the glass or damaging your DIY solar setup. Use lukewarm water in a spray bottle for stubborn ice patches, never hot water that could crack cold panels from thermal shock. Install panels at… Read more: Snow on Your Solar Panels? Here’s What Actually Works (And What Wastes Your Time)
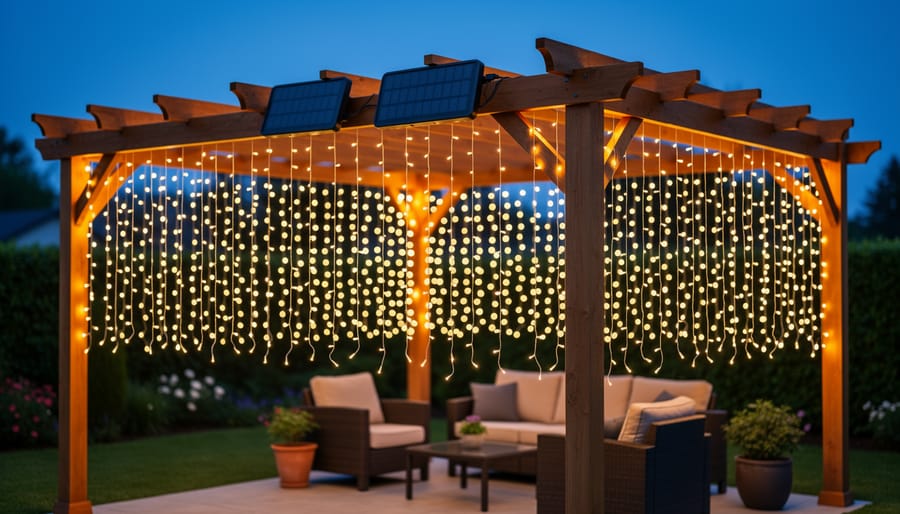
Picture this: Last summer, I draped what looked like sparkling fairy lights across my patio pergola, and guests immediately asked where I’d hidden the extension cord. There wasn’t one. These solar powered outdoor curtain lights had transformed my backyard into an enchanting evening retreat without adding a cent to my electric bill or requiring any… Read more: Solar Curtain Lights That Actually Work Outdoors (What I Learned Installing Mine)


")


")