Build a Solar-Powered Drip System That Waters Your Garden Day and Night
Updated:

Transform your garden into a self-sustaining oasis with solar-powered drip irrigation systems that combine clean energy with precision watering. This innovative solution slashes water consumption by up to 70% while delivering optimal moisture directly to plant roots, eliminating the hassle of manual watering and reducing your environmental footprint. By harnessing the sun’s energy to power efficient micro-drippers, these systems operate autonomously during peak daylight hours when plants need water most, ensuring consistent growth even during scorching summer months.
Modern solar drip systems have evolved beyond simple timer-based operation, now incorporating smart sensors that monitor soil moisture, weather patterns, and plant needs in real-time. This intelligence, coupled with the reliability of solar power, creates a maintenance-free growing environment that produces higher yields with minimal input. Whether you’re maintaining a small herb garden or managing a larger agricultural plot, these systems scale effortlessly to meet your specific requirements while maintaining optimal water efficiency and plant health.
For environmentally conscious gardeners and DIY enthusiasts, this marriage of renewable energy and precision irrigation represents the future of sustainable gardening. The initial setup requires basic technical knowledge, but the long-term benefits – including reduced water bills, healthier plants, and zero operating costs – make it an invaluable investment for any serious grower.
How Solar Drip Irrigation Actually Works
The Solar Power Hub
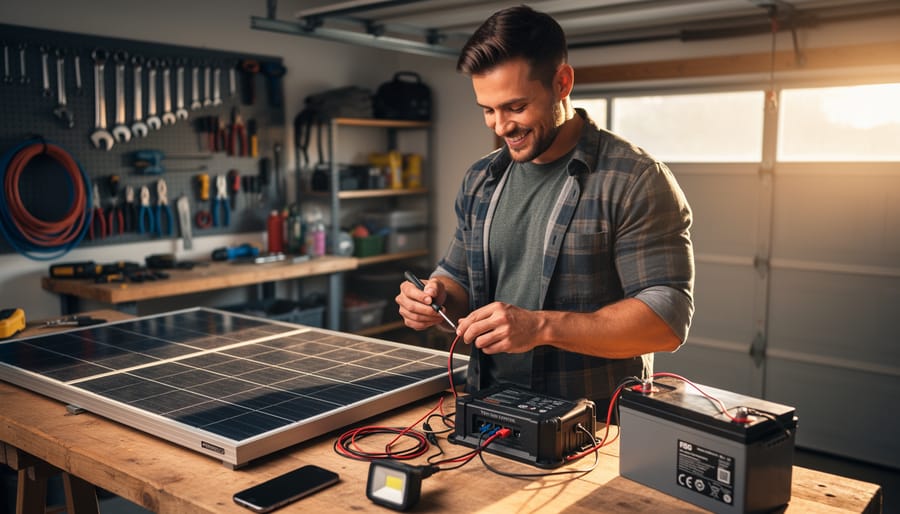
The heart of any solar-powered drip irrigation system lies in its power generation and management components. As someone who’s helped countless gardeners set up these systems, I can tell you that getting this part right is crucial for long-term success. Let’s break down the essential components of what I like to call the “power hub.”
At the forefront are your solar panels, which convert sunlight into electricity. For most home garden systems, a 100-watt panel is usually sufficient, though you might need more depending on your pump’s requirements. I remember when I first started, I underestimated my power needs – don’t make the same mistake! Always add about 20% more capacity than you think you’ll need.
The charge controller is your system’s traffic cop. This device regulates the power flow from your panels to the battery, preventing overcharging and extending battery life. Modern solar irrigation controllers often include built-in charge management features, but having a dedicated controller offers better protection and control.
For energy storage, deep-cycle batteries are your best friend. These batteries are designed to handle repeated charging and discharging cycles, unlike car batteries. I recommend a 12-volt deep-cycle battery with at least 100 amp-hours capacity for most systems. This setup ensures your irrigation system keeps running even during cloudy days or nighttime operation.
Remember to mount your solar panels where they’ll receive maximum sunlight exposure, typically facing south in the Northern Hemisphere. Tilt them at an angle roughly equal to your latitude for optimal performance. Keep the battery in a ventilated, weather-protected enclosure, and ensure all connections are properly sealed against moisture.

The Water Distribution System
The heart of any drip irrigation system lies in its water distribution components. At the core, solar water pumps for irrigation work to move water from your source to your plants. I’ve found that submersible pumps work best for most home setups, as they’re quieter and more efficient than surface pumps.
Water quality is crucial for system longevity, which is why I always recommend installing both primary and secondary filters. The primary filter catches larger debris, while the secondary filter removes smaller particles that could clog your drip emitters. Trust me, spending a bit more on good filters will save you countless hours of maintenance headaches down the road.
From the pump, water flows through your mainline – typically 1/2 inch or 3/4 inch PVC pipe. Think of this as your system’s highway, distributing water to various zones in your garden. Branching off from the mainline are smaller supply tubes, usually 1/4 inch in diameter, that connect directly to your drip emitters.
Speaking of emitters, these tiny devices are where the magic happens. They come in various flow rates, typically from 0.5 to 4 gallons per hour. For most vegetables and flowers, I’ve found that 1 GPH emitters work perfectly. You can choose between pressure-compensating emitters, which provide consistent flow regardless of pressure variations, or standard emitters that are more budget-friendly but slightly less precise.
Remember to include a pressure regulator to protect your emitters and ensure even water distribution throughout your system. I learned this lesson the hard way when high pressure once burst several of my emitters!

Designing Your System
Calculating Water Needs
Calculating the right amount of water for your garden is crucial for the success of your solar-powered drip irrigation system. As someone who learned this the hard way when I first started, I can tell you that both overwatering and underwatering can spell disaster for your plants.
Start by identifying your plants’ specific water needs. Most vegetables need about 1-1.5 inches of water per week, while established perennials might need less. Factor in your local climate, soil type, and seasonal changes. Sandy soils drain faster and require more frequent watering, while clay soils retain moisture longer.
To calculate daily water requirements, use this simple formula:
Water needed (gallons) = Garden area (sq ft) × 0.623 × Water depth (inches)
For example, a 100 sq ft vegetable garden needing 1.5 inches of water per week would require:
100 × 0.623 × 1.5 = 93.45 gallons per week, or about 13.35 gallons daily
Remember to adjust these calculations based on:
– Rainfall amounts
– Temperature and humidity
– Plant growth stage
– Mulching (reduces water needs by 25-50%)
– Soil moisture levels
I recommend using a moisture meter for the first few weeks to fine-tune your calculations and ensure your system delivers the right amount of water to keep your plants thriving.
Sizing Solar Components
Selecting the right components for your solar-powered drip irrigation system doesn’t have to be complicated. I’ve found that many gardeners get overwhelmed by the math, but let me break it down into simple steps that anyone can follow.
First, calculate your daily water requirements. Count your drippers and multiply by their flow rate (typically 1-2 gallons per hour) and running time. For example, if you have 20 drippers running for 2 hours daily at 1 gallon per hour, that’s 40 gallons per day.
Next, determine your pump’s power consumption. Most small irrigation pumps use between 24-40 watts. To be safe, I always recommend performing detailed solar panel sizing calculations based on your specific pump model and local sun hours.
For battery sizing, consider how many days of backup power you need. A good rule of thumb is to multiply your daily power consumption by 1.5 to account for cloudy days. Using our previous example with a 30-watt pump running 2 hours daily:
– Daily consumption: 30W × 2 hours = 60 watt-hours
– Recommended battery capacity: 60Wh × 1.5 = 90Wh
I typically recommend a 100W solar panel and a 12V battery with at least 20Ah capacity for most small to medium garden setups. This provides enough power while allowing for future expansion.

DIY Installation Steps
Setting Up the Solar Array
Now comes the exciting part – setting up your solar array! First, choose a sunny location for your panels where they’ll receive maximum sunlight throughout the day. I usually recommend mounting them at a 30-45 degree angle facing south (in the Northern Hemisphere) to optimize sun exposure.
Secure your mounting brackets to a sturdy surface, whether it’s your roof, a pole mount, or a ground-based structure. Make sure the mounting system is weatherproof and can withstand local wind conditions. When I installed my first system, I used adjustable brackets that let me fine-tune the angle seasonally.
Connect your solar panels in series or parallel depending on your charge controller’s specifications. Run the wiring through weatherproof conduit to protect it from the elements. Connect the positive and negative leads to your charge controller, which then connects to your battery bank.
Double-check all connections and use appropriate gauge wiring to prevent voltage drop. Install a disconnect switch between the panels and charge controller for safety during maintenance. Remember to ground your system properly – this is crucial for protecting your equipment from lightning strikes and electrical surges.
Installing the Irrigation Network
Start by mapping out your irrigation network on paper, marking the main water source and areas that need coverage. Once you have your plan, begin with the mainline installation. Connect your chosen solar pump options to a sturdy PVC pipe that will serve as your mainline, ensuring all connections are watertight with appropriate fittings and pipe cement.
From the mainline, branch out smaller distribution lines using 1/2-inch polyethylene tubing. Space these lines according to your garden’s layout, typically 2-3 feet apart for vegetables and ornamental plants. Secure the tubing with ground stakes every 4-6 feet to prevent movement.
Next, punch holes in your distribution lines and insert the drip emitters. I recommend starting with 1-gallon-per-hour emitters, spaced about 12 inches apart for most plants. For water-hungry plants, you might want to add an extra emitter. Remember to install flush valves at the end of each line for periodic system cleaning.
Finally, add filters at key junction points to prevent clogging, and pressure regulators to ensure consistent water flow throughout your network. This setup will help maintain optimal water pressure and distribution across your garden.
Maintenance and Troubleshooting
Regular maintenance is key to keeping your solar-powered drip irrigation system running smoothly. I’ve found that a monthly check of all components can prevent most common issues before they become serious problems.
Start by inspecting your solar panels – clean them with a soft cloth and water to remove dust and debris that can reduce efficiency. Check all connections for signs of corrosion or loose wires, and ensure your battery terminals are clean and tight.
The most frequent issues I encounter include clogged drippers, which you can usually fix by removing and cleaning them with vinegar solution. If your system isn’t delivering water consistently, check the filter – it often needs cleaning every 2-3 months depending on your water quality.
Here’s a simple maintenance schedule I recommend:
Weekly:
– Walk the garden to check for leaks or blocked emitters
– Monitor system pressure and water flow
Monthly:
– Clean solar panels
– Check battery voltage
– Flush main lines to remove sediment
– Inspect all electrical connections
Seasonally:
– Replace or clean filters
– Check and calibrate sensors
– Test backup battery system
– Adjust watering schedule
If your system stops working altogether, first check the battery charge level – low voltage is often the culprit. For pressure issues, inspect the pump and clean the intake filter. Remember to winterize your system in cold climates by draining all lines and protecting components from freezing.

Building your own solar-powered drip irrigation system is a rewarding project that benefits both your garden and the environment. By following the steps outlined in this guide, you can create an efficient, sustainable watering solution that saves time, conserves water, and reduces your carbon footprint. Remember to start small, test your system thoroughly, and make adjustments as needed. The initial investment in solar components and irrigation equipment will pay off through reduced water bills and healthier plants. Whether you’re a seasoned gardener or just starting, this project offers a perfect blend of eco-friendly technology and practical gardening solutions. Don’t be afraid to experiment and customize your setup to match your garden’s unique needs. Join our growing community of solar enthusiasts, and share your experiences as you embark on this green energy journey. Your garden—and the planet—will thank you!


