Your Hampton Bay Solar Light Stopped Working? Here’s Why (And How to Fix It Tonight)
Updated:
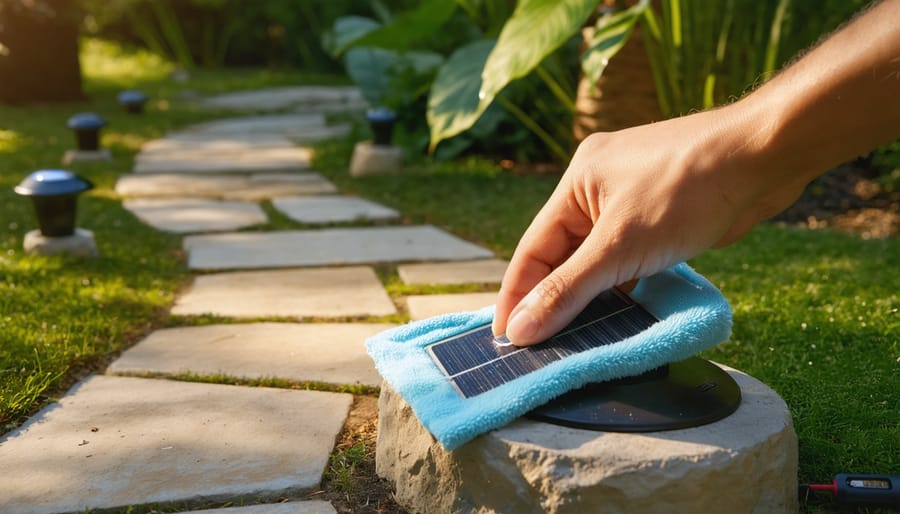
**Check the solar panel surface first** – dirt, leaves, or a thin film of grime blocks sunlight absorption and prevents charging. I learned this the hard way when my own Hampton Bay pathway lights died after just two weeks; a simple wipe with a damp cloth brought them back to life instantly.
**Verify the battery connections and condition** by unscrewing the light fixture and examining the rechargeable batteries. Corrosion on the terminals or swollen batteries are common culprits that stop the charging cycle. Most Hampton Bay models use standard AA or AAA rechargeable batteries that cost just a few dollars to replace.
**Test if the light sensor is triggering properly** by covering the solar panel completely with your hand in a bright room. If the light turns on, your sensor works fine but the panel isn’t getting enough sunlight during the day. If nothing happens, the sensor itself may need cleaning or the internal wiring could be loose.
**Reset the on/off switch and check for water damage** – many people don’t realize Hampton Bay lights have a tiny switch near the battery compartment that can get bumped to “off” accidentally. While you’re in there, look for moisture or condensation inside the housing, which shorts out the circuitry and requires thorough drying plus a weatherproof seal check.
These troubleshooting steps solve 90% of Hampton Bay solar light failures without requiring any special tools or electrical expertise.
Why Hampton Bay Solar Lights Stop Working (The Most Common Culprits)
Hampton Bay solar lights are pretty straightforward devices, but like any outdoor tech, they have their weak spots. Before we dive into fixes, let me share what I’ve learned from troubleshooting dozens of these lights in my own yard and for friends.
At their core, these lights operate on a simple principle: a solar panel charges a rechargeable battery during the day, then at dusk, a light sensor triggers the LED to illuminate using that stored energy. Sounds simple, right? Well, that’s actually good news—it means fewer things can go wrong compared to complex electrical systems.
The catch? Each component in this chain needs to work perfectly for your lights to shine. From my experience, Hampton Bay lights typically fail at five key points: the solar panel gets too dirty to charge effectively, the rechargeable battery degrades (usually after 1-2 years), the light sensor gets confused by nearby light sources, moisture sneaks into the housing and corrodes connections, or—less commonly—the LED itself burns out.
These issues mirror common solar light problems across most brands, but Hampton Bay models have a few specific quirks I’ve noticed. Their battery compartments, for instance, sometimes lack robust sealing, making them more susceptible to moisture damage in humid climates.
The good news? Most of these problems have DIY-friendly solutions that’ll save you from buying replacements. Let’s walk through each culprit systematically so you can identify exactly what’s plaguing your lights.
Quick Diagnosis: Finding Your Specific Problem in 5 Minutes
The Visual Inspection Test
Before diving into technical fixes, let’s start with what your eyes can tell you. I remember when my neighbor’s Hampton Bay lights suddenly failed—turns out a thick layer of pollen was the culprit!
Grab your light and examine it carefully in good daylight. Check the solar panel first—is it covered in dirt, leaves, or that mysterious outdoor grime? Even a thin film can drastically reduce charging efficiency. Look for cracks in the plastic housing or lens, which might let moisture inside (the silent killer of electronics).
Inspect all visible screws and connections—are they tight and secure? Gently shake the light. If you hear rattling, something’s loose inside. Finally, peer into the battery compartment if accessible. Signs of white or green corrosion, or any moisture droplets, mean water’s found its way in.
This quick visual check takes just minutes but often reveals the exact problem without any tools needed.
The Light Sensor Test
Solar lights rely on a photocell sensor to know when it’s dark enough to turn on. If your Hampton Bay light stays off at night or won’t turn on during the day, the sensor might be confused. Here’s a simple test I learned after my neighbor’s lights started acting strangely.
First, make sure the light is fully charged by placing it in direct sunlight for a full day. Once charged, completely cover the solar panel with your hand or a dark cloth—this simulates nighttime conditions. Within a few seconds, the light should turn on. If it does, your sensor is working properly, and the issue likely lies elsewhere (like the battery).
If nothing happens, try cleaning the panel surface with a damp cloth, as dirt can interfere with the sensor. Still no response? The sensor itself may be faulty and need replacement. This quick test saves you from unnecessarily replacing parts and helps pinpoint the real problem fast.
The Battery Test
Your battery might be dead even if everything else looks fine. Here’s how to check without fancy tools: First, remove the battery and look for any visible corrosion or bulging—these are clear signs it needs replacing. Next, try the “swap test” I learned after my third solar light failure: if you have multiple Hampton Bay lights, swap batteries between a working and non-working unit. If the previously dead light now works, you’ve found your culprit!
Another simple check is to leave the light in direct sunlight for two full sunny days with a fresh battery installed. If it still won’t illuminate at night, the battery isn’t the issue. Most Hampton Bay solar lights use standard AA or AAA rechargeable batteries (usually NiMH), which typically last 1-2 years before needing replacement. Keep in mind that extreme temperatures accelerate battery degradation, so seasonal testing helps catch problems early.
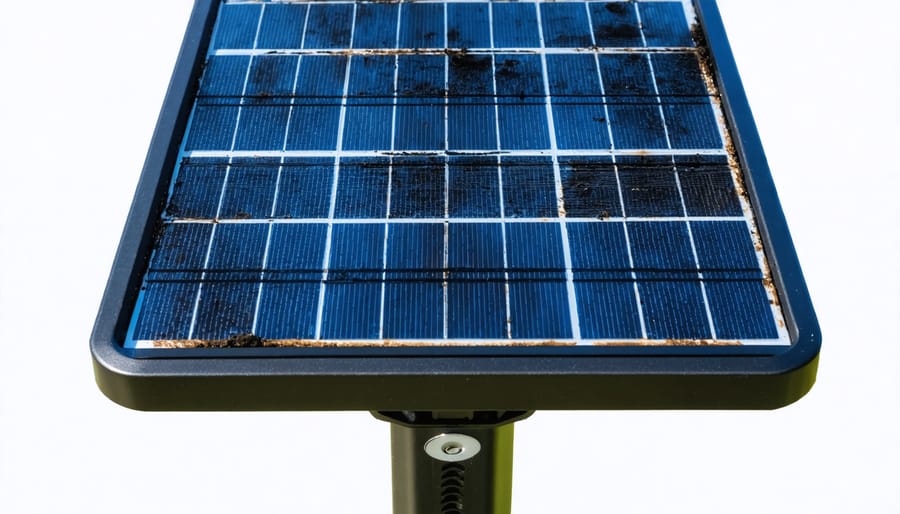
A dirty solar panel is the most common reason Hampton Bay solar lights fail to charge properly during the day.
Fix #1: Dirty Solar Panel (The 2-Minute Solution)
I’ll never forget when Charles called me, frustrated that his Hampton Bay pathway lights had stopped working after just six months. “I thought solar was supposed to be maintenance-free!” he said. When I visited his yard, the problem was instantly clear—a thick layer of pollen, dust, and grime covered every panel. After a quick wipe-down, those lights shone bright as new that very evening.
Here’s the thing: dirt is solar energy’s worst enemy. Even a thin film of dust can block up to 40% of sunlight from reaching your panel’s photovoltaic cells. Without adequate sunlight, your battery can’t charge, and your lights won’t work—it’s that simple.
The fix takes just two minutes per light. Grab a soft, damp microfiber cloth (avoid paper towels, which can scratch) and gently wipe the solar panel surface in circular motions. For stubborn grime, mix a drop of mild dish soap with warm water. Never use harsh chemicals or abrasive cleaners—they’ll damage the protective coating. For a complete guide on maintaining your lights, check out these proper cleaning techniques.
**Prevention tip**: Clean your panels monthly during pollen season and quarterly otherwise. If you live in a dusty area or near construction, increase frequency to biweekly. Charles now sets a phone reminder and says his lights have worked flawlessly for three years straight.
Fix #2: Dead or Worn-Out Battery Replacement
How to Know Your Battery is Dead
A dead battery shows specific symptoms that differ from other solar light problems. If your Hampton Bay light doesn’t illuminate *at all* after a full sunny day, the battery is likely the culprit. I learned this the hard way when my pathway lights stayed dark despite spotless panels—turned out those batteries had been working overtime for three years!
Here’s a quick test: Charge the light in direct sunlight for 8-10 hours, then cover the solar panel completely at dusk. If nothing happens, you’re probably looking at battery failure. However, if the light flickers weakly or only glows for 30 minutes before dying, that’s also a telltale sign of battery degradation.
Compare this to dirty panels (where lights gradually dim over weeks) or faulty sensors (where lights behave erratically, sometimes working, sometimes not). Battery issues are consistent—they simply won’t hold a charge anymore, typically after 1-3 years of use.
Finding the Right Replacement Battery
Finding the right battery makes all the difference in getting your Hampton Bay lights working again. Most Hampton Bay solar lights use rechargeable NiMH (Nickel-Metal Hydride) batteries, typically AA or AAA size, rated at 1.2 volts. I learned this the hard way when I grabbed regular alkaline batteries from my drawer—they simply don’t work with solar charging systems!
You’ll find replacement batteries at home improvement stores like Home Depot or Lowe’s, online retailers, and even solar specialty shops. Look for batteries specifically labeled for solar lights—they’re designed to handle repeated charging cycles.
For compatible alternatives, brands like EBL, Tenergy, and AmazonBasics work great with Hampton Bay fixtures. Just match the size (AA or AAA) and stick with NiMH chemistry. Pro tip: buy batteries with at least 600mAh capacity for better performance and longer runtime between charges. While you might pay slightly more upfront, quality batteries last significantly longer than budget options.
Replacing the rechargeable battery is often the solution when cleaning the solar panel doesn’t restore functionality.
Replacing the Battery (Step-by-Step)
Replacing the battery is easier than you might think! I remember my first time doing this—I was nervous about breaking something, but the process is surprisingly straightforward.
Start by locating the small screws on the bottom or back of your light housing. You’ll typically need a Phillips-head screwdriver. Remove these screws and gently twist or pull apart the housing sections. Some models have clips that snap together, so apply gentle, even pressure if you encounter resistance.
Once opened, you’ll see the battery connected to two wires. Note which wire connects to which terminal—snapping a quick photo helps! Disconnect the old battery by carefully pulling the wire connectors apart (they usually slide off).
Insert your new rechargeable battery, matching the wire connections exactly as before. Most Hampton Bay models use AA or AAA NiMH batteries rated at 1.2V. Double-check that connections are secure and no wires are pinched.
Reassemble the housing, ensuring the rubber seal sits properly to maintain weather resistance. Tighten screws firmly but don’t overtighten—you could crack the plastic.
Fix #3: Faulty Light Sensor or Switch Issues
Sometimes your Hampton Bay solar light has plenty of power, but it just won’t turn on when it’s supposed to. I learned this the hard way when my pathway lights stayed dark all night despite fully charged batteries. The culprit? A dirty light sensor that couldn’t tell day from night.
**Diagnosing Sensor Problems**
The light sensor (usually a small dome or circular component on top of your fixture) tells your light when to turn on and off. To test if yours is working, cover it completely with your hand during daylight. If the light doesn’t turn on within a few seconds, you’ve found your problem.
**Cleaning Sensor Contacts**
Dirt, moisture, and corrosion are sensor enemies. Gently wipe the sensor surface with a soft, dry cloth—sometimes that’s all it takes! For stubborn grime, use a cotton swab dipped in rubbing alcohol. If you notice green or white crusty buildup on the sensor’s electrical contacts inside the housing, carefully clean them with a pencil eraser or fine sandpaper. This simple fix has saved me from replacing lights more times than I can count.
**Switch Issues**
Some Hampton Bay models have an on/off switch that can fail or get stuck. Toggle it several times to break through any corrosion. If your light has a manual override switch, try bypassing it temporarily by connecting the wires directly (remember to disconnect the battery first for safety).
**When to Replace**
If cleaning doesn’t help and the sensor looks cracked or water-damaged, replacement is your best bet. Fortunately, universal solar light sensors are inexpensive (usually $5-15) and straightforward to install—just match the wire connections.
Fix #4: Water Damage and Weatherproofing Problems
Water damage is one of the sneakiest culprits behind solar light failure, and I learned this the hard way when three of my Hampton Bay pathway lights suddenly stopped working after a heavy rainstorm. When I opened them up, I found condensation droplets coating the inside of the solar panel—not a good sign!
**Spotting the Signs of Moisture Infiltration**
First, examine your light closely. Look for foggy or cloudy areas inside the clear housing, visible water droplets, or corrosion (that greenish or white crusty stuff) around electrical connections. If you see any of these, moisture has found its way inside.
**Drying Out Your Light Safely**
Once you’ve identified water damage, carefully disassemble the light following your manufacturer’s instructions. Remove the batteries immediately—wet batteries can corrode rapidly. Use a soft, lint-free cloth to gently wipe all internal components. For stubborn moisture, place the disassembled parts in a warm, dry location for 24-48 hours. I like to use a bowl of uncooked rice to speed up the drying process, just like with wet phones!
**Resealing Your Light Housing**
After everything’s bone-dry, inspect the rubber gaskets or O-rings around the housing. These deteriorate over time, creating gaps where water sneaks in. If they look cracked or brittle, you can find replacements at most hardware stores for a few dollars. For minor seal issues, try resealing with nail polish—it works surprisingly well as a waterproof barrier around seams.
**Prevention Tips**
Apply a thin layer of dielectric grease on electrical connections before reassembly. This creates a moisture barrier that’s saved countless lights in my garden. Also, consider adding a small silica gel packet inside the housing for ongoing moisture absorption.
Fix #5: LED Bulb or Wiring Connection Failures
Sometimes the issue isn’t with your solar panel or battery—it’s the LED bulb itself or the connections that deliver power to it. I learned this the hard way when I spent an hour troubleshooting a light only to discover a wire had simply wiggled loose from vibration during a windstorm!
**Testing Your LED**
First, let’s see if your LED is actually the problem. With a fully charged battery installed, cover the solar panel completely with your hand (this tricks the sensor into thinking it’s nighttime). If the light doesn’t turn on, try gently pressing on the LED bulb or wiggling the wires connected to it. If you get a flicker, you’ve found your culprit—a loose connection.
**Checking Wire Connections**
Open your light’s housing and inspect where wires connect to the LED. Look for corrosion (that greenish buildup), frayed wires, or connections that look loose. Sometimes simply unplugging and reconnecting these can restore contact. For corroded connections, a quick cleaning with a cotton swab dipped in white vinegar works wonders.
**Re-soldering Basics**
If you’re comfortable with a soldering iron (don’t worry if you’re not!), re-soldering loose connections is straightforward. Heat the existing joint until the old solder melts, remove it with a desoldering pump, then apply fresh solder. Just remember: quick, clean contact—holding the iron too long can damage the LED.
**When to Replace**
If your LED won’t light even with good connections and a charged battery, it’s replacement time. Most Hampton Bay replacement LEDs cost under $10 and simply plug in—no soldering required!
When Your Hampton Bay Light Needs Sunlight Relocation
I learned this lesson the hard way when I placed three beautiful Hampton Bay solar lights under my porch overhang. They worked for maybe two days before dying completely – and I felt like such a rookie! Here’s the thing: solar lights need direct sunlight for at least 6-8 hours daily to charge properly.
Think of your solar panel like a plant – it craves that sunshine. I now use a simple observation method: check your light’s location at 10 AM, noon, 2 PM, and 4 PM on a sunny day. If there’s shade during any of these peak hours, you’ve found your culprit.
Common shade creators include tree branches, roof overhangs, fences, and even other outdoor structures. Seasonal changes matter too – that spot with perfect summer sun might be shaded come fall when the sun sits lower.
**Quick relocation tips:**
– Move lights away from overhangs by at least 3 feet
– Trim back branches creating shade
– Avoid north-facing locations (in the Northern Hemisphere)
– South or west-facing spots typically receive maximum sun exposure
Sometimes the fix is literally just moving your light two feet to the left. Test the new location for a few days before permanently installing.
Preventing Future Problems: Maintenance Tips from Someone Who’s Been There
After dealing with my fair share of solar light hiccups, I’ve developed a simple maintenance routine that keeps my Hampton Bay lights shining bright year after year. Trust me, spending just 15 minutes each season beats troubleshooting problems later!
My monthly checklist is straightforward: I wipe down the solar panels with a damp microfiber cloth (dirty panels can reduce charging by up to 50%), check for any debris in the light fixtures, and make sure nothing’s blocking the sensors. Every three months, I inspect the batteries for corrosion and give all connections a gentle cleaning with a cotton swab.
Here’s something I learned the hard way – seasonal care matters. In spring, I do a deep clean after winter grime buildup. Summer means checking that plants haven’t grown around the lights, casting unwanted shadows. Fall is when I test all batteries and replace any showing weakness before winter hits.
Speaking of winter, if you’re in a cold climate like I am, bring your lights indoors when temperatures consistently drop below freezing. Remove the batteries first and store them separately in a cool, dry place. This simple step has doubled my lights’ lifespan.
For extending battery lifespan, I’ve found that letting batteries fully discharge once every few months actually helps them maintain capacity. Also, replacing batteries proactively every 1-2 years prevents most performance issues before they start.
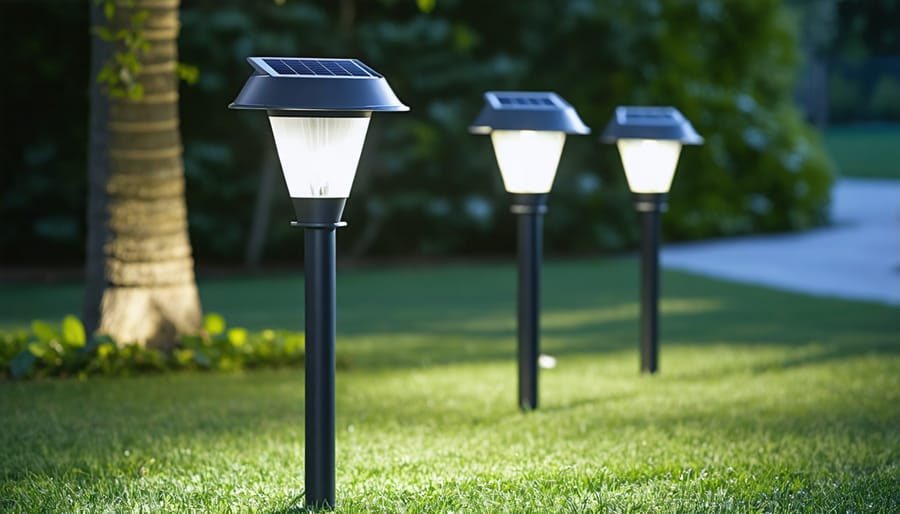
Properly functioning Hampton Bay solar lights provide reliable illumination when maintained and positioned correctly.
You’ve now got a complete toolkit for bringing those Hampton Bay solar lights back to life! I remember the satisfaction I felt fixing my first set—it cost me nothing but twenty minutes and a simple battery swap. Most solar light issues really do come down to those straightforward fixes we covered: dirty panels, worn-out batteries, or water damage.
Start with the simple stuff first. Give those panels a good cleaning, check if the on/off switch is actually on (we’ve all been there!), and test the batteries. Nine times out of ten, you’ll solve the problem without breaking out any tools.
Here’s something I’ve learned after years of tinkering: sometimes replacement makes more financial sense than repair. If your lights are several years old and you’re facing multiple component failures, comparing the cost of parts to a new set might surprise you. But for single issues? Absolutely worth the DIY approach.
I’d love to hear about your solar light repair experiences! What worked for you? Did you discover any tricks we didn’t cover? Drop your stories in the comments—your insights might help the next person troubleshooting in their backyard.
How useful was this post?
Click on a star to rate it!
Average rating 0 / 5. Vote count: 0
No votes so far! Be the first to rate this post.
We are sorry that this post was not useful for you!
Let us improve this post!
Tell us how we can improve this post?
charlesnoble
Here at Spheral Solar, I’m a hands-on solar power enthusiast, constantly exploring and experimenting with DIY solutions. I’m dedicated to sharing my discoveries, insights, and even the bumps I hit along the way, all in the pursuit of a more sustainable future.
Why Your Solar Lights Stop Working (And How to Fix… by Charlesnoble December 1, 2025 Check the solar panel first by wiping away dirt, leaves, and debris that block sunlight absorption. A grimy panel is the number one reason solar lights stop working, and a simple cleaning with soapy water restores function in about 60% of cases. While you’re at it, reposition any lights that…
Your Solar Light Won’t Turn On? Here’s Why (And How… by Charlesnoble November 10, 2025 Check your solar panel first—nine times out of ten, dirt, leaves, or shade are blocking the sunlight your fixture needs to charge. I learned this the hard way when my entire pathway lighting system “died” last fall, only to discover a thin film of pollen had cut charging efficiency by…
Why Your Solar Lights Glow Yellow (And How to Fix Them) by Charlesnoble December 30, 2025 Notice your once-bright solar lights glowing yellow or dim? This frustrating problem typically signals one of three culprits: aging batteries that can’t hold a full charge, dirty solar panels blocking sunlight absorption, or LEDs nearing the end of their lifespan. I’ve dealt with this issue countless times in my own…
Turn Any Chandelier Into a Solar-Powered Showpiece… by Charlesnoble February 17, 2026 Gather mason jars, solar garden lights, and a wire basket to create an elegant outdoor chandelier that requires zero electrical wiring and costs under $50. Pop the solar panels off inexpensive garden stakes, fit them into jar lids you’ve drilled holes through, and suspend everything from a chandelier frame you’ll…
Why Your Solar Path Lights Keep Failing (And Which… by Charlesnoble January 11, 2026 Look beyond the advertised lumens and focus on actual light distribution patterns when comparing lantern solar path lights—a 10-lumen fixture with a well-designed diffuser will outperform a 20-lumen light with poor optics every single time. I learned this the hard way after installing my first set of bargain solar lights…
10 Best Rechargeable Batteries for Solar Lights by Nick April 23, 2021 While lithium-ion batteries have long been touted as the future of the solar battery world, some close rivals are giving them a run for their money. This blog post gives you a closer look at the best rechargeable batteries for solar lights currently available for solar light applications. We’ve covered…
Subscribe for handpicked DIY projects, exclusive tips, and giveaways.
Calculate your home’s air exchange rate by dividing your square footage by 60—most homes need complete air replacement every 1-3 hours to prevent moisture buildup, stale air, and indoor pollutants that trigger allergies and respiratory issues. A 1,500 square foot home requires roughly 25-50 cubic feet per minute of continuous ventilation. Install solar-powered attic fans… Read more: Solar-Powered Ventilation That Slashes Your Energy Bill While Keeping Your Home Fresh
Connect your parallel batteries to a single charge controller rather than using multiple controllers—this prevents voltage mismatches that cause one battery to overcharge while another sits partially drained. I learned this the hard way when my first dual-battery setup left one battery constantly undercharged because each controller operated independently, creating competing charging profiles. Install a… Read more: Why Your Parallel Battery Setup Isn’t Charging Evenly (And How to Fix It)
Set your three-way valve to point toward the roof when you want solar heating, typically between 10 AM and 4 PM on sunny days when your panels can effectively warm the water. Point it toward the bypass position during cloudy weather, at night, or when your pool has reached the desired temperature and you’re just… Read more: Why Your Pool Solar Heater Valve Position Changes Everything (And How to Get It Right)
")
")
")
")
")

")
")
")
")
")


