Solar Power Installation Step by Step: Complete DIY Guide From Start to Finish
Updated:
Installing a home solar system yourself takes 2-4 weekends for an average 5kW setup, requires solid electrical knowledge and comfort working at heights, and can save you $5,000-$8,000 in labor costs if you tackle everything except the final utility interconnection. The process breaks down into five main phases: permitting and design, mounting the racking system, installing the panels, wiring the electrical components, and connecting to your home’s power system.
I’m Charles, and I’ve guided hundreds of DIYers through their first solar installations. The most common question I get is whether this is really something a homeowner can handle. Here’s my honest take: if you’ve successfully rewired a subpanel, installed a ceiling fan without second-guessing yourself, and don’t mind spending a day on your roof, you can absolutely do this. But if the phrase “conduit bending” makes you nervous or you’re unclear about the difference between AC and DC wiring, you’re better off hiring a licensed electrician for at least the electrical portions.
The truth about DIY solar is that it’s more accessible than ever in 2026. Equipment has become more standardized, online permitting has streamlined the bureaucracy in most areas, and the tools you need are probably already in your garage. What hasn’t changed is that this is serious electrical work involving your home’s power system and your roof’s structural integrity. Done right, you’ll generate clean power for decades. Done carelessly, you risk fire, roof leaks, or a system that fails inspection and sits useless until you pay someone to fix it.
This guide walks you through every step with the same advice I’d give my neighbor leaning over the fence asking how hard it really is. We’ll cover what you need, what can go wrong, and exactly how to avoid the mistakes I see most often.
Key Takeaway: DIY solar installation success comes down to four essentials: prioritizing safety above timeline, planning thoroughly before touching your roof, knowing when to call licensed help (especially for electrical connections), and following local codes to pass inspection the first time.
What You’ll Need: Tools, Materials, and Preparation
Before you climb onto your roof with a drill in hand, you need to gather your equipment and complete some essential groundwork. A proper installation starts with thorough preparation, and trust me, nothing derails a project faster than realizing halfway through that you’re missing a critical tool or forgot to file for permits.
When I installed my first system back in 2019, I thought I could make do with the basic tools already in my garage. I was wrong. Halfway through mounting the rails, I realized my cordless drill didn’t have enough torque for lag bolts, and I spent an hour driving to the hardware store while my panels sat exposed on the roof. Learn from my mistakes: invest in the right tools upfront, and your installation will go smoothly.
Here’s what you actually need before you start:
Power tools: impact driver or heavy-duty drill with torque settings, angle grinder for cutting rails, wire strippers rated for 10-6 AWG
Hand tools: socket wrench set, adjustable wrenches, tape measure (25 ft minimum), level (4 ft), chalk line, stud finder
Safety equipment: fall arrest harness with anchor points, hard hat, electrical-rated gloves, safety glasses, non-slip work boots
Solar components: photovoltaic panels, inverter (string or micro), mounting rails and hardware, flashing kits, grounding equipment
Electrical materials: MC4 connectors, appropriately-rated wire (USE-2 for outdoor runs), conduit, junction boxes, DC and AC disconnect switches, dedicated breaker
Permits and plans: approved building permit, engineered stamping if required, site plan showing panel layout, electrical diagram
The permit process varies dramatically by location, but it’s not optional. Most jurisdictions require both building and electrical permits for solar installations. Check your local building department early because approval can take two to six weeks. Many cities now offer streamlined solar permit application guidance that walks you through requirements step by step.
Your site assessment comes next. Walk your roof and identify any repairs needed before installation. A solar system lasts 25-plus years, so your roof should too. Mark where rafters are located using a stud finder (you’ll mount rails directly to these), and verify you have clear access to your electrical panel. Take photos of your roof from multiple angles; you’ll reference these during layout planning.
Finally, confirm delivery timing for your components. Panels are bulky and you don’t want them sitting in your garage for weeks, but you also can’t start mounting until they arrive. Coordinate delivery for a few days before your planned installation weekend, giving you time to inspect everything without rushing.
Critical Safety Warnings and When to Stop
Before you touch a single solar panel, let’s establish the boundaries that keep you safe and legal. Solar installation involves working at heights while handling equipment capable of delivering lethal voltage, which means respecting your limits isn’t being cautious, it’s being smart.
Warning: Solar panels generate electricity whenever light hits them and cannot be turned off. Working on an energized roof while exposed to electrical hazards and fall risks demands absolute adherence to safety protocols.
The most critical safety equipment isn’t optional. You need a proper fall arrest system rated for rooftop work, not a hardware store rope. Wear a hard hat, electrical-rated gloves when working near connections, and non-slip boots with good ankle support. Work with a partner, always. One person stays on the ground to call for help if needed, hand up tools, and provide a second set of eyes. I learned this the hard way during my first installation when a dropped wrench nearly hit my dog, who’d wandered into the work area because no one was watching the ground.
Weather determines whether you work that day, period. Postpone if wind exceeds 20 mph, rain is forecast within four hours, or temperatures drop below freezing. Wet roofs and cold fingers cause accidents. Morning dew counts as wet. If you’re rushing to beat weather, you’ve already made a dangerous decision.
Know your absolute stop points. Call a licensed electrician for anything involving your main breaker panel, the connection between your inverter and home electrical system, or grid interconnection work. Most jurisdictions legally require licensed professionals for these connections, and your homeowner’s insurance may be void if you do them yourself. If your roof shows any sagging, soft spots, or structural concerns, stop and get an engineer’s assessment before adding panel weight. If you encounter wiring that doesn’t match your system diagram, don’t improvise. If you feel rushed, uncertain, or pressured to skip a safety step, stop completely.
DIY means managing a project smartly, not doing literally everything yourself. Hiring professionals for the dangerous 10% of the work while handling the other 90% still saves you thousands of dollars and keeps you alive to enjoy those savings.
Step-by-Step Solar Installation Process
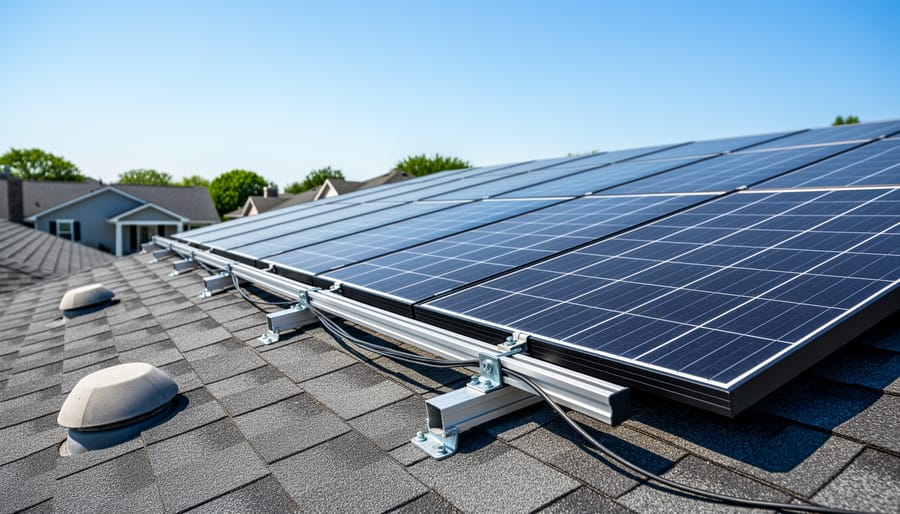
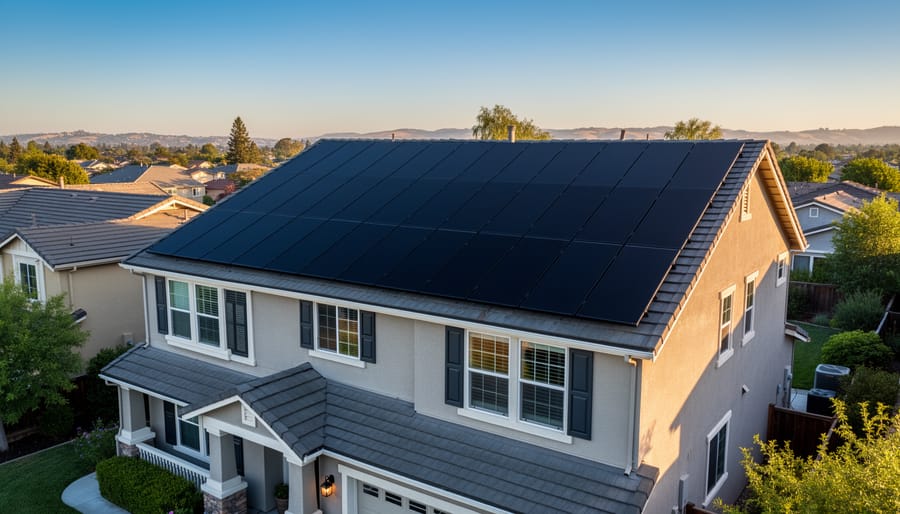
A clear view of a residential solar array highlights the mounting rails, panel spacing, and real-world rooftop context.
Step 1: Prepare Your Roof and Install Mounting Hardware
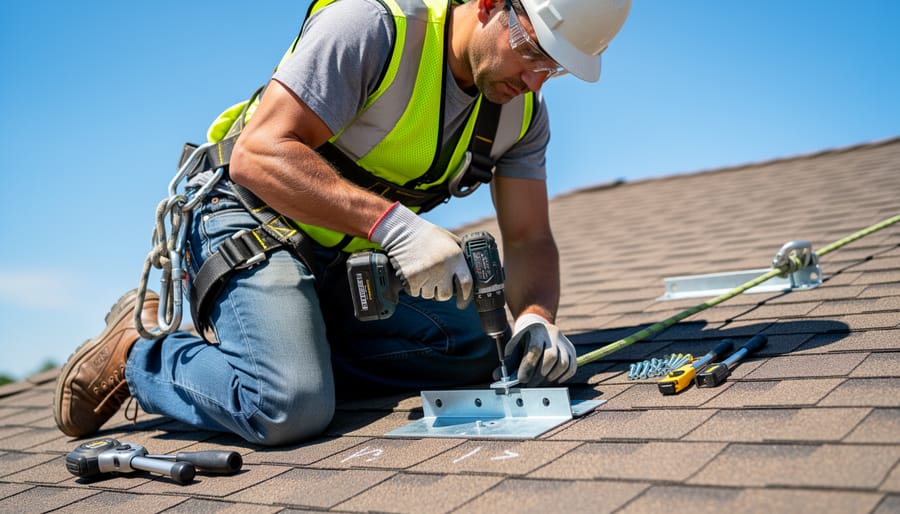
This shows the kind of careful, safety-focused hands-on work involved in attaching mounting hardware on a roof.
Your roof preparation determines whether your system lasts three years or thirty. Start by locating your rafters using a stud finder or by measuring from known reference points, rafters typically run 16 or 24 inches on center. Mark each rafter location with chalk, then measure and mark where your mounting feet will go according to your rail layout plan.
Before drilling anything, double-check your marks. I learned this the hard way when I drilled six holes before realizing I’d measured from the wrong edge. Once confirmed, drill pilot holes through the roofing material and decking into the rafters. Each lag bolt needs to penetrate at least 1.5 inches into solid wood.
The flashing installation is critical for waterproofing. Slide the flashing under the shingle above your mounting point, ensuring the top edge sits beneath the shingle while the bottom laps over it. Seal all edges with roofing sealant, not just a dab, be generous here. Then bolt your mounting feet through the flashing into the rafters, adding another bead of sealant around the bolt.
For the rail system, Charles’s trick for uneven roofs is invaluable: attach only the end mounts first, run a taut string line between them, then adjust middle mounts to just touch the string. This creates perfectly level rails regardless of roof irregularities. Secure all rails with the proper clamps, maintaining consistent spacing, usually 40 to 48 inches apart depending on your panel width.
Don’t rush this foundation. Just as you wouldn’t skimp on the base of a solar tool charging station, your panel mounting system needs precision now to prevent leaks and sagging later.
Step 2: Secure the Solar Panels to the Racking
Transporting panels to your roof is where many DIYers get nervous, and rightfully so, a single dropped panel can mean hundreds of dollars down the drain. Work with a partner using a rope-and-pulley system or ladder hoist rather than carrying panels up yourself. Once on the roof, place panels face-down on a blanket or cardboard to protect the glass while you work.
Attach panels to the rails using mid-clamps between panels and end-clamps at the array edges. Start with your first panel at the bottom corner, securing end-clamps loosely at first. The next panel slides in beside it, and a mid-clamp bridges both panel frames. Continue across the row before starting the second row above. Leave about 3/8-inch gaps between panels for thermal expansion and water drainage, panels expand in heat and contract in cold.
Proper solar panel setup means checking that frames sit flat on the rails with no rocking or gaps. Tighten all clamps to manufacturer specs using a torque wrench (usually 8-12 ft-lbs). Panels should feel solid but not deformed. Double-check that drainage channels at the bottom of each panel face downward so water flows off the array rather than pooling.
Step 3: Wire the Solar Panel Array
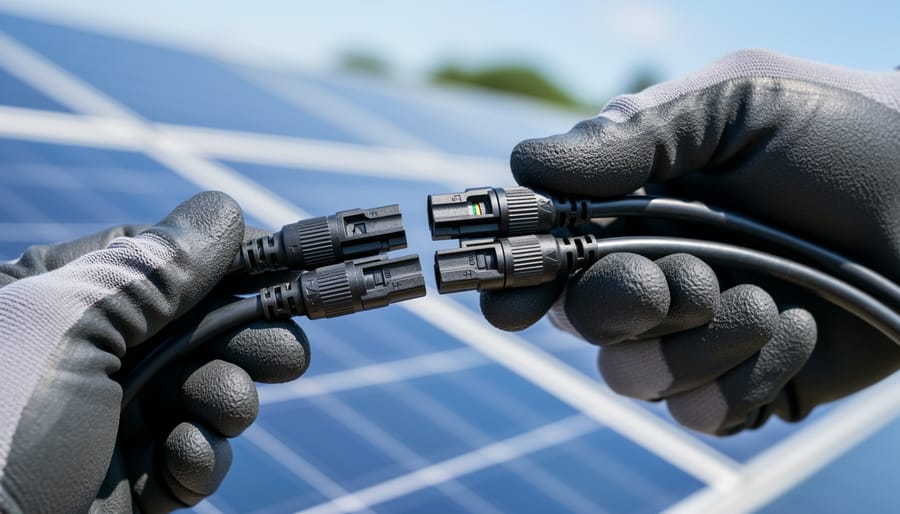
Close-up detail emphasizes correct connector handling when wiring the solar panel array.
With your panels securely mounted, it’s time to connect them electrically. This step transforms individual panels into a unified power-generating system.
Most residential installations use MC4 connectors, these waterproof snap-together plugs are designed for solar applications and make connections straightforward. Each panel has two pigtails: positive and negative. To wire panels in seriesconnect the positive lead from one panel to the negative lead of the next panel. This increases voltage while keeping amperage constant, which is ideal for longer wire runs and works well with string inverters.
If you’re using micro-inverters (one per panel), you’ll wire in parallel instead, all positive leads connect together, and all negative leads connect together. This maintains voltage while increasing amperage. Your system design determines which approach you’ll use, so follow your plans exactly.
Work methodically across the array, making one connection at a time. MC4 connectors click together satisfyingly when properly seated, you shouldn’t be able to pull them apart without the special disconnect tool. After making each connection, give it a gentle tug to confirm it’s secure.
Run your wiring through UV-resistant conduit from the array to your roof’s entry point. Use cable clips to secure conduit against the racking, keeping wires neat and protected from weather and physical damage. Leave a small service loop (extra wire) at each panel for future maintenance access.
Before moving on, double-check every connection. A single loose connector can shut down your entire string.
Step 4: Install the Inverter and Disconnect Switches
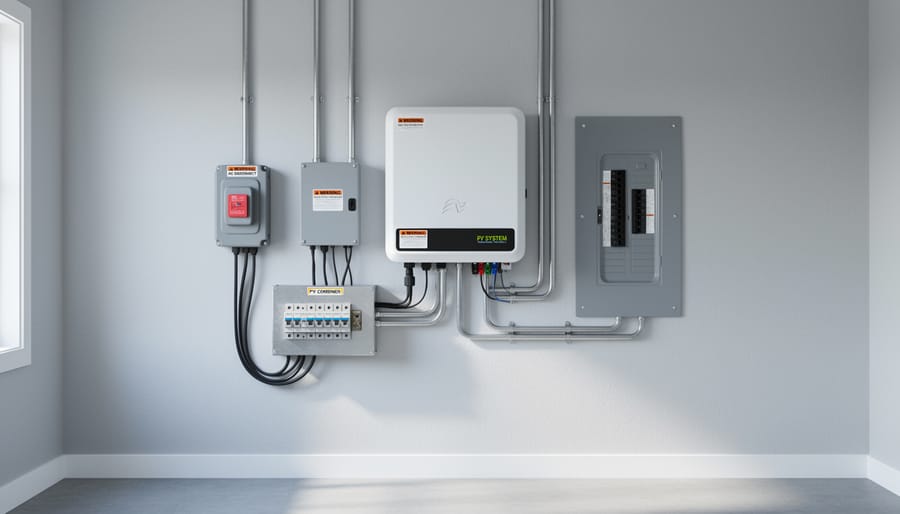
An installed inverter setup illustrates the safe, organized equipment placement used in real solar installations.
Mounting your inverter correctly makes the difference between smooth operation and frustrating downtime. Choose a location that stays shaded throughout the day, direct sunlight shortens inverter lifespan, with good airflow and easy access for monitoring. I installed my first string inverter in a sunny garage corner and regretted it within months when efficiency dropped during summer heat.
For string inverters, mount the unit on an exterior wall near your main panel, leaving at least 12 inches of clearance on all sides for ventilation. Use the manufacturer’s template to mark mounting holes, drill into studs or use appropriate wall anchors, and secure the inverter level. Route your DC wiring from the array into the inverter’s DC input terminals, following polarity carefully, reversed connections damage expensive equipment.
Install your DC disconnect switch between the array and inverter input, typically within arm’s reach of the inverter. This safety device lets you completely isolate the solar array for maintenance. Mount the AC disconnect switch between the inverter output and your breaker panel. Both disconnects should be clearly labeled and accessible.
Micro-inverter installations skip the central inverter entirely, each panel gets its own small inverter mounted directly to the racking beneath it. You’ll still need an AC disconnect at the array location and run AC wiring instead of DC conduit to your panel. Micro-inverters cost more upfront but eliminate the single point of failure that string inverters represent.
Step 5: Connect to Your Home’s Electrical System
This is the most critical, and potentially dangerous, step in your solar installation. The connection from your inverter’s AC output to your home’s main electrical panel is where solar electricity integrates with your house wiring and, if you’re grid-tied, the utility network. Here’s what’s involved and why you should seriously consider hiring a licensed electrician for this phase.
The basic process involves running AC wiring from the inverter to a dedicated breaker in your main panel. That breaker needs proper sizing based on your inverter’s output (typically 20-30 amps for residential systems) and must comply with the NEC’s 120% rule, which limits how much generation you can backfeed into a panel. You’ll also need to install a separate AC disconnect switch between the inverter and the panel, creating a visible shutdown point.
Note: Most jurisdictions require a licensed electrician to perform main panel work, and your homeowner’s insurance may not cover damage or fires resulting from DIY electrical connections, even if your solar system is otherwise permitted.
The wiring itself runs through conduit from your inverter location to the panel. Inside the panel, you’ll connect to a new breaker (which you’ll install in an available slot), attach the neutral wire to the neutral bus bar, and ground the system properly. This sounds straightforward, but working inside a live electrical panel carries serious risks. One wrong move can cause electrocution, arc flash, or create a fire hazard that won’t show up until months later.
Here’s my honest professional interconnection recommendation: unless you’re a qualified electrician or have extensive electrical experience, hire a pro for this step. A licensed electrician will ensure code compliance, proper breaker sizing, correct grounding, and safe workmanship. This typically costs a few hundred dollars and includes the permit and inspection coordination, money well spent for peace of mind and legal protection.
If you absolutely insist on doing this yourself and have the electrical knowledge, shut off the main breaker, verify power is off with a multimeter, and work methodically. But most successful DIY solar installers recognize that knowing when to call in expertise is a mark of wisdom, not defeat.
Step 6: Set Up Monitoring and Battery Storage (If Applicable)
Installing monitoring equipment transforms your solar system from a black box into an interactive dashboard showing real-time production, consumption, and savings. Most modern inverters include built-in monitoring that connects to your home Wi-Fi network, follow the manufacturer’s app instructions to pair your system with your phone or computer. You’ll typically scan a QR code on the inverter, connect it to your network, and watch production data appear within minutes.
If your system includes battery storage, the setup process varies significantly by manufacturer. Lithium battery systems like Tesla Powerwall or LG Chem handle much of the configuration automatically once physically connected, while other systems require manual programming of charge/discharge parameters. Most DIYers find the physical installation straightforward, mounting the battery, connecting DC cables to the charge controller, and running AC output to your critical loads panel, but software configuration can be tricky. Set your battery to prioritize self-consumption during peak rates if you’re on time-of-use billing, or configure it for backup power if outages are your main concern.
If you’re still deciding whether to add batteries now or later, Spheral Solar’s sizing calculators help determine what capacity makes sense for your usage patterns and backup needs. Charles added batteries two years after his initial installation and wishes he’d run the conduit during the original install, plan ahead even if you’re not buying batteries yet.
Step 7: Test and Commission Your System
Testing your system before it goes live is the moment when all your hard work either pays off or reveals issues that need fixing. Take your time here, rushing through commissioning can mean missing problems that are easier to catch now than after everything’s buttoned up.
Start with visual checks: scan every connection point for loose wires, proper torque on terminals, and secure MC4 connectors. Look for any damaged insulation or pinched wires. Your inverter should still be off at this stage.
Now measure your DC voltage at the array. With panels in sunlight, check voltage across the positive and negative DC lines before the inverter. You should see roughly the sum of your panel voltages if wired in series (for example, eight 40-volt panels should show around 320 volts). This confirms your panels are producing and properly connected.
Next, turn on your DC disconnect, then your inverter. Most inverters run through a self-check sequence, LEDs will flash, displays will cycle through startup screens. This takes anywhere from 30 seconds to three minutes. Your monitoring system should come online and start showing real-time production data within a few minutes.
Normal readings on a sunny midday: voltage steady within your system’s spec range, current flow matching your panel ratings (accounting for sun angle), and power output climbing as the inverter stabilizes. Check AC voltage at the inverter output, it should match your home’s voltage, typically 240 volts.
Watch the system for at least an hour. Production should remain steady without dropouts or error codes.
Verification, Inspection, and Grid Connection
Before calling for inspection, you need to verify your system works correctly and meets code requirements. Start by checking voltage output from your array with a multimeter, during peak sun, you should see voltage close to your system’s rated DC voltage at the combiner box. Then verify AC output at the inverter matches expected values based on current sun conditions and system size. Watch your monitoring system for at least a few hours to confirm consistent production without dropouts or error codes.
Once you’re confident the system operates properly, schedule your electrical inspection through your local building department. Most jurisdictions require this within 30 days of installation completion. The inspector will verify several key areas: proper conductor sizing and protection (checking that wire gauge matches breaker sizes and circuit loads), correct grounding and bonding throughout the system, weatherproof connections and proper conduit installation, appropriate disconnect switch placement and labeling, and code-compliant spacing and clearances around equipment. They’ll also confirm your installation matches the approved permit drawings.
Common inspection failures include undersized wire for the circuit length, missing or inadequate labeling on disconnects and breakers, improper grounding connections at the array and main panel, conduit not properly secured or lacking required supports, and equipment installed too close to windows, vents, or property lines. The good news? These are all fixable, usually within a day or two.
Here’s your post-installation verification and inspection preparation checklist:
Test DC voltage at array output and confirm it matches system specifications
Verify AC output at inverter during sunny conditions and check monitoring data
Photograph all connections, labels, and equipment installations before covering or boxing them in
Double-check all required labels are in place and legible (DC/AC disconnects, rapid shutdown, system ratings)
Ensure all conduit is properly secured with required straps at correct intervals
Schedule inspection at least two weeks out to avoid delays
Prepare your permit documents and approved plans to show the inspector
If you don’t pass on the first try, the inspector will provide a correction notice listing specific deficiencies. Fix these issues, then request a re-inspection. Most jurisdictions don’t charge for the first re-inspection if you address problems within 30 days.
After passing electrical inspection, you’ll submit your interconnection application to your utility company along with the inspection approval. The utility reviews your application, typically taking two to six weeks, then installs a bi-directional meter if needed and grants Permission to Operate. This PTO letter is your green light to flip the system on and start generating. Until you receive PTO, keep your system disconnected even if it passed inspection; operating without utility approval can result in fines and jeopardize your interconnection agreement. Timeline from installation completion to PTO averages four to eight weeks total, though this varies widely by location and utility responsiveness.
After Installation: First Week Monitoring and Optimization
Your system is live. Now comes the fun part, watching it work.
For the first few days, check your monitoring app multiple times daily. You’ll notice production follows a predictable curve: minimal output at sunrise, ramping up through mid-morning, peaking around solar noon, then declining symmetrically through the afternoon. This bell curve confirms everything’s functioning correctly. If you see flat spots, unexpected dips, or one panel producing significantly less than others, you’ve caught an issue early.
Confirm your net meter is spinning backward (or the digital display shows negative) when your production exceeds your home’s consumption. This moment, seeing your utility meter run in reverse, is deeply satisfying. Charles still remembers walking outside every hour on day one just to watch his meter.
Set your monitoring system’s alerts conservatively at first. You want notifications for significant production drops (say, 20% below expected), not every passing cloud. Most systems let you adjust thresholds as you learn your baseline.
Within the first week, verify your production matches your system’s rated capacity adjusted for your location and season. A 5kW system in good sun should produce 20-30 kWh on a clear day, though this varies widely by latitude and time of year.
Beyond monitoring, optimization opportunities emerge quickly. You might discover that trimming a single tree branch eliminates afternoon shading, or that running your dishwasher at noon instead of evening maximizes self-consumption. For those in multi-unit buildings exploring solar panels for apartments community solar monitoring reveals similar patterns.
Schedule your first maintenance inspection for month three, but for now, just enjoy watching your investment generate clean power.
Common Questions About Solar Installation
Most DIYers hit pause when real-world doubts creep in after reading through installation steps. You’re wondering about timelines, legal requirements, and whether you’re truly ready to tackle this. Here are honest answers to the questions I hear most often from first-time solar installers.
How long does DIY installation actually take?
Plan for 2-4 full days of work spread across 1-2 weeks, depending on system size and your experience level. A typical residential system takes about 16-24 hours of actual labor, but permitting, inspections, and waiting for utility approval add weeks to the overall timeline.
Do I really need permits for a DIY installation?
Yes, absolutely. Permits protect you legally, ensure your system qualifies for incentives and net metering, and verify the installation meets safety codes. Skipping permits can void your homeowner’s insurance and make your home difficult to sell.
Can I realistically install solar completely on my own?
You can handle most physical installation work solo with a helper for lifting panels, but you’ll likely need a licensed electrician for the final electrical connections and grid interconnection. Most jurisdictions require licensed professionals for certain steps regardless of your skill level.
What if my roof needs repairs before I can install panels?
Fix roof issues first, period. Solar panels last 25-30 years, and you don’t want to remove them in five years for roof work. Address any worn shingles, soft spots, or structural concerns before mounting hardware goes up.
The hardest part varies by person. Some DIYers struggle with the physical demands of rooftop work, while others find electrical planning intimidating. For me, ensuring proper waterproofing around mounting penetrations caused the most second-guessing during my first install. The good news is that none of these challenges are insurmountable when you follow code requirements and take your time.
Expanding your system later is definitely possible, though it requires planning ahead. Leave space on your racking for additional panels, size your inverter with expansion capacity, and install conduit that can handle extra circuits. If you’re considering growth, factor that into your initial 8 kW solar cost planning rather than starting too small.
Code compliance comes down to following your approved permit plans exactly, using listed components, and passing inspection. Your local building department provides a checklist of what inspectors verify. If you’re unsure whether something meets code, ask the inspector’s office before proceeding rather than hoping it passes.
You’ve just walked through the complete seven-step process, from mounting hardware and securing panels to wiring, connecting the inverter, and commissioning your system. Installing solar panels yourself delivers real empowerment and substantial savings compared to professional installation costs, typically $5,000 to $15,000 in labor alone. Yes, there’s a learning curve. You’ll spend time researching, double-checking connections, and possibly redoing a mounting bracket or two. But thousands of DIYers have successfully completed their own installations, and you can too.
The confidence you gain from this project extends beyond solar. Once you’ve mastered your home installation, you’ll find yourself tackling other solar projects like solar drip irrigation for your garden or even a DIY solar AC unit. Each project builds on the skills you’ve developed.
I encourage you to share your installation story in our community forum. Other DIYers benefit from hearing what worked, what didn’t, and what you’d do differently next time. Use Spheral Solar’s calculators to fine-tune your system design before you start, because proper planning truly makes the physical installation smoother and faster.
From my own experience: that first moment when your monitoring system shows power flowing from your roof is worth every careful measurement and cautious connection you made. Welcome to the solar DIY community. You’re not just saving money, you’re taking control of your energy future.
How useful was this post?
Click on a star to rate it!
Average rating 0 / 5. Vote count: 0
No votes so far! Be the first to rate this post.
We are sorry that this post was not useful for you!
Let us improve this post!
Tell us how we can improve this post?
charlesnoble
Here at Spheral Solar, I’m a hands-on solar power enthusiast, constantly exploring and experimenting with DIY solutions. I’m dedicated to sharing my discoveries, insights, and even the bumps I hit along the way, all in the pursuit of a more sustainable future.
DIY Solar Generator – Complete Guide With Diagrams by Paul July 17, 2021 Building a weatherproof DIY solar generator involves mounting and wiring a battery, charge controller, inverter, trickle charger, and fusing inside a weatherproof case. Then all the relevant input and output sockets are wired and mounted on the outside of the case where they are easily accessible. What Exactly Are Solar…
What You’ll Actually Pay for an 8 kW Solar System… by Charlesnoble May 10, 2026 An 8 kW solar system typically costs between $16,000 and $24,000 before incentives, with most homeowners paying around $20,000 for professional installation. After claiming the 30% federal tax credit, your actual out-of-pocket expense drops to $11,200-$16,800. That’s real money we’re talking about, and I’ve helped dozens of DIY solar enthusiasts…
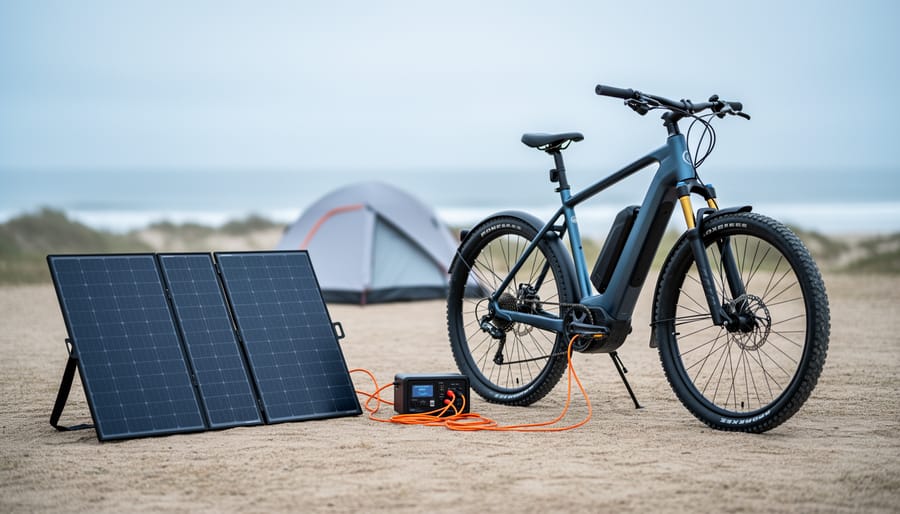
How I Built a 48V Ebike Solar Charger That Works Anywhere by Charlesnoble January 14, 2026 Calculate your ebike’s battery capacity in watt-hours by multiplying 48 volts by your amp-hour rating—this determines the minimum solar panel wattage you’ll need. A standard 48V 14Ah ebike battery holds 672Wh, requiring at least a 200-watt solar panel for a full day’s charge in optimal sunlight conditions. Match your solar…
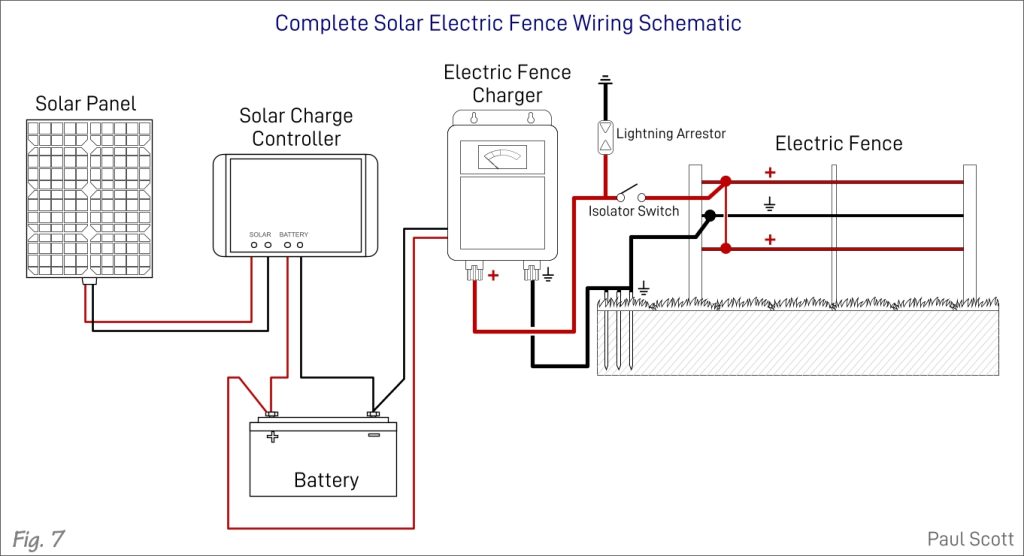
How to Build a Solar-powered Electric Fence (With Diagrams) by Paul November 1, 2021 Heads up: some links here are affiliate links, and purchases through them support the site. As an Amazon Associate I earn from qualifying purchases. You can build a permanent DIY, 3-acre solar-powered electric fence can with basic technical skills in under a week. And depending on whether you opt for…
How Does a Solar-Powered Drip Irrigation System Work by Paul September 13, 2021 Heads up: some links here are affiliate links, and purchases through them support the site. As an Amazon Associate I earn from qualifying purchases. Solar-powered drip irrigation can be installed in most gardens using a small solar system, readily available irrigation materials, and minimal tools. If you already have a…
How to Choose a J1772 Solar Charger for Your Ebike:… by Charlesnoble July 14, 2026 A J1772 solar charger combines a standard J1772 charging connector (the same Type 1 plug used by most North American EVs and electric bikes) with solar panels and battery components to create an off-grid or grid-supplemented charging system. You’ll need three core elements: solar panels (typically 400-800 watts for practical…
Subscribe for handpicked DIY projects, exclusive tips, and giveaways.
Installing a home solar system yourself takes 2-4 weekends for an average 5kW setup, requires solid electrical knowledge and comfort working at heights, and can save you $5,000-$8,000 in labor costs if you tackle everything except the final utility interconnection. The process breaks down into five main phases: permitting and design, mounting the racking system,… Read more: Solar Power Installation Step by Step: Complete DIY Guide From Start to Finish
After testing dozens of solar chargers across camping trips, power outages, and backyard experiments, we found the X-Dragon 20W delivers the most reliable charging performance for phones and tablets, while the Goal Zero Nomad 50W steps up when you need to power larger devices or handle extended emergencies. If you’re planning weekend hikes, assembling an… Read more: 7 Best Solar Powered USB Chargers of 2026, Tested and Reviewed
There is something special about a mature tree. Decades of growth, shade that actually cools the house, branches that the kids climbed, a root system that has quietly held the yard together through every storm. So when circumstances force a move, whether it is a home renovation, a new driveway, or a construction project that… Read more: How to Move a Mature Tree Without Killing It: The Complete Relocation Guide