How to Install a Solar Heating System for Your Inground Pool (Step-by-Step)
Updated:
You can heat your inground pool with solar panels mounted on your roof, garage, or ground rack, capturing free energy from the sun and extending your swim season by months while slashing heating costs to nearly zero. A properly sized solar heating system circulates pool water through black collector panels where sunlight warms it by 10-15°F before returning to your pool. Most DIY installations take a weekend and cost between $2,500-$5,000 for an average 15×30 pool, paying for themselves in 2-4 years compared to gas or electric heaters.
I installed my first pool solar system back in 2019, and the difference was remarkable. By early May, when my neighbor’s unheated pool sat at a chilly 62°F, mine was a comfortable 78°F. The system worked so well that I’ve since helped a dozen friends set up their own, and the technology has only gotten better and more affordable by 2026.
The beauty of solar pool heating is its simplicity. Unlike photovoltaic panels that generate electricity, these are straightforward heat exchangers with no moving parts beyond your existing pool pump. Water flows through hundreds of small tubes in the collector panels, absorbing solar radiation as it passes through. The warmed water returns to your pool, and the cycle repeats throughout the day. There’s no complex electronics, no batteries, and minimal maintenance.
Choosing the right system means understanding your climate, pool size, and how you use your pool. Someone in Arizona faces different challenges than a pool owner in Pennsylvania. You’ll also need to decide between glazed and unglazed collectors, determine the proper square footage of panels, and figure out the best mounting location. Among the 9 ways to heat a pool, solar stands out for its combination of effectiveness, low operating cost, and environmental benefits.
This guide walks you through every decision and installation step, from calculating your collector area to mounting panels and connecting the plumbing. Whether you’re handy with basic tools or tackling your first major home project, you’ll find the process more straightforward than you might expect.
Key Takeaway: Solar pool heating extends your swim season by weeks or months, eliminates ongoing fuel costs since sunlight is free, and reduces your carbon footprint by replacing gas or electric heating with clean renewable energy.
Understanding Solar Pool Heating for Inground Pools
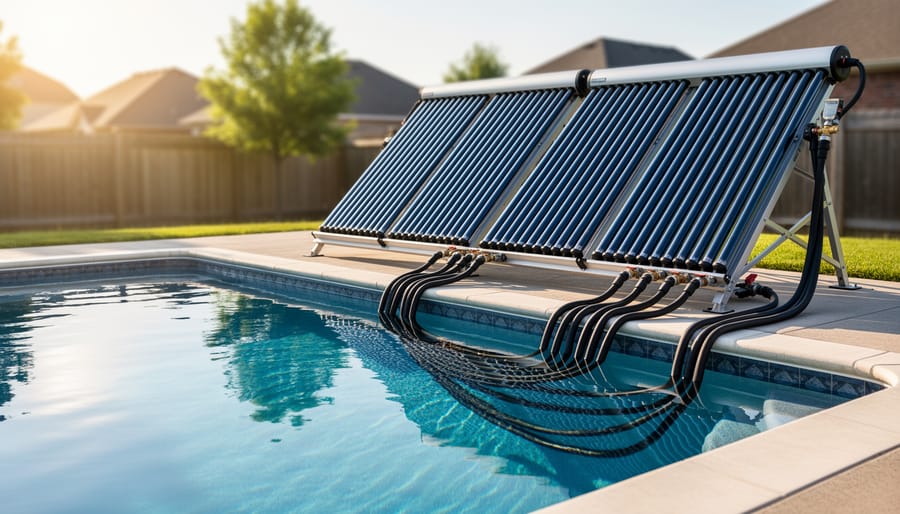
A roof-mounted solar collector setup paired with an inground pool shows how solar heating can blend into a real home installation. The scene highlights the pool’s inviting atmosphere powered by sunlight.
Solar pool heating harnesses the sun’s energy to warm your pool water through a beautifully simple process. Your existing pool pump draws water from the pool and sends it through your regular filter to remove debris. From there, the water is pumped through collectors mounted on your roof, rack, or ground installation. These collectors contain a network of small tubes that absorb solar radiation and transfer that heat directly to the water flowing through them. Once warmed, the water returns to your pool, typically increasing the overall temperature by 5 to 15 degrees Fahrenheit on a sunny day.
The system consists of four essential components working together. Solar collectors (the panels themselves) act as your heating element, capturing and transferring solar energy to the water. Your pool’s circulation pump moves water through the entire system, while the filter keeps everything clean before the water reaches the collectors. Finally, valves control whether water flows through the solar collectors or bypasses them entirely, giving you the flexibility to heat only when needed.
What makes solar pool heating such a smart choice for inground pool owners is the triple benefit it delivers. You get to enjoy your pool comfortably in spring and fall when the water would otherwise be too cold. Operating costs drop dramatically because you’re not burning natural gas or running expensive electric heaters for hours each day. And you’re making a genuine environmental contribution by choosing renewable energy over fossil fuels, a decision that feels even better when you’re floating in that warm water on a cool evening.
Choosing the Right Solar Collectors for Your Pool
This close-up showcases different solar collector styles that pool owners compare when choosing a system. The textures and materials help readers visualize what collectors look like before installation.
Selecting the right solar collectors is the foundation of an effective pool heating system, and in 2026, you’ve got solid options that balance performance with budget. The first decision you’ll face is glazed vs unglazed collectors, and it really comes down to your climate and how you use your pool.
Unglazed collectors are the workhorse for most residential inground pools. They’re basically black rubber or plastic mats that water flows through directly. Simple, affordable, and surprisingly effective in warm climates where you’re mainly extending the season from late spring through early fall. They handle pool chemicals well and can last 10 to 15 years with minimal fuss. If you live somewhere that rarely dips below freezing during pool season, unglazed is likely your best bet.
Glazed collectors, on the other hand, feature tubes encased in insulated glass boxes, similar to what you’d see on a home solar hot water system. They’re more efficient in cooler weather and can capture heat even on overcast days, making them ideal if you’re in a northern climate or want year-round heating with a pool enclosure. The trade-off is higher upfront cost and a bit more weight on your roof.
For sizing, the general rule is your collector area should equal 50 to 100 percent of your pool’s surface area. A 400-square-foot pool in Florida might need only 200 square feet of collectors, while the same pool in Colorado would benefit from closer to 400 square feet. Factor in how much you use a pool cover (which dramatically reduces heat loss), your target temperature, and how many months you want to swim.
When shopping, look for collectors with at least a 10-year warranty and check the OG-100 rating if available, which standardizes thermal performance. Avoid the cheapest no-name options that skimp on UV stabilization. Your goal is matching system capacity to your specific needs, not just buying the biggest system you can afford. Measure your pool, assess your climate honestly, and size accordingly for the best return on your investment.
Tools and Materials You’ll Need
The image captures the hands-on “gather and install” feel of DIY solar pool heating, plumbing fittings, tape, and valves in place near pool equipment. It supports the tools-and-materials section with real-world context.
Before you begin your solar pool heating installation, gather all necessary materials and tools to ensure a smooth, efficient project. Having everything on hand prevents mid-installation trips to the hardware store and keeps momentum going. Here’s what you’ll need, organized by category:
Solar Collectors: Unglazed or glazed panels sized to cover 50-100% of your pool surface area
Mounting Hardware: Roof brackets or ground racks, stainless steel bolts, lag screws, and flashing for roof penetrations
PVC Piping: Schedule 40 PVC pipe (1.5″ or 2″ diameter), 90-degree elbows, T-fittings, couplings, and unions for easy disconnection
Valves and Controls: Three-way diverter valve (manual or automatic), check valve, pressure gauge (0-30 PSI range)
Adhesives and Sealants: PVC primer and cement, Teflon tape, silicone sealant, roofing cement for flashing
Basic Tools: Power drill with bits, PVC saw or hacksaw, adjustable wrenches, screwdrivers (Phillips and flathead), measuring tape, level
Safety Equipment: Work gloves, safety glasses, fall protection harness if working on roof, sturdy ladder rated for your weight plus materials
Optional Upgrades: Automatic controller with temperature sensors, pipe insulation for cool climates, expansion tanks for closed systems
Most materials are available at local pool supply stores, home improvement centers, or online retailers. Solar collectors represent your largest expense, typically running $150 to $400 per panel depending on size and quality. Budget $200 to $400 for plumbing components and mounting hardware, plus another $50 to $100 for tools if you don’t already own them. Total project costs usually range from $1,500 to $3,000 for a complete DIY installation, which is significantly less than professional installation at $3,000 to $7,000.
I recommend buying slightly more PVC fittings than your initial plan calls for. You’ll inevitably need an extra elbow or coupling as you fine-tune pipe runs during installation. It’s better to return unused parts than halt work for a single missing piece.
Safety Warnings and Pre-Installation Considerations
Before you climb a ladder or cut a single pipe, you need to understand the real risks involved in this project. Solar pool heating is absolutely doable for DIYers, but it combines several hazards that demand your respect and preparation.
If you’re mounting collectors on your roof, fall protection is non-negotiable. More DIY injuries happen from falls than any other cause. Use a quality roof harness system rated for your weight, secure your ladder at both top and bottom, and work with a helper whenever possible. Never work on a roof when it’s wet, windy, or icy. If your roof pitch exceeds 6:12 or you’re uncomfortable with heights, ground-mounting your collectors is a smarter choice than risking a serious injury.
Warning: Always use proper fall protection when working on roofs, and check with your local building department about permit requirements before you start, many jurisdictions require permits for roof-mounted solar installations and plumbing modifications.
Electrical safety around pool equipment is critical. You’ll be working near the pool pump, which operates on 120V or 240V power. Always shut off the breaker to your pool equipment before doing any work in that area, and verify it’s off with a voltage tester. Never work on electrical components while standing in water or on wet ground. If you need to modify any electrical connections or install automatic valves with powered actuators, hire a licensed electrician, this isn’t the place to learn on the job.
Working with PVC cement and primer releases strong fumes that can cause dizziness and headaches. Always work in a well-ventilated area, preferably outdoors. Keep the primer and cement cans closed when not actively using them, and take breaks if you feel lightheaded. Wear gloves to protect your skin, because this stuff bonds instantly and doesn’t come off easily.
Know when to call a professional. If you discover your roof structure seems weak or damaged, stop and get a structural assessment. If your existing plumbing is complex or uses materials you’re unfamiliar with, a plumber can integrate your system correctly. When local codes require licensed work or inspections, follow those rules, they exist to protect you and your property value.
Planning Your Solar Pool Heating System Layout
Before you buy a single solar collector, walk your property with a critical eye. The difference between a system that barely warms your pool and one that extends your season by months often comes down to smart placement decisions made right now.
Start with a sun exposure analysis. Your collectors need at least 6 hours of direct sunlight daily during swimming season. Stand where you’re considering installation around 10 AM, noon, and 2 PM on a clear day. Look for shadows cast by trees, neighboring buildings, or chimneys. That mature oak tree might provide lovely shade for your patio, but it’s your solar system’s enemy. South-facing installations in the Northern Hemisphere capture the most energy, though southeast or southwest orientations work nearly as well.
As you evaluate potential locations, run through these critical factors:
Daily sun exposure hours during swimming season (minimum 6 hours unobstructed)
Roof pitch and angle relative to your latitude (steeper isn’t always better)
Distance from pool equipment pad to proposed collector location
Accessibility of existing plumbing tie-in points after the filter
Now calculate your collector area. Measure your pool’s surface in square feet (length times width for rectangles; multiply diameter by itself by 0.785 for circles). In warm climates with long seasons, you’ll need collectors covering 50-70% of your pool’s surface. Cold climates or year-round heating? Plan for 80-100%. A 400-square-foot pool in Florida might need 250 square feet of collectors, while the same pool in Colorado should have 350-400 square feet to compensate for lower sun angles and cooler temperatures.
Roof mounting typically wins on efficiency because collectors sit at an ideal angle and pipes run shorter distances. Check that your roof structure can handle 3-5 pounds per square foot when the system’s full of water. Asphalt shingle roofs work great; tile requires extra care with penetrations.
Ground mounting makes sense when your roof faces north, trees create too much shade, or structural concerns rule out rooftop weight. You’ll need a clear patch of yard, concrete pads or ground racks, and longer pipe runs. The trade-off: easier future maintenance and no roof penetrations to weatherproof.
Sketch your pipe route from the pool equipment to the collectors. Every 90-degree elbow and extra ten feet of pipe costs you heat and flow efficiency. The straightest path with gentle bends wins.
Step-by-Step Installation Process
Step 1: Mount the Solar Collectors
Mounting your solar collectors correctly is critical for both safety and performance. Whether you’re installing on a roof or at ground level, the process requires careful attention to structural integrity and positioning.
Start by locating roof rafters or studs using a stud finder if mounting on a roof. Your collectors need solid attachment points that can handle wind loads and the weight of water-filled panels. Mark your mounting locations, spacing brackets according to the manufacturer’s specifications, typically 4-6 feet apart. Most systems use L-brackets or rails that attach directly to the roof structure.
When drilling into your roof, predrill holes slightly smaller than your lag bolts. Apply roofing sealant generously around each hole before inserting the mounting hardware, then add another layer on top. This creates a watertight seal that prevents leaks. For tile or metal roofs, use appropriate flashing kits designed for your specific roofing material.
Position collectors to face true south in the Northern Hemisphere (or true north if you’re in the Southern Hemisphere). The tilt angle should roughly match your latitude for year-round efficiency, though you can adjust 10-15 degrees lower to favor summer heating. In Phoenix at 33°N, for example, aim for a 20-25 degree tilt. Use a digital level or angle finder to verify your slope.
Leave 1-2 inches of space between adjacent collector panels to allow for thermal expansion. Rigid connections will crack or warp as the panels heat up and cool down throughout the day. Secure the collectors to your mounting brackets with stainless steel hardware to prevent rust, but don’t overtighten, snug is sufficient.
For ground installations, pour concrete footings or use ground screws rated for your soil type and local wind loads. Elevate collectors at least 12 inches off the ground to prevent debris accumulation and allow air circulation underneath.
Step 2: Run Supply and Return Lines
Running supply and return lines efficiently is crucial for maximizing your solar heating system’s performance. This step connects your pool equipment to the collectors you just mounted, and getting the pipe routing right will save you headaches down the road.
Start by measuring the distance from your pool filter to the collectors. Use Schedule 40 PVC pipe, typically 1.5″ diameter for pools under 20,000 gallons, or 2″ for larger pools. Bigger isn’t always better here: oversized pipes reduce flow velocity and heating efficiency, while undersized pipes strain your pump.
Plan your pipe route to minimize bends and elevation changes. Every 90-degree elbow adds resistance, so use two 45-degree fittings instead when possible. Mark your path clearly before cutting any pipe. For roof installations, you’ll usually run pipes up the exterior wall or through an eave, then across to the collectors.
Cut your PVC sections and dry-fit everything first, this lets you spot problems before making permanent connections. When you’re ready to cement, prime both the pipe end and fitting socket, then apply cement and twist the joint a quarter-turn for an even seal. Hold for fifteen seconds.
Maintain a slight upward slope (1/4 inch per 10 feet) on your supply line to eliminate air pockets. Your return line should slope back toward the pool for complete drainage during winterization.
Secure pipes every 4-5 feet using mounting clips or straps. Unsupported sections will sag, crack, or vibrate loose over time. For any pipes exposed to direct sun, wrap them with foam pipe insulation, this prevents heat loss and protects against UV damage. The extra five dollars spent on insulation will pay for itself in the first season.
Step 3: Install Valves and Controls
With your collectors mounted and pipes run, you’re ready to install the control components that direct water flow through your solar system. This step determines whether heated water returns to your pool or bypasses the collectors entirely, making proper valve installation crucial for system performance.
Start by installing the three-way diverter valve on the return line near your pool equipment. This valve controls whether water flows through the solar collectors or bypasses them completely. Position it after your filter and before the line splits toward the collectors. For manual valves, ensure the handle moves freely through all positions and faces an accessible direction. If you’re using an automatic valve, mount it according to manufacturer specs with the actuator motor pointing upward to prevent water damage. Getting the valve position right affects both flow efficiency and how easily you’ll adjust the system later.
Next, install a check valve in the return line from the collectors, positioned before the water rejoins the main pool line. This simple one-way valve prevents heated water from flowing backward through the collectors at night, which would actually cool your pool. The arrow on the valve body must point toward the pool. Use PVC primer and cement for permanent connections, letting each joint cure for the recommended time before moving to the next.
Add a pressure gauge on the supply side before the collectors. This lets you monitor system pressure and detect clogs or leaks early. Most gauges thread directly into a tee fitting.
If you opted for automatic controls, mount the temperature sensors now: one on the collector and one on the pool return line, following the control unit’s wiring diagram.
Step 4: Connect to Existing Pool Plumbing
With your collectors mounted and valves installed, you’re ready to integrate everything into your pool’s circulation system. This is where your solar heating loop becomes part of your pool’s everyday operation.
First, identify the connection point: you’ll tie in after the filter but before any existing heater. This placement ensures the solar collectors receive clean, filtered water, which protects them from debris and extends their lifespan. Locate the return line coming from your filter, this is typically a 1.5″ or 2″ PVC pipe heading back toward the pool.
Cut into the return line at your chosen spot using a PVC saw, making straight, clean cuts. Dry-fit your diverter valve assembly first to confirm everything aligns properly before applying any cement. The flow should split here: one path continues directly to the pool, the other diverts up to your solar collectors and returns via your three-way valve.
When you’re confident the layout works, it’s time to make permanent connections. Apply PVC primer to both the inside of fittings and outside of pipes, this step softens the plastic for a proper chemical bond. Immediately follow with PVC cement, working quickly since it sets in about 30 seconds. Push joints together firmly with a slight twist, hold for 15 seconds, then wipe excess cement. To hook up the right way double-check that flow arrows on your valves point in the correct direction before cementing.
Let all connections cure for at least two hours (four is better) before pressurizing the system. Mark your valve positions clearly so you’ll remember which setting routes water through the collectors versus bypassing them.
Step 5: System Startup and Priming
With your collectors mounted, pipes run, and valves installed, you’re ready for the critical startup phase. This process determines whether your system will run smoothly or need immediate troubleshooting, so take your time and follow each step carefully.
Before turning anything on, do a final visual inspection of all connections. Look for pipes that weren’t fully pushed into fittings, valves installed backward (check the flow direction arrows), or any spots where you forgot to apply primer and cement. It’s much easier to fix these issues now than after water is flowing.
When I started up my first system, I learned the hard way that air pockets can prevent proper circulation and even damage collectors if they create hot spots. The key is introducing water gradually while giving trapped air multiple escape routes.
Here’s your startup sequence:
Close the valve to your solar collectors so water initially bypasses them and circulates normally through your pool
Turn on your pool pump and verify normal operation for 2-3 minutes, watching for any new leaks at your connection points
Slowly open the valve to the solar collectors about one-quarter turn, listening for the sound of water entering the pipes
Continue opening the valve gradually over 5-10 minutes until fully open, allowing air to purge through the system return line
Go up to your collectors and feel along the panels, they should all be warming evenly as water fills them completely
Check the pressure gauge if you installed one; it should read within your pump’s normal operating range (typically 10-20 psi)
Run the system for at least 30 minutes, then revisit every connection point to check for drips or seepage
You’ll know the system is properly primed when water flows steadily from the collector return line and you can feel warmth building in the panels on a sunny day. Some gurgling during the first few minutes is normal as air works its way out, but persistent air noises after 15 minutes suggest a leak somewhere pulling air into the system.
If you notice cold spots on certain collector panels, try briefly closing and reopening the valve to force water through any air-locked sections. The temperature difference between your supply and return lines should be noticeable to the touch within an hour on a clear day, that’s your system working.
Testing, Verification, and System Optimization
Once your system is up and running, the real question is: did it work? The best way to find out is simple. On a sunny morning, use a basic pool thermometer to measure the water temperature as it enters the collectors (at the supply line) and again as it exits (at the return line). You should see a 5 to 15 degree Fahrenheit rise during peak sun hours. If you’re getting 10 degrees or more, you’re doing great. If it’s under 5, something needs adjustment.
Flow rate matters as much as sunshine. Too fast, and water races through the collectors without absorbing much heat. Too slow, and you’re not moving enough volume to warm the whole pool efficiently. Most systems perform best when water flows through the collectors at a rate that allows a 10-15 degree temperature gain. If your existing pump struggles to push water through the new solar loop, you might need a separate pump dedicated to the solar circuit. Watch your pressure gauge: a reading 5-10 psi higher than before the collectors indicates healthy flow; anything above 15 psi suggests a blockage or undersized piping.
Tip: Use the site’s solar pool heating calculator to estimate expected performance based on your system size and location, then compare your real-world results.
After 24 to 48 hours of operation, inspect every connection and joint for leaks. Check where the new lines tie into your existing plumbing, around valve housings, and at the base of each collector. Even a slow drip wastes water and signals a weak seal that could fail later. If you spot moisture, shut down the pump, let the system drain, and redo that connection with fresh primer and cement.
Now comes optimization. If your pool isn’t warming as much as you’d hoped, try running the pump longer during sunny hours rather than spreading circulation across the whole day. Adjusting your diverter valve to send more flow through the collectors can help, but don’t starve your filter. Charles swears by this trick: on a cool morning, bypass the solar system entirely and let the pool warm with solar cover warmth then switch the collectors on once the sun is strong. You’ll maximize heat gain without fighting an uphill battle at dawn. Track your progress with daily temperature readings for a week. You’ll quickly see patterns and know whether your system is delivering the extended swim season you built it for.
Maintenance and Next Steps
Your solar heating system is now up and running, but a little routine care will keep it performing efficiently for years to come. The good news? Maintenance is minimal compared to gas or electric heaters, with no moving parts in the collectors themselves to wear out.
Start by checking your system monthly during the swimming season. Walk around the collectors and pipe runs looking for any signs of leaks, loose connections, or physical damage from weather or debris. Clear any leaves, branches, or dirt that have accumulated on the collector surfaces, as even a thin layer can reduce heat transfer. A quick rinse with a garden hose is usually all you need.
Here’s a simple schedule to keep your system in top shape:
Monthly: Inspect for leaks, clear debris from collectors, check valve operation
Seasonal (spring): Test system startup, verify temperature rise, tighten any loose fittings
Seasonal (fall): Winterize in cold climates by draining collectors and pipes to prevent freeze damage
Annual: Inspect mounting hardware, check roof penetrations for weatherproofing, clean sensors if using automation
In climates where temperatures drop below freezing, winterization is critical. Drain all water from the collectors and exposed piping before the first hard freeze, or use a non-toxic antifreeze solution if your system is designed for it. Some DIYers install manual drain valves at low points specifically for this purpose.
Beyond basic maintenance, consider tracking your results. Note how many degrees your pool warms on sunny days, how much longer your season extends, and estimate the propane or electric costs you’re avoiding. These numbers make the project feel even more rewarding. If you’re enjoying the automation-free simplicity of manual valves, you might eventually want to upgrade to a solar controller that optimizes flow automatically based on temperature differentials.
Share your installation photos and lessons learned with the Spheral Solar community. Other DIYers benefit from real-world experiences, and you’ll find plenty of tips for squeezing even more performance from your system.
Common Questions About DIY Solar Pool Heating
Installing a solar heating system yourself naturally brings up practical questions. Here are the most common concerns from DIYers planning their first pool heating project, with straightforward answers based on real-world experience.
How long does installation take?
A typical DIY installation takes one to two full weekends for a moderately experienced homeowner working alone, or one weekend with a helper. The actual time varies based on system size, roof access difficulty, and whether you’re using manual or automatic controls.
Can I use my existing pool pump?
Yes, in most cases your existing pool pump handles solar heating just fine since the system adds minimal resistance to flow. You’ll want a pump rated at least 1 horsepower for pools under 20,000 gallons, or 1.5 to 2 horsepower for larger pools.
What happens on cloudy days?
The system still collects some heat on overcast days, though much less than full sun. Your pool simply won’t gain temperature those days, but it won’t lose the warmth already there either since the system stops circulating water through the collectors when they’re cooler than the pool.
How much will this extend my swim season?
Most pool owners gain an extra month or two of comfortable swimming, sometimes more in moderate climates. You can expect your season to start two to four weeks earlier in spring and stretch two to four weeks later into fall, depending on your location and sun exposure.
Do I need building permits?
Requirements vary widely by location. Many areas don’t require permits for ground-mounted systems, but roof installations often do need approval because they affect structure and appearance. Always check with your local building department before starting work.
Will this work in my climate?
Solar pool heating works anywhere you get regular sunshine during pool season. Northern climates see excellent results from May through September, while southern regions can extend comfortable swimming nearly year-round with proper sizing.
What if I make a mistake during installation?
PVC plumbing mistakes are usually easy to fix since you can cut out bad sections and redo connections. The biggest risk is roof leaks from improper mounting, which is why careful waterproofing and following manufacturer instructions for roof penetrations matters so much.
Is the heat gain really noticeable?
Absolutely. On a sunny day, you’ll see a 10 to 15 degree temperature rise as water passes through the collectors, which translates to maintaining your pool 5 to 10 degrees warmer overall compared to an unheated pool.
The learning curve for solar pool heating is gentle. You’re working with straightforward plumbing concepts, and the system is forgiving since water temperature isn’t as critical as, say, household plumbing. Most DIYers find the project less intimidating once they start than it seemed during the planning phase. The key is taking it step by step, double-checking measurements before cutting, and not rushing the connections. If you can handle basic home improvement projects, you can handle this one.
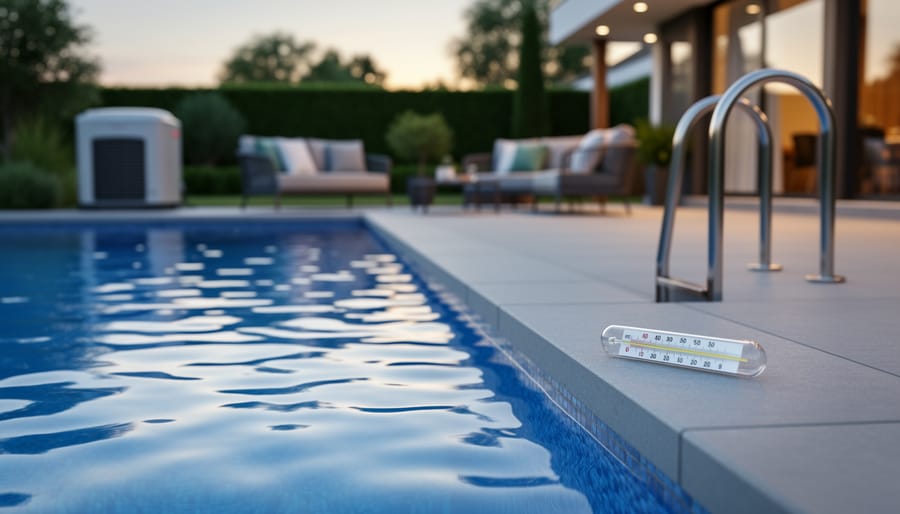
A serene pool scene under the evening glow illustrates the outcome readers want: comfortable, extended swim time from solar energy. The sunlight reflections emphasize warmth and relaxation.
Installing a solar heating system for your inground pool is absolutely within your reach as a DIY project. You’ve seen the step-by-step process, the tools required, and the safety considerations, nothing here demands specialized training or expensive contractors. What you get in return is remarkable: a swim season that stretches weeks or even months longer, hundreds of dollars saved annually on heating costs, and the satisfaction of harnessing free energy from the sun.
The environmental impact alone makes this worthwhile. You’re eliminating fossil fuel consumption while enjoying warmer water, which feels pretty great when you’re floating on a sunny afternoon knowing your heating bill is zero.
Start by measuring your pool and assessing your roof or yard space. Price out collectors and materials. Most homeowners complete installation in a weekend, and the system pays for itself within two to four years through energy savings. That’s a smart investment by any measure.
Charles here, I’ll never forget the first time I dove into my solar-heated pool after finishing the installation. The water was perfect, the sun was shining, and I knew every degree of warmth came from my own work and clean energy. That feeling doesn’t fade.
We’d love to hear about your project. Share your installation photos, challenges, and results in the Spheral Solar community forums. Your experience helps other DIYers take the plunge, and together we’re building a network of solar-powered pool owners who swim longer and spend less.
How useful was this post?
Click on a star to rate it!
Average rating 0 / 5. Vote count: 0
No votes so far! Be the first to rate this post.
We are sorry that this post was not useful for you!
Let us improve this post!
Tell us how we can improve this post?
charlesnoble
Here at Spheral Solar, I’m a hands-on solar power enthusiast, constantly exploring and experimenting with DIY solutions. I’m dedicated to sharing my discoveries, insights, and even the bumps I hit along the way, all in the pursuit of a more sustainable future.
What Should a Pool Be Heated To? The Complete… by Charlesnoble July 4, 2026 Most residential swimming pools should be heated to 78-82°F for comfortable recreational use, though your ideal temperature depends on how you plan to use the pool, who’s swimming, and whether you want to keep energy costs in check. If you’re heating with solar, you’ll find this sweet spot is easy…
How to Install a Whole House Ventilation System… by Charlesnoble July 12, 2026 Installing a whole house ventilation system powered by solar takes about 6 to 8 hours for a moderately skilled DIYer and delivers continuous fresh air circulation without touching your electric bill. The core method involves mounting a solar panel on your roof to power an intake or exhaust fan, routing…
How to Make DIY Solar Tubes for Free Natural… by Charlesnoble July 7, 2026 You can build a DIY solar tube for $50 to $150 and start harvesting natural daylight in a weekend. This simple project combines a reflective tube, clear dome, and diffuser to channel sunlight from your roof into dark interior spaces, delivering illumination equivalent to multiple bulbs without electrical costs or…
AGM vs. Lead Acid Batteries: Which Is Better for… by Charlesnoble July 23, 2026 AGM batteries outperform traditional flooded lead acid batteries in nearly every practical measure that matters for solar installations, but whether that performance justifies their 50-100% higher upfront cost depends entirely on how hands-off you want your system to be and how often you’ll cycle the battery deeply. After running both…
6 Best Solar Spot Lights of 2026, Tested and Reviewed by Charlesnoble August 8, 2026 After testing dozens of solar spotlights in real-world conditions throughout 2026, the AloftSun Solar Motion Sensor Outdoor Lights emerged as the top overall choice for most homeowners, thanks to its reliable performance and versatility across different landscape lighting scenarios. But picking the right solar spotlight depends entirely on what you’re…
5 Sources of Electrical Energy Every Solar DIYer… by Charlesnoble July 1, 2026 Electricity powers our homes from five main sources: solar panels, wind turbines, hydroelectric generators, fossil fuel generators, and battery storage systems. If you’re building a reliable off-grid setup or backing up your solar array, understanding how these sources work together transforms a single-point-of-failure system into resilient, year-round power. I learned…
Subscribe for handpicked DIY projects, exclusive tips, and giveaways.
There is something special about a mature tree. Decades of growth, shade that actually cools the house, branches that the kids climbed, a root system that has quietly held the yard together through every storm. So when circumstances force a move, whether it is a home renovation, a new driveway, or a construction project that… Read more: How to Move a Mature Tree Without Killing It: The Complete Relocation Guide
A mass energy conversion calculator lets you determine how much energy is locked inside any amount of matter using Einstein’s famous equation E=mc². Whether you’re working on a physics assignment or simply curious about the enormous energy potential in everyday objects, the calculation itself takes just seconds once you understand the formula’s three components: energy… Read more: How to Use a Mass Energy Conversion Calculator (Step-by-Step Guide)
Low voltage circuit protection in DIY solar systems boils down to matching the right fuse or breaker to your wire size and expected current, not to the capacity of your battery bank or inverter. Most fires and equipment failures happen when people oversize protection devices, thinking bigger is safer, when the opposite is true. Your… Read more: How to Size Low Voltage Circuit Protection for Your DIY Solar System