How Ultrasonic Motion Sensors Can Supercharge Your Solar Security System
Updated:
Ultrasonic motion sensors revolutionize home automation by detecting movement through high-frequency sound waves, offering precise detection ranges up to 25 feet without the false triggers common in traditional infrared sensors. These ingenious devices emit inaudible pulses at 40 kHz, measuring the time taken for echoes to return, and calculate exact distances with millimeter-level accuracy. For DIY enthusiasts integrating smart security with solar power systems, ultrasonic sensors provide reliable 24/7 monitoring while consuming minimal energy – typically under 20mA during operation.
I’ve installed dozens of these sensors in solar-powered security systems, and their versatility never fails to impress. Whether you’re securing a garden shed or automating outdoor lighting, these sensors excel in harsh weather conditions where other technologies falter. The latest models even feature adjustable sensitivity and zone mapping, allowing precise control over detection areas while eliminating false alarms from small animals or swaying vegetation.
Connect one to your Arduino or Raspberry Pi, and you’ll unlock endless possibilities for sustainable home automation projects that perfectly complement your existing solar setup.
How Ultrasonic Motion Sensors Actually Work
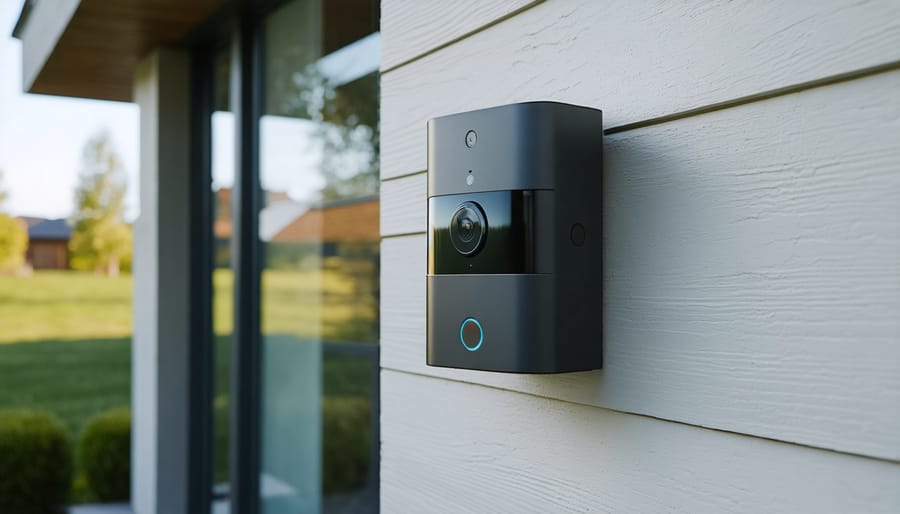
Modern ultrasonic motion sensor installed on a residential exterior showcases contemporary security technology.
The Science Behind Sound Wave Detection
Sound waves are fascinating things – they’re basically invisible ripples traveling through the air that bounce off objects in their path. In ultrasonic motion sensors, these waves work like an echo-location system, similar to how bats navigate in the dark. The sensor sends out high-frequency sound waves (way above what human ears can hear) and waits for them to bounce back.
The key to understanding motion sensor operation lies in how these waves interact with moving objects. When something moves within the sensor’s range, it changes how these sound waves return to the sensor. Think of it like ripples in a pond – when you throw a stone in, the ripples travel in a predictable pattern. But if a fish swims through those ripples, it disrupts the pattern.
The sensor constantly measures the time it takes for these waves to return. When something moves, this timing changes, and that’s what triggers the sensor. It’s pretty clever – the sensor can tell the difference between stationary objects (like furniture) and moving ones (like people) based on these subtle changes in the sound wave patterns.
Detection Range and Accuracy Factors
When I first started working with ultrasonic motion sensors, I quickly learned that their detection capabilities aren’t as simple as the product specs might suggest. Typically, these sensors can detect movement anywhere from 2 to 15 meters, depending on the model and environmental conditions. However, several factors affect their performance.
The sensor’s accuracy largely depends on the size and material of the object being detected. Large, solid objects reflect ultrasonic waves better than small or soft materials. Temperature and humidity also play crucial roles – warmer air allows sound waves to travel faster, while high humidity can reduce the sensor’s effective range.
Something I discovered through trial and error is that the detection cone (the area where the sensor can detect motion) usually spans about 15-30 degrees from the center point. This means that at greater distances, the detection area becomes wider but potentially less reliable.
Surface texture matters too. Smooth, hard surfaces reflect ultrasonic waves better than rough or absorbent materials. I’ve found that mounting height and angle are critical – usually, positioning the sensor at about 7-8 feet high with a slight downward tilt gives the best results for most home applications.
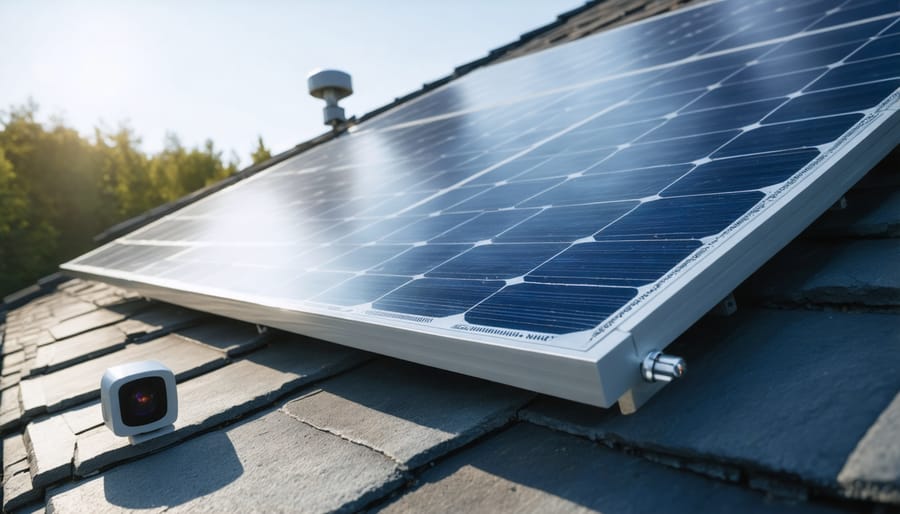
Solar panel installation with integrated ultrasonic security sensor demonstrates clean energy and security integration.
Integrating Ultrasonic Sensors with Solar Power
Power Requirements and Solar Compatibility
When it comes to powering ultrasonic motion sensors, you’ll be happy to know they’re quite energy-efficient. Most models consume between 15-40mA during operation and often less than 2mA in standby mode. This low power requirement makes them ideal candidates for solar-powered security systems.
For reliable operation, you’ll typically need a 5-12V power supply, though some models can run on as little as 3.3V. In my experience setting up these systems, a 5W solar panel paired with a 2000mAh battery usually provides more than enough juice for continuous operation, even during cloudy days.
To properly size your solar setup, consider these factors:
– Daily runtime requirements
– Local sunshine hours
– Backup power needs
– Seasonal variations
I’ve found that installing a slightly larger panel than theoretically needed (say, 10W instead of 5W) provides a helpful buffer against common solar system issues like partial shading or dust accumulation. A good rule of thumb is to multiply your sensor’s power consumption by 1.5 to account for system inefficiencies.
For optimal performance, consider using a charge controller with your solar setup. This helps protect both the battery and sensor from voltage fluctuations, ensuring your motion detection system remains reliable year-round. Remember to position your solar panel where it receives maximum sunlight exposure, typically facing south in the Northern Hemisphere.
Wiring and Connection Basics
Let me walk you through the basic wiring setup for your ultrasonic motion sensor. First, you’ll need four key connections: VCC (power), GND (ground), TRIG (trigger), and ECHO (receiver). For most projects, you’ll want to connect VCC to your power source (typically 5V DC) and GND to your system’s ground.
The TRIG pin needs to be connected to a digital output pin on your microcontroller – this is what sends out the ultrasonic pulse. The ECHO pin should be connected to a digital input pin – it’s responsible for receiving the reflected signal. I always recommend using a 1kΩ resistor in series with the ECHO pin to protect your microcontroller.
When working with Arduino, I typically connect TRIG to digital pin 9 and ECHO to digital pin 10, but you can use any digital pins available. Just remember to update your code accordingly. If you’re powering your sensor through solar, ensure your voltage regulator provides a stable 5V output – these sensors can be sensitive to voltage fluctuations.
A quick tip from my experience: keep the wires as short as possible and avoid running them parallel to power lines to prevent interference. Also, double-check your connections before powering up – reverse polarity can damage your sensor permanently.
Common Installation Mistakes to Avoid
Positioning and Environmental Factors
Proper sensor placement is crucial for reliable motion detection. From my experience, mounting your ultrasonic sensor at a height of 6-8 feet provides optimal coverage while minimizing false triggers from small animals. Always position the sensor perpendicular to the expected direction of movement – this ensures the soundwaves can effectively bounce back to the receiver.
Keep your sensor away from air vents, fans, or areas with significant temperature fluctuations, as these can affect the speed of sound and cause erratic readings. I learned this the hard way when my garage sensor kept triggering due to the heat from my parked car!
Environmental factors like humidity and temperature can impact sensor performance. While most modern sensors compensate for these variations, extreme conditions might require adjustment. For outdoor installations, use weather-resistant housing and avoid directing the sensor toward reflective surfaces like puddles or metal siding.
Remember to clean your sensor periodically – dust and debris can accumulate on the transducer, reducing sensitivity. A gentle wipe with a soft, dry cloth is usually sufficient for maintenance.
Maintenance and Weather Protection
Just like maintaining solar equipment, keeping your ultrasonic motion sensors in top condition requires regular attention. Start by gently cleaning the sensor face with a soft, dry cloth monthly to remove dust and debris that could affect performance. Avoid using harsh chemicals or water directly on the sensor, as these can damage the sensitive components.
For outdoor installations, consider adding a small protective hood or cover to shield the sensor from direct rain and snow. I’ve found that even a simple plastic cover can significantly extend the sensor’s lifespan. Make sure any protective housing doesn’t interfere with the sensor’s detection range or create false readings from reflected signals.
Temperature extremes can affect sensor accuracy, so check calibration seasonally if your sensor is exposed to varying weather conditions. In areas with high humidity, consider using silica gel packets near the sensor housing to prevent moisture buildup. Remember to inspect wire connections regularly for signs of corrosion or damage, especially if your sensor is part of an outdoor security system.
Pro tip: Mark your calendar for quarterly maintenance checks to ensure consistent performance year-round.
Weather-resistant ultrasonic sensor demonstrates durability in challenging outdoor conditions.
Real-World Applications and Success Stories
Let me share some inspiring examples from our community of makers and DIY enthusiasts who’ve put ultrasonic motion sensors to creative use. Sarah, a member of our solar DIY forum, installed these sensors to automate her garden lighting system. By connecting the sensors to her solar-powered LED lights, she created an energy-efficient setup that only activates when someone walks through her garden path at night.
Another remarkable project comes from Mike, who integrated ultrasonic sensors with his solar-powered security system. He positioned multiple sensors around his property’s perimeter, creating an invisible fence that alerts him through his smartphone when anything larger than a small animal crosses the boundary.
In my own workshop, I’ve used these sensors to create an automatic door opener for my solar-powered greenhouse. When my hands are full with plants or tools, the sensor detects my approach and triggers the door mechanism – it’s been a real game-changer for accessibility!
Local maker spaces have also embraced these sensors for innovative projects. The Denver Green Tech Community recently created an automated waste sorting system using ultrasonic sensors to detect bin capacity and optimize collection routes. This solar-powered solution has helped reduce collection trips by 30%, showing how these simple sensors can contribute to both convenience and sustainability.
Ultrasonic motion sensors represent an exciting frontier in DIY home automation and security projects. As we’ve explored throughout this guide, these versatile devices offer reliable motion detection through sound wave technology, making them perfect for both indoor and outdoor applications. Whether you’re looking to enhance your home security system or create an automated lighting setup, ultrasonic sensors provide an accessible and effective solution.
I’ve seen countless DIY enthusiasts transform their projects using these sensors, from simple garage door openers to sophisticated presence detection systems. The key is to start small, experiment with different configurations, and gradually build up to more complex applications as your confidence grows.
Remember to consider factors like mounting height, detection range, and environmental conditions when planning your installation. Don’t be afraid to join our community forums to share your experiences or ask questions – we’re all here to learn and grow together.
Ready to start your own ultrasonic sensor project? Grab your Arduino, gather your components, and dive in! And don’t forget to share your success stories with us in the comments below. Your creative solutions might just inspire another maker’s next great project.
How useful was this post?
Click on a star to rate it!
Average rating 0 / 5. Vote count: 0
No votes so far! Be the first to rate this post.
We are sorry that this post was not useful for you!
Let us improve this post!
Tell us how we can improve this post?
charlesnoble
Here at Spheral Solar, I’m a hands-on solar power enthusiast, constantly exploring and experimenting with DIY solutions. I’m dedicated to sharing my discoveries, insights, and even the bumps I hit along the way, all in the pursuit of a more sustainable future.
Wire Your Motion Sensor Switch to Ignore False Triggers by Charlesnoble March 15, 2026 Wire your motion sensor switch by identifying the three critical connections: line (incoming power), load (outgoing to light fixture), and neutral. Connect the black wire from your power source to the sensor’s line terminal, the red or black load wire to your light fixture, and join all white neutral wires…
How to Trick a Motion Sensor to Stay On by Charlesnoble September 14, 2023 There are many ways to trick a motion sensor of solar lights and security cameras to stay on. These include wrapping the sensor in aluminum foil to mimic motion, hanging shiny CDs that spin in the breeze, or pointing fans at the detector. This article provides a comprehensive guide to…
8 Best Solar Flood Lights in 2023 by Nick April 27, 2021 Searching for the best solar flood lights among thousands of other floodlights was no child’s play. We scrutinized several brands ranging from quality dusk to dawn light to reliable motion sensor lights. We also looked for vital features that make a great solar light—excellent IP rating, battery capacity and type,…
10 Best Outdoor Solar Lights in 2023 by Adeyomola August 30, 2021 You will get the best experience with outdoor solar lights when you opt for lights with good solar panels and long lighting times. But besides that, ensure your choice can charge quickly and offers sufficient brightness. Such a selection will give you a complete experience. Best Solar Lights for Outdoors…
18 Best Solar Shed Lights in 2023 by Nick February 21, 2021 Sheds today get used for so many different things! They are no longer just a storage house for garden tools and lawnmowers. Sheds are now used in so many different and creative ways, such as the famous “she-shed,” personal gyms, man caves, kid playhouses, pool houses, cabins, carpentry areas, and,…
Why Your Solar Path Lights Keep Failing (And Which… by Charlesnoble January 11, 2026 Look beyond the advertised lumens and focus on actual light distribution patterns when comparing lantern solar path lights—a 10-lumen fixture with a well-designed diffuser will outperform a 20-lumen light with poor optics every single time. I learned this the hard way after installing my first set of bargain solar lights…
Subscribe for handpicked DIY projects, exclusive tips, and giveaways.
Route your PV wires through UV-resistant conduit within 18 inches of leaving the solar array, securing it every 3 feet with proper clamps to prevent wind damage and code violations. This single step prevents 80% of the wire degradation issues I’ve seen in DIY solar installations over the past decade. Group your positive and negative… Read more: Why Your PV Wire Management Could Fail Inspection (And How to Fix It)
Understand that 6000 volts sounds terrifying but delivers surprisingly low amperage—typically around 120 milliamps for just 3/10,000th of a second per pulse. This combination creates an unforgettable shock that trains animals to avoid the fence without causing lasting harm. The voltage pushes current through thick fur and hide, while the minimal amperage and microsecond duration… Read more: Why 6000 Volts Won’t Kill Your Livestock (But Will Stop Predators Cold)
Check the maximum voltage and current ratings first—these determine whether your controller can actually handle your solar panel array without frying itself on the first sunny day. I learned this the hard way when my first DIY system shut down every afternoon because I’d paired 600 watts of panels with a controller rated for only… Read more: Why Your Solar Setup Needs Both a Charge Controller and Inverter (And How to Pick the Right Ones)


")


")


